Introduction
Layer parenting is a cool new feature in Adobe Animate, and here's how easy it is.
So, here I have a character inside a graphic symbol.
If I double click the symbol, you can see all of the layers and symbols that make up this character.
All of the symbols have been distributed to layers, and we're pretty much ready to start layer parenting one note before I get into the layer parenting is,
Preparing symbols with correct pivot points
I have already set the center point for all these symbols.
And what I mean is, I select the symbol and then select the Free Transform Tool.
I have moved the center point from the center position which is the default for the center point, and I've moved it to a more natural anatomically correct location, where body parts would normally and naturally hinge, right?
So, you can see the thigh has been hinged at the hip and the lower leg has been hinged at the knee and so forth.
The upper arm is hinged at the shoulder, the forearm hinged at the elbow, and naturally, the head hinged at the neck.
So, once that is all done, now we can start layer parenting.
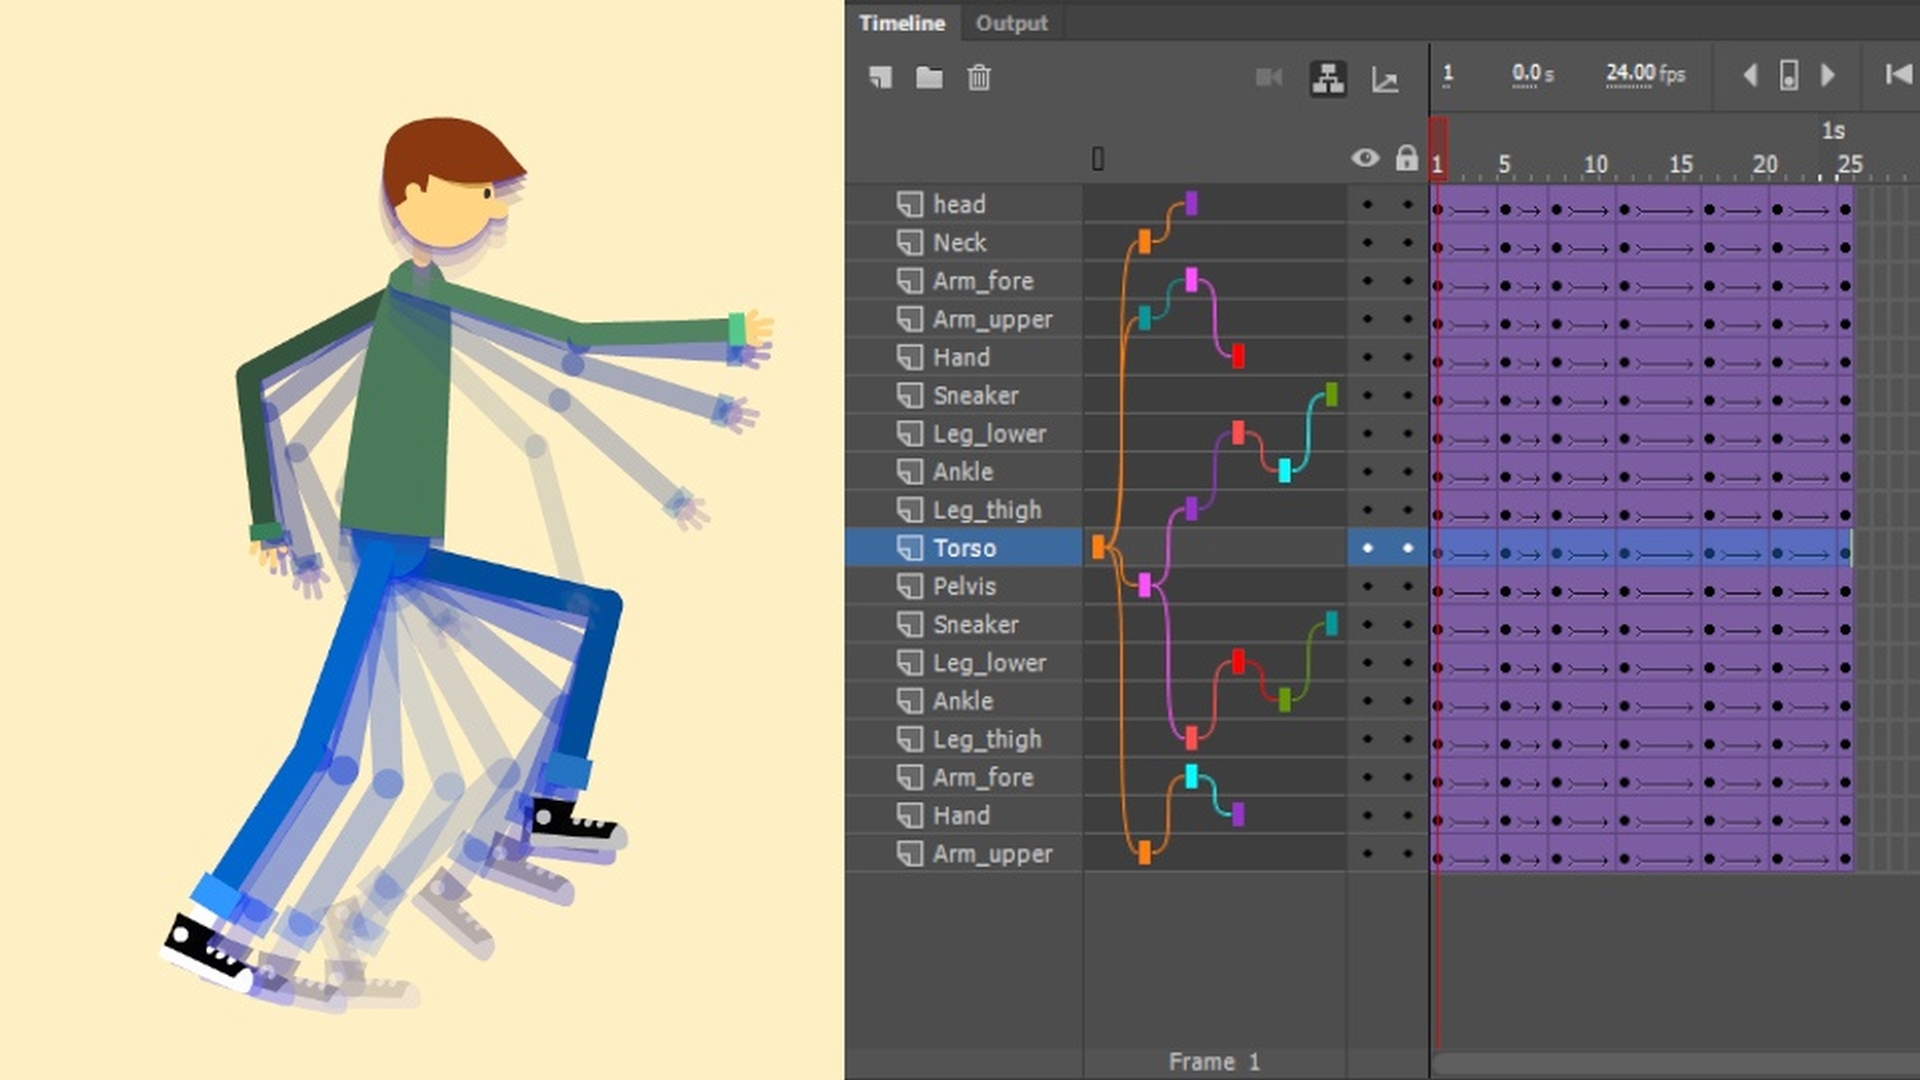
We need to show the Parenting view.
Enabling the parenting view and choosing parent layers
So, here in the Timeline, click this icon here.
This is the Show Parenting view icon.
Now the next thing to do is decide what is going to be the parent layer or the parent symbol?
In this case with this character, I want it to be the torso.
The first thing I want to do is, you can see I have a symbol here that is acting as the pelvis for this character.
The pelvis is going to be a child of the torso.
So, in order to parent layers together,
Parenting character limbs and testing transformations
all you need to do is click in here in the Parenting view and drag from the child layer to the layer that you want the parent to be.
So in this case, I'm dragging from the Pelvis layer to the Torso layer.
Now you can see the layer parenting path take place.
Now the next step is to parent the pelvis to the thigh.
So, let's click on the Leg_thigh layer and drag it to the Pelvis.
And working our way down this leg, let's select the Leg_lower and we want that to be a child of the thigh.
So, let's drag it to the Leg_thigh.
And now you can see how this parenting is being visually represented here inside of the Layer Parenting view.
The Ankle will be a child of the lower leg and then the foot or the shoe is going to be a child of the Ankle.
If I now select the Free Transform Tool and move it, let's say rotate it, all the child layers will go with it.
Here I'm selecting the upper thigh and rotating it, and all of the child layers or symbols are actually responding correctly.
And since the torso is a parent of the pelvis in the entire leg assembly, if we rotate that, you can see how that works.
So, let's finish the layer parenting for the entire character.
So, just like the leg, we treat the arms the same way.
The Arm_upper becomes a child of the Torso layer, the Arm_fore becomes a child of the Arm_upper and the Hand becomes a child of the Arm_fore.
The Neck layer becomes a child of the Torso layer, and then the Head layer becomes a child of the Neck layer.
Modifying parents and starting character animation
In the event, you say you want to remove a parent bone, you can actually click inside the Parent view on a specific layer and Remove the parent.
You can even change the parent by rolling over Change parent and then selecting any one of the other layers.
Now with your character all set, ready to go, you can create additional keyframes in your Timeline, and then simply start animating.
In this case, we're going to make this character walk.
So, as you can see, layer parenting is really a great new feature.
It's a time-saver, it makes animating characters and anything that has a lot of different moving parts that need to be linked together a much easier task.
So, I hope you enjoy this new feature layer parenting.


