Introduction
Hello, my name is Russell Preston Brown from Adobe.
And this tutorial is all about working with Adobe Lightroom and Adobe Photoshop here on the iPad.
Here, you can see I have an image that I've adjusted here in Lightroom.
And this is where you have to start this process, by the way.
Here in Lightroom, I can now go to this icon right up here.
Sending photos from Lightroom to Photoshop on iPad
And I can select Edit in Photoshop, this is really fantastic.
A quick and easy way to take an image that you've adjusted in Lightroom and transfer it over to Photoshop here on the iPad.
And here, we are now in Photoshop on the iPad.
And here's what's different.
Right up here in the upper left hand corner, if you import an image in from Lightroom, you can now send to Lightroom, you can round trip the image back after you've made adjustments or even added layers.
Check this out.
You could also tap on these three dots right here.
And you can take this document and create a Photoshop cloud document.
But in this process, I want to demonstrate the workflow between Lightroom and Photoshop, this round-tripping workflow.
So, first, I'm going to add a new layer to this document.
Editing in Photoshop and sending changes back to Lightroom
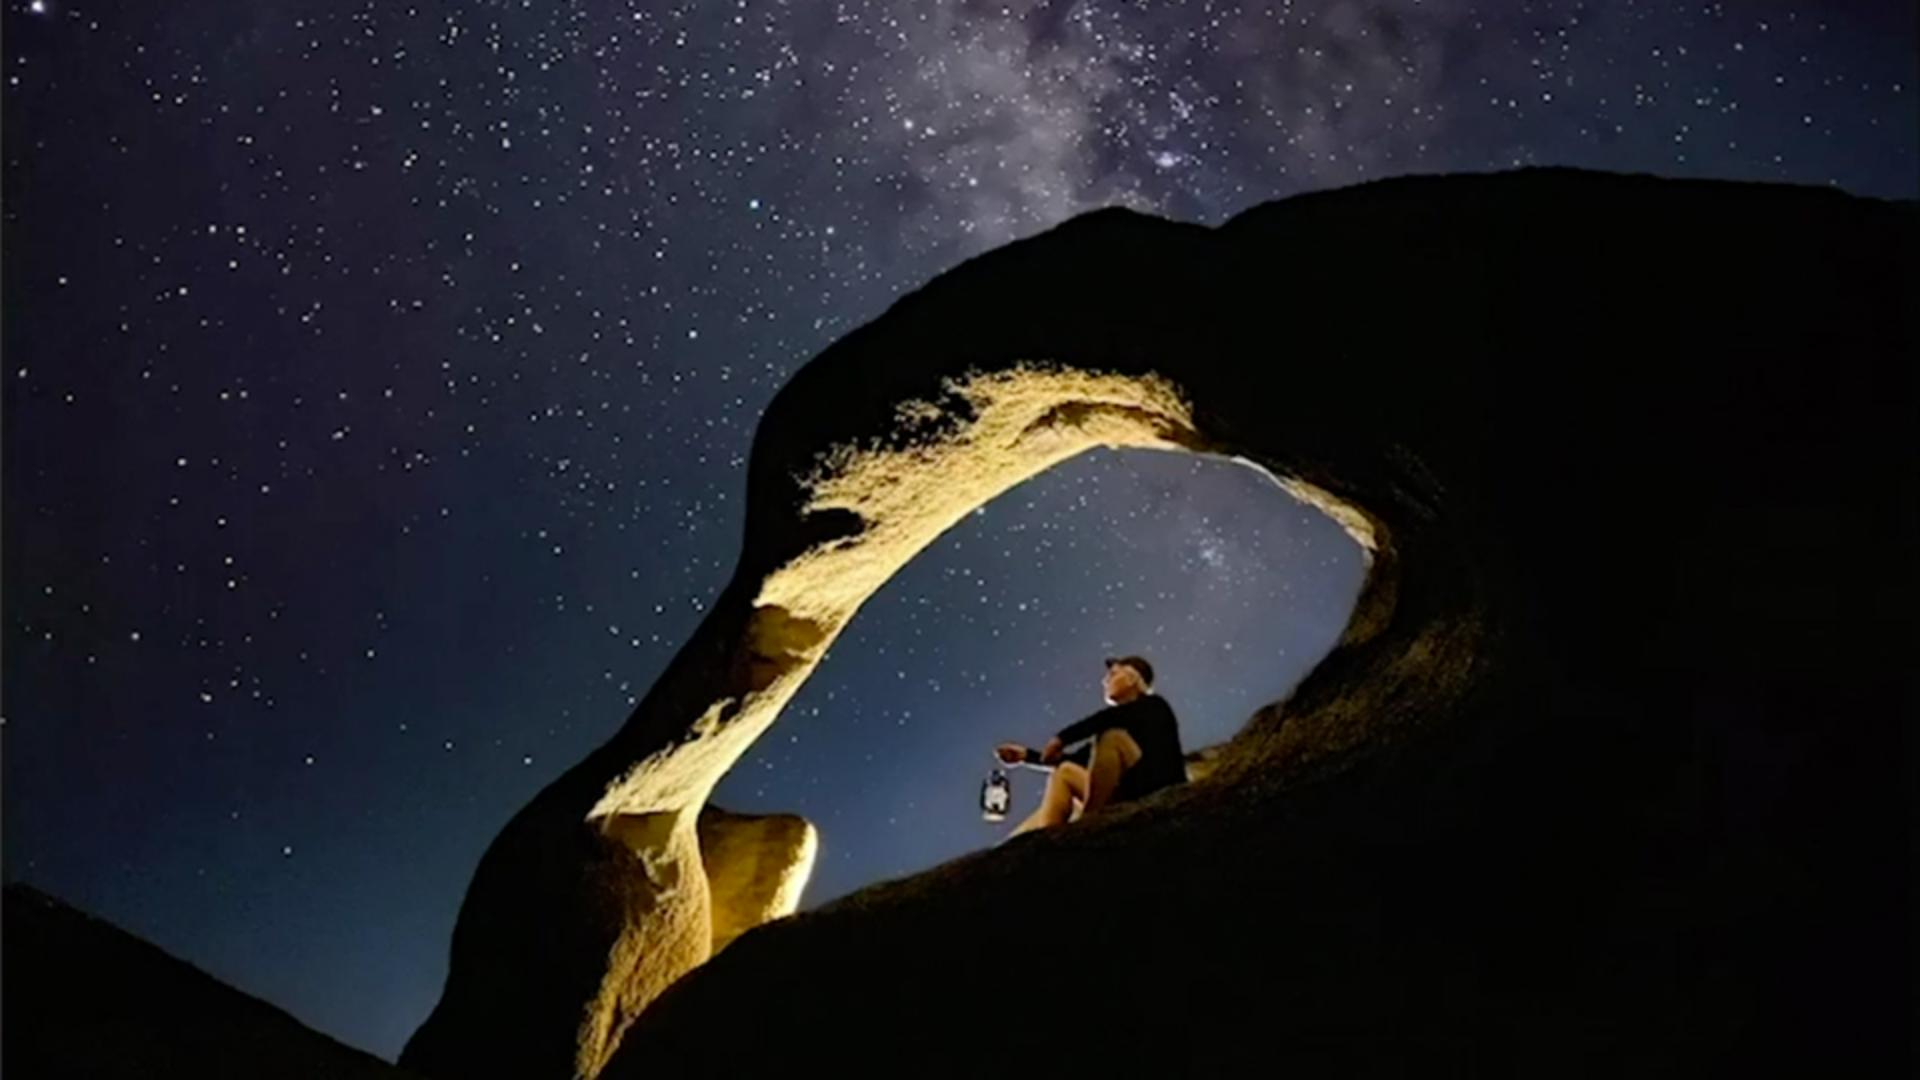
Here, from my photos, I have an image right here that I'm going to apply on top of this image.
This is something I created earlier.
Some stars and the milky way that I've placed into position.
You can see that I can move this around.
It's a unique layer.
I'm going to select Done.
You can now see that additional layer over here in my Layers panel.
And I can turn the visibility on and off.
So now, I'm going to send this back to Lightroom by tapping here, Send to Lightroom.
Here we are back in Lightroom.
Check this out.
Here is my original image that I started with.
And here is the image I just created in Photoshop here on the iPad.
Notice that there is a Ps icon on this image.
This indicates that it is a Photoshop document, And in this case, it's a Photoshop document with layers.
Check this out.
I'm going to tap on this image.
Round‑tripping files while preserving layers
And then once again, I'm going to select over here under this flyout menu, and I want to Edit in Photoshop.
So, our first test of this round trip process is to prove to you that I can create a layer in Photoshop, share it back to Lightroom, and then if I open it back up in Photoshop, I round trip all the way back to Photoshop.
As you can see here, we have the exact same layers.
I can turn them on and off.
So, the layers have been maintained.
Now, check this out.
Once again, I'm going to say Send to Lightroom.
Right there.
I'm tapping on that.
It will then take the existing project and send a copy back to Lightroom.
So, I can go between each of the applications.
But the great thing is, each time you do that, you get a copy of the previous version.
I like this because I can incrementally change something and keep track of the changes.
Now, here's something that's even more interesting.
What if you want to go into the original image here, the one we first created and I want to make some adjustments to this?
For example, I go into Effects, and I adjust Dehaze
Understanding flattened edits and recovering layers
to make the stars a little bit more dramatic.
I now select to Edit in Photoshop.
In this particular case, when I've made adjustments to an image, it will flatten the layer document, and send a flattened version over to Photoshop as you see here.
Check it out.
I only have one layer.
So, now you know that if you make adjustments to an image, it will flatten the image.
However, there is a secret to recovering the layers if you want them.
If I Cancel from this now, it will then cancel this process and discard my edits, and return to Lightroom.
Let's see what happens.
I select to Cancel.
It comes back to Lightroom and there is no new copy.
I have the three images I started with.
But if I would like to recover the layers from the original, I tap on the image, I go to effects, and notice I've adjusted Dehaze earlier, I can remove those adjustments and send it back to 0.
I simply double-tapped on it.
You can also go down here, tap on this icon, and reset all adjustments right there.
Essentially, I've got them all back to 0.
Check this out.
If I now round trip back to Photoshop once again, this image that I had previously adjusted, will now return into Photoshop, as you can see here, with all of its layers.
So, you've now seen the several different ways of working with this round trip process from Lightroom, to Photoshop, and back.
So, the moral of the story is that you can now use the power of Lightroom and Photoshop together more easily for the projects you're working on here on the iPad.
Give these techniques a try the next time you want to work on a really powerful image.
There you have it.
Give it a try.