Introduction
Hello, my name is Russell Preston Brown from Adobe Systems.
And this tutorial is all about creative masking.
Here, inside of Adobe Photoshop for the iPad.
Creating a basic mask from a selection
Now typically, you might make a mask, for example, with the Rectangular Marquee Tool that I'm going to tap on over here.
And of course, I can tap and hold to reveal all of the Selection Tools available.
With the Rectangular Marquee Tool selected, I'm going to tap and drag across my screen, just like this.
Now, I'm going to go over here to my Layers panel.
In this case, this is the Detailed View which displays the image, the name of the image and the mask.
I'm going to turn on the visibility of this Papyrus Grass layer.
This is the layer I want to mask.
Then, from my Selection Tools Action Bar here at the base I'm going to select to Invert my mask.
Right there.
Then, I'm going to tap here on Mask.
Right there.
So, there is a simple basic mask created from a selection.
But we're working here on an iPad.
Painting creative masks with brushes and Apple Pencil
We have the ability to work with the Apple pencil and the brushes available here on the iPad.
Let's get a bit more creative and use a Brush to create a mask.
First, I'm going to eliminate this mask that I just created by going here to my Taskbar and at the base are ...
Tap on those ..., and you can select Delete mask right there.
Let's start all over again.
And I'm going to select the Brush Tool.
I'm going to tap and hold on the Brush Tool to reveal all of the brushes I have available.
Check this out.
I've selected the Spatter & Texture brush.
A really nice brush from all of these brushes you can select.
Tap away and I can start to work with this brush.
Before I do that, notice that I've set the size here by tapping on this location right here.
Tapping here, you'll notice that I'm at 100 percent Opacity.
And you'll notice that I have black for the foreground and white for my background.
This looks great.
So now, I'm going to create a mask.
I can do that from here in the Taskbar.
Tapping right there, I can create a mask.
And there it is.
Now I can start to paint into that mask with black.
As you see here.
Check this out.
That's really interesting.
I'm using the Brush to paint in a mask.
Much more interesting.
But wait, there's more controls available to you.
Always be sure and tap on the base here, the ... of your Tool Option Bar.
You'll find additional adjustments you can make to that brush.
Check this out.
I'm going to Use pressure for size and Use pressure for opacity.
Cool.
Tap away, and begin to paint again.
I can then add even more texture with those new settings.
Let's just finish that up.
And there's my finished results.
A really creative way of making a mask.
Let's go back in and check out this mask.
If I double tap here, on the mask.
Right over here.
You can see it here.
If I double tap again.
I can dismiss that, and I can see how the mask is being applied to that layer.
The mask then hides the top layer to reveal the layer below.
So, that's one creative way of using masking here on the iPad.
Here's a second technique I like to use.
In this case, once again I'm going to delete the mask.
Building gradient-based masks for smooth transitions
Here, from the Fly Out menu Delete mask.
Then let's create a new mask, here.
Just like that.
Now, in this case I want to use the Gradient Tool.
Tapping on the Gradient Tool right here.
And I also notice that I'm using black for my foreground and white for my background.
That's important, because I'm painting into this mask.
Then, check this out, if I tap, and draw to the right, I can then create a gradient mask.
Let's take a look at that, double tap on the mask.
And there it is.
Double tap again.
I can tap and drag farther to get a softer mask, as you see here.
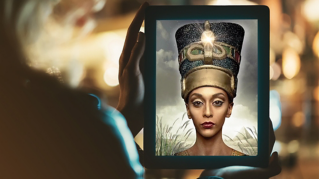
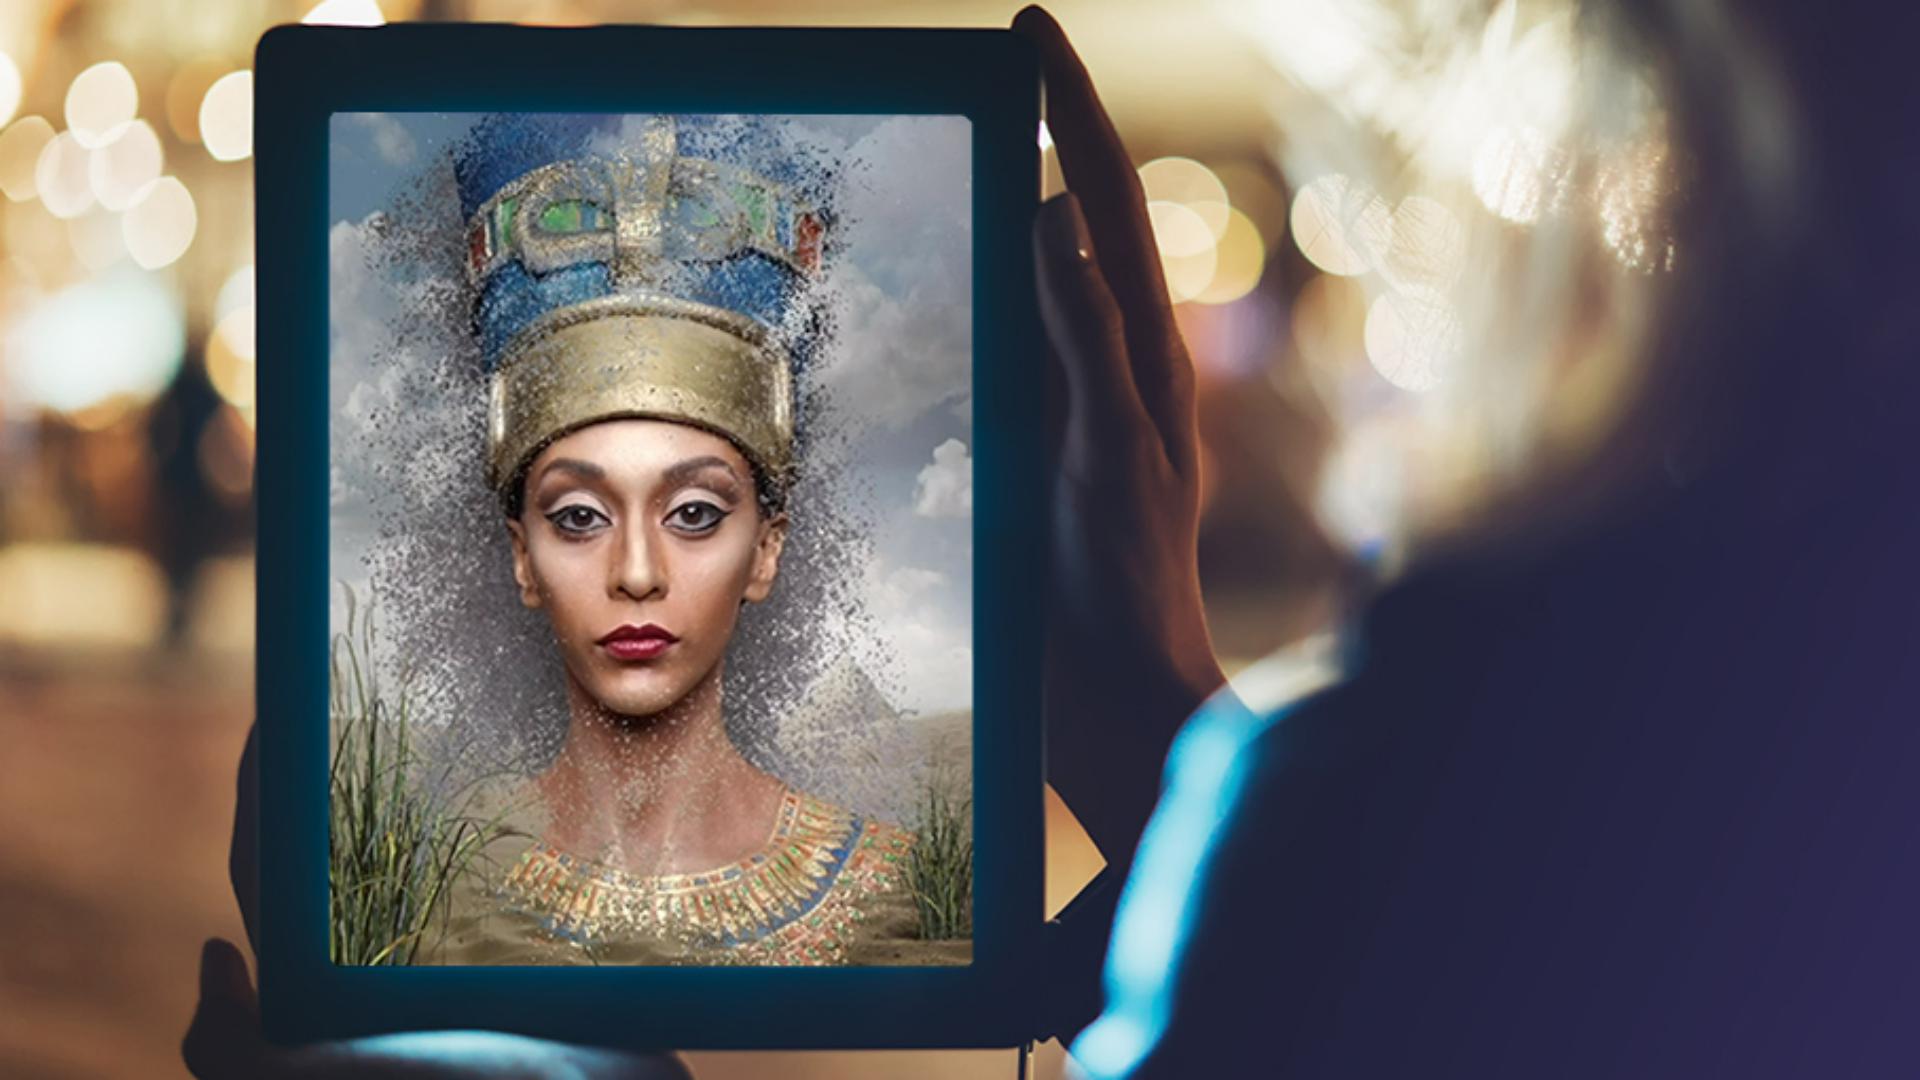
But in this project, I'm going to tap and draw down from the top to the bottom.
Because I want to create a mask that makes it look like Nefertiti is emerging from the clouds, as you see here.
That looks great.
But there are some adjustments you can make to this.
Refining masks with blur and transformation tools
One of them is over here in the Taskbar.
It's this icon right here, to adjust Filters and adjustments.
And Gaussian blur.
I can blur my mask.
Because I've targeted the mask.
I can then blur it more and get a lot of adjustment to the way the mask looks, simply by blurring the mask.
Then selecting Done.
So, that's one way to adjust your mask.
The second technique is to transform the mask.
But before you do that, you have to do something special over here in the Taskbar.
I need to Unlink the mask from the image, by tapping on this icon right here.
I can then break the link, so that I can adjust and transform the mask without transforming the image that it is combined with.
If I tap on the mask now and go to my Transformation Tool here.
Right there.
I can then select any of the points, and then move and transform the mask.
Just like this.
When you've completed these adjustments, select Done.
And those adjustments will be applied.
Wow.
You've just seen two great creative ways to mask images here inside of Photoshop for the iPad.
We first saw the ability to paint into the mask with a brush for these results.
Then I used the Gradient Tool to create the mask you see here.
I also used the Transformation Tools and the Gaussian blur to finesse that gradient even further.
There you have it.
Try out these two different ways to make a mask here on the iPad in Adobe Photoshop.
Give it a try.