In diesem Video führe ich das neue Asset-Verkrümmungs-Werkzeug (Asset Warp Tool) vor.
Hier habe ich eine Figur.
Alle ihre Teile sind in einem Symbol verschachtelt.
Ich mache einen Doppelklick auf den Teil, den ich animieren möchte.
Auf der Zeitleiste (Timeline) seht ihr, dass ich drei verschiedene Ebenen habe: den Streichholzkopf (MatchHead) – dieses Symbol hier –, die Flammengrafik – die ich schnell benenne – und auf der untersten Ebene das Hölzchen (Stick).
Ich sperre die Ebenen für Hölzchen und Streichholzkopf, weil sie jetzt nicht bearbeitet werden.
Ich wandle sie in Konturen um, weil ich mich nur auf die Flamme konzentrieren möchte.
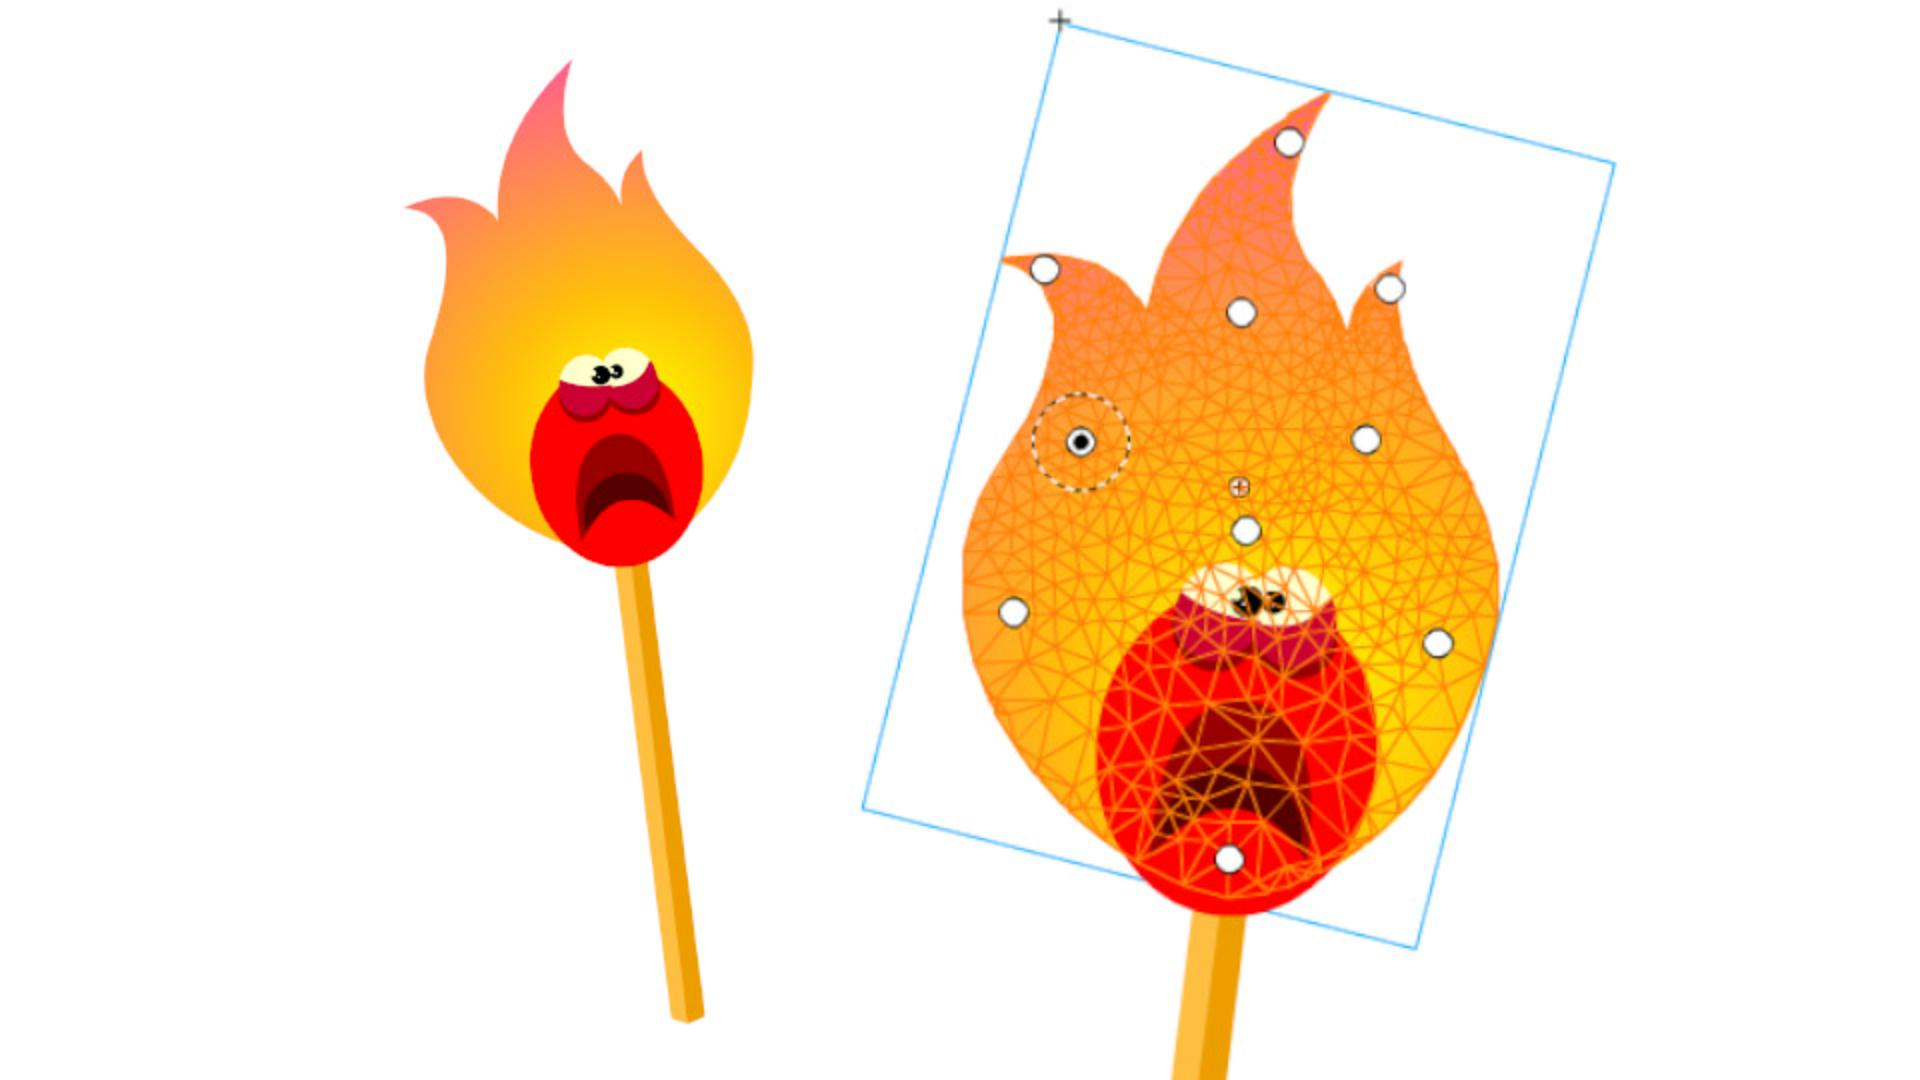
Das „Assetverkrümmungs-Werkzeug“ (Asset Warp Tool) ist dieses Icon hier mit dem kleinen Pin.
Ich wähle es aus und platziere per Klick einige Pins.
Den ersten Pin setze ich hier unten, wo die Flamme mit dem Streichholz verbunden ist.
Dieser Pin wird jetzt dargestellt durch einen Punkt mit einem gestrichelten Kreis um ihn herum.
Außerdem wurde ein Gitter auf meine Form angewendet.
Ich füge weitere Pins hinzu.
Ich klicke dort auf die Grafik, wo ich sie später bearbeiten möchte.
Das sollte reichen.
Jetzt kommt der unterhaltsame Teil, in dem wir diese Form animieren.
Auf der Ebene, die meine Flammengrafik enthält, erstelle ich für jeden zweiten Frame einen Keyframe.
Bei diesem zweiten Keyframe auf Frame 3 werde ich mit der Manipulation des Gitters beginnen, mit dem Asset-Verkrümmungs-Werkzeug (Asset Warp Tool).
Ich fange also hier an und verschiebe die Spitze der Flamme in die entgegengesetzte Richtung.
Ich klicke einfach auf den Punkt in der Mitte und ziehe ihn an eine andere Stelle.
Wenn ihr den Cursor auf dem gestrichelten Kreis positioniert, könnt ihr die Grafik per Klicken und Ziehen drehen.
Ich wiederhole diese Schritte, um die Gitterform zu manipulieren.
Ich bin mit der Grafik auf diesem Keyframe zufrieden und mache mit dem Keyframe für Frame 5 weiter.
Ich bearbeite die Form weiterhin willkürlich.
Manchmal hilft es, eine echte Flamme zu beobachten, d. h., eine Kerze anzuzünden und sich anzusehen, wie die Flamme flackert, um diese zufälligen Veränderungen nachzuahmen.
Ich erstelle weitere Keyframes und spiele mit diesem Gitter.
Mit dem Asset-Verkrümmungs-Werkzeug (Asset Warp Tool).
Ihr seht, wie schnell und einfach sich eine Form kontrolliert deformieren lässt.
Über das Kontextmenü kann man ein klassisches Tween anwenden (Create Classic Tween) auf die Keyframes, die das Gitter enthalten.
Das Asset-Verkrümmungs-Werkzeug (Asset Warp Tool) ist eine tolle neue Funktion, die den Zeitaufwand beim Zeichnen deutlich reduziert, da man eine einzige Form auf viele Arten manipulieren kann.


