Introduction
Another way to create a layer mask is to add a black to white gradient - to the mask.
This is a great technique when you want a soft subtle transition - between images.
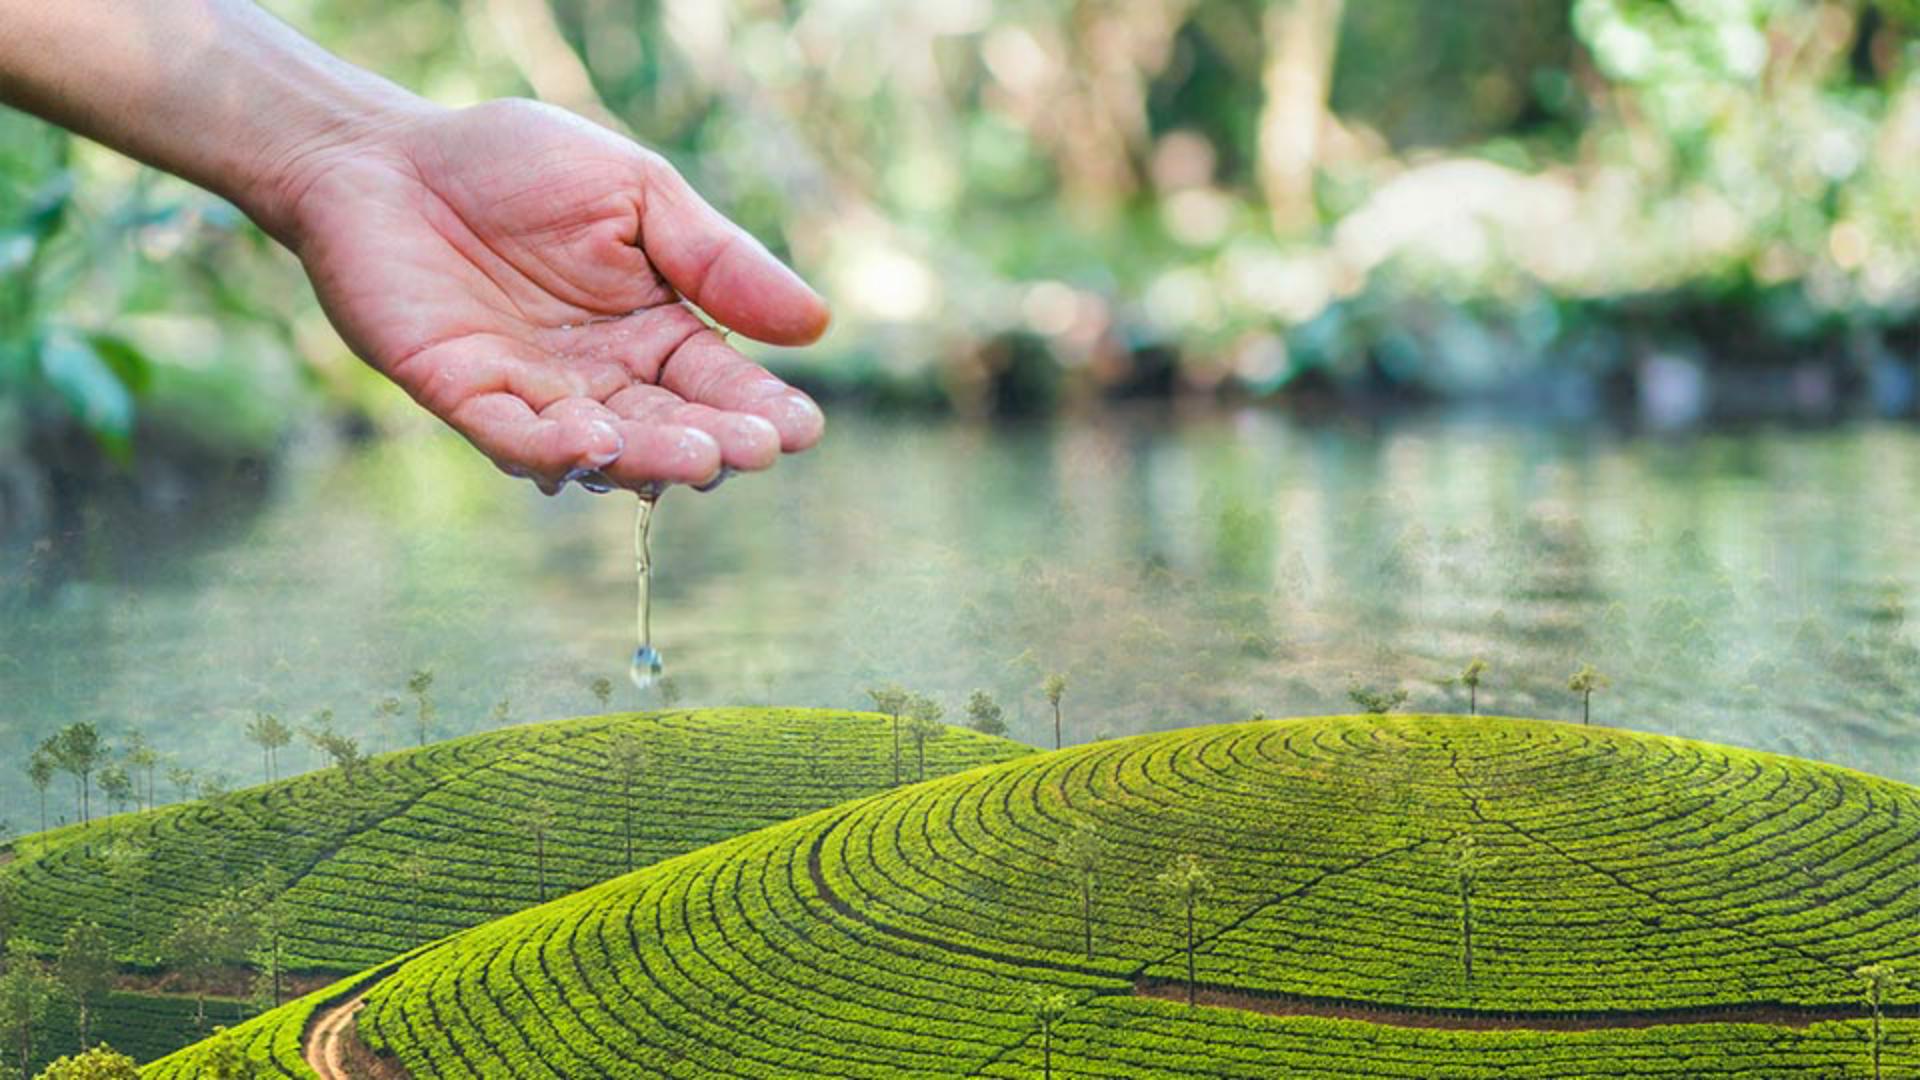
In this tutorial, - we'll use a gradient to add a layer mask to blend this photo with this photo to create this new image.
We'll start by adding a layer mask - to the top layer and then we'll add a gradient that applies black, shades of gray - and white to the mask.
The black will hide part of the top layer, revealing the photo on the layer below, while the white - will show part of the top layer obscuring the photo, dissolve the layer below.
And the shades of grey in between - will partially hide the top layer, creating a soft transition - between the two images.
Hi, I'm Jan Kabili from Adobe.
This is one of my favorite - layer masking techniques for creating blended images - like fantasy composites, or wedding portraits with multiple images.
And it brings together - much of what you've learned about layer masks so far in this course.
So let's take a look at how to use a gradient - with a layer mask.
In this image, we have two layers,
Step 1: Understanding the layer setup and blending goal
this photograph of a hand - with a water droplet on the top layer, and this photo of green hills - on the bottom layer.
What we'd like to do - is to add a layer mask to the top layer the Hand layer that will allow us to see a combined image that smoothly transitions - from the hand at the top down to the green hills at the bottom.
Everything you learned - about layer masking, in other tutorials in this course - applies here.
The difference is that instead of starting this layer mask - with a selection, or by painting on the mask, we're going to start - with a white to black gradient.
Step 2: Adding a layer mask to the top layer
With the Hand layer selected, we'll go down - to the bottom of the Layers panel and click the Add Layer Mask button there.
And that adds this layer mask - on the Hand layer.
Step 3: Applying a black-to-white gradient on the mask
Now let's put a gradient - on this layer mask.
First, we'll go to the Toolbar and check - that the foreground color is white, and the background color is black.
If you're following along, - and that isn't true for you, then press the X key on your keyboard And that will switch - the foreground and background colors.
So I do have white as my foreground and black as my background color.
And with that configuration, - I'm going to select the gradient tool, which is in the middle of the Toolbar.
Up at the top in the Options bar, you can see that I have a gradient - that goes from white to black.
If you don't see that, - then click the drop down and then open the Basics folder - inside of that drop down.
And here you have a series of gradients.
Click the first one, which is the foreground - to background gradient.
Now to apply that gradient - to the layer mask, I'm going to click in the image - in around the center of the hand and drag down to about a third of the way - into that black reflection in the water.
By the way, the direction and length - of the line you draw affects the gradient that you'll have.
When I release my mouse, - you can see the result.
And this is what we were going for, the hand image at the top gradually fading - into the landscape image at the bottom.
And if you want to see - why that's happening,
Step 4: Viewing and understanding the gradient mask effect
we'll take a look at the layer mask.
I'll hold the Option key on a Mac - or the Alt key on Windows as I click on the layer mask thumbnail - in the Layers panel.
Here you see the gradient - that was applied to the mask.
White at the top - is allowing the Hand layer to be visible.
Black at the bottom - is hiding the Hand layer, so we see the landscape showing through.
And in between that transition - from white gray down to dark gray gives us a dissolve - between those two layers.
Let's go back and Option or Alt click again - on the layer mask thumbnail to see our image.
Now there's one more thing - that I'd like to share with you.
Step 5: Refining the gradient mask by painting with the Brush tool
And that is that you're not limited - to using just one method of making a layer mask.
For example, even though we started - with a gradient on this layer mask, we could paint on the layer mask too.
So let's just try that.
I'd like to paint in the area - of the water droplet to make it more visible.
For that I'll go over to the Toolbar and I'll make sure - that white is my foreground color.
And then I'll go to the Brush Tool - and select that, and I want to use a pretty big soft brush.
I have about a 200 pixel brush - at 0% Hardness.
And with that, I'm going to paint - a little crescent of white on the layer mask.
And that lets us see more - of the content of the Hand layer.
And so the water droplet - looks more distinct.
And if you'd like to see - the layer mask again, I'll hold the Option or Alt key, - click on the layer mask thumbnail and there you can see the impact - of having painted with white on this layer mask.
So to recap what we did in this tutorial, we added a layer mask to the top layer - in this combination image and on that layer mask, we do a gradient that goes from white - down through shades of gray to black.
That layer mask gradient allowed us to gradually and subtly - combine two images.
And these are just the kinds of skills that will help you get great results when you're working with layer masks - on your own images. -