Prueba estos tutoriales con Photoshop
Edita fotos para crear nuevas imágenes y gráficos.
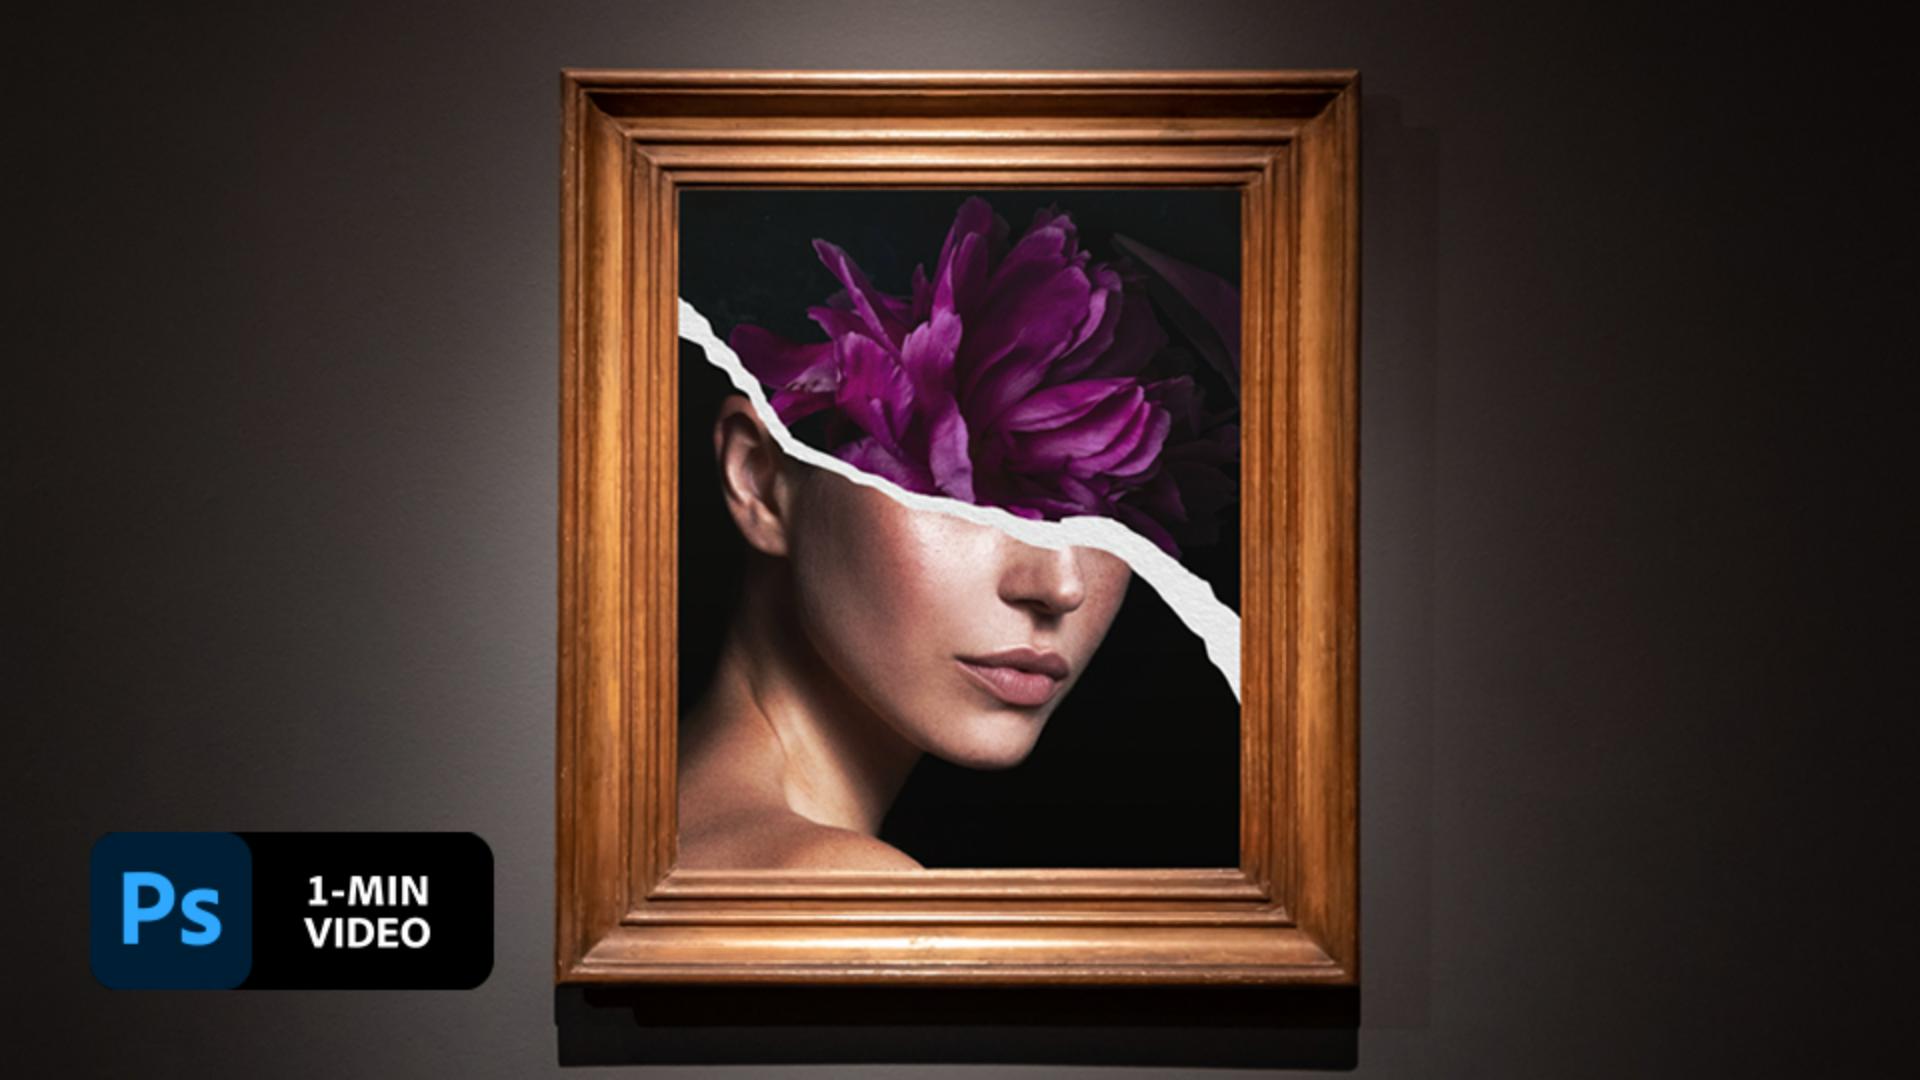
Lidia Lukianova likes a layer of mystery. See how she simulates torn paper using selections, layer styles, and clipping masks in Adobe Photoshop.
Lidia Lukianova is an artist and designer with a passion for illustration. Her design work includes all kinds of projects from identity and illustration to lettering and animation.
This sample file has Adobe Stock images you can use to practice what you learn in this tutorial. If you want to use the sample file beyond this tutorial, you can purchase a license onAdobe Stock . Check out the ReadMe file in the folder for the terms that apply to your use of this sample file.
Lukianova used the Lasso (L) tool to draw the jagged edge of the ripped paper across the model’s face. She then traced along the right, bottom, and left side of the image to close the selection.

She then applied a layer mask to hide the area not included in the selection.

Lukianova added and renamed a new layer to serve as the simulated paper edge.

With the Paper edge layer selected, she used Control+click (Windows), Command+click (macOS) on the mask of the Model layer to make a selection. Then she used the Paint Bucket (G) to fill the new layer with white.

Lukianova deselected the Paper edge layer by holding Control+D (Windows), Command+D (macOS), then dragged it below the Model layer. Then she used the Move tool to bring the paper edge up so it would peek out just above the model.

Still on the Paper edge layer, Lukianova selected the Warp tool (Edit > Transform > Warp). She dragged the top handles to customize the shape of the ripped edge so it looked less uniform and more natural. She pressed Enter, or Return, when she was done.

To add the appearance of dimension to the torn paper, Lukianova double-clicked the Paper edge layer to bring up the Layer Style dialog. Then she selected to apply a Drop Shadow and adjusted the settings to get the look she wanted.

Lukianova dragged the paper texture image from her desktop to her open document and dragged the new layer so it was just above the Paper edge layer. Then she held the Alt (or Option) key as she clicked between the layers to clip the paper texture to the paper edge.

Finally, Lukianova dragged flowers into the image and moved the layer to the bottom to complete the composition.

Make textured images seem tangible in your digital compositions.

Note: Project files included with this tutorial are for practice purposes only.
Artist
Adobe Stock contributors