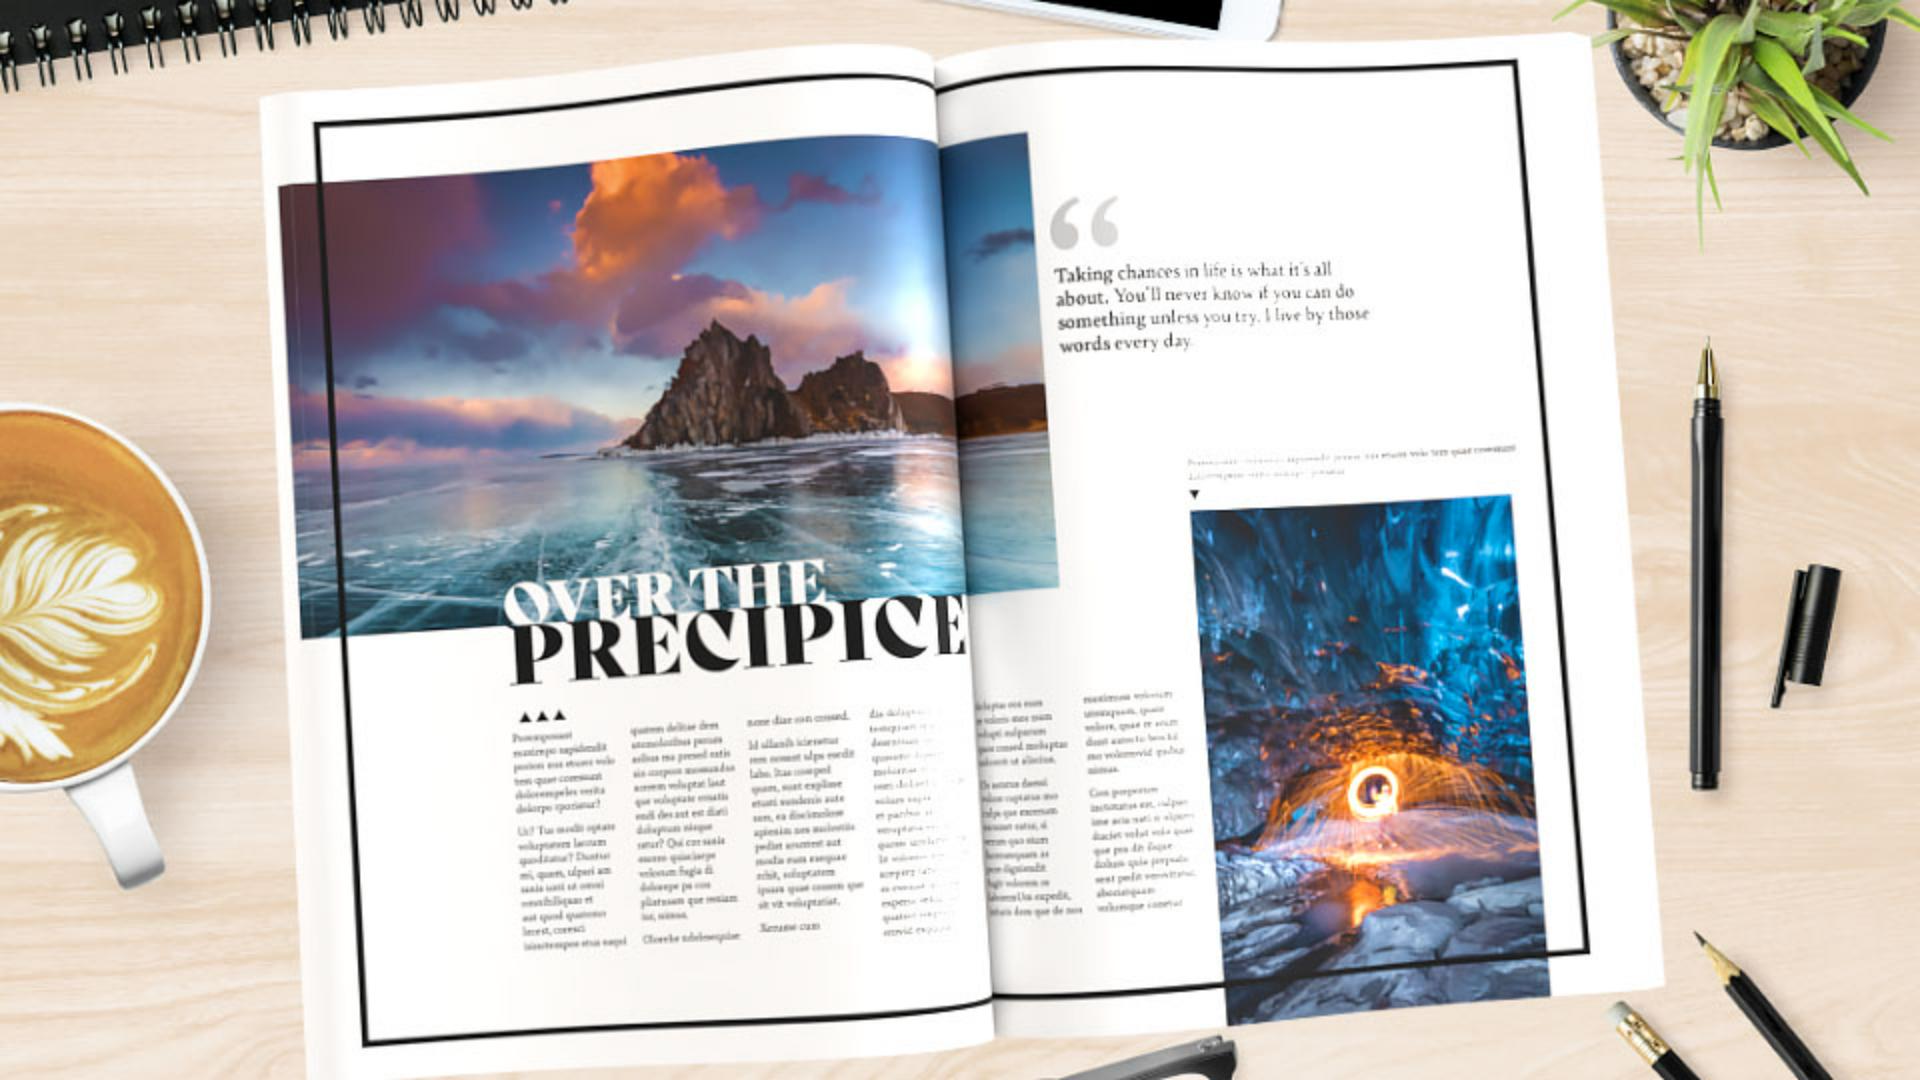
In this tutorial, you'll use Adobe InDesign to set up a document from Modern Magazine Layout, starting from scratch using margins, columns and more.
So, let's get started.
To start a new document, choose File, New, Document...
In this case, this project will be a printed magazine but later could be adjusted to work as a digital layout as well.
So, choose Print to set the proper settings right away.
Then to see more layout sizes, click View All Presets.
Magazine layouts come in different sizes but for this example, choose A4.
Now to set some layout settings, start by changing the name over here to Magazine.
Then set the Units to Inches or whatever you prefer.
We'll be jumping right into designing a spread so, change this number of Pages to 3 so we have some pages to start with.
Bleed Guides should definitely be set to accommodate for content printing to the edge of the pages.
So, click Bleed and Slug and set the Bleed to the typical 0.125 in.
There.
Click Create to get started.
If you were creating a larger magazine with multiple sections, setting up the layout we're about to do might be best done on a master page so it can control multiple spreads at once.
But for this example, you'll work right on the spread and document to get the idea of how these tools work.
To show the spread, choose 2 from the Page menu over here.
Then to see the entire spread, choose View, Fit Spread in Window.
The first thing you'll add is a frame around the design to give it a different look.
But these margin guides need to be moved to give us more room.
To do that choose Layout, Margins and Columns...
We're just going to make a quick change here.
So, make sure Make all settings the same is set and change the Top margin to 0.4375 in, that's a little bit closer to the edge of the page and click OK.
Now to add the frame, select the Rectangle Tool and draw a frame within the margin guides.
To change the appearance, change the Stroke to 6 pt over here in the Properties panel.
And then, so you don't accidentally move the frame, lock it in place by pressing Command L on macOS or Control L on Windows.
Now to add column guides for your content like text.
To open the Margins and Columns dialog box again, choose Layout, Margins and Columns...
And to add columns so we can easily adjust the layout across different spreads, change the Columns to 5 and the Gutter or the space between the columns to 0.1875 in.
Now the first column for this design needs to start the same distance from the black line as the distance you see here.
So, we'll let InDesign do the math.
Deselect Make all settings the same so you can change the Outside margins separately.
Insert the cursor after the number and type *2 then click in another field to see the value multiplied by two.
Click OK.
To add some horizontal guides, so you can make it easier to divide the layout into thirds or quarters for visual alignment, choose Layout, Create Guides...
Change the Number of row guides to divide the page into thirds or whatever you like.
Then set the Gutter to 0 in so you can have individual guides.
Click OK. and with the guides set, now you can start to add some placeholder content.
In this case, you'll create some frames for images and text so you can mark up your design quickly and add content later.
So, select the Rectangle Frame Tool and draw a few frames for the images here and here.
Now to resize the frames quickly, press Command on macOS or Control on Windows and resize the frames making sure they snap to the columns and to the red bleed guide.
Now to add text frames, press the letter T to select the Type Tool, draw a text frame here, maybe to hold a quote, a text frame here to hold the heading.
And two more text frames.
One here, and one here for the body copy.
Once again, you can press Command on Mac or Control on Windows and resize the frames to snap to the column guides if you need to.
Now to set up the frames for the text.
These two frames are going to have text flowing from one to the other, so you need to thread them together.
So, to select the frame on the left, select the Selection Tool and click in the frame.
To connect it to the other frame, click the artboard and release.
Then, click in the text frame to the right.
To fill the frames with placeholder text, right click one of them and choose Fill with Placeholder Text.
Now these text frames need to be split into columns.
So, to do that, click on the frame to the left and choose Object, Text Frame Options...
We need four columns to match the column guides, so change the columns to 4, and the Gutter 0.1875 in to match the column guides and click OK.
Do the same for the text frame here, dividing it into two columns.
Your layout is now set up to receive content.
To finish your design, you could add your own text and formatting, place your own images or the images you downloaded for this tutorial, and add some flair like this quote, to finish your Modern Magazine Layout.


