Get signatures
Adobe Acrobat Sign is a feature rich app that offers many workflow and configuration options. However, many features and steps are optional, and you may use the app’s default settings to quickly send documents for getting signatures.
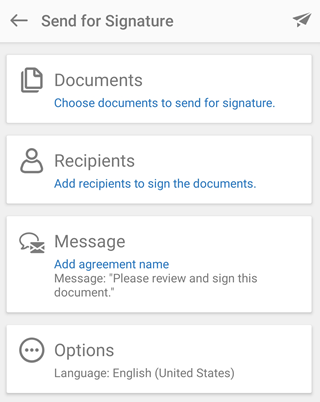
The app’s Send for Signature feature allows you to:
Send any number of documents to any number of recipients.
Specify a signing order.
Specify a signer’s role and verification method.
Password protect documents.
Add and edit form fields.
Follow below steps to quickly send documents for signature using the app’s default settings:
Log in to Acrobat Sign.
Tap Send for Signature.
Tap Documents > Add Documents and add one or more documents.
Tap Done.
Tap Recipients and add one or more email addresses. You can tap
 to browse your contacts list.
Tap Done.
Tap
 .
.
Understand recipient roles
Adobe Acrobat Sign mobile app provides an option to choose the following roles for document recipients:
Signer: Signers are required to apply at least one signature to an agreement. This is the default role of a recipient.
Approver: Approvers need to enter their name before sending the transaction to the signers. They are not required to sign or interact with any fields.
Delegator for Signer: The delegator role is designed for workflows that require a person to make the final judgment on who the correct next person is that should sign the document.
Delegator for Approver: Delegator for approver makes the final judgment on who the correct next person is that should approve the document.
Note
Adobe Acrobat Sign web interface provides support for additional roles as described in the product help.
Send for signature
To send one or more documents for signature:
Log in to Acrobat Sign.
Tap Send for Signature.
Follow these steps to select the documents that you want to get signed:
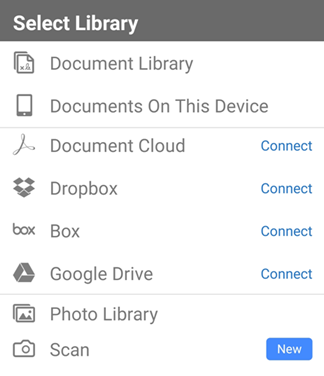
Tap Documents > Add Documents.
Select a location from the list of locations. You may be required to sign-in to access the locations.
Tap a document to add it to the list.
Optionally, tap Add Documents if you want to add more documents.
Tap Done.
Follow these steps to add recipients:
Tap Recipients and add one or more email addresses.
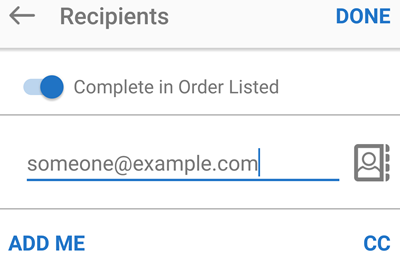
Disable the Complete in Order Listed button if you do not require signing in the order as the listed recipient order.
Optionally, tap
to browse your contacts list.If you want to set the signer’s role or authentication mechanism, tap the
 . Then, select the desired role and/or authentication method.
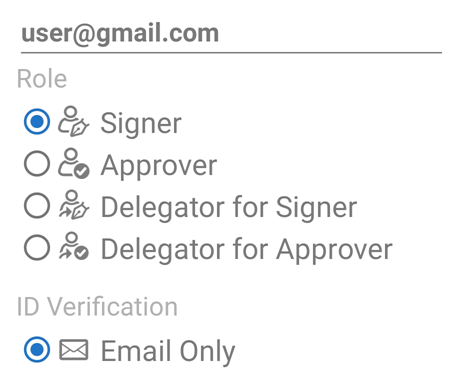
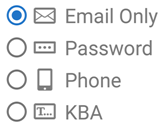
If you need to change the default ID verification method, select one of the following:
Email Only: If the signer gets the document in an email, the signer’s identity is assumed.
Password: Enter a password.
Phone: Enter the signer’s phone number.
KBA (Knowledge Based Authentication).
Tap OK.
Tap Done.
If you need to customize the email message, tap Message, and edit the document name or message.
Tap Done.
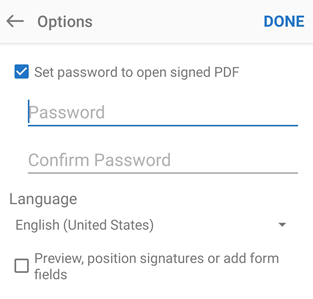
If you need to change the document options, tap Options:
Tap the Set password checkbox to password protect the document. Enter the password twice.
Change the language by tapping the Language drop down list and selecting a new language.
Check the Preview, position signatures or add form fields field checkbox to edit the form fields.
Tap Done.
If you chose to add or edit any fields, change the document as needed when it reloads.
Tap
.
Get signature in person (waiting agreement)
You can get signatures in person for a document that you have already sent. To do so:
Tap Waiting for Others.
Search for a file or select one based on the document’s title, date, or sender.
Tap the document to open the details page and tap

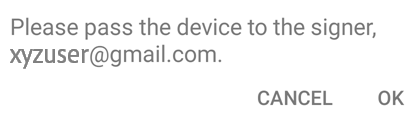
In the dialog that opens, tap OK and pass the device to someone for signing.
The signer taps Proceed to confirm their identity and completes the signing workflow.
Get signature in person (new agreement)
To get a new document signed in person:
Tap Get Signature in Person > Documents.
Tap Add Document. You may be asked to allow Adobe Acrobat Sign access to your files.
From the appropriate locations, select a document that needs to be signed.
Add a document and tap Done.
Tap Recipients and add the signer’s email address.
Tap Done.
Tap
Tap OK, and pass the device to someone for signing.
The signer confirms their identity by tapping Proceed and then completes the signing workflow.
Tap Click to Sign.
Manage pending documents
The Waiting for Others feature allows you to see a list of documents that you have sent to others to sign.
View a list of sent documents
Tap Waiting for Others.
Search for a file or select one based on the document’s title, date, or sender.
Tap the document to open the details page.
Send a reminder
To remind a document recipient there’s a document ready to sign, send them a message:
Follow the steps above.
Tap the
 > Remind.
Enter an optional reminder message.
Tap Send Reminder.
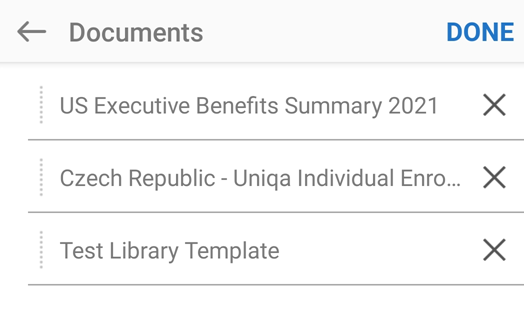
Edit a document list
Both the Send for Signature and Get Signature in Person panels allow you to create lists of documents. You can add, remove, and reorder files in the list:
Add your first document.
Tap Add Documents at the bottom of the screen to add more documents.
When you have two or more documents in the list, edit the list as follows:
To delete a file, swipe from right to left to remove the document.
To reorder the document list, long press the dots icon and drag the file to a new location in the list.