Prøv disse selvstudier med Photoshop
Rediger fotos for at skabe nye billeder og grafiske elementer.
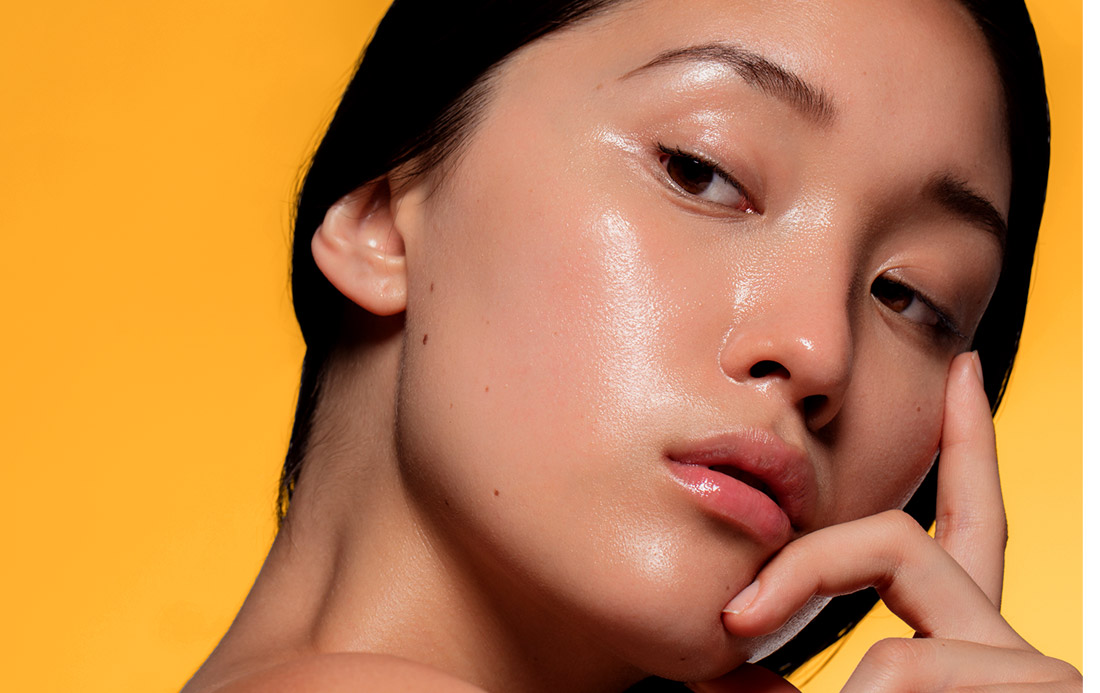
Erica Larson creates dramatic digital makeup using brushes, masks, and the Curvature Pen tool to design colorful face paint in Adobe Photoshop.
Graphic artist Erica Larson dreams up inspired designs every day as an associate creative director on the Adobe Studio team. In other words, she makes stuff that makes others want to make stuff.
This sample file has Adobe Stock images you can use to practice what you learn in this tutorial. If you want to use the sample file beyond this tutorial, you can purchase a license onAdobe Stock . Check out the ReadMe file in the folder for the terms that apply to your use of this sample file.
Larson worked with a photo that focused on a model’s face. She specifically looked for an image that showed dewiness or detail in the skin to achieve the results she wanted.
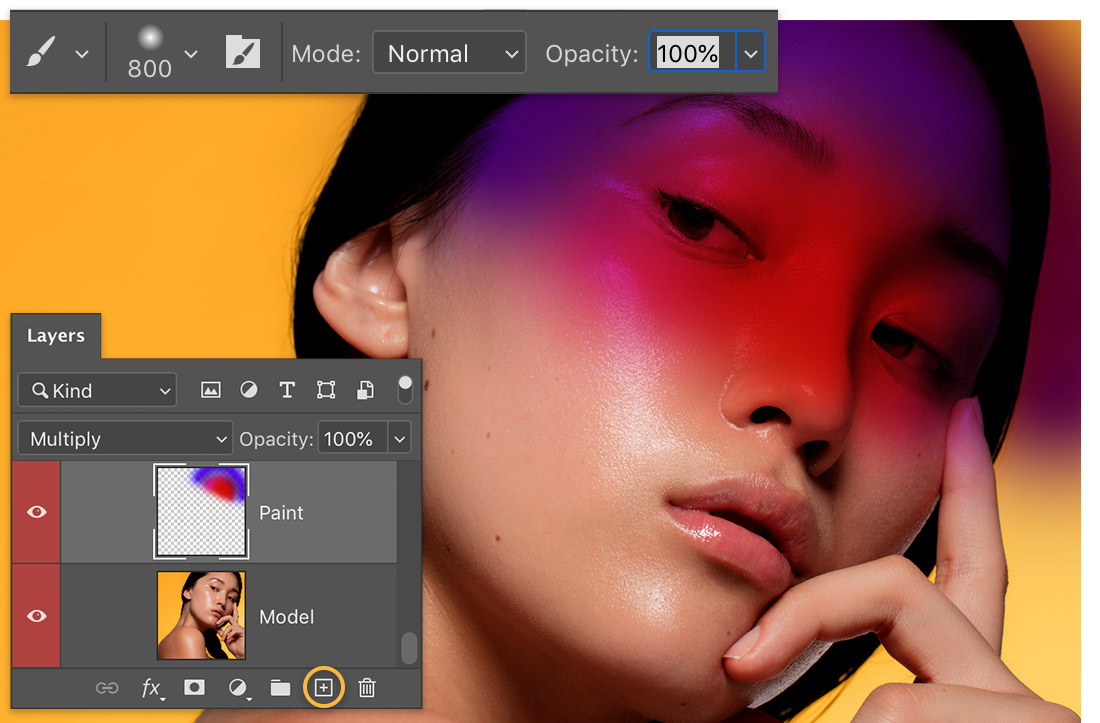
To design the art for the face paint, Larson chose the Brush (B) tool and set it to a soft round tip with increased Opacity. She set the layer blend mode to Multiply so the paint would “melt” into the skin. Then she brushed with different colors to paint a design over the model’s face.
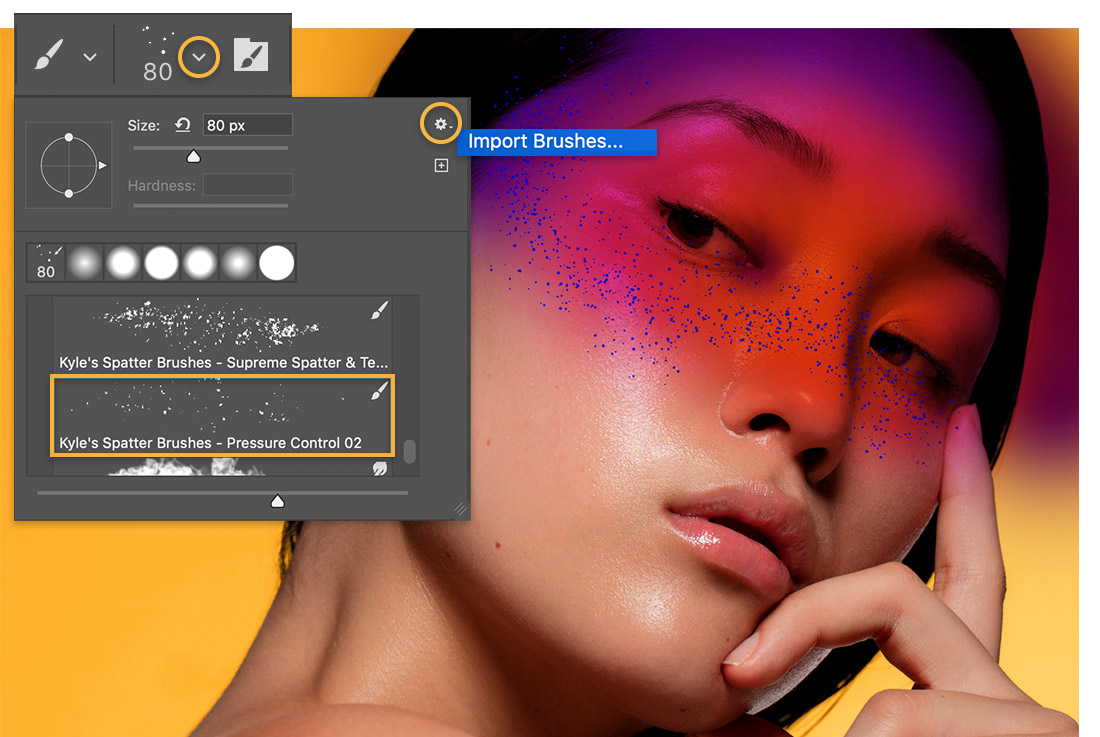
Larson imported brushes to add design elements to her art. For this composition, she painted with a spatter brush to add a glitter effect to the cheeks and bridge of the nose. If you’d like to use the same custom brush, click the Gear icon from the Brush properties dialog, select Import Brushes, and find the spatter_brushes.abr file in the practice files. When you import the brushes, they will appear under a category called spatter_brushes.
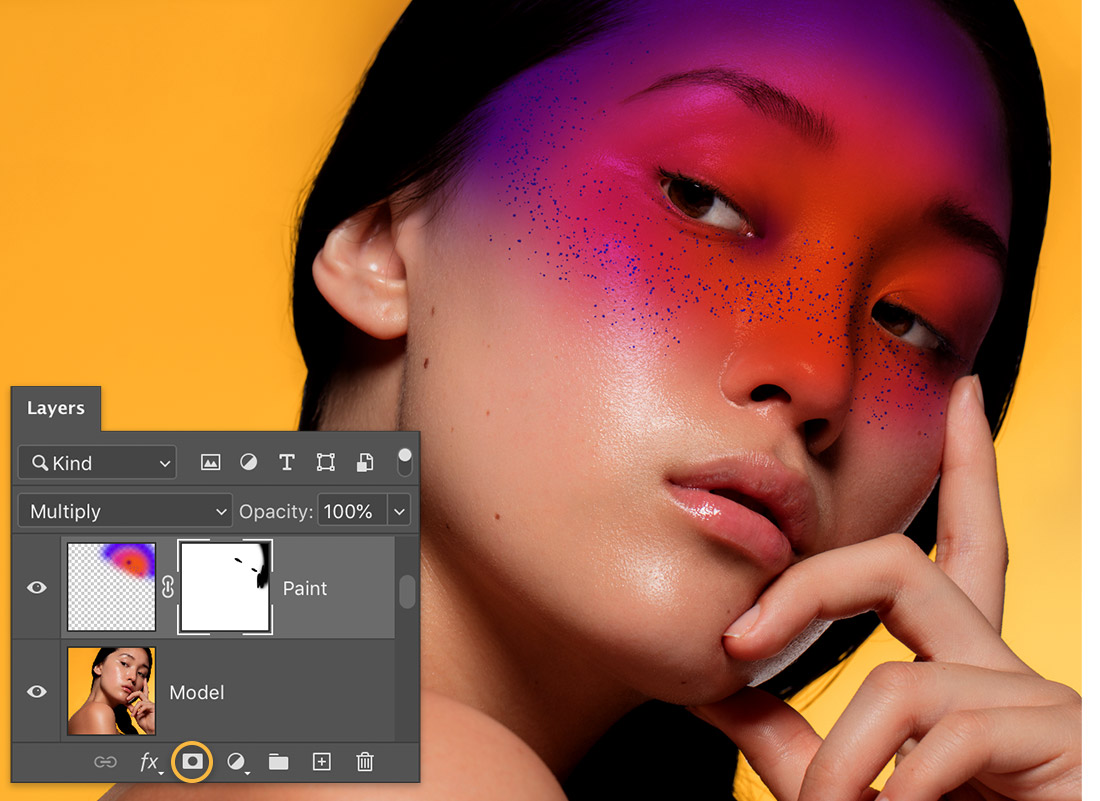
The paint spread beyond the model’s face. To fix this, Larson applied a mask to the art layer, then brushed on the mask with black to hide areas of the art — eyes, hair, and finger — so the original image would show through. She used the [ ] keys to adjust the brush size as she worked.
Larson used the Curvature Pen tool and set the mode to Path and the Path operation to Exclude Overlapping Shapes to create a custom path around one of the eyes. She clicked to add points for a curved path and double-clicked to create corners. She closed the path by clicking on the original point.
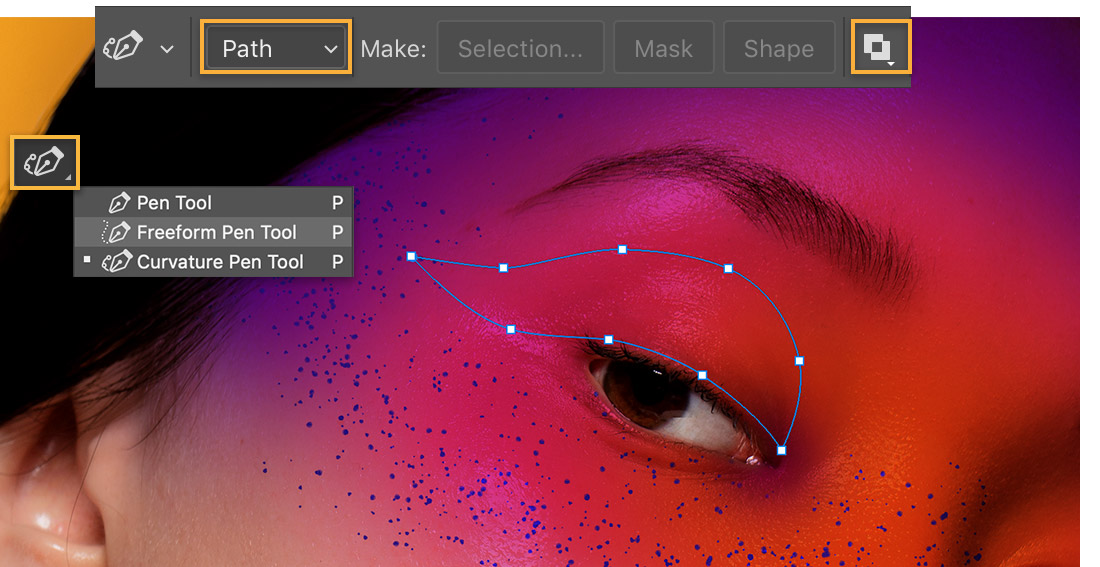
With the path defined, Larson right-clicked, chose Make Selection, and set Feather Radius to 4. She made sure the mask thumbnail was still selected on the Paint layer then painted with a black brush inside the selection leaving the right side soft for a smoother blend.

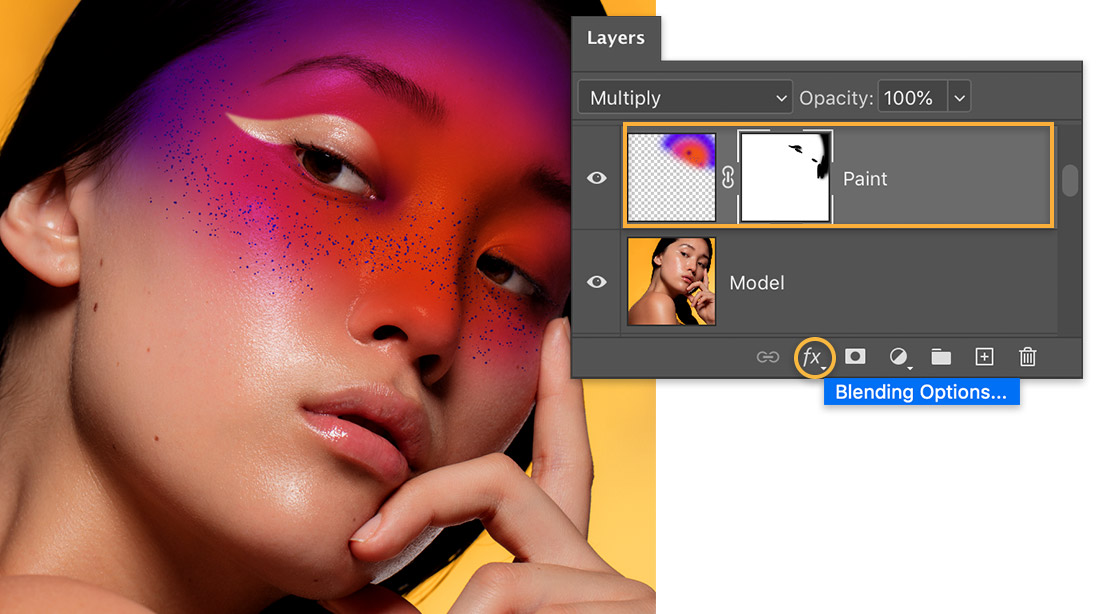
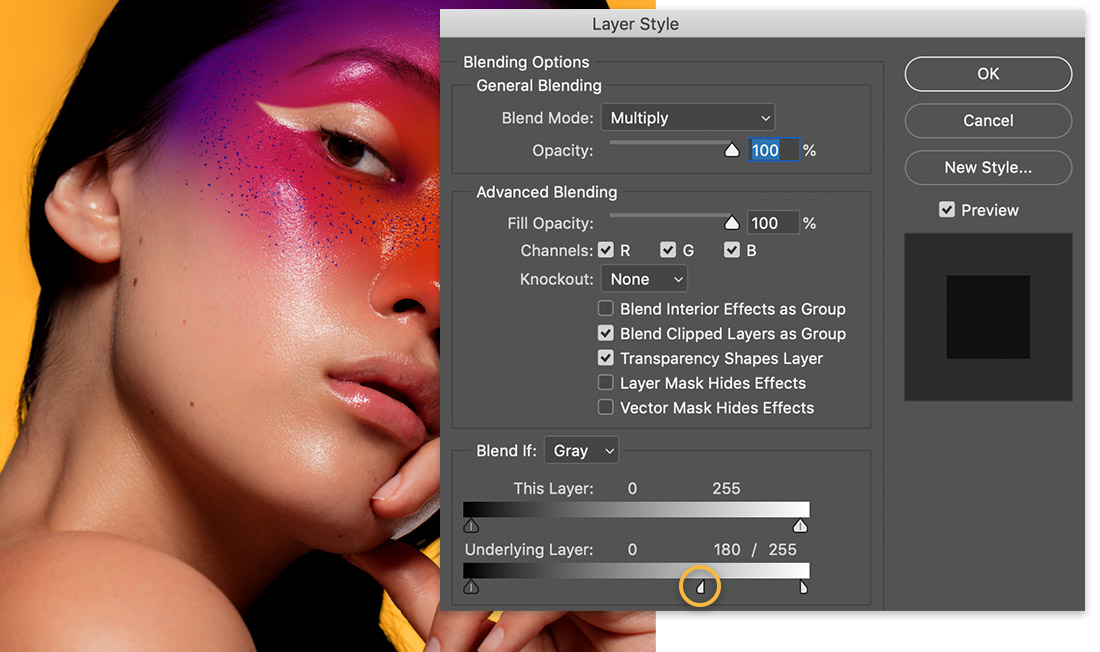
Larson wanted the digital paint to look more realistic, as if it were painted directly on the model’s skin. To create this effect, she added a Blending Options layer style from the Layers panel.
She fine-tuned the effect by using Alt (Windows) or Option (macOS)+click on the Underlying Layer slider and dragged it to the left.
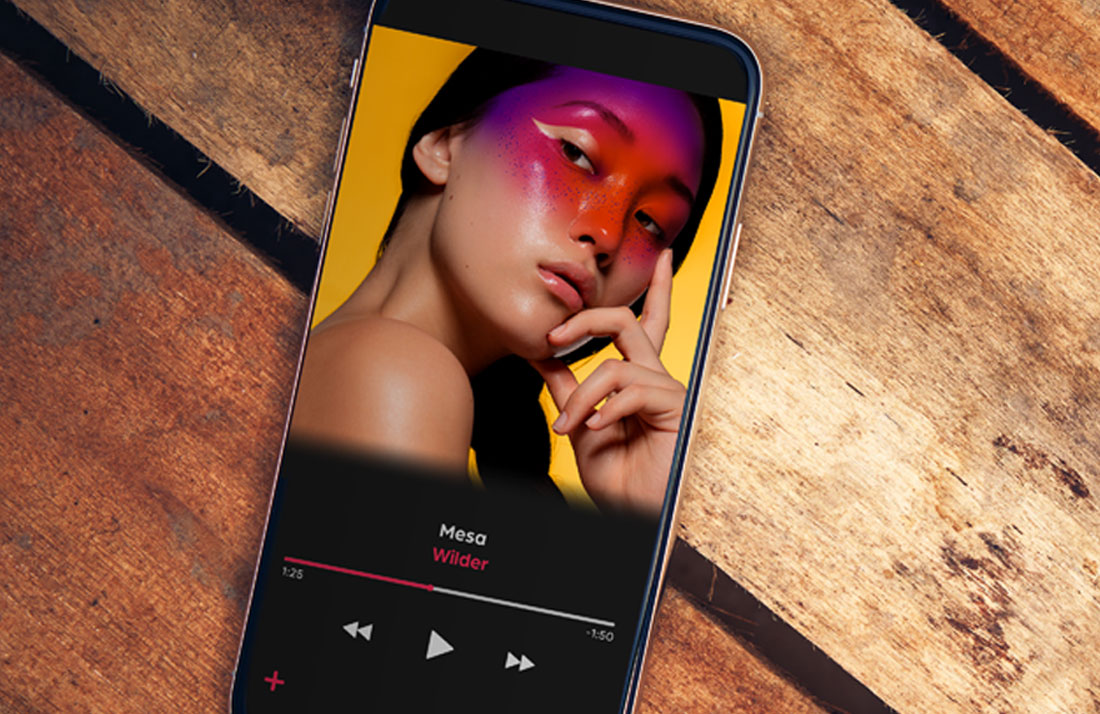
Take your digital makeup artist skills to a whole new level and create dazzling face paint designs with Photoshop brushes and colors.
Note: Project files included with this tutorial are for practice purposes only.
All Consent Allowed