Introduction
When a puppet in Adobe Character Animator hears the voice, it analyzes the sound in real time and picks a mouth shape that fits.
So, as you talk, the mouth is constantly switching to match whatever syllable is heard, resulting in automatic instant lip sync.
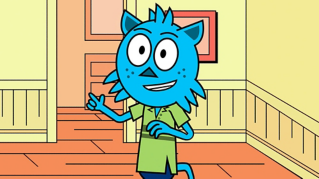
Continuing with the Photoshop template Chad from Character Animators home screen,
Understanding mouth shapes and visemes for lip sync
inside Photoshop, you can twirl open the Mouth group to see all the different potential mouth shapes.
There are 14 total here, so let's break them down.
Three of these, Neutral, Smile and Surprised are silent mouth and only show up when nothing is being said.
In these cases, the shape of your mouth in the webcam will control what shows up here.
Neutral is the default state and the one that any puppet with a mouth should have.
Smile and Surprised are additional optional silent mouth shapes that will get triggered if you smile or open your mouth in surprise.
The other 11 are audio-based mouths called visemes and they'll show up when something is said.
These are Ah, D, Ee, F, O, M, Oh, R, S, Uh and w-Ow By naming these mouth shapes exactly this way and putting them in a Mouth group Character Animator will know what to do with them once they're imported.
Armed with this knowledge, you can create your own custom mouth sets, either by tweaking a template mouth like the one provided in Chad or creating your own from scratch.
Making a responsive mouth set takes some time and experimentation.
So, Chad's mouth set is a great starting point.
Feel free to use it exactly as it is or just as a guide for your own custom creations.
In Character Animator,
Preparing lip sync recording in character animator
if you double click the Chad Photoshop scene in the Project panel on the left, it will automatically open up in Record mode.
If the microphone icon is on and the Lip Sync behavior is armed, then you're ready to record audio.
For now, you could just disarm all the other behaviors by clicking the red dots next to them.
A shortcut to disarm everything at once is holding down Command on Mac or Control on Windows while clicking an arming dot.
You can do this and then arm Lip Sync to ensure it's the only behavior looking for input.
If you click the red Record button in the Scene panel and start talking Character Animator will record data for the armed Lip Sync behavior.
Editing and refining visemes on the timeline
Clicking the Record button again to stop will create two things in the Timeline, a Waveform of your audio and a Lip Sync take with all of the individual visemes below.
By dragging the left and right edges of any viseme you can trim or expand how long it appears.
You can also right click any viseme to swap it out for any other one, with some accompanying suggestions to help guide you for sounds that share the same viseme.
Tapping the first letter of a viseme on your keyboard will also do a switch.
You can remove a viseme by right clicking and choosing Silence.
And right clicking on an empty area of the Viseme track will allow you to create a new viseme.
Audio doesn't need to be recorded live.
Generating lip sync from external audio files
If you're working with voice actors or recording in another program, you can go to File, Import... and bring in external audio files for your voices.
You can then drag them into your scene, select the puppet you want to apply the lip sync to and go to Timeline, Compute Lip Sync Take from Scene Audio.
This will analyze the audio file and create the Lip Sync track from its contents.
Accurate looking lip sync is a critical part of a believable animated performance.
So, it's worth spending the time to make your mouth look as great as possible.