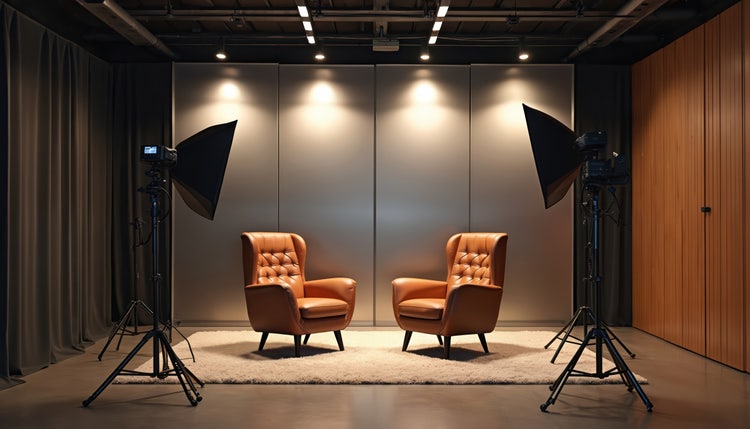

How lighting impacts video quality and how to get it right.
Good lighting can make or break a video. This guide explores how lighting affects video quality and shares practical tips for getting it right, from filming to post-production.

https://main--cc--adobecom.aem.live/cc-shared/assets/img/product-icons/svg/firefly-80.svg
Adobe Firefly
https://main--cc--adobecom.aem.live/cc-shared/assets/img/product-icons/svg/firefly-80.svg
Adobe Firefly
The next evolution of creative AI is here for all your ideas, with image, video, audio and vector tools.
Key takeaways:
- Poor lighting can lead to noise, dull colours, and loss of detail.
- Proper light placement improves clarity, depth, and subject focus.
- Consistent colour temperature keeps footage natural and visually clean.
- Editing tools like Lumetri Color in Adobe Premiere can fix exposure and balance issues in post-production.
- AI tools like Adobe Firefly allow lighting corrections using simple text prompts.
- Even budget setups (window light, LED panels, reflectors) can produce professional results.
Why lighting matters in video production.
Lighting has a major impact on how your video looks on screen. It affects everything from brightness and sharpness to colour accuracy and overall visual quality. Even if you are filming with a good camera or smartphone, poor lighting can make footage look unprofessional.
With good lighting, cameras can capture:
- Clear details and textures
- Natural-looking skin tones
- Better depth and dimension
- Balanced brightness and contrast
- Cleaner, sharper footage
How lighting affects video quality.
Lighting influences multiple technical and visual elements in video production. More than making things brighter, light directly affects how your camera records detail, colour, and depth in every frame.
Exposure and brightness.
Exposure refers to how bright or dark a video appears. Proper lighting helps cameras capture balanced exposure without losing detail in shadows or highlights. When lighting is poor, cameras often compensate by increasing ISO. This can lead to grainy footage and a noticeable drop in overall quality, especially in low-light indoor setups.
Sharpness and detail.
Good lighting helps your camera capture cleaner, sharper visuals. When there isn't enough light, footage can start to look soft or slightly out of focus, even if your camera is capable. This is especially common when filming indoors at night or in dimly lit rooms, where the camera struggles to lock in fine details.
Colour accuracy.
Lighting has a direct effect on how colours appear on screen. Different light sources create different colour tones, which can shift the overall look of your video. For example, warm lighting creates yellow or orange tones, cool lighting creates bluish tones, and mixed lighting can lead to uneven or inconsistent colours.
Depth and dimension.
Lighting adds depth by creating natural contrast between light and shadow. This separation helps your subject stand out clearly from the background. Without it, videos can feel flat, with the subject blending into the surroundings. Even a simple setup, such as placing a light at an angle, can instantly make the scene look more dimensional.
Mood and visual style.
Lighting also sets the tone of your video and influences how it feels to the viewer. The right lighting style helps reinforce your message and keeps your video visually engaging from start to finish. For instance, soft lighting is usually the go-to style for interviews and lifestyle videos, dramatic low lighting is the preference for cinematic scenes, and bright studio lights are common for tutorials and product demonstrations.
Types of lighting used in video production.
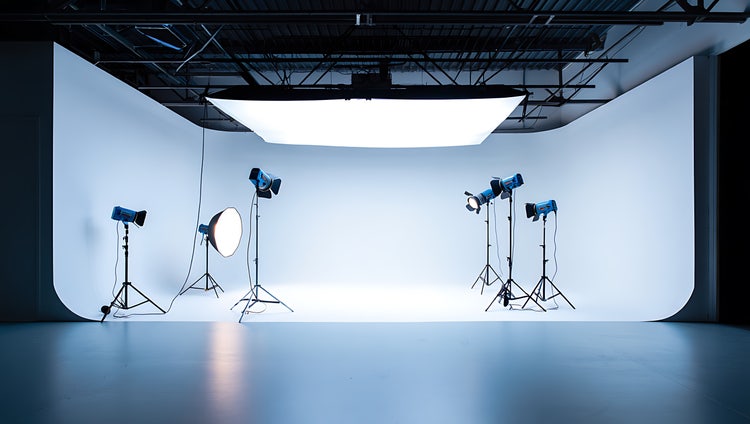
Understanding the basic types of lighting makes it much easier to build a clean and balanced lighting video setup, even with simple equipment.
- Key Light
The key light is your main light source and the foundation of your setup. It is usually placed at an angle to the subject and provides the strongest illumination in the scene. This light defines the overall look, brightness, and direction of your shot. - Fill Light
The fill light is used to soften the shadows created by the key light. It helps reduce harsh contrast without removing all depth from the image. It is typically less intense than the key light and is placed on the opposite side. - Back Light
The back light sits behind the subject and helps separate them from the background. It adds depth and makes the subject stand out more clearly. This is also commonly referred to as a rim light or hair light. - Background Light
Background lighting is used to illuminate what's behind the subject. It adds visual interest and prevents the background from looking dull or flat. Even a subtle light in the background can improve overall composition. - Practical Lights
Practical lights are real light sources that appear within the frame itself. These help add realism and atmosphere to a scene. These can include lamps, neon signs, and decorative lights or bulbs.
How to optimise lighting for better video quality.
You don't always have to have a professional studio setup to improve your lighting video quality. Small adjustments in light placement and setup can make footage look cleaner, brighter, and more professional.
Position lights correctly.
Light placement has a major effect on how your subject appears on camera. Even a strong light source can produce poor results if it is positioned incorrectly. A common beginner mistake is placing lights directly overhead or directly in front of the subject, which can create harsh shadows and flat-looking footage.
If you are filming at home, natural window light can work surprisingly well. Facing a large window during daytime hours often creates soft, flattering lighting without needing extra equipment.
Diffuse harsh lighting.
Hard lighting can create sharp shadows, bright hotspots, and uneven skin tones. Diffusing the light softens the overall look and helps footage appear more natural. You can soften lighting using softboxes, white curtains, diffusion sheets, and reflectors.
Control colour temperature.
Colour temperature affects the tone and mood of your video. When multiple colour temperatures appear in the same shot, skin tones can look unnatural, and the video may feel visually distracting. To keep colours balanced:
- Use matching light sources whenever possible.
- Adjust your camera's white balance settings.
- Avoid mixing daylight with warm indoor bulbs.
- Choose daylight-balanced LEDs for a cleaner look.
Reduce shadows and glare.
Strong shadows and glare can pull attention away from the subject and make videos look less refined. To minimise harsh shadows, try adding a fill light opposite the key light or moving lights farther from the subject. To reduce glare, use softer light sources instead of direct bulbs and avoid pointing lights directly at reflective surfaces.
Use reflectors for balance.
Reflectors are one of the simplest and most affordable tools for improving lighting. They help bounce existing light back onto the subject to brighten shadow areas naturally. Typically, white reflectors are used for soft neutral lighting, silver reflectors for increased brightness, and gold reflectors for warmer skin tones. If you do not have professional reflectors, white foam boards, chart paper, or even light-coloured walls can work as budget-friendly alternatives.
How to fix bad lighting in post-production.
Even with a good setup, lighting problems can still happen during filming. Footage may turn out too dark, overly bright, uneven, or slightly off in colour due to changing conditions, indoor lighting, or camera limitations.
The good news is that many of these issues can be improved during post-production. Basic colour correction tools can help recover detail, balance exposure, and make footage look more polished without needing to reshoot the scene.
Method 1: Using video editing software.
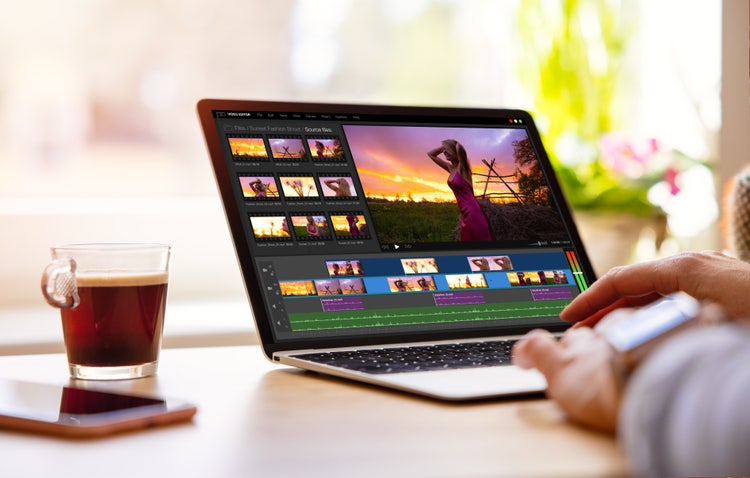
Video editing platforms such as Adobe Premiere include built-in colour correction tools designed to improve lighting and exposure problems quickly. One of the most commonly used tools is the Lumetri Color panel, which allows editors to adjust brightness, shadows, contrast, and colour balance in a more controlled way. Here's how:
- Open your project in Adobe Premiere.
- Go to the Color workspace.
- Open Lumetri Color and select Basic Correction.
- Adjust the Shadows and Blacks sliders upward to reveal detail in dark areas.
- Lower Highlights or Whites if the footage looks overexposed.
- Use the Exposure slider to adjust overall brightness.
- Fine-tune Contrast to improve depth and separation.
- Adjust White Balance if the colours appear too warm or too cool.
Lighting effects
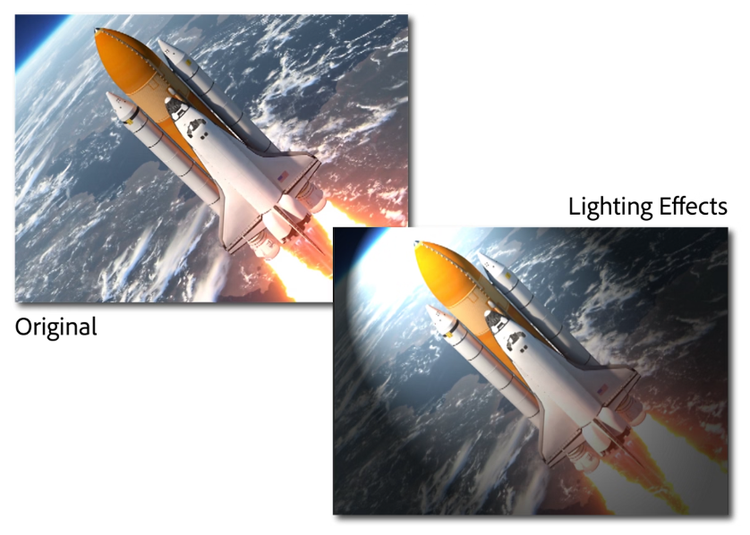
You can also use Lighting Effects to add and customise digital lighting within a scene. To use it:
- Open the Effects panel.
- Search for Lighting Effects.
- Drag the effect onto your video clip.
- Open Effect Controls to customise the lighting setup. You can experiment with different light styles depending on the look you want to create:
- Directional lighting: Creates a broad light source similar to sunlight
- Spotlight effect: Produces a focused beam for dramatic emphasis
- Omni lighting: Creates a softer, more evenly spread light source
Method 2: Using AI video editing tools.

AI-powered tools are making lighting correction faster and more accessible, especially for creators who do not want to spend time manually adjusting multiple settings. For instance, Adobe Firefly allows users to edit and refine footage using natural-language prompts. This makes it easier to fix common lighting problems, experiment with different visual styles, and speed up post-production workflows. Here's how:
- Go to the Adobe Firefly homepage and select Generate video.
- Select the Edit tab to directly upload a video from your device.
- On the Edit page, select a partner video model to edit your video using text prompts.
- Add a prompt describing what you want to edit in the clip. For example:
- "Brighten the subject while keeping the background natural."
- "Reduce harsh shadows and improve skin tones."
- "Fix overexposed highlights and balance the lighting."
- "Make the footage look warmer and more cinematic."
- Select Generate.
- If you're happy with the results, download the final output.
Looks panel
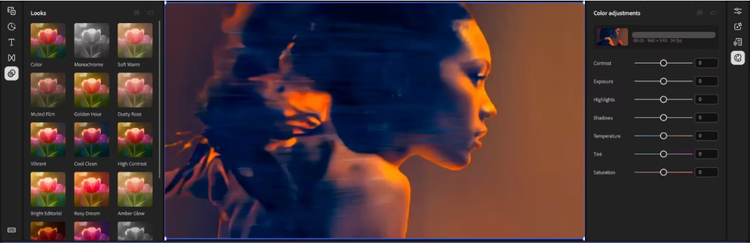
Adobe Firefly also includes built-in AI video editing presets that can instantly adjust lighting, colour tone, and overall mood without manual grading. While you still have the option of fine-tuning sliders, you can also apply a Look to instantly reshape how your footage feels. These presets are especially useful when you want quick, consistent lighting styles across multiple clips.
Some of the default Looks that help adjust lighting and visual tone include:
- Soft Warm: Adds a gentle, cosy warmth with flattering skin tones
- Golden Hour: Mimics sunset lighting for a cinematic, natural glow
- Cool Clean: Creates a crisp, modern look with cooler tones
- Amber Glow: Enhances warmth with a slightly rich, cinematic tint
- Deep Glow: Adds moodier contrast with soft illuminated highlights
- Bright Editorial: Produces a clean, high-key look ideal for tutorials and branded content
- Rosy Dream: Introduces a soft pinkish tone for a stylised, aesthetic finish
Discover even more features.
Common lighting mistakes to avoid.
Even with good equipment, small lighting mistakes can noticeably reduce video quality. Avoiding these mistakes can instantly improve your video quality, even without upgrading your camera or editing tools:
- Relying only on overhead room lights.
Ceiling lights are convenient, but they often create unflattering shadows under the eyes and uneven brightness across the face. This can make videos look flat or tired. A better approach is to introduce a front-facing light source at a more natural angle instead of depending entirely on ceiling lighting. - Mixing multiple light colour temperatures.
Using a combination of daylight, warm bulbs, and cool LEDs in the same frame can confuse the camera and create inconsistent skin tones or colour shifts. For a cleaner look, try to stick to one consistent light temperature or match your sources as closely as possible. - Neglecting the background.
Many creators focus only on lighting the subject and forget the background. A completely dark or randomly lit background can make the frame feel unfinished. Even a small practical light (like a desk lamp or subtle LED strip) can add depth and make the scene more visually balanced. - Overexposing the subject.
Too much light on the face or subject can blow out details, especially on lighter surfaces or reflective skin. This often happens when lights are placed too close or set at full intensity. Adjusting distance or lowering brightness helps maintain natural detail and a more balanced image. - Skipping light diffusion.
Direct light sources can feel harsh. They create strong shadows and shiny highlights on the skin. Without diffusion, the image can look unnatural or overly "clinical." Softening the light using a diffuser, curtain, or softbox helps create a smoother, more flattering result.
Frequently asked questions.
You may also like