Introduction
Eyes and eyebrows in Adobe Character Animator give your character a wide variety of expressive possibilities.
When you look around, blink, or move your eyebrows, your animated character does the same.
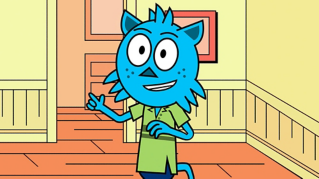
We'll continue with the Photoshop template Chad from Character Animators home screen.
Setting up independent eyebrows with naming and tags
In Photoshop, at the top of the Head group, we see two layers, +Left Eyebrow and +Right Eyebrow.
There are a few things to note.
First, when we talk about left and right here, we're talking about the characters left and right, not the left and right sides of the screen.
Second, when you add a + in front of a layer's name, that's a special code to Character Animator to make that layer what we call independent, meaning it can move on its own without affecting other layers.
If you took the + off the eyebrow layers, you would notice how the eyebrows would be pulling and warping other layers as they move.
If the layer names start with a + instead, they'll move on their own.
A + in Photoshop or Illustrator gets translated into this crown icon in Rig mode in Character Animator, allowing you to easily toggle and experiment with making parts independent.
Because the layers were precisely named Left Eyebrow and Right Eyebrow, when the artwork was imported, those layers got automatically tagged as eyebrows.
You can check this in Rig mode by selecting the layer and looking at the Tag section in the right Properties panel.
You can toggle between a Visual or Text based tag system.
So, if I just named this layer Eyebrow or Brow or Layer 472 Final Final for real this time, I can easily tag it here.
The character is controlled by a set of rules called Behaviors.
Customizing eyebrow behavior and expressiveness
When you import a character, you get a standard behavior set automatically, which you can see in Record mode in the Properties panel on the right.
The eyebrow controls are in the Face behavior.
So, trolling that open reveals several options to customize the eyebrows.
Eyebrows strength exaggerates or minimizes the amount of vertical eyebrow movement as you move your own eyebrows in the webcam.
High numbers move up and down a lot while 0 means no vertical movement at all.
Raised and Lowered Eyebrow Tilt determines how much and in which directions the eyebrows will pivot in their highest and lowest positions.
You can experiment with these parameters to customize the level of expressiveness that you want.
Let's take a closer look at the eyes back in Photoshop.
Building eye groups with pupils and blinks
Each eye has its own group, Left Eye and Right Eye, each with three layers inside.
An Eyeball, Pupil and Blink layer.
The relationship is pretty simple.
The pupil stays inside the shape of the eyeball.
And because we want it to move around without pulling on other layers, we add a + to make it independent.
The Blink layer only shows up when you blink.
And doing so, will hide the other layers in its group, the Eyeball and Pupil.
If you return to your scene in Record mode in Character Animator,
Controlling eye gaze with camera, mouse, or keyboard
you can see that the eyes are controlled by the Eye Gaze behavior, which has several options.
A red dot means that something is armed for recording.
So, by default, we can see that the Eye Gaze is looking for camera input following your own eyes in the webcam.
If we disarm Camera Input, we have two other options we could arm.
Mouse & Touch Input lets us control the pupils by dragging a mouse or fingers on a touch enabled screen.
Keyboard Input lets us control the pupils with the keyboard arrow keys.
Any of these methods work, arm the one that gets the best results you're looking for.
Towards the bottom Snap Eye Gaze is checked by default, meaning the eyes will dart around to one of nine different common positions depending on where you're looking in the webcam.
But unchecking this will make the pupils more free moving.
So, these eyebrows and eyes are a basic example, but you could customize them into whatever size, shape and color you want in your own unique style.
Once you save, any edits will automatically show up in Character Animator.
For more advanced users, there's also the option of tracking your upper and lower eyelids or adding clipping masks to prevent the pupils from floating off the eyeballs.
The eyes are one of the most expressive parts of a character.
So, it's worth spending some time tweaking the parameters until you get the effect that best fits your character.