Hello, I'm Jess, a motion designer and art director.
I love exploring styles, and this lesson dives into features for stylizing 3D scenes.
With the Advanced 3D renderer in After Effects, we can use embedded 3D model animations and combine 2D effects with 3D assets efficiently.
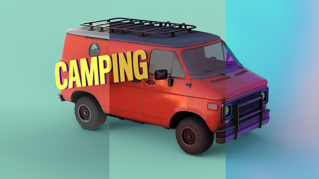
This scene has a 3D model of a van with the camera orbiting around it.
The camera's parented to a rotating null positioned in the model center.
There's also an Environment Light with an Animated composition as its Source.
The model, which is an FBX file, has an embedded animation.
We can bring that into After Effects.
FBX, GLTF, and GLB formats support animation, but OBJs don't.
Twirl open the 3D model layer in the Timeline, and the Animation Options too.
You may have to hit the Toggle Switches/Modes button to reveal the drop-down menu.
Select the animation you want to play from the drop-down.
You can access this option from the Properties panel too.
Right-click the layer and apply Time Remapping to adjust the animation's timing with smooth interpolation.
Now the tires on the van are rotating.
We can add a loop expression to the time remap on this layer as well.
Next, let's give this scene some character and color.
You'll notice we can't add effects directly to a 3D model.
So, what exactly do we do?
Well, we need a solid with an effect that references the 3D model.
Right-click the FBX layer and select Create, Create 3D Layer Instance.
A new solid layer has been added with the CC Composite effect, referencing the 3D model.
If I solo this layer, you'll see the 3D model.
I'll undo that.
After Effects has hidden the main model, but we can turn the visibility back on to get those shadows back.
Now we can add effects to this new layer instance to color correct and stylize it to our liking.
Let's add the Tint effect and change the color.
I want to apply this color treatment to just the top of the van, so I'll add a Set Matte effect to mask this.
We already have a solid layer in the scene with a black and white gradient map to reference.
Make this drop-down Effects & Masks, so it reads the Gradient Ramp effect.
Set the matte to Luminance, so we're using the brightness information and Invert the matte.
We can change the layer blending mode and opacity to dial in the look.
To tweak the colors of the bottom half, duplicate the Instance solid layer and uncheck Invert Matte.
Next, we'll update the Tint colors, try out a new blending mode and actually let's swap the colors on Tint.
That blue is feeling a little harsh, so let's reduce the Opacity.
Finally, we can do this another time and this time I'll use Tritone, tweak these colors and set the matte to reference a looping image sequence.
There's one in the Timeline already named brush-[1-4].png, so we'll select that layer from the drop-down.
No surprise here, tweak the blending mode and Opacity.
One issue we're running into here is that the instances are on top of our text, so we have some ghosted textures.
If I drag the text above the instances, we lose the shadow casting from the text on the van.
Let me Toggle Switches/Modes again.
Moving the text above the layer stack created a new 3D bin, indicated by the dotted and solid outline around the 3D switches.
We want to keep the text in the same bin as the van, so let's undo that.
Instead, we can duplicate the Set Matte of our Instance layers and reference the text layer, change it from Luminance to Alpha Channel.
If I solo this layer, you'll see that the text is knocked out.
Now we have ghosting on the backside of the van, but we can keyframe the matte from Alpha Channel to Off around two seconds where the shadow isn't needed anymore.
We can then add this Set Matte to the two other instances.
Try stacking up different effects for different treatments, and mix 2D and 3D assets to make striking visuals.
Remember to increase the Render Quality under Render Options when you're ready to export.
Unlock your creative voice by mixing 2D effects with 3D assets right inside of After Effects using the Advanced 3D renderer.
Keep trying new things and thanks for joining me.