Introduction
[Jess Libby]: Isolate and track the subject in your footage using the AI-powered Object Matte Tool in After Effects for faster, more accurate results and creator control.
Hi, I'm Jess, a motion designer and art director specializing in After Effects.
Let's go over how to use the Object Matte Tool.
Select your subject
Open the provided After Effects file and double-click the footage to open it in the Layer Viewer.
Yep, it's a dog wearing sunglasses.
Look at him.
Isn't he handsome?
Scrub to a frame when the subject is the most visible.
The first frame will work in this case.
Select the Object Matte Tool from the Toolbar.
Hover over the subject you want to select to preview the matte.
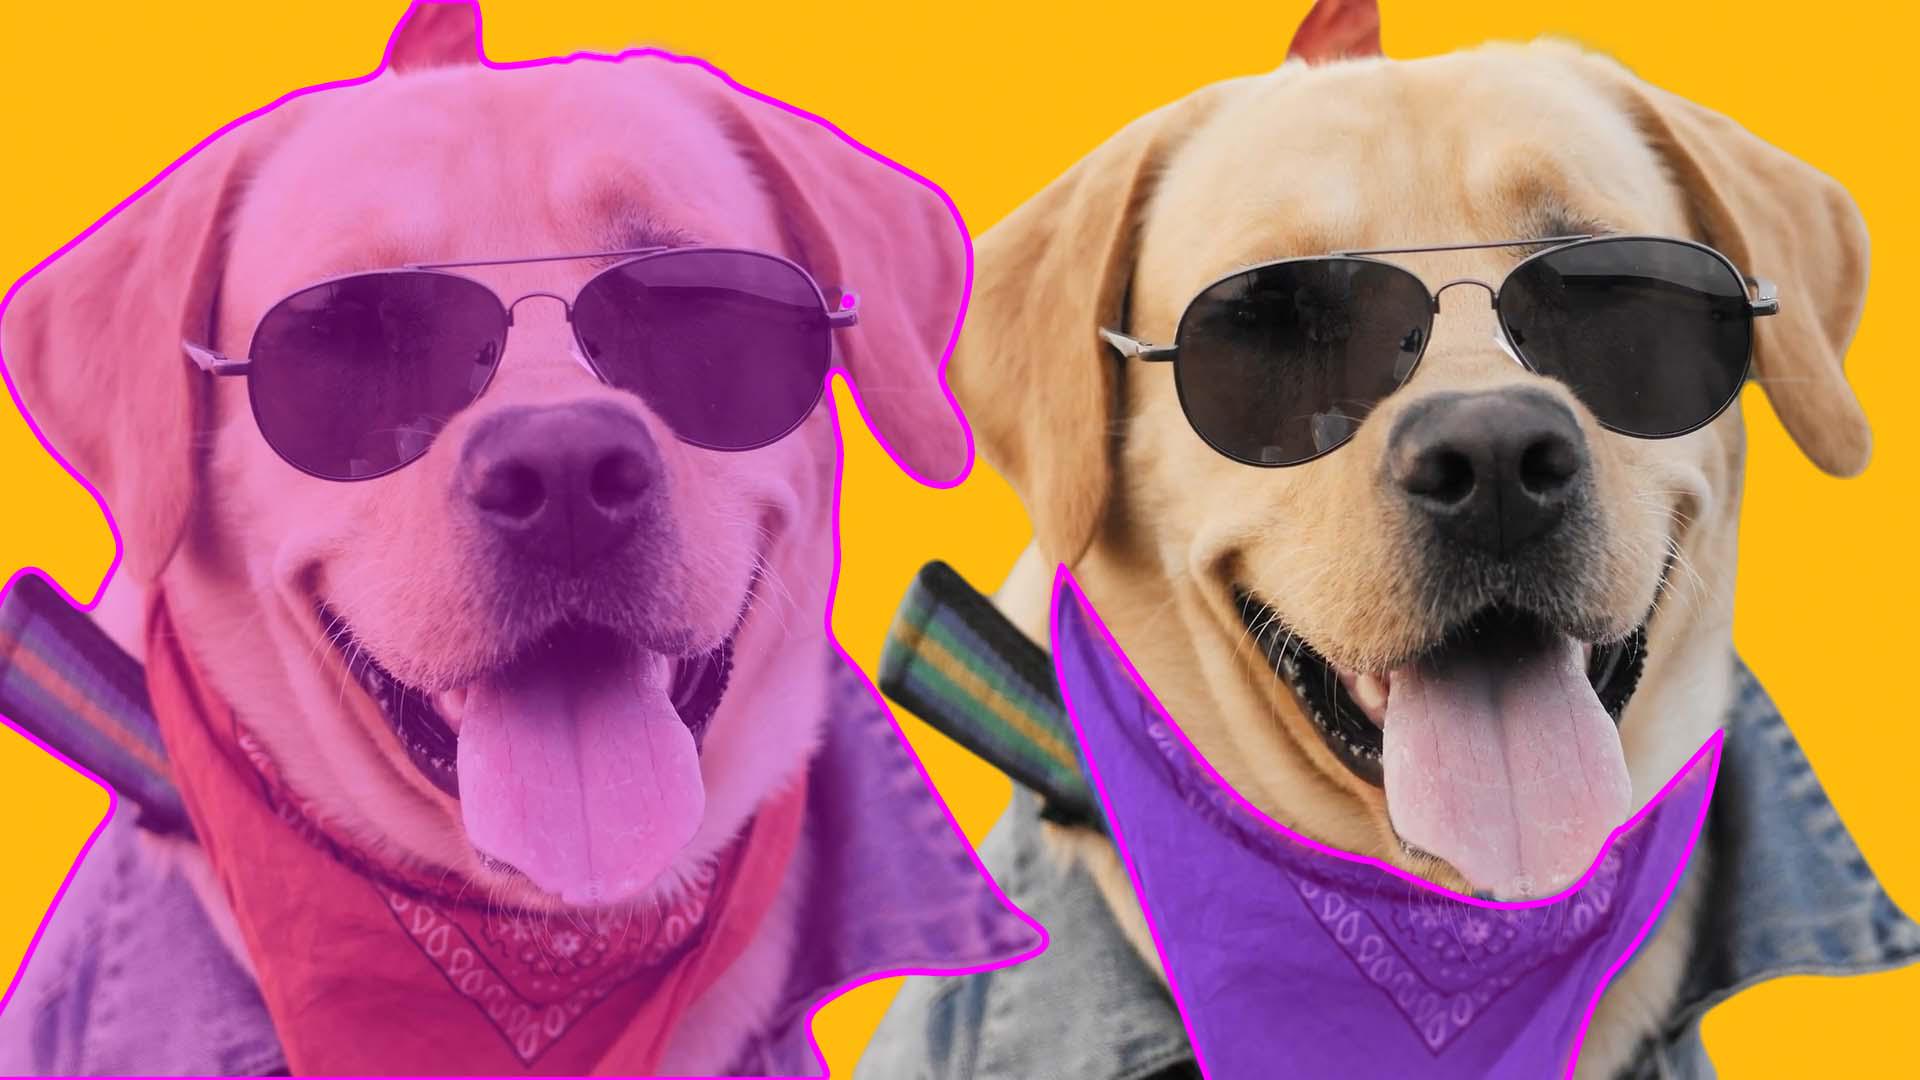
It's highlighted pink in the viewer.
Click the object - or in this case, the handsome dog - and watch as the subject is isolated in your footage.
The pink area is currently selected.
In this yellow bar, After Effects is reminding us to view at full resolution for the best results.
Go ahead and navigate to View, Resolution, Full.
To add to the selection, we can click more areas or use the Rectangle or Lasso Tool in the Menu Bar to better control the area your selection covers.
To remove selections, hold Alt or Option while selecting.
You'll see a minus icon next to your cursor indicating the tool is removing from the selection.
In the bottom of the Layer Viewer, use the Alpha switches to adjust how you view selections.
Let's go back to the previous one.
Now click and hold the Object Matte Tool to reveal all the powerful selection tools in this suite.
The Quick Selection Tool is the Roto Brush reimagined.
Click and drag over an object to select it based on its color, contrast, and edges in the footage.
Drag using the Selection Brush Tool to manually refine selections for a more precise control.
With the Refine Edge Tool, paint along the object's edges to preserve its natural edges and intricate details.
This is perfect for hair and fur.
Look how it captures the dog's ear fuzz!
You can adjust the brush size for these Tools in the Brushes panel on the right of the Composition Viewer.
Navigate to Window, Brushes, if the panel isn't visible.
Once you're happy with the frame results,
Apply your matte across all frames
hit the Spacebar and watch as After Effects applies the selection across all the frames.
It takes a bit of time, so let's speed past the waiting with a little editing magic.
Now you can scrub through the Timeline to double-check your selection across the footage and refine specific frames by using the same process.
This looks pretty good.
We may just have to fix up this area here, and once we do, we'll just have to hit Spacebar again to repropagate those frames. [silent clip playing] When the matte has been dialed in across the clip, select Freeze in the Layer panel to lock the Matte in.
We'll have to take a little break while After Effects freezes the matte.
Don't be fooled, I sped this part up.
Now we can return to the Composition panel to keep working.
Refine and apply creative adjustments
With the layer selected, open the Effect Controls panel to fine-tune the settings: control feathering, contrast, edges, and chatter, which is that flickering edge movement on both the main matte and also those refined edges, like where the fur on the dog is.
Turn on Decontaminate Edge Colors to remove color casting bleeding from your object.
It's not necessary for this clip, but it can make a big difference if vibrant colors are in the background and spill onto the edges of our object.
I also thought it would be nice to have two dogs, so this one has a friend.
Let's right-click and pre-compose the footage.
Let's just select to move the effects into the composition.
To create a new version, let's duplicate this composition in the Project panel by selecting it and using the shortcut Ctrl + D.
Double-click into this new composition, and this time we'll change the bandana color using the same steps.
Select this layer and duplicate it using Ctrl + D, delete the preexisting object matte effect.
And now we're back to step one.
Select the bandana using the Quick Selection Tool.
You may have to keep on filling in areas and taking some away.
For this part, we'll also use the Refine Edge Tool to capture the detail of the chin fur.
Here we go again.
Let's hit Spacebar and once this selection is correct, hit Freeze. [silent clip playing] Now we can jump back to the Composition Viewer and apply some color adjustments.
Let's refine the Object Matte settings to soften up the selection, and make sure that that color applies to the whole bandana.
If we're ready, let's get these twin dogs into the same composition.
We'll position them and offset their timing so that they don't move at the exact same time.
Wunderfluff.
Now, these handsome pups are ready for their close-up.
The Object Matte Tool makes even the trickiest shots totally doable.
Now go find your own challenging footage and give it a go - no dogs required, but highly recommended.