In this video we're going to start with a video clip from an Adobe Premiere Pro CC sequence and build a 3D title open graphic in Adobe After Effects, making sure to utilize dynamic link.
So the 3D text is editable back in our original Premiere Pro CC project.
And to really make our title graphic pop we're going to place it in the scene using the camera tracker in After Effects.
So like I just said: We'll start here in Premiere Pro CC.
Let's look at our project.
We have a sequence called Tree_Edit and really, it's not much of a sequence since it only contains one video clip.
But let's check out the clip by pressing the space bar to begin playback.
So this is a shot where the camera person was walking back through the forest.
Now I'll stop playback towards the end of the clip by pressing the space bar again, right around 9.5 seconds.
Looking at this current frame I see a place where I'd like to add the title right here in front of this tree.
Replace with After Effects comp
To have the text appear like it's placed in the scene with this camera move we need to use the camera tracker in After Effects.
So go ahead and right-click directly on the clip in the Timeline and choose Replace With After Effects Composition.
Now, as a good practice you should save your After Effects project right next to your Premiere Pro CC project file.
I'll call this Title_Text.aep and click Save.
Since we want to place the text using the camera tracker:
3D Camera Tracker
Let's change the Workspace.
Go to Window, Workspace and choose Motion Tracking.
Now you can see the Track Camera function right here in the upper left corner of the Tracker panel.
Before we place the Track Camera it's a good idea to move the Current Time Indicator down the Timeline and take a look at the area where we're going to place the text into the scene.
Now - making sure our video layer is selected in the Timeline - go to the Tracker panel and click Track Camera.
What this is going to do is analyze the video clip and based on that analysis, it's going to recreate a software version of that camera flying through the scene in After Effects.
That will give us the ability to place anything into our 3D scene, making it appear as though it was originally a part of the scene when the camera move was first created.
Now let's take a closer look at the Camera Tracker in the Effect Controls panel.
I want you to know that this gives you a status update as to the progress of the analysis and it's doing the analysis in the background.
So you're free to keep working on other compositions and keep your workflow moving.
If you ever have any errors during the analysis you may need to click on the Shot Type dropdown menu.
Here you can specify the kind of lens the footage was shot with, like a Variable Zoom lens.
Meaning you may have been zooming in or out as the shot was occurring.
Or you could Specify the Angle of View if you know the specific lens that the footage was shot with.
But Fixed Angle of View is going to work perfectly well with this project, so we'll just leave that setting.
Select ground plane and origin
Now, once the analysis is finished, you should see the words "Solving Camera" pop up in the middle of the Comp panel.
And when that disappears you'll notice a bunch of X graphics appear in the bottom of the scene.
If you're not seeing these Xs: Make sure the effect is actually selected in the Effect Controls panel, otherwise the Xs might disappear.
Now, since we've already placed our Current Time Indicator where we'd like to add our text in the scene we can just hover directly over the scene.
And you'll notice a target moving around the scene with our cursor.
Now you want to make sure the target looks like it's sitting on the ground plane and then click once where you'd like to add the text.
That will automatically select three points in the scene.
In order to see this more clearly: Change the Comp magnification to 100 percent.
Then we can press and hold down the space bar to temporarily grab the Hand tool, allowing us to click and move around the Comp panel, bringing the target back into view.
Once reframed, let go of the space bar and then move your mouse over the center of the target.
Then go ahead and right-click and Set the Ground Plane and Origin.
This will reset the position data for the scene, so that any object you add into the scene will be placed at 000, and that actually will be right in the center of the target.
Add text and camera
Now that we've set the Ground Plane and Origin: Go back up to the target and right-click again and choose Create Text and Camera.
Notice we have two new layers in the Timeline: A text layer that lives in 3D space and the camera.
You know the text is in 3D space because you can see 3D has been enabled here in the switches panel.
This is important to understand, because this 3D text layer is just reacting to the camera moving through the scene, which has recreated the initial camera move used to shoot this footage.
If we scrub our Current Time Indicator it looks as though the text is locked into the scene.
Now, since my text is laying flat I'll go ahead and select the Text layer and press R to open the rotation and orientation settings and then zero out the coordinates for orientation.
So the text should now be standing straight up and facing the camera.
To further edit the text let's go ahead and change our Workspace to the text layout.
I'll go to the double arrows up here in the right corner of the interface and choose the Text Workspace.
Now the font I'm using is Acumin Pro Black, but if you're a trial user of After Effects you'll need to use Acumin Pro Bold.
Either way: If you don't have this font active on your system you'll want to navigate to the Creative Cloud desktop application under Assets, then Fonts, then click Manage Fonts to launch Typekit where you can go ahead and activate the available Acumin font for your system.
If your type appears too large or too small you can adjust the font size here in the Character panel, as long as your text layer is selected.
Also, if you need to change the color of the text: Just click on the fill color chip and choose a new color.
I'll leave mine set to gray.
The kerning of my text appears to be a little off.
So go to the kerning setting in the Character panel and you'll see it's set to Metrics, which means these are the settings originally designed by the font creator.
A fast way to adjust kerning is to change the setting to Optical which makes the software look at each individual letter and adjusts the space according to how the letters look together visually.
This is a quick way to save you from having to kern letter by letter.
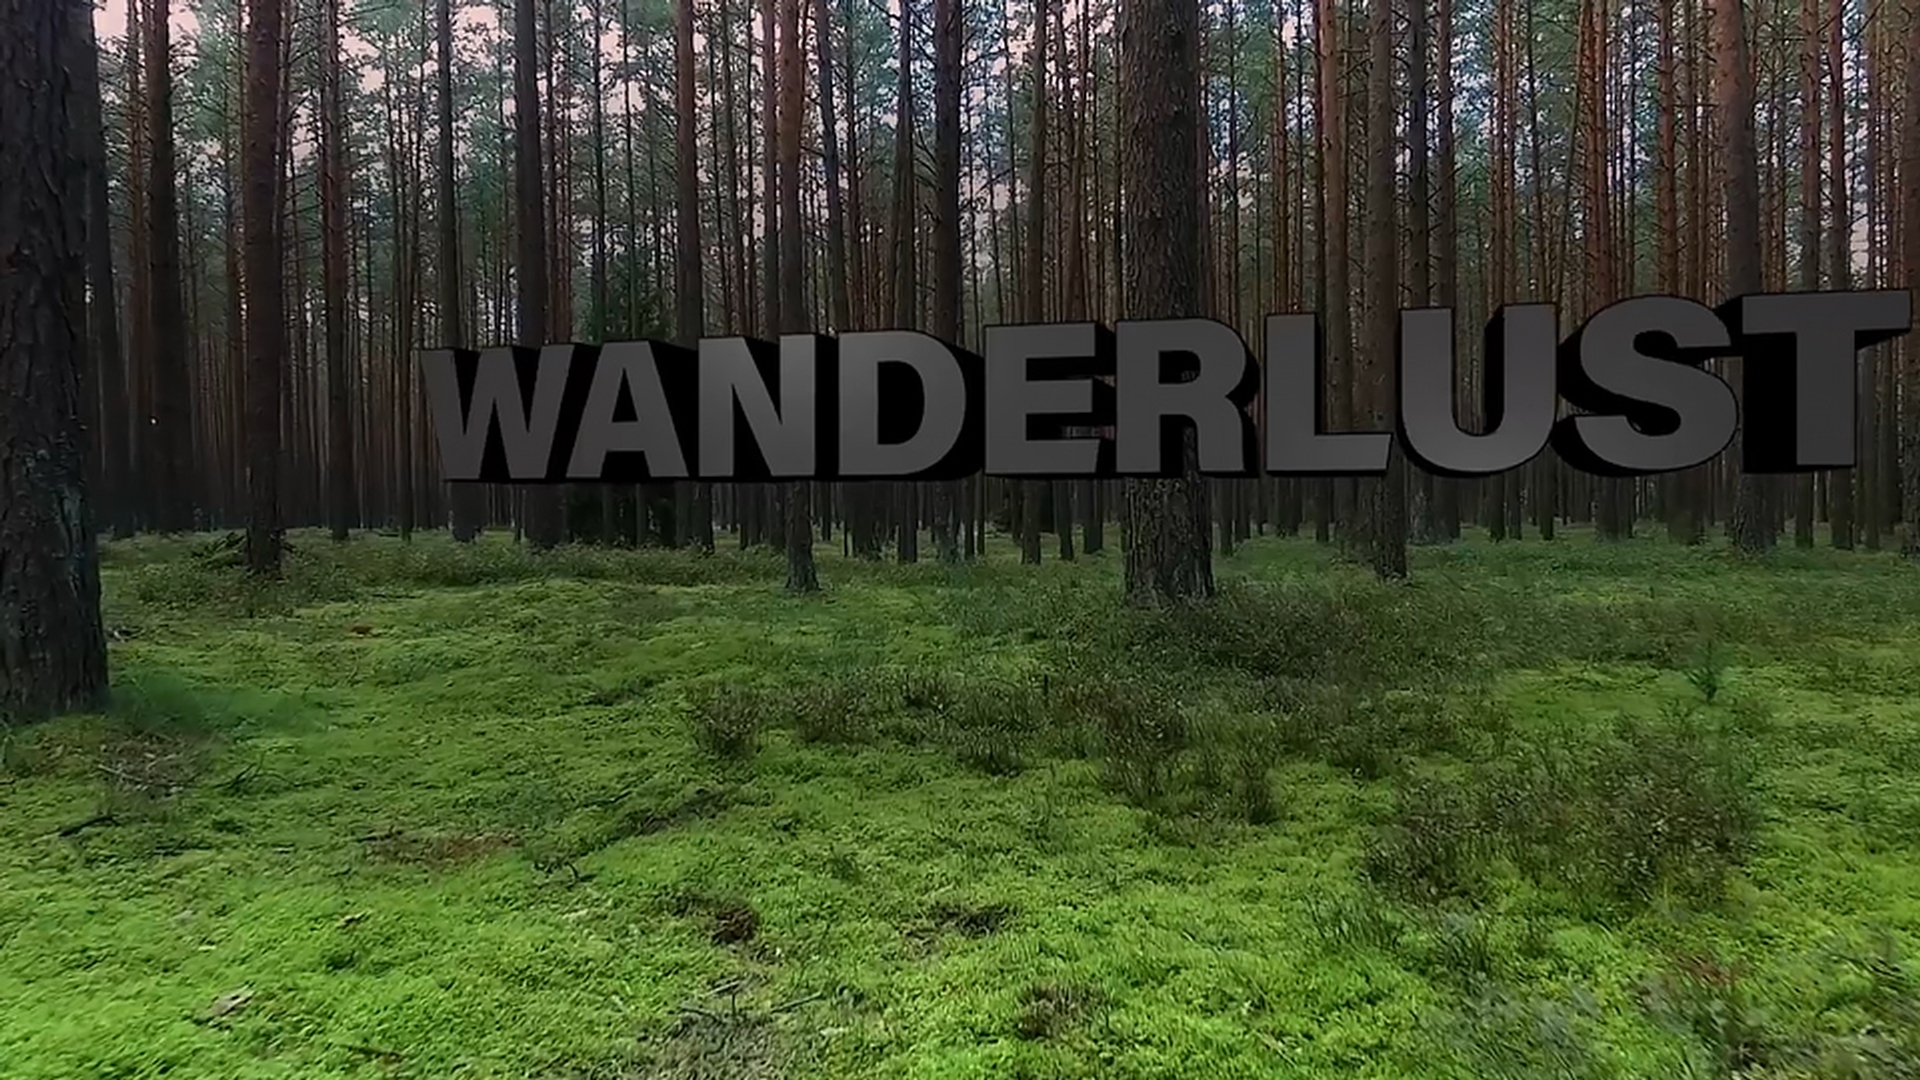
Now let's go ahead and change our text from the word "Text" to our actual title.
And to be quite honest: I'm not exactly sure
Change text
what the final approved title is going to be, so I'm going to choose the longest word out of all the possibilities - Wanderlust.
To change the type go to the Timeline and double-click directly on the T icon in the Text layer to automatically select all the type in the Comp panel.
Then type Wanderlust, making sure to grab the Selection tool to set the type when you're finished.
Since this is a longer word, let's change the justification in the Paragraph panel form Left to Centered.
Now would be a good time to press Shift + / to automatically resize the magnification of the Comp panel to fit into the view.
To add more visual interest to our text let's add a little bit of a rotation on the Y axis, like this.
And let's change the type to All Caps by activating the All Caps button in the bottom of the Character panel.
You can also enable it by using the fly-out menu in the upper right hand corner of the panel.
This looks pretty good, but let's have the type hover above the ground by adjusting the anchor point with the Text layer selected.
Press A to open the anchor point and scrub on the Y axis until you see the type moving up in the scene over the top of the tree trunks.
I'll set mine to around 85.
And since I used the anchor point adjustment instead of position I can still see where the original origin was set in my scene using my axis handles as a reference.
Make text 3D
Now we're ready to make our text 3D.
Making sure that the Text layer is still selected in the Timeline I'll press AA which will open the Material Options and Geometry Options if available.
Notice: In this instance, I only have Material Options available.
To enable Geometry Options for my Text layer we need to change Renderers.
Go to the upper right corner of the Composition panel and click on the button that says Classic 3D.
This will open the Renderer settings where we can click on the dropdown menu to change to the Cinema 4D Renderer.
Now even though this enables 3D geometry for text and vector layers, it's important to note that this also disables some key functions of After Effects you might be used to using like blend modes and track mattes.
But don't worry, if you need to use those features you can always utilize Pre-Compose and change the Renderer back to Classic 3D in the Pre-Comp.
Now before we close up this menu click on the Options button to open the Quality slider.
Usually when I'm building animations I slide this all the way to the left when I work, only to slide it back up just before I render.
Since I want to see some of the finer details in this title as we build things I'll just drag the slider just to the right of center until I see the Anti-Aliasing setting switch to Best.
Let's click Okay to set the Quality slider and Okay again to change our Renderer.
And if we select our Text layer and press AA again you'll notice: Now we have the Geometry Options.
To create our 3D geometry we need to add some Extrusion Depth.
So I'll click and drag on the slider to increase the extrusion value to a setting of somewhere around 25.
Add lights
You might notice that it's kind of hard to see our type.
So to add some definition, let's add a light into the scene by going up under Layer and choosing New, Light.
For the light I'll just create a Point light which is similar to say a lamp light bulb without a lampshade.
So it's going to throw a light in 360 degrees.
I'll leave it white with an Intensity of 100.
We'll leave a Smooth Falloff which means it'll have a Radius of 500, and then at 500 pixels it'll start falling off from 100 percent brightness all the way down to nothing over the next 500 pixels.
I do want it to Cast Shadows.
They don't need to be so dark so I'll bring them down to about 72 percent.
And Shadow Diffusion will just soften up the shadows a little bit.
So we'll bring that up to a setting of around 30 pixels and click Okay.
Even though the light has been added to the scene we need to reposition it closer to the title text.
I'm going to use a sneaky shortcut available in the Parent column of the Timeline.
If this column isn't active: Right-click next to the Name area in the top of the Timeline and enable the Parent Column.
Let's grab the pick whip of the light layer and hold down Shift as we drag on the pick whip and point it at our Text layer.
Let go of the mouse, then let go of Shift.
And you'll notice the light has repositioned itself exactly where the text axis handles are.
Clearly we need to reposition our light up in the scene.
So press P to open the light layer position values.
Then scrub on the Y axis until you see the light go up just inside the text.
Then click and drag on the Z axis until we see the light start illuminating the front of our type.
Let's also move the light to the left side of the word by clicking and dragging on the X axis.
To create more dimension, let's add a Bevel to the edges of our type.
So go back down to the Geometry Options for the Text layer and in the Bevel dropdown menu, choose Convex to give our text a slightly rounded edge.
And while I'm liking the extra highlights on the edge of the text, it does appear to be a little chunky, so let's change the Bevel Depth to a value of 0.8.
Another way to change how lights illuminate an object is through adjusting the Material Options.
So with the Text layer selected, scroll down to the Material Options.
To make the text a little more shiny I'll adjust the Specular Shininess.
The more we increase this value the more refined or tight a specular highlight will appear.
I'll set a value around 88.
To control how the light falls off across the text we can adjust the Diffuse setting.
The higher the Diffuse setting the more the light will spread across the word.
I'll set this around 71 percent.
Clearly we need to illuminate the right side of the word.
And so now I select Light 1 and press Command D - or control D on Windows - to duplicate the light.
Now we can press P to open the position data for our duplicate light and scrub on the X parameter to move it down the word and illuminate the right side.
I'll also scrub on the Y axis a little bit to move the light down.
Add materials
Now the last way you can refine the appearance of a 3D object is by applying custom materials to different parts of the geometry.
Let's start by making the face of our type a little bit darker.
Collapse the Text layer and open it one more time, so you can see the text option.
Then go to the Animate fly-out menu and choose Front, Color, RGB.
Instead of this bright red - let's click in the color field and choose something like a dark gray.
I'm going to choose a brightness value of around 23.
Click Okay to set the face color and let's take a minute to look at our type.
Overall, I'd like the type to appear more black and rather than continuing to add more custom material settings here in the Add menu it's important to remember: You can always go back and change the original color of the text.
Let's reset the color of this type layer to black by going up to the Character panel, hover over the black color chip until you see the eye dropper and click once to reset the fill to black.
Now I have the nice dark text I was looking for.
So let's save the project and jump back over to Premiere Pro CC.
Once you're back in Premiere Pro CC: Give it a second to update and you should see the text appear in the scene.
Remember when I said I wasn't quite sure what the final approved title would be?
Well, of course we need to change our title.
Update title in Premiere Pro
Thankfully, we can do that here in Premiere Pro CC without having to go back to After Effects.
To change the text, simply select the linked Comp and then press F on your keyboard to load up a match frame.
Then you can go Effect Controls panel and change the title.
I want to change it to say "hide & seek", using an ampersand.
Now notice: Even though I'm using upper and lower case - since I had enabled All Caps in the Character panel in After Effects this new title is also using that same setting.
To see our finished title I'm going to go ahead and render the sequence by selecting the Timeline and choosing Render In to Out.
Now that it's rendered I'll press the control and accent grave keys to go full screen and then press the space bar to begin playback.
Now I know what you're thinking: Can I create multiple versions of a graphic in one Premiere Pro CC project without having to go back to After Effects?
And the answer is yes.
Just duplicate the linked Comp in Premiere Pro CC and repeat the process we've done here and each different version will update accordingly.
So that's how you send a clip from Premiere Pro CC to After Effects to add 3D text into the scene while still maintaining the ability to update and change that text back in our Premiere Pro CC project.


