One of the best ways in Photoshop to create a gradual and seamless transition from one image to another is to use the Gradient Tool.
Gradients are one of my favorite techniques to use with compositing, because they provide so many ways to merge different images together.
Hey everybody, Seán Duggan here from the Adobe Learn team.
In this video, I'll show you how you can use Photoshop's powerful Gradient Tool and combine it with a layer mask for blending images together.
Let's get started!
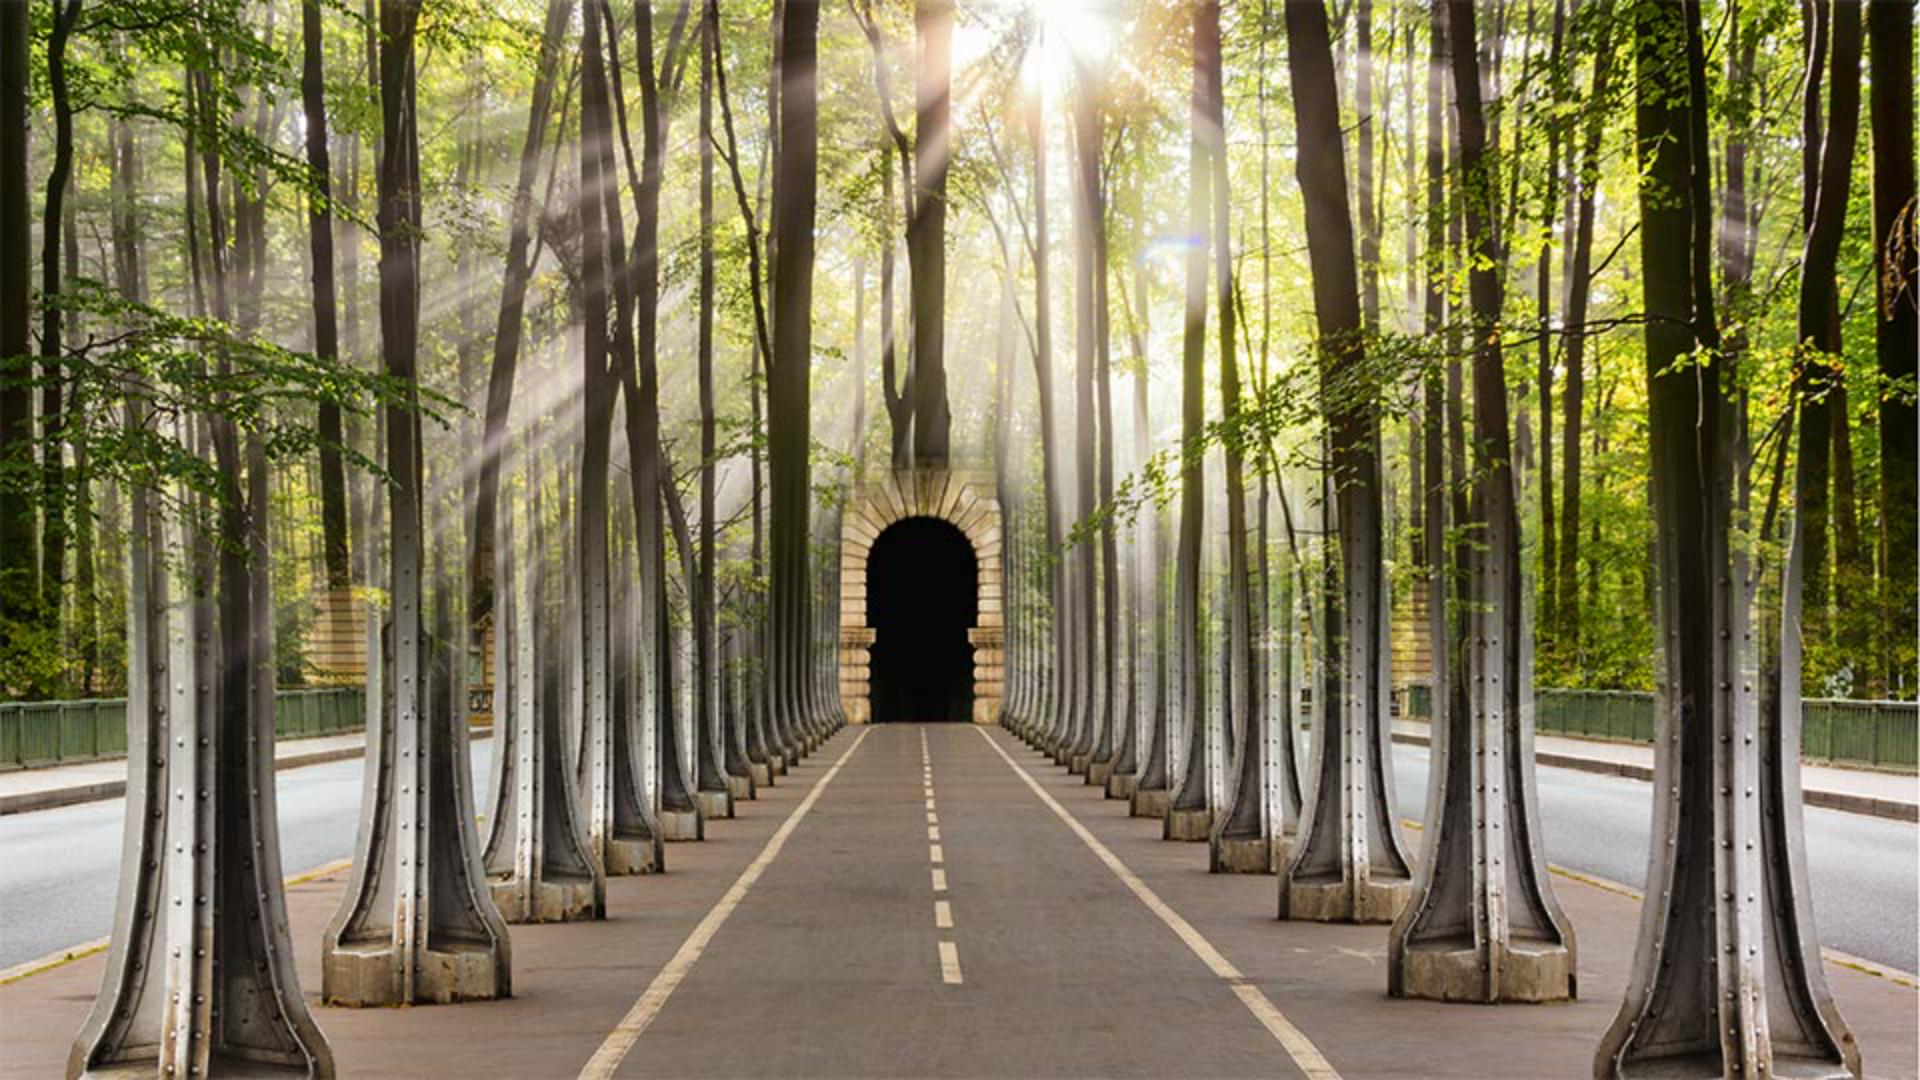
In this file I have two images that are each on their own layer a photo of a path under a bridge and a scene in a forest.
I'll click on the Bridge Path layer and then down at the bottom of the Layers panel, I'll click on the Add Layer Mask icon.
You can see a new layer mask thumbnail has been added to the right of the Bridge layer thumbnail.
The mask thumbnail is totally white, which means it's currently showing the entire image on the top layer.
We'll add a gradient to this layer mask to create a smooth transition that will reveal part of the Forest layer below.
I'll go over to the Tools panel on the left, and I'll select the Gradient Tool.
In the Options bar for this tool, I'll click on the first Gradient Style icon, which is for a Linear Gradient.
Next, I'll make sure that the Blending Mode for the gradient is set to Normal and the Opacity is at 100%.
I also want to make sure that this checkbox, which reverses the gradient colors, is not checked.
On the left side of the Options bar, I'll click the small preview of the gradient so I can choose what type of gradient I'll be using, and I'll open the Basics folder.
I'll click the third gradient swatch so I can create a black to white gradient.
Then I'll tap the Enter or Return key on the keyboard to close the Gradient Picker In a layer mask, black will hide the layer and white shows the layer.
Since I'm using a black to white gradient, it will create a smooth transition between the Forest photo and the Bridge Path image.
Next, I'll double check the Layers panel to make sure that the layer mask is the active part of this layer, and the highlight border around the mask thumbnail confirms this.
I'll start the gradient about halfway up on the third steel column on the left side.
I'll click and drag down diagonally to the right to where the path enters the tunnel.
The great thing about this tool is that you can see a live preview of the effect as you're creating the gradient.
That looks pretty good.
If you look over at the Layers panel, you can see how this black to white gradient has modified the layer mask, causing part of the forest scene to be revealed.
The gradient control line on the image shows a black circle where I started, and a white circle where I ended the gradient.
I can drag on either of these points to lengthen or shorten the gradient.
Dragging on the small Diamond icon in the center modifies the transition between the two colors.
Moving this near one of the end points will create a harder and more noticeable transition.
For a smooth and gradual blend, leave this near the center of the gradient line.
You can also drag one of the circle points to change the direction of the line.
I'll move the black control point to the right to create a vertical gradient.
And I'm going to drag this down a little bit more and maybe drag the white point down a bit more, just to bring those trees down a bit farther onto the steel columns.
For this composite, I like the vertical gradient the best, because the vertical lines of the trees blend so well with the steel bridge structure.
If you want to hide the gradient control line to better evaluate the image, Command H on a Mac or Control H on Windows, will toggle its visibility off and on.
You can also modify the initial gradient mask by painting on it with the Brush Tool.
For example, I'd rather that the tree in the center is not visible over the tunnel opening in the background.
So I'll choose the Brush from the Tools panel, and I'll paint with white in that area to reveal the arched opening on the Bridge Path layer.
In the Layers panel, you can see how the layer mask thumbnail reflects this new edit with the Brush Tool.
The gradient mask technique can be very effective for combining many different types of images.
For instance, here are two examples of a wedding portrait where I used a Linear Gradient and a Radial Gradient to blend two images of the bride and groom.
The Gradient Tool combined with a layer mask is an essential compositing technique for creating a smooth and seamless transition between two images.
Give it a try on your own projects.


