Work with PDFs
See also
Check your interface! If the screen below matches your app interface, you’re on our new and a more intuitive interface. See how to View PDFs on new experience. If no, continue reading. 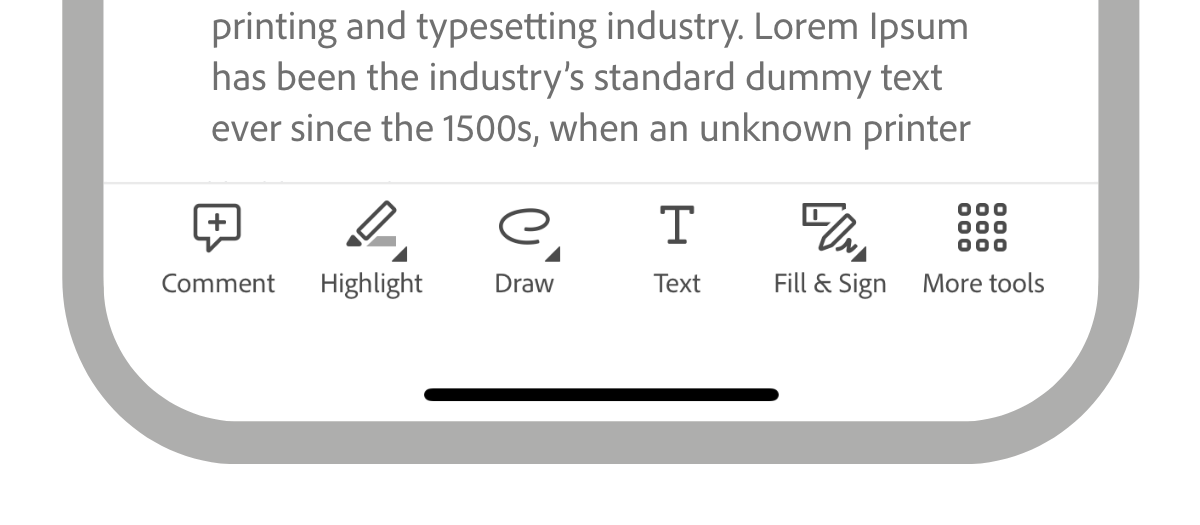
When you open a PDF, the menus that appear may vary based on the file. Non-shared files display an action menu at the top of the screen and a floating action button at the bottom.
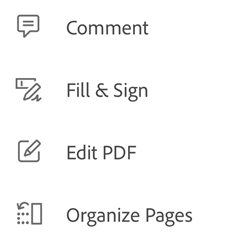
The overflow icon ( ) and the floating action button
  open a context menu that displays additional options based on your service subscriptions. For instance, you require a subscription to view ‘Organize Pages’ and ‘Edit PDF’ options.
Note
SEEING A DIFFERENT INTERFACE? Voila! You’re using the new and improved interface of Acrobat iOS. The new interface is designed to give you a smooth and consistent experience in working with PDFs across all platforms. To learn how to work on PDFs using our redesigned interface, refer to our New Experience Help.
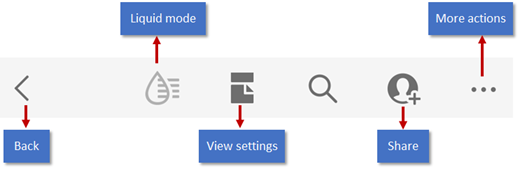
Menus and viewing contexts
Menu options vary based on the viewing context. The top menu bar, context menu options, and the floating action button can change based on the selected file type.
Non-shared files: The top menu contains tools for changing the view mode, undo/redo, text search, share, and an overflow menu that provide access to tools for sending a copy of the file, editing the PDF, exporting, combining with other PDFs, compressing files, setting password, organizing pages, saving a copy, printing, and other actions associated with your subscription services. A floating action button (
) provides access to the Comments, Fill & Sign, and other tools. The tools displayed in the top menu may vary, for instance the ‘Bookmark’ tool appears only for files containing bookmarks.
Shared files (view only): An overflow menu provide access to tools for printing and managing the shared file.
Review files: Files in an ongoing review display the comment bar, the comment filter, and an overflow menu that provide access to tools for managing the review. The floating action button is not available. For details, see review.
Comment
Note
For details about review workflows, see Share & review.
Acrobat’s rich commenting features support sticky notes, highlight, crossout, underline, adding text, freehand draw, and adding text comments to any markup type. To comment a file:
Open a PDF.
Tap
Tap
 Comment.
From the comment tool bar, tap the desired tool.
To add text or sticky notes, tap a location, enter text, and then tap Post.
To add markup, such as underlines or highlights, long press a location and drag to select text.
To add a note to the markup, tap it, enter text, and then tap Post.
To delete a comment, tap on the comment to open it and then tap
 .
.To reply to comment, tap it, type your reply in the Add a reply field, and tap Reply.

Share a PDF
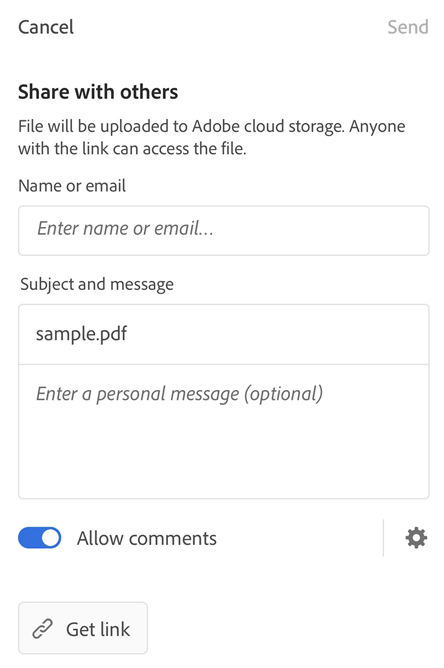
You require an internet connection to share files for review. To share a PDF:
Tap
>  Share.
In the Share dialog that opens, add 1 or more email addresses.
To make the file read-only, disable Allow comments. By default, Acrobat allows recipients to add comments and annotations.
Optionally, tap the Subject and message fields to edit them.
Tap Send. Alternatively, tap Get link to generate a sharable link.
Your file is automatically uploaded to Adobe cloud storage so that it’s available on any device.
Note
For details about sharing and review workflows, see Share & review.
Compress a PDF
See Compress a PDF.
Save files
Some files are automatically saved to the cloud, including:
Files that changes after downloading from the cloud.
Files that requires Adobe cloud storage features, including share, reviews, combining files, exporting PDF, and more.
Actions that ask you to choose Done, Save, and more are saved when you exit that action.
Save local files to the cloud
You can save files stored on your device to the cloud:
Open the list of files on Home or go to Files > On This Device.
Tap
> 
Recognize & modify text on scanned files
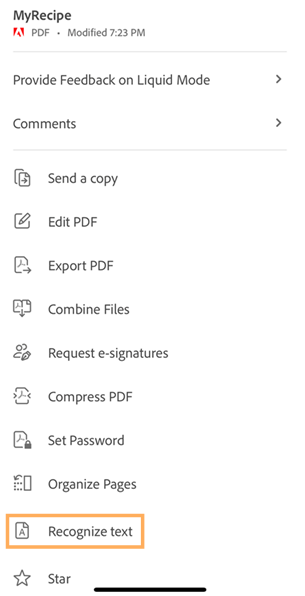
To recognize and interact with text on scanned files or images:
Open a scanned PDF file or create a PDF from an image that you want to interact with.
Tap
> Recognize text.Alternatively, long press on the document and then tap Recognize text.
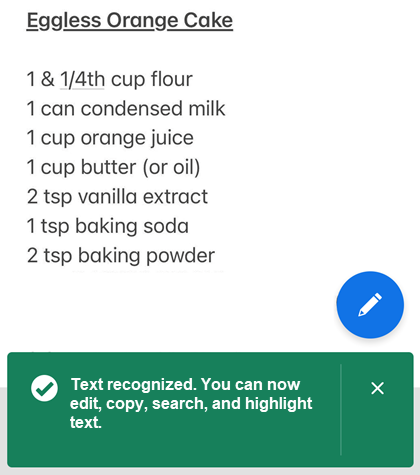
Once the text is recognized, you see a confirmation message as shown below.
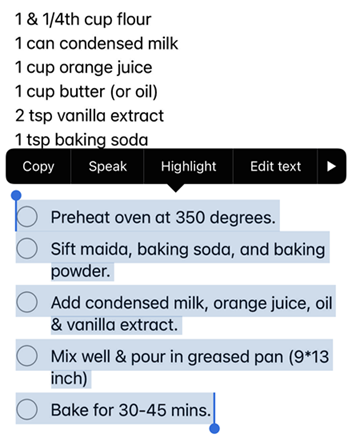
Long-press on the text that you want to interact with and then select a desired option from the menu. You can take any of the following actions:
Copy the selected text.
Read aloud the text.
Highlight the text.
Edit the text.
Underline or strikethrough the text.
Edit a PDF
Users with a subscription to the Edit PDF service can modify PDF files.
Add text
To add text and images:
Tap
> Edit PDF.Tap

Tap the text location in the document.
Optionally, long press the text box to:
Drag it to a different location.
Grab a blue corner handle and resize the text box.
Delete the text. Tap Delete.
Select any text tool in the top menu. You can change the font style, size, weight, color, and alignment.
Tap Done.
caddtext.png
Edit existing text
To edit existing text:
Tap
> Edit PDF.Alternatively, long press the section that you want to edit and then from the menu that appears, select Edit text.
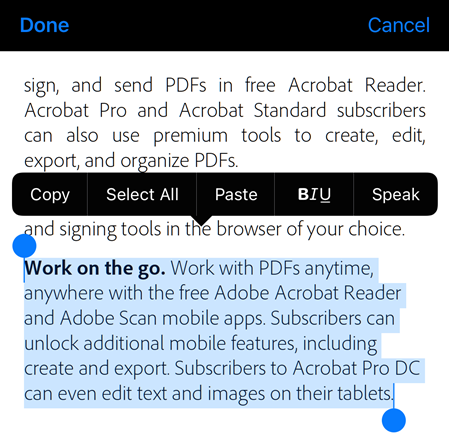
In edit mode, take any of the following actions, as required:
To select the entire text block, tap Select All.
To copy the selected text, tap Copy.
To change your text selection, drag the handles to select or deselect specific text.
To change the font style, size, weight, color, and alignment, tap BIU.
To have the app read-aloud the selected text, tap Speak.
Once done, tap Done.
Change fonts
You can change the fonts of existing text or create documents using different fonts. You can use the fonts that are installed on your Creative Cloud app.
To change fonts:
Tap
> Edit PDF.
Tap the text to select it and adjust the selection to include the select the text that you want to change the fonts for.
From the bottom menu, tap
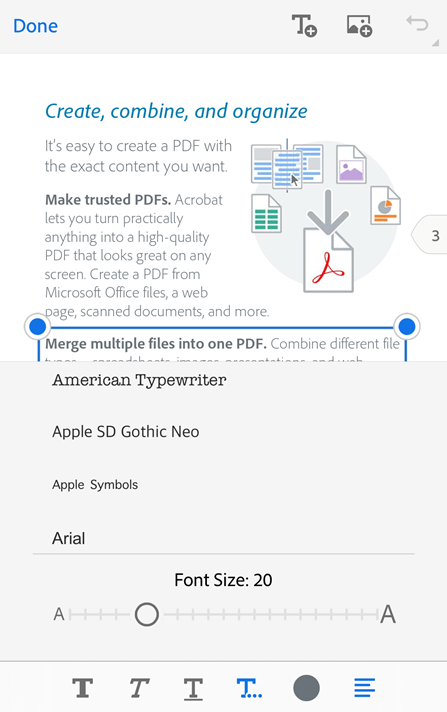
 .
.From the list of fonts that appear, tap on the desired font style.
It changes the font style of the selected text, as shown below.

Note
If you want to use an additional font that is not available in the fonts list, you need to install that font in your Creative Cloud application. Once you install a new font in your Creative Cloud app, you must re-launch your Acrobat Reader app for the font to appear in the list of fonts.
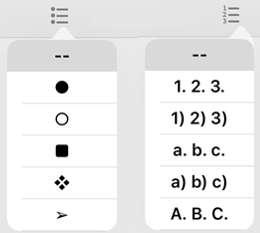
Insert lists
You can insert a new list or convert existing text into either a bulleted or numbered list. To do so, simply select text as described above and tap one of the list icons.
Edit images
You can delete, resize, rotate and move new and existing images. To do so:
Tap
> Edit PDF.Tap an image.
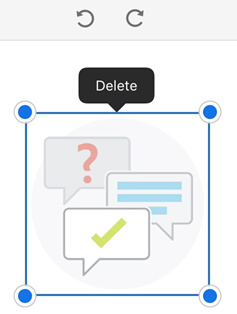
Long press an image and:
Drag it to a different location.
Grab a blue corner handle and resize the image.
Delete the image. Tap Delete.
Tap
 or
or  to rotate the image.
Tap Done.
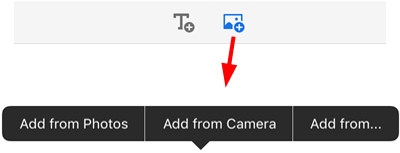
Add images
To add a new image to a PDF:
Tap
> Edit PDF.Tap

Tap the image location in the document.
Tap an image source and navigate to the image.
Optional. Long press the image to:
Drag it to a different location.
Grab a blue corner handle and resize the image.
Delete the image. Tap Delete.
Tap Done.
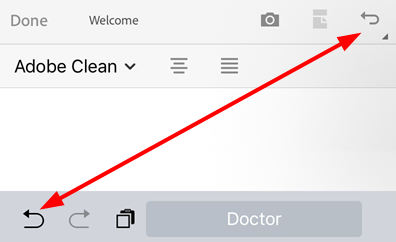
Undo-redo
You can always undo and redo actions. Available methods vary by context:
In edit mode, tap
 or
or  in the upper right.
When the keyboard is open,
or .
Star files
Starring a file helps you keep track of important files. Once starred, a star appears next to the file in the locations you specify.
You can control the starred file location behavior with your Specify starred file location settings. For example, you can star a file on the cloud but not on your device.
To star a file, open any context menu and tap  . A star then appears next to the file in the locations specified by your Specify starred file location settings.
To unstar a file, tapping >  .
.
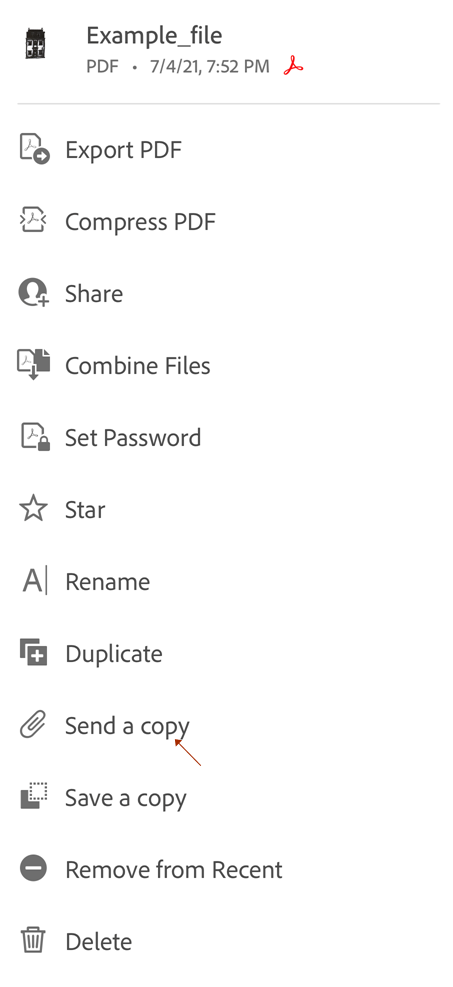
Send a copy of PDF
You can send a copy of non-shared files. To do so:
From the list of files, tap
next to the file. Or, open the file and tap from the top menu.Tap Send a copy.
From the dialog that opens, select a desired app and complete the workflow to send a copy of the file.
You can send the file copy as an email attachment, via message, AirDrop, to Google Drive, and more.
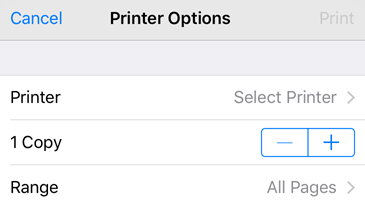
Print a PDF
Printing uses your device’s printing capabilities. You can set up a printer ahead of time or at the time of printing.
Open a PDF.
Tap
and then 
In the Printer Options dialog, select a printer.
Note that the printer must be AirDrop enabled. See https://support.apple.com/en-us/HT201387 for details.
Use the + and - buttons to set the number of copies to print.
Tap Print.
Note
You cannot print password-protected PDFs from Acrobat mobile app.
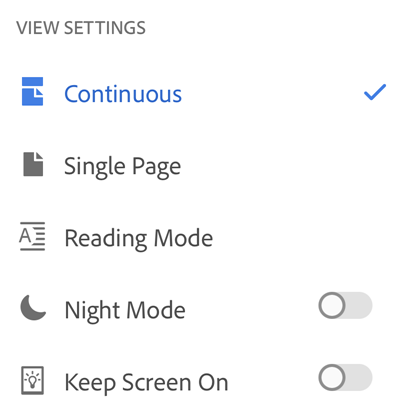
View settings
You can enhance your PDF viewing experience with custom view mode settings. To customize the view mode:
Tap anywhere in the PDF to show the tool bars if they are hidden.
Tap the view settings icon. The displayed icon represents the current view.
Use one of more of the following modes:
Continuous: Swipe up or down on the screen to change pages. Recommended when marking up documents.
Single Page: Swipe left or right to change pages, or tap the right or left document edge.
Reading Mode: The text reflows to fit the current view. Note that in Reading Mode, objects recognized as images are displayed on their own line with the displayed width limited to the screen width. Zoom is disabled, so parts of some images may appear off the screen.
Night Mode: Use Night Mode to invert black and white in low light conditions to reduce eye strain and extend your battery life.
Keep Screen On: Enable this mode to prevent the screen from dimming while reading a PDF document.
Two Pages (iPad only): You can enable a two-page view when reading documents on iPad.
Two Pages with cover page (iPad only): iPad users can enable this mode to view two pages along with the cover page.
Note
You can also keep the PDF screen from dimming by enabling your device’s screen brightness lock.