Introduction
Here's the first look at Adobe Dimension CC.
A new compositing tool that lets you create a photo-realistic image from start to finish in minutes.
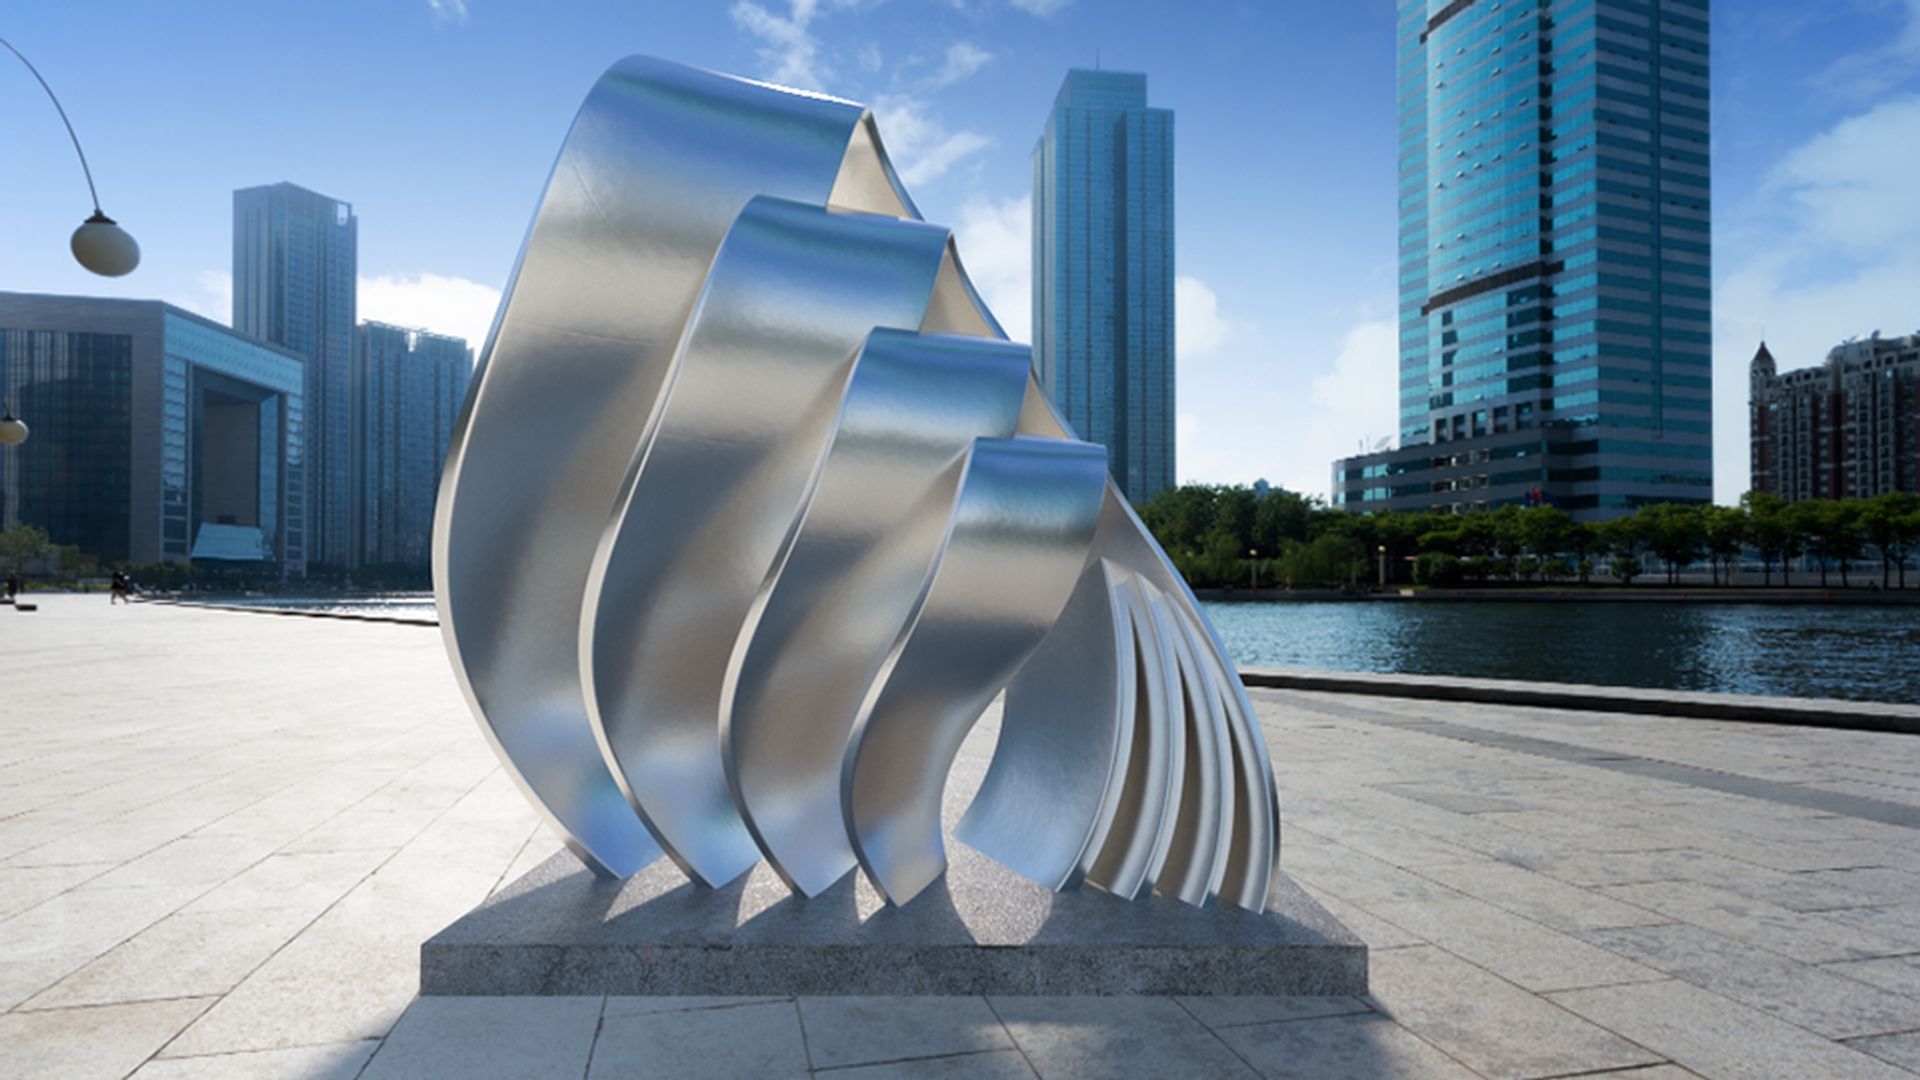
I'll show you how to create a 3D rendering of a large metal sculpture situated along the waterfront plaza.
The final 2D image may be used both online and in print.
I'll begin by creating a new project.
I start out in Design mode.
Overview of the Adobe Dimension interface and assets
And on the far left, we have the Toolbar, then the ASSETS panel, as well as a LIBRARIES panel.
On the upper right is the Preview panel that shows a fast live preview of what your current design will look like in the final render; a SCENE panel which lists all of the objects in your scene.
And below the SCENE panel, you'll find contextual property panels that change depending on what's selected in the scene.
The ASSETS panel is loaded with free assets, including some starter kits, with 3D Models, Materials, Lights and background Images.
Let's start.
Adding 3D models and Adobe Stock assets to the scene
I'll click once on the Mobius strip in the OUTDOOR kit to add it to my scene.
It automatically drops into the center of the scene, and is aligned to the perspective of the grid.
The Mobius strip also appears in the SCENE panel to the right.
Now, with a part of the Mobius artwork in place, I want to add another object to the scene to give the sculpture a base.
I can search Adobe Stock for 3D models and add them to my CC Library directly from the app.
Here, I'll search Adobe Stock and select Models in the menu below.
Once I find something I like, I'll license it.
There.
It's added to my library and ready to use.
I'll drag the Background Concrete slab model from the library into the scene.
It appears large in relation to the sculpture, so first I'll resize it using the Scale tool.
Then I'll use the Rotate widget to spin the model along the horizontal axis.
Now, I'll position it where I want under the Mobius using the arrows, and the Select and Move on screen widget.
Notice how Dimension CC helps me keep the slab in perspective.
Now I can use the Camera tools to orbit around the scene
Positioning objects, camera navigation, and background alignment
and pan and zoom to change the perspective in relation to the ground plane.
This doesn't actually change the sculpture itself, just the camera position.
That's a good angle, but it's missing visual context.
So, I'll add a background to the scene.
Back to our handy OUTDOOR kit, I'll click the image of the waterfront plaza and it loads into the scene as the background.
Now, I'll change some of the sculptures properties.
I need to make the Mobius strip and the Background Concrete slab sit correctly in the background image.
Dimension CC makes it really simple.
Click Align Camera to Image to automatically align 3D models to the perspective of the background image.
I can change the look of the sculpture easily.
Applying materials and duplicating sculpture elements
First, I'll select the Mobius sculpture within the scene or click Mobius Strip on the SCENE panel.
I'll click the Turquoise Glass Material from the OUTDOOR kit to apply it.
And view the RENDER PREVIEW panel.
Now the artist also wants to see what the Mobius sculpture would look like in aluminum.
So, we'll scroll in the Materials tab and drag the Aluminum material onto the scene.
Check out the RENDER PREVIEW to get an idea of how the aluminum sculpture will look on the Background Concrete slab within the OUTDOOR scene.
Now that I have the models in perspective, I'll adjust their scale and position.
I'll use the vertical arrow of the widget to sync the objects slightly down into the ground plane.
Watch the Y coordinate changing in the object Properties panel.
Now with the first Mobius strip selected, I'll Duplicate it three times.
You'll see Mobius Strip 2, Mobius Strip 3 and Mobius Strip 4 added to the scene in the Properties panel.
I'll scale each part of the Mobius sculpture down by about 25%.
Once that's done, I'll position them carefully.
At this point, I want to get a better idea of what everything looks like.
I get a play-by-play update of the current scene in the small RENDER PREVIEW.
I can expand the window, and you'll see it quickly render the preview, getting more refined as it progresses.
Now you may have noticed that the lighting on the sculpture doesn't match the lighting in the image.
I also want the sculpture to reflect its environment.
If I click Create Light from Image,
Lighting the scene, rendering, and exporting to Photoshop
I can use the background image as an outdoor light source.
And just like that, Dimension CC automatically generates a 360-degree panoramic natural light source that wraps around the scene.
I can adjust the light properties to my liking.
I'll adjust the reflection of the image by watching the RENDER PREVIEW as I change the Intensity and Rotation of the image-based light.
Then I can tweak the Intensity of the SUN LIGHT and play with the Height and Rotation of the shadows.
Now everything looks the way I want.
The next step is to render the image.
It can take some time, but the results are worth it.
All I need to do is choose the RENDER Quality and the output Format.
If I check the Auto Save option, I can name the file and tell Dimension CC where to save the file when the rendering is complete.
Here's the final render image with an amazing amount of detail, created in just minutes.
And here I have the file open in Photoshop CC where I can continue to refine it.
Dimension CC has created separate layers, which makes it easy to edit these components separately.
So, there you have it.
Using Adobe Dimension CC, we were able to quickly and easily combine 3D models, apply materials and lights, and add a background image to blend a 3D scene into a 2D photo of the sculpture in a realistic setting.


