For this tutorial, I'm using the Multi-layer Photoshop Files.prproj file.
You can find that project file with the media associated with this tutorial.
Just double click on the project file to open it in Premiere Pro CC.
And in fact, the project file is an empty one.
There's nothing in here yet because we're going to import something in a moment.
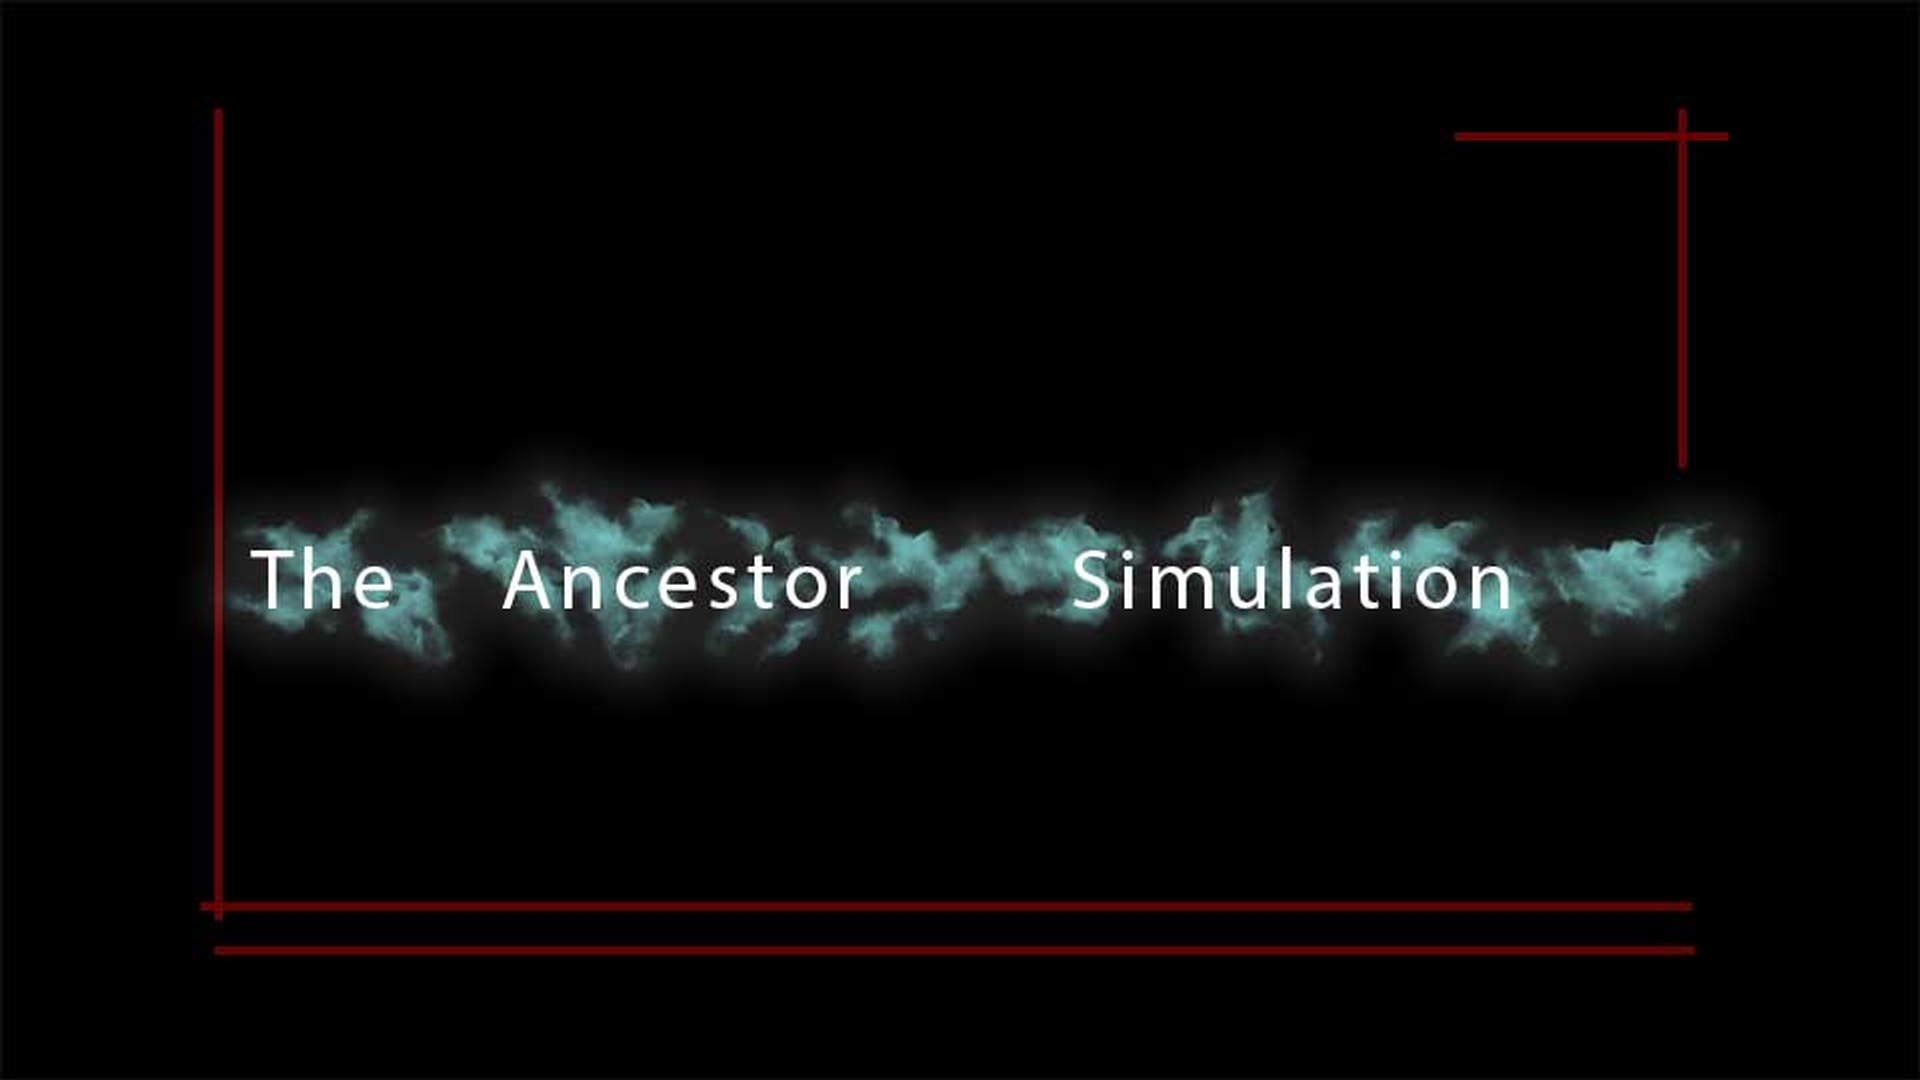
I'm also working with this 'TAS_MAIN_TITLE.psd' file.
And if I switch over to Photoshop CC, you can see the contents of that file.
This is a multi-layer Photoshop CC document.
And you can see there are text layers.
There are some shapes; there's a black background.
And there's a layer effect applied to one of the layers.
That's this smoky background.
Premiere Pro CC has the Photoshop CC display engine built in.
So, you can access and work with individual layers in Photoshop CC documents directly.
I'm going over to Premiere Pro CC.
And in fact, it doesn't really matter how you import a Photoshop CC document, you'll get the same options.
Here, I'm going to right click on the background of the Project panel.
And I'm going to choose Import...
And in my MEDIA folder, I'm going to select this Photoshop CC document, and click Open.
When you import a Photoshop CC document, you get this Import Layered File Dialog box where you can choose the way that the multiple layers in the PSD are going to be imported.
Everything hangs on this Import As: menu.
And by default, Merge All Layers will give you a single clip in the Premiere Pro CC Project panel.
All of the enabled layers in the PSD, that's the ones that already have checkboxes on them here, will be incorporated into that single clip.
I'll just click OK, and there's our PSD.
If I double click to open this, it pops up in my Source monitor.
But what if I don't want every single layer?
In fact, I don't think I really want that full layer of black behind my text and behind my shapes.
Well, I'm going to right click again, and choose Import...
Choose the PSD, and click Open.
And this time instead of Merge All Layers, I'm going to choose Merge Layers.
It's a subtle difference in the description.
And now I can select only the layers I want to be incorporated into that merged single clip.
In this case, for example, I'm just going to deselect Layer 2 which has got the black background.
And this will leave me with transparent areas in the title, so I can put it in front of another background.
You've got some pretty straightforward options here to Select All the layers, or none of the layers, and reset the selection to match the original document.
But I'm just going to click OK.
And I'll double click to open this in the Source monitor.
And right now, it looks identical, but if I go to my Settings menu in the Source monitor.
And it's worth noting here that I'm in the Assembly workspace, so my Source monitor's over on the right with my Program monitor.
I'm going to turn on Transparency Grid, and right away you can see the difference.
If I double click on the original version that has the black layer, you can see that the whole background is covered up.
It's worth noting that any changes you make in a Photoshop CC document will update automatically inside of Premiere Pro CC.
You're not really copying anything anywhere when you import, you're just creating a link to it.
So, if I go back to Photoshop CC, for example, and just to illustrate this, I'll select these shape layers.
I'm just holding the Shift key down to select all of them.
And I'll select the Shape tool to give me the Shape Fill color.
And choose another color that updates in the PSD.
It won't change in Premiere Pro CC until you save, so I'm going to go to File and choose Save.
And now when I toggle back to Premiere Pro CC, you can see right away every instance has updated.
I'll just go back to Photoshop CC, undo with Control Z or Command Z on Mac OS.
And save with Control S or Command S and back in Premiere Pro CC, it updates again.
This is not quite the same thing as Dynamic link where the changes will update whether or not you save.
Still it's pretty convenient.
Now I'm going to right click again and choose Import..., choose this document again, and choose Open.
And this time, instead of the Merged Layers option or the Merge All Layers option, I'm going to choose Individual Layers.
When you import individual layers from a Photoshop CC document, each item comes in as a separate clip.
So, again here I might as well keep that Layer 2.
But I've got an additional option here: The Footage Dimensions.
When this menu is set to Document Size, regardless of the size of the item on the layer, the entire clip will be the full dimensions of the Photoshop CC document.
In this case, I happen to know it's an HD 1920 x 1080 PSD.
That means, for example, that this text you see in the center of the screen will remain in the center.
And these red lines will remain at the top right corner and bottom left corner.
If instead I change this menu to Layer Size, then each item, each layer that is will be imported at only the dimensions of that layer.
This means that every item will appear in the center of the screen.
You won't maintain the relative positions of the contents of the layers.
Now there are reasons why you would want to do this.
You might, for example, be using a PSD where multiple layers of the PSD are intended to be completely separate clips.
But in this case, I'm going to switch back to Document Size, And I'm going to click OK.
Now I get a bin which contains all of those clips.
And if I double click to open this up, you can see that I've got each individual layer.
See I can double click on each of these and these are still linked to the original Photoshop CC document.
If I make any changes, each of these items will be updated.
I'm just going to go back to my Project panel.
And I've got one more version of this to import.
I'm going to right click and choose Import...
I'm going to just double click on the item this time.
And in the Import As: menu, I'm going to choose Sequence.
Instead of importing just individual clips, I'm also going to have a sequence made from those clips.
So, I'll click OK.
Again, I've got a bin named after the Photoshop CC document.
But you'll notice even in the Icon view, one of these items has a different symbol in the bottom right-hand corner.
This is a sequence.
I'll just double click to open this up.
And I'll zoom in a little on the navigator.
And reposition my tracks just a little, let's resize.
And you can see that I've got every separate clip as a separate layer in this sequence.
Now I could have done this manually.
It just saves a few clicks.
You'll notice that each clip has a short duration.
And that's set in the User Preferences.
Here in Windows under Edit, Preferences; In Mac OS in the Adobe Premiere Pro CC Application menu and Timeline.
The Still Image Default Duration applies to any graphic content that you create or import into Premiere Pro CC.
So, for example, this applies to adjustment layers, just as it applies to imported still images.
And a Photoshop CC document is a still image.
You can change this default duration, or I'll just cancel here.
Of course, like any other clip in a sequence, you can trim to change the duration of each of these clips in the Timeline panel.