Layers are at the heart of Photoshop on the web, offering tremendous flexibility in the creation and editing of images.
In this video, I'll introduce you to layers, then I'll show you some helpful tips for using them in your own daily work.
If you'd like to follow along with me, be sure to have the Understand Layers file open in Photoshop.
Or if you prefer, you can apply these techniques directly to any image of your own.
I've opened up the sample file and I can see the content here on the canvas.
Here on the right in the Layers panel, I see the individual layers that I created earlier on.
Now layers in Photoshop are like transparent panes of glass that you can stack on top of one another to create one cohesive design.
Content on one layer is going to sit on top of any of the content below.
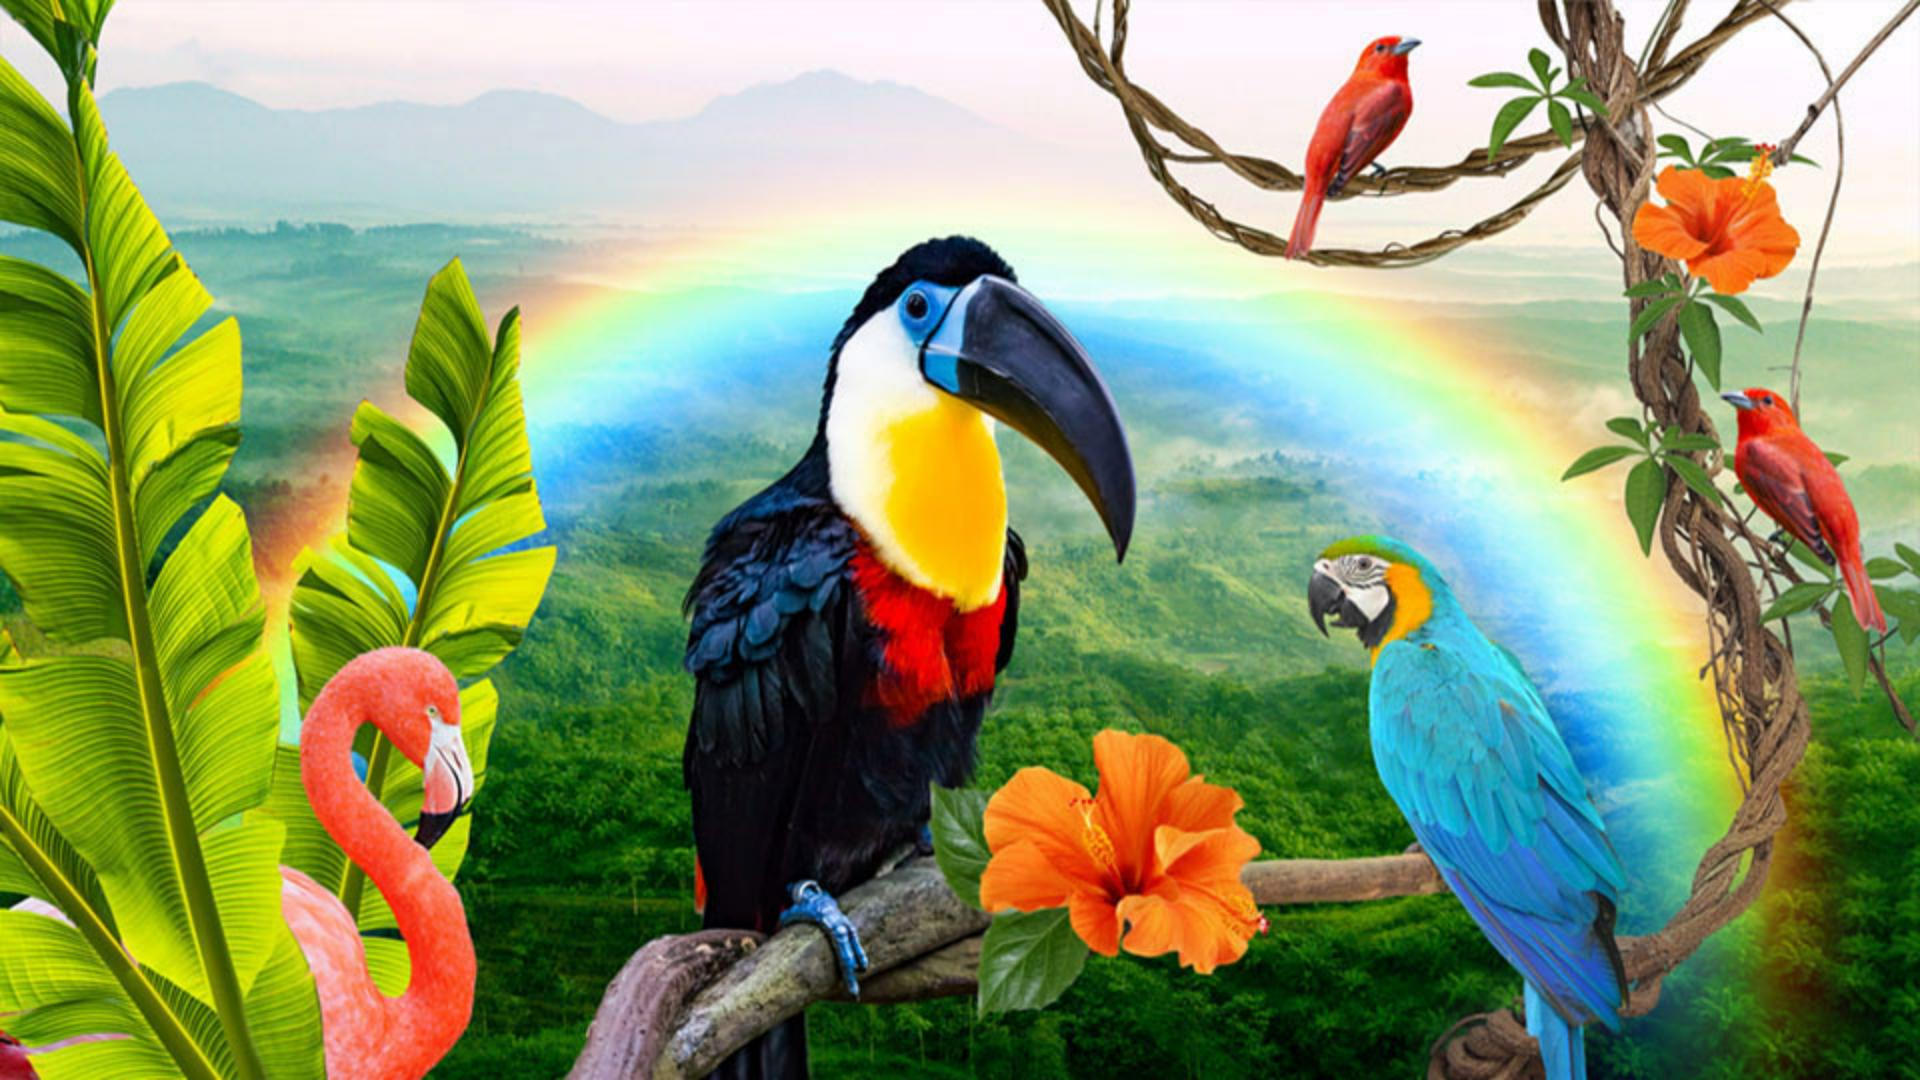
So for example, the Flamingo here is sitting on top of the Banana Leaves, Banana Leaves on top of the Single Leaf and so on.
I can show and hide a layer by clicking on the Eye icon on the left.
Both Red bird and Rainbow are not visible until I toggle them on and then back off again.
If I toggle off the Background layer, notice that the gray and white checkerboard pattern indicates transparent areas or the lack of content.
I'll go ahead and toggle that Background layer back on for now, I can always change the order of my layers by clicking and dragging a layer to a new location in the stack.
When I dragged the Banana Leaves above the Flamingo layer, it looks now as if the flamingo is behind the leaves.
I like the look of that.
If I start to have many layers in the design, I can move the content of a layer using the Move Tool.
I'll start by making sure I have the Move Tool selected here in the Tool panel on the left.
Notice in the Move options, I have an Auto-select dropdown.
I'll go ahead and leave Layer selected here.
I'll move the content on the canvas off to the side by holding the Spacebar then pressing and dragging with the Hand Tool.
And now when I click on any visible object in the canvas, Photoshop automatically targets the correct layer.
I can now click and drag the leaf off to the side of the flamingo a bit.
I can keep working this way clicking and dragging the visible content until it starts to look the way I'd like.
The next thing I want to do is add some additional birds to the design.
I'll start by unhiding the Red bird layer by clicking on its Visibility icon.
I'd like to duplicate this bird.
So with the layer active, I can right click and then in the menu select Duplicate.
Or if I prefer to use a keyboard shortcut Command on Mac or Control on Windows and the letter J, I can't see the second bird on the canvas as it's directly on top of the first, but in the Layers panel, I can see Photoshop created a copy.
I'll go ahead and double click on that copy, and I'll give it a unique name.
Next, I'll go ahead and move that second bird off to the side and I want to make it a bit larger.
So I'll click and drag one of these control points to proportionately resize it.
To make it look a little bit more realistic I'd like to flip the second bird horizontally.
Which brings me to a really terrific feature.
And that's the Contextual toolbar just below my selection here on the canvas.
As you work in Photoshop, you'll start to realize how handy this toolbar can be.
It notices what it is I'm doing on the canvas.
In this case I'm resizing an object, and it dynamically suggests some of the most relevant next steps in my workflow.
I can go ahead and flip the bird by clicking on the horizontal flip icon.
And lastly, I'll move it over a bit more here, so that's gripping this branch.
With the basics of layers pretty well covered, let's move on to the powerful ways you can alter a layer leveraging these buttons here towards the top of the panel.
I'll begin from the left.
Clicking on this first icon will add a new empty layer just above whatever layer I currently have selected.
The second icon is for Adjustment layers, and this is where the magic of Photoshop really starts to shine.
When I add an Adjustment layer, it'll affect all of the layers below it.
Notice when I click on the icon, a dropdown list allows me to change color, brightness, contrast, and other properties in my design, without permanently altering the original pixels.
To the right of the Adjustment layer is the Layer effects dropdown a set of pre-made styles that I can apply to a layer to create various visual effects like Strokes, Shadows, Glows and Bevels.
Just after that are Layer masks.
These allow you to easily isolate and apply changes to just parts of a layer.
Right of that is Clipping masks.
Like a layer mask, a clipping mask allows you to isolate and make changes, but in this case using more than one layer.
Next up is the Arrange layers menu with some pretty straightforward options for rearranging and managing your layers.
A trash can to delete a layer and then the Layer actions dropdown.
Below all of the icons are two additional controls, Blend modes and Opacity.
Let's go ahead and apply these two to the design.
I'll begin by toggling on the visibility of the Rainbow layer.
Notice that it has a black background that obscures the forest behind it.
With it selected, I'm going to try to reduce the opacity of the layer by clicking on this Opacity dropdown, then here in the slider, I'll go ahead and adjust the value.
Notice that it's darkening up the forest a bit, while it's adding this nice rainbow glow.
That's not exactly what I had in mind.
So I'm going to go ahead and revert my change by clicking on the back arrow here.
I can also just press Command or Control on the keyboard and the letter Z for a quick undo.
To the left of the Opacity slider is a Blend dropdown, and in that list a variety of blend modes that I can choose from.
Rather than limiting me to adjust the opacity a blend mode affects how the active layer is blended with all of the layers below it.
And this can give me some really nice results.
And again, since this is a non-destructive behavior, I can always experiment and change my mind later on if I'd like.
With that Rainbow layer still selected, I'll hover over each of the blend mode options, giving me a preview of the change on the canvas.
The Lighten blend mode seems to give my rainbow that nice glow without darkening the forest below.
So I'll go ahead and select that.
Once I'm totally satisfied with my work, I can download my image to my computer using this Download button here in the upper right.
Any changes that I've made are automatically saved to the Creative Cloud, so I could always just come back later and pick up where I left off.
As you might guess, I've really only touched on all the ways you can leverage layers in Photoshop on the web.
I encourage you to give them a try.


