Introduction
In Rush, you can take control of the look of your video by customizing lighting and color using the Edit controls in the Color panel.
Let's look at how this works.
I'll create a new project and name it.
Starting a project and opening color edit controls
I've got some Media in a folder on my Desktop, so I'll select these clips in the order I want them to appear in a sequence and press Create.
I'll put the playhead over the first clip in the sequence, open the Color panel and select the Edit controls which are right next to the Presets.
There are both Basic and Advanced controls and it's worth playing with all of these to get a feel for what they do.
Adjusting basic lighting and tonal controls
For clips that look too bright or too dark, you can change the Exposure.
Right after boosting exposure on a clip that has back-lighting or silhouettes, I find that moving the Highlight slider to the left can bring detail back into the bright areas.
There's no need to adjust color controls in order.
The Contrast slider darkens the blacks while simultaneously brightening the whites.
While the Shadows slider deepens or brightens only the dark pixels.
Moving to the second clip in my sequence, I'll again start by editing the basic color controls.
After a bit of practice with these tools, instead of just dragging the slider, try typing in a numeric value.
For most of these controls, a positive number increases the effect and typing a negative number or just dragging the slider to the left will decrease the effect.
In this case, I'm increasing details in the Shadows when I pull the slider to the right or I'm reducing details in the Shadow areas when I pull to the left.
Some controls like Temp and Tint
Fine-tuning color temperature and vibrance
change the overall tone of the image.
Pulling Temp to the right adds yellow and warms the look, while the Tint control adds more magenta or more green to the clip.
Extreme adjustments add intensity, but I find when I go for a bold look with one slider, I have to revisit some of the other controls I've already adjusted to rebalance the look.
I'll toggle the Color settings on and off to check out my changes.
Don't worry about going too far.
You can use the Reset button at any time and just start over.
I'll move on to the next clip in my sequence.
I want to enhance the color.
Many people are tempted to just drag the Saturation slider to the right, but the Saturation slider increases color across the entire shot and ends up making her face look a bit too orange.
I'll press the Reset button and show you why Vibrance is the better option in this case because Vibrance enhances color intensity while protecting the skin tones.
I'll take a quick look at the before and after and then move on to Advanced controls.
Using advanced controls for film effects and sharpening
The Faded Film slider does just what you'd expect.
It reduces the contrast and adds a bit of haze to the image which is perfect for the San Francisco scene.
It gives a 1970s edge to the look.
If I change my mind, I can press the Reset button next to the Advanced controls to remove the Faded Film look while leaving the Basic control settings in place.
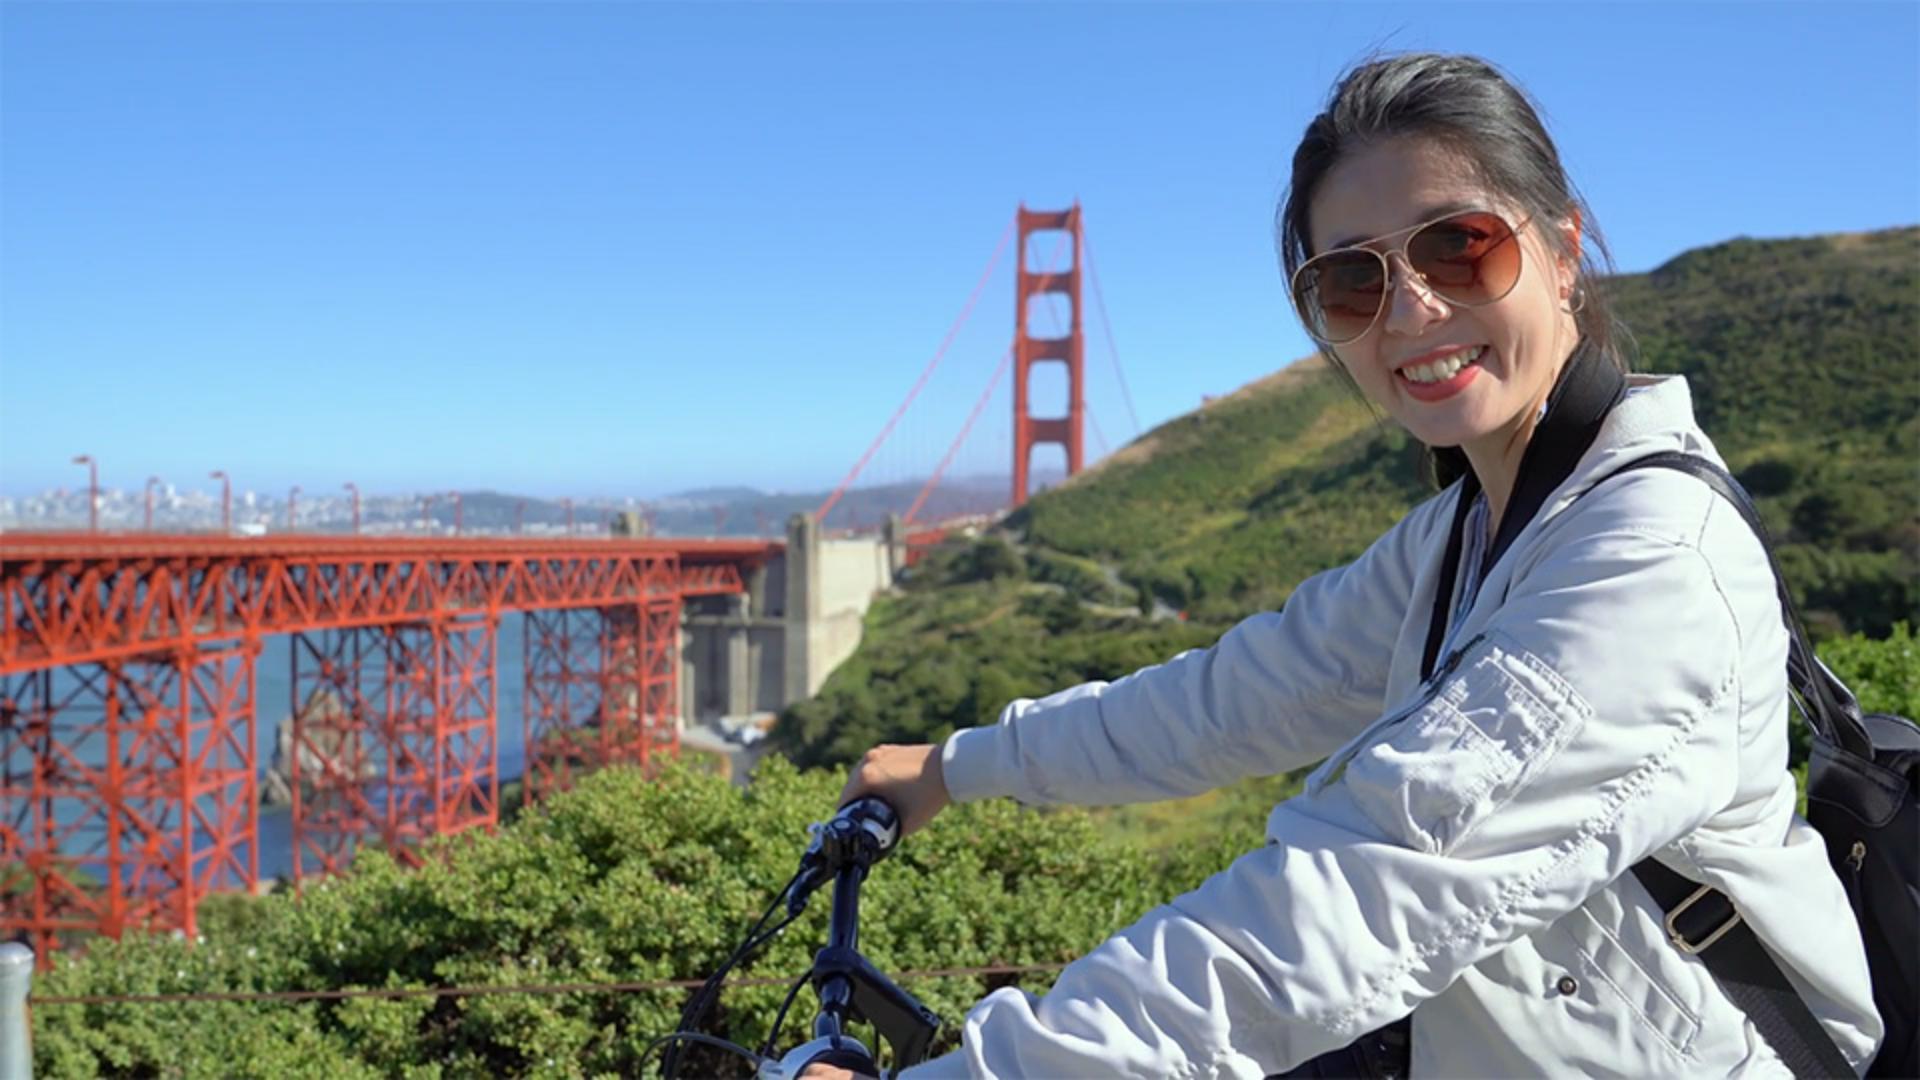
Another great Advanced control allows you to sharpen the image.
These street signs and even the cyclist aren't crisp.
So, I'll crank this slider to 100 and toggle the before and after results.
I can make changes to the Basic controls at any time and still reset the Advanced settings to Default without losing my Basic adjustments.
The Basic and Advanced controls are completely independent from each other.
I'll also sharpen the final shot in my sequence to remove some of that San Francisco haze from the background.
As a final step, I'll apply a Vignette under the Advanced controls.
Sliding to the right will brighten the edges of the clip, but I want to draw attention to the center of the image, so I'll slide the control left to darken the edges.
I can also adjust Feathering to blend the Vignette into the image.
I'll make a few more adjustments using the Basic controls
Creating and saving custom color presets
then go to the More Options button and choose Create Preset.
Now I can name and save this look and it will be available in the Presets tab so I can apply it to other clips.
Creating custom color looks in Rush can take your videos to the next level.
After adjusting lighting and color settings, save some presets, so you can reuse the custom looks you create in other sequences.


