Introduction
Welcome back to part 3.
In this final tutorial, I'm going to walk you through the process of taking your illustrations and packaging them up into a lookbook.
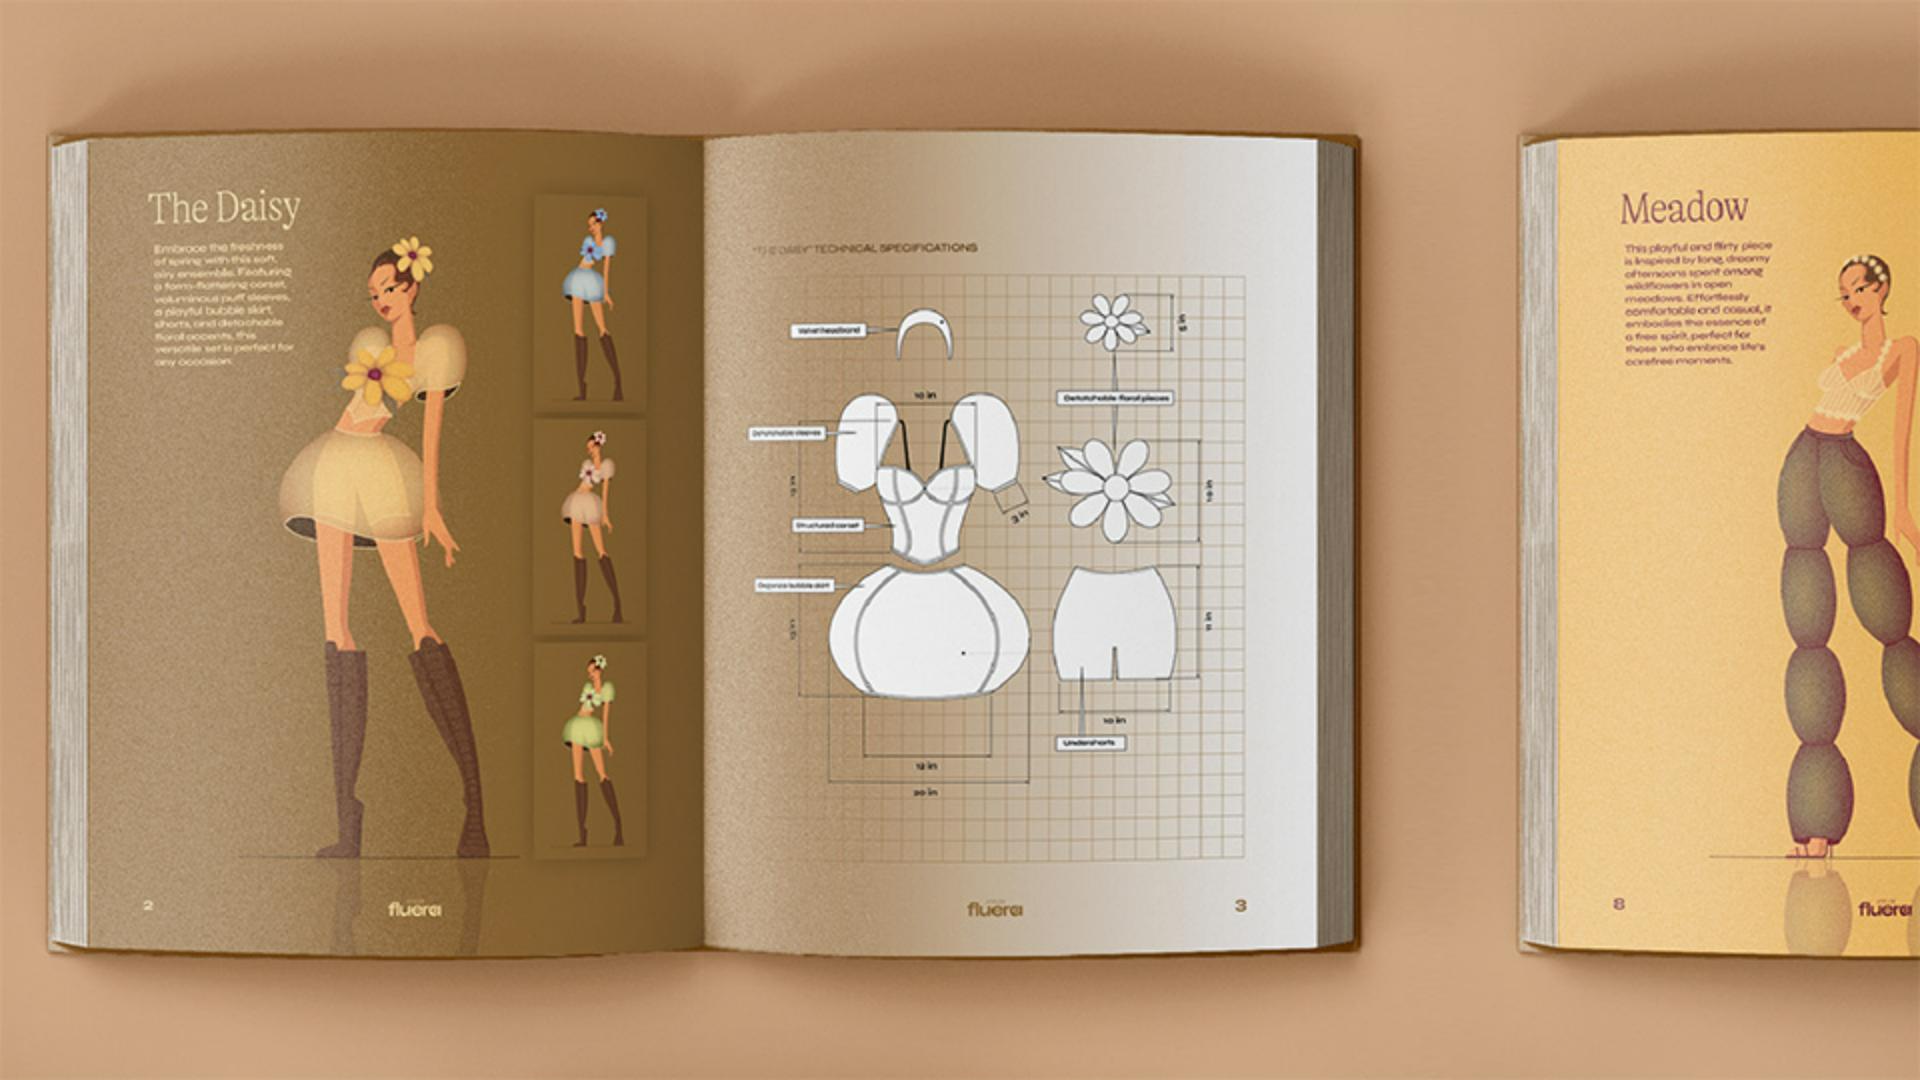
So, the way that I've decided to lay this out is to have a large image of my illustration over on the left page of my spread, along with some descriptive text, and in this section here I want to have a few different colorways.
So, to create these color variations,
Creating colorways with recolor artwork
I'm going to lock all of the shapes of my base character.
Next, we're going to select the entire outfit, navigate to Edit, Edit Colors and then select Recolor Artwork...
Now when you see this Color Wheel, you can start to tweak the positioning of these different colors like so.
You can choose to have your colors linked as I have them here by making sure you have this Link icon selected, or if you unlink, you will have more control over individual colors.
And it's that easy.
So, I've gone ahead and tweaked all my colors in this composition to create a blue version, which I've added to my lookbook, in addition to this pink and green version too.
Designing technical specifications and flats
So on this side of the spread, I want to include detailed technical specifications of my outfit.
The reason why this is important is because our fashion illustration that we drew over here is a more artistic representation.
And in some cases, we may also want to make sure that we're communicating realistic proportions and dimensions in our design.
So, to create these, it's best to start with a base model with realistic proportions.
And then you essentially want to use a black stroke with a white fill and start creating very clean, accurate and symmetrical shapes and lines.
If you have certain pieces that are overlapping each other, you can pull them out over to the side to make sure that you're clearly showing each piece.
Once you're done, you can remove that base model altogether and you can create labels using simple shapes and the Text Tool like so.
You will also want to add dimensions too.
And luckily Illustrator makes that so easy for us.
You will find the Dimension Tool over in your Toolbar,
Adding accurate measurements with the dimension tool
and once you select it, navigate over to the Settings icon.
In here, you can go ahead and select your Units, the Precision, in other words, how many decimal values you want to see, as well as your Scale.
And you also have a range of options for styling all the lines as well as the text.
So now I'm going to select my Linear Dimension Tool and start marking out some of those main lengths and widths like so.
So here is what that will look like once I have all my dimensions applied, and I've also gone ahead and done the same for the rest of the outfits in the collection.
Finalizing and presenting the fashion lookbook
And now I have a finished fashion lookbook for Atelier Fluera, which I can send to my client and/or use as a portfolio piece.
So that's it.
You now have the tools and knowledge to go ahead and bring your fashion illustrations to life using Adobe Illustrator.
Happy illustrating.