Portrait vs. landscape: Orient your photos for maximum impact.
Your photo composition is one of the most important decisions you’ll make when shooting and editing. Explore the differences between these two camera orientations.
Make the best choice for every shot.
The orientation of any image can transform the emotions of a photo, from playful or intimate to dramatic or detached. But while a horizontal image for landscape photography or a vertical subject in an upright portrait shot might seem natural, image orientation isn’t always intuitive.
Most cameras — whether they’re smartphones or DSLR cameras — only capture rectangular pictures, so you only have two options. Discover how, given the options of landscape orientation or vertical format, you can select the right approach for the best shot.
The difference between landscape and portrait orientation.
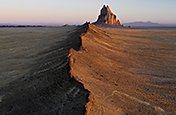
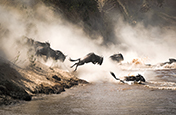
Landscape images align with the horizon line. The photo is wider than it is tall, to capture the vastness of a natural setting. This view is landscape orientation or horizontal orientation. Your TV screen is an example of landscape mode.
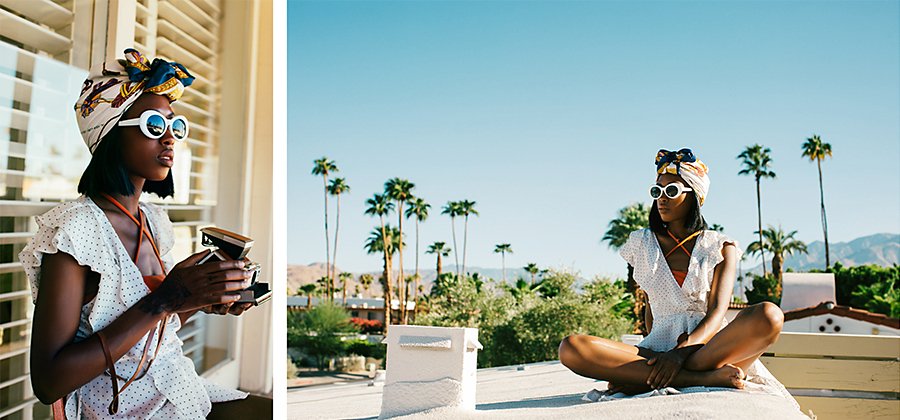
Portrait photography often uses a vertical orientation to capture an entire person or subject, or to place emphasis on a subject, as in a close-up head-and-shoulders headshot. Photos are taller than they are wide in portrait orientation. By default, smartphones display in portrait orientation.
Typically, subjects with strong vertical orientations — like people, tall buildings, and waterfalls — work best in a portrait orientation, while scenery like a mountain range displays best in a horizontal orientation. However, scenery and people can be captured with either portrait format or landscape format. The primary considerations are your style, how you will use the image, and what you want to convey to the viewer.
Consider how you will use the image.
You’ll want to know where an image will appear prior to photographing that busy toddler, creampuff vintage car, or towering skyscraper. Different applications often call for either a portrait orientation or landscape orientation.
For example, if you’re posting to Instagram, or many other scrolling-based online image viewing sites and platforms, shoot in portrait format. If it’s a website banner for a desktop browser, landscape orientation is an obvious choice. However, for the mobile version of that same website, portrait images would be a better fit. Here are some general guidelines.
When portrait orientation might be a good fit:
- Portrait photography
- Architecture photography
- Lifestyle photography
- Editorial photography
When landscape orientation might be a good fit:
- Landscape photos
- Nature photos
- Group shots
- Event photography
In all circumstances, the setting and your photographer’s eye will influence the decision.
Tell a story and create a mood.
Once you know the intended use for your image, choose the main subject — a person or object you want to draw attention to — and decide what you want to emphasize and what to exclude to capture the emotion you want to evoke.
“When I’m in the city, a lot of the stuff I do is portrait style. Everything is really big and tall and I want to be able to show that,” photographer Aaron Rashid says. “The vertical orientation exaggerates the height. But when I’m out in the desert, it’s wide-open flat spaces and I want to show the size and distance, so I’ll shoot landscapes.” A horizontal orientation emphasizes the expanse or tranquility of farmlands, prairies, woodlands, and other outdoor spaces.
Other considerations include your shooting style, the composition, the perspective of the scene, the distance from the subject in the scene, the scene overall (foreground and background), and the emphasis you want to place on the subject.
“I try as much as I can to get the golden ratio incorporated in my image somehow,” says Rashid. “I’ll look for ways that I can break it up into the rule of thirds.”
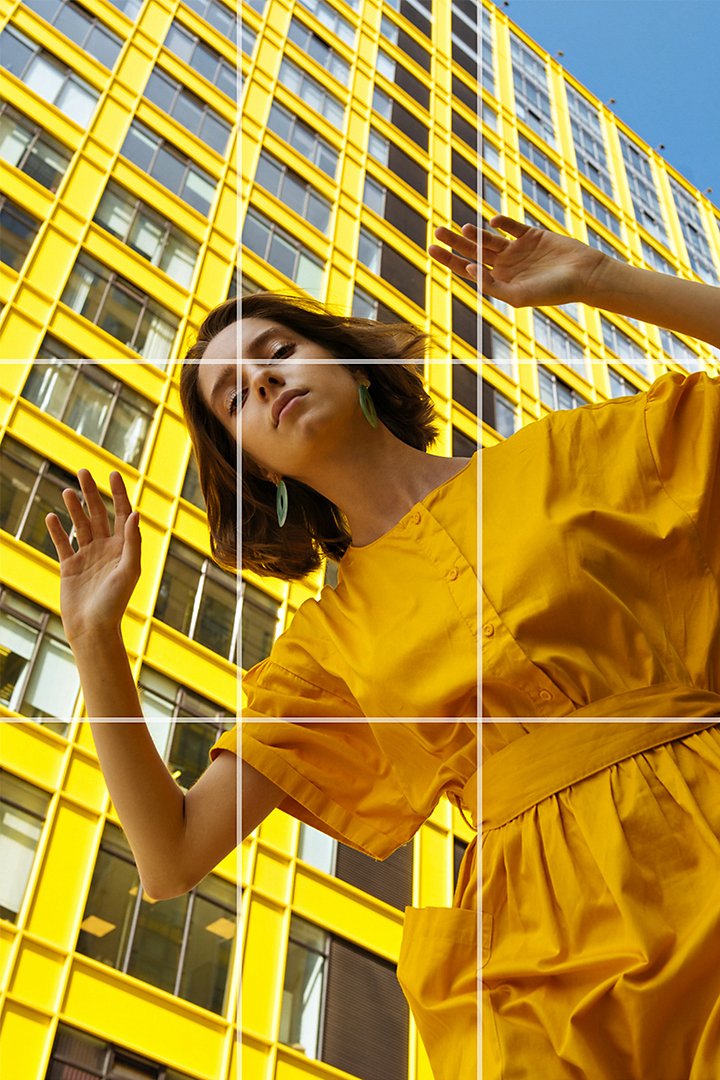
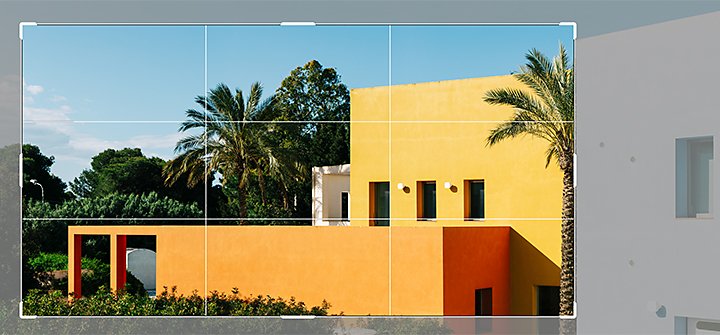
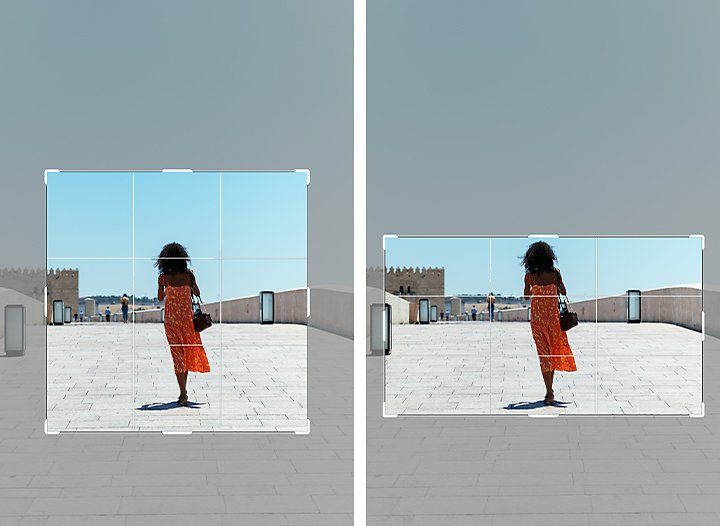
Understand the rule of thirds.
Imagine each photo is a grid of nine equal cells. This can help you compose images. In many cameras, you can turn on a rule of thirds grid to make these imaginary cells visible.
As you assess the main subject of your image, think about which section will best convey your message. Position the main subject, for example, in the bottom third of the frame, and again in the center left cell. Snap a few shots with the main subject located in the cross points where the grid lines intersect. These locations often produce the strongest emotional impact.
“I find that if you have no idea how you’re going to crop an image, the image should look okay if you put the main subject either on a place where the lines intersect or in one of these corners,” Photoshop expert Jesús Ramirez says.
Use camera modes to capture the image.
Preprogrammed camera settings can help beginners learn what to look for in the camera’s manual settings. For example, whether shooting portraits or a horizontal image, you might want to blur the background to draw attention to your subject. The portrait mode on your smartphone camera will automatically shorten the depth of field, keeping your subject in focus while blurring the background. Using a DSLR or mirrorless camera in manual mode, you’ll need to know the focus range of your lens. Get as close to your subject as possible and zoom in as far as you can, and choose the largest aperture available on your camera.
Smaller apertures typically make everything in your image really crisp, as opposed to larger aperture settings, often used to blur the background with a bokeh effect in portraits. Use lower apertures for landscapes. And set your camera up on a tripod so you can use longer shutter speeds.
Change the image post-shoot.
If your in-the-moment image composition doesn’t quite work when you get ready to use the photo, you can always change the orientation, aspect ratio, and size of your image in Adobe Lightroom or Adobe Photoshop. And when your photo is a little crooked, you can straighten it with these programs too.
“You have to keep in mind the purpose of an image when you’re cropping,” Ramirez says. “For example, you might want to create some negative space at the top or on the right side of your image so a designer can put some text there.”
The rule of thirds grid will help you land on your composition. If you need more sky above your subject, you can use the Content-Aware Fill tool in Photoshop to fill in the missing space. Although Content-Aware Fill was designed to replace unwanted objects from an image with new details from the surrounding area, it can also fill in blank spaces.
Sometimes you want to reverse the perspective of your image. For example, that running cheetah image might look menacing in a magazine if the page orientation places it next to a portrait of a toddler on a swing. Solve the problem by flipping the entire image horizontally so the cat is running away from the child. With Image Rotation commands you can also flip an image vertically.
You can modify your image composition with the Crop tool.
1. Click the crop icon in Photoshop (or the C key).
2. Use the crop handles to click and drag or use a free-form crop to select the part of the image you want to keep.
3. Choose Image › Crop.
Be sure the Delete Cropped Pixels box is unchecked or you will lose the pixels outside of your image area.
You can also use the Trim tool to remove transparent pixels or background pixels of a specific color from the top, bottom, left, or right area of your image.
Various applications call for specific aspect ratios such as 1:1 (square) or 16:9 (widescreen). You can use the aspect ratio drop-down if you need a specific one, or use the original aspect ratio. You can also rotate the aspect ratio from landscape to portrait with the X key, or click the flip icon.
Straighten the image.
A crooked photo creates visual tension. It can be dramatic. But it can be jarring if you don’t want to convey a sense of imbalance or chaos. If your horizontal and vertical lines should be straight but aren’t, you can align them in both Lightroom and Photoshop.
In Lightroom, click the crop icon (or the R key) to reveal the grid overlay. Grab the rotate icon (two arrows) that’s just outside the box to rotate your image until it aligns with the grid lines. Lightroom also provides a Straighten slider below the Crop tool. Double-tap the middle of the slider bar for an initial adjustment. You can tweak it from there.
Use the Perspective Crop tool in Photoshop to make a box around something angled that should be straight, and it will automatically adjust it. You can also hover outside of the corner handles and click and drag to line things up.
Ramirez recommends using Camera Raw inside of Photoshop to adjust an image perspective.
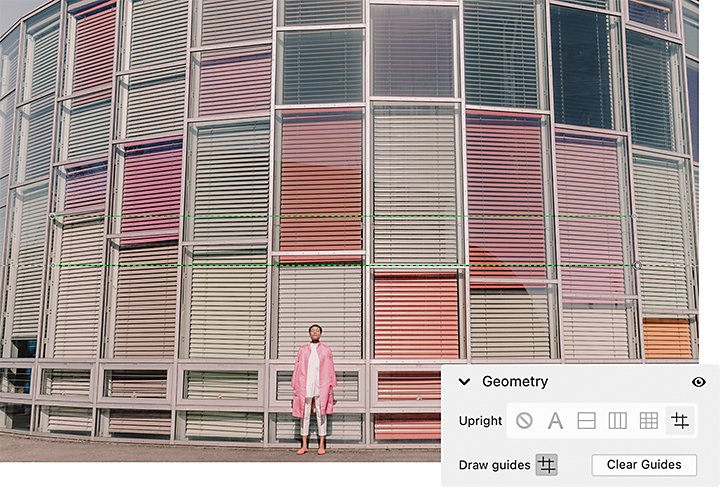
1. Go to Filter › Camera Raw filter › Geometry
2. Select the Guided icon
3. Draw two or more guides (lines) on the image to adjust the perspective
4. Click OK
You can create a crop preset if there’s a dimension you use frequently.
1. Select New Crop Preset from the drop-down menu
2. Photoshop provides a name or you can type a custom name in the data field of the dialog box
3. Click OK
The next time you open the drop-down menu, your preset crop dimensions will be available near the bottom of the menu.
Learn from a pro photographer.
Photographer Chris Burkard captures landscapes from around the world, giving people a sense of places they may never go. Hear Burkard share tips on scale and perspective to help you understand ways to use different photo orientations.
Your choice isn’t necessarily final.
It takes patience, practice, and intuition to create stunning images. Start experimenting. Don’t let the dilemma of portrait vs. landscape hold you back. On a photoshoot, context helps make the call as to how to orient your photos. You can focus on the main subject and exclude everything else, emphasize the wide-open spaces, or try both perspectives.
Remember that you’re creating art to tell a story and elicit an emotion. Use the orientation that tells that story best.
Contributor
Do more with Adobe Photoshop Lightroom.
Edit photos easily with Lightroom presets, Super Resolution, easily share photos from any device, and access your projects anywhere with cloud photo storage management.
You might also be interested in…

Build your personal brand with professional headshots.
Become your own professional headshot photographer with these DIY headshot tips.
How leading lines guide the eye.
Draw attention to the subject of your photo and direct the viewer’s eye with leading lines.
Tips for capturing nature photos of all kinds.
Explore the possibilities of nature photography, from animals in motion to sprawling landscapes.
Full frame vs. crop sensor: Which format is best for you?
Learn the differences between each sensor type so you can pick the best camera for your needs.