Express your love of the game with these ready-to-remix templates in Adobe Express. Share your fandom and help us inspire the next generation of fans and players alongside our Lioness ambassadors, Alessia Russo and Khiara Keating.
Do it all with Premiere Pro.
Simplify your workflows with AI.
Premiere Pro is loaded with AI features — like Colour Match, Auto Ducking and Enhance Speech — saving you time and helping you unlock your creativity.
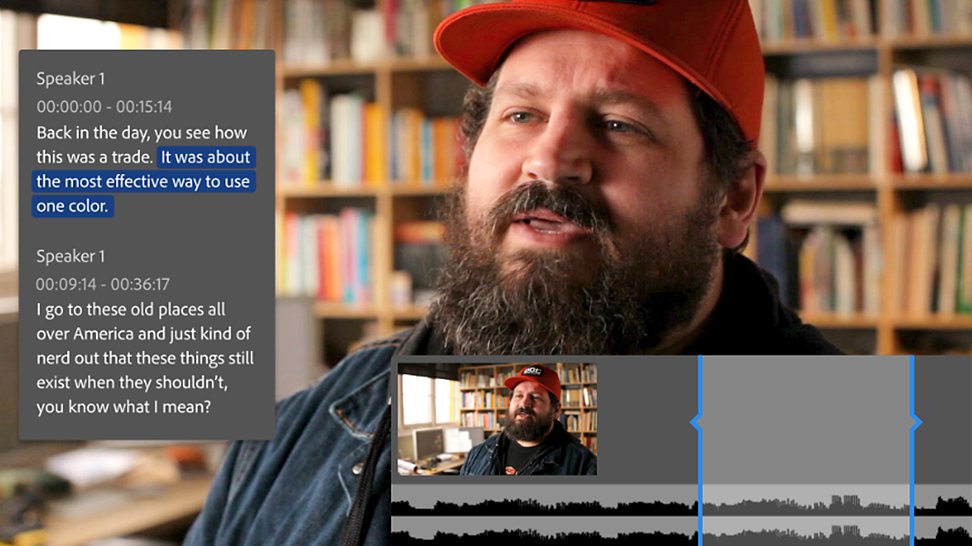
Create rough cuts fast with Text-Based Editing.
Auto-generate your transcript, highlight text to add clips to your timeline — then refine, reorder and trim clips just like you’d edit a text doc. And for further refinement, clear all awkward pauses with bulk deletion and use filler-word detection to remove unwanted filler words.


See how to create amazing videos with Premiere Pro.
Edit and trim with total precision.
Industry-standard tools help you craft the perfect story. Easily set start and end points for your clips with three-point editing. Use stacked (“pancake”) timelines to pull source footage into your rough cuts with fewer clicks. And trim with tools that let you ripple, roll, slip or slide edit points to find the right cut fast.
Add eye-catching video transitions, effects and titles.
Choose from hundreds of built-in video effects and transitions or get started with professionally designed templates and then adjust them to create looks that are all your own.
Customise your colours.
Premiere Pro comes with powerful video colour correction and grading tools. Automatically balance your colours with AI, use professional colour wheels and curves controls to adjust all or part of a frame and check your results with built-in video scopes.
Adjust audio and mix music for great sound.
Reduce noise and enhance dialogue with pro audio tools and add advanced effects as you master sound design. Browse music tracks, use AI to auto-fit them to your clips and license them — all within Premiere Pro.
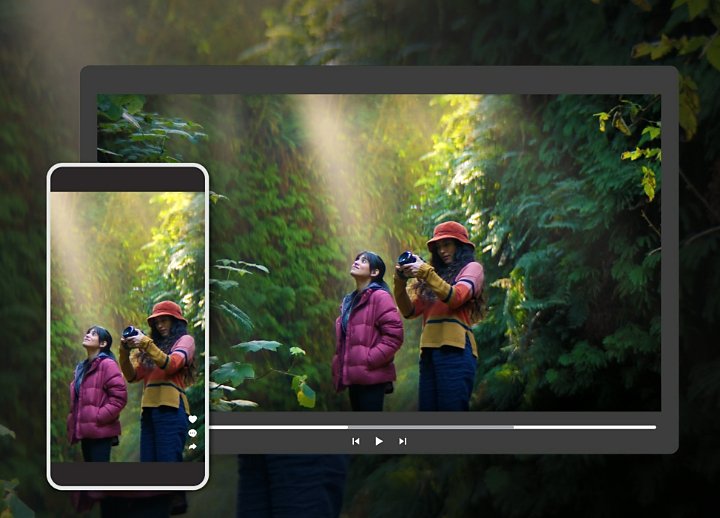
Quickly get feedback and share your final video.
Get feedback from collaborators through Frame.io — it’s integrated into Premiere Pro and part of your Creative Cloud subscription. Automatically reframe your final video for vertical platforms and easily export to TikTok or use your own presets.
See what new can do.
Premiere Pro is improving all the time. With your subscription, you get access to new features as they’re released — and sneak previews of the latest innovations in the Premiere Pro (beta) app.

Fine-tune your audio faster than ever.
A redesigned audio workflow in Premiere Pro (beta) includes more intuitive and interactive fade handles and clip badges, a bold new waveform display that intelligently resizes with track height and more.

Save time and clicks with AI audio tools.
AI automatically tags audio clips as dialogue, music or sound effects in Premiere Pro (beta). Select any clip’s badge, no matter the sound-type and the right controls for the job are at your fingertips.

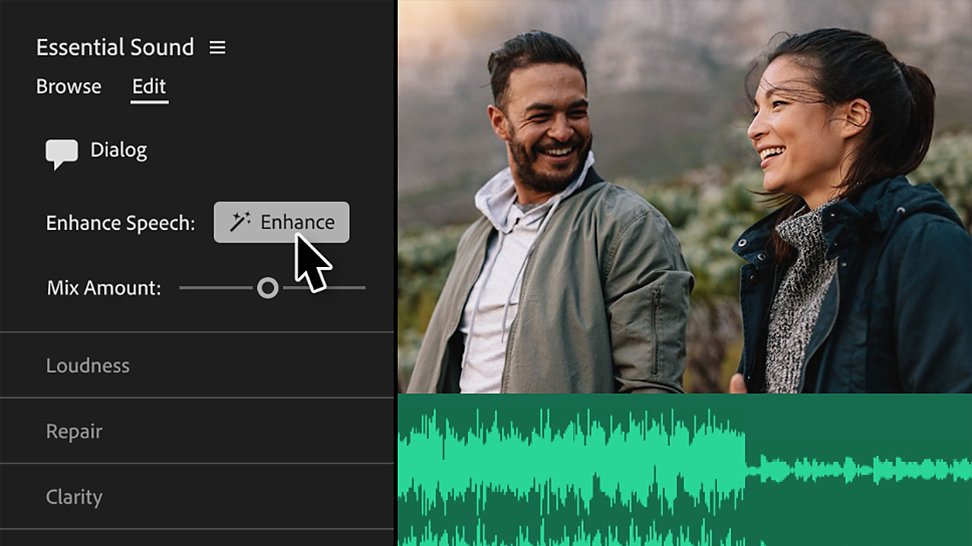
Get crystal-clear dialogue — in just a click.
AI-powered Enhance Speech removes distracting background noise and improves the quality of your dialogue.
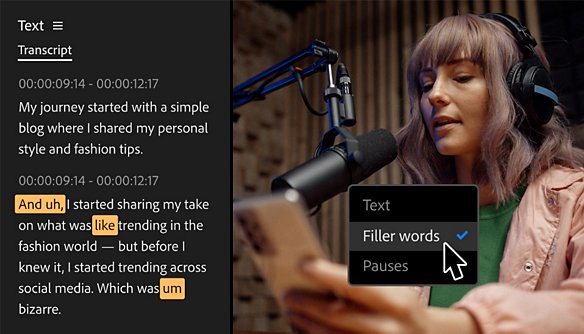
Eliminate verbal stumbles and filler.
Filler-word detection, in Text-Based Editing, instantly pinpoints clunky filler words across your footage. Then use bulk delete to clear out filler while keeping your speaker’s cadence sounding natural.
MAX London
Discover the latest Adobe products, features and innovations — including generative AI — and hear from inspiring speakers.

Find the Creative Cloud plan that's right for you.
Premiere Pro Single App
£21.98/mo inclusive of VAT
Includes 100GB of cloud storage, Adobe Fonts, and Adobe Portfolio.
Learn more
50% off for 3 months
Creative Cloud All Apps
incl. VAT for the first 3 months, then for 9 months. See terms.
Save 50% for the first 3 months of your annual subscription on 20+ Creative Cloud apps and services.
See what's included | Learn more
Students and teachers
£16.24/mo inclusive of VAT
Save over 65% on 20+ Creative Cloud apps — includes Premiere Pro.
See terms | Learn more
Business
£65.49/mo per license exclusive of VAT
Get Premiere Pro and 20+ Creative Cloud apps, plus features to easily manage licenses, simplify billing, and more.
Learn more
Purchase by phone: 0800 028 0148