How to draw a fashion croquis.
Unleash your inner fashion designer and follow this step-by-step guide to bring your design ideas to life.
From ready-to-wear to haute couture.
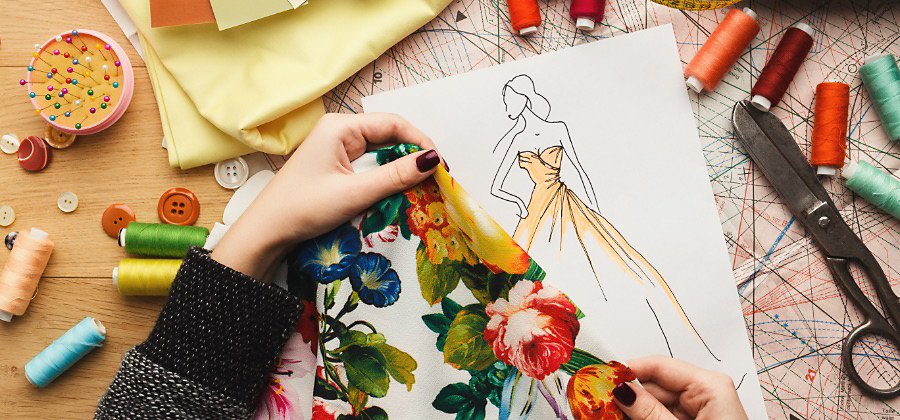
In fashion, a croquis is a quick sketch of an ensemble. These expressive fashion illustrations bring an artist’s design to life. “Whether you’re working with seamstresses, pattern makers, fabric suppliers or sales reps, croquis can help everyone visualise what a collection will be,” explains fashion designer and creative director Lynn Doherty. So before you cut fabric and sew seams, you must solidify your ideas and create your own croquis.
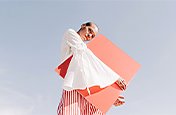
"Croquis are taller and disproportionate to a human body,” says designer Saudamini Madra. The fashion model figure is exaggerated with elongated legs, arms and neck. The average human body is about seven heads tall, but croquis often spun from eight to eleven heads tall. This helps show the movement of the garment and how the clothes will drape on a person. Additionally, the details and facial features of croquis are often indistinct so the focus remains on the clothes.
While it can be helpful to use a croquis template as you’re learning to draw, don’t be afraid to explore different body shapes and poses. From there, you'll find your own signature croquis style.
Study what’s fashionable.
Just as you may look to other designers for clothing inspiration, look at other croquis drawings before you start sketching. Explore how other artists use materials and shading to capture depth and movement in their designs. And see what poses look natural. In addition to copying the poses you see in drawings, you can also reference photographs. Magazines and fashion blogs are full of photos of professional models in unique poses. Do some research and save photos to look at while you sketch.
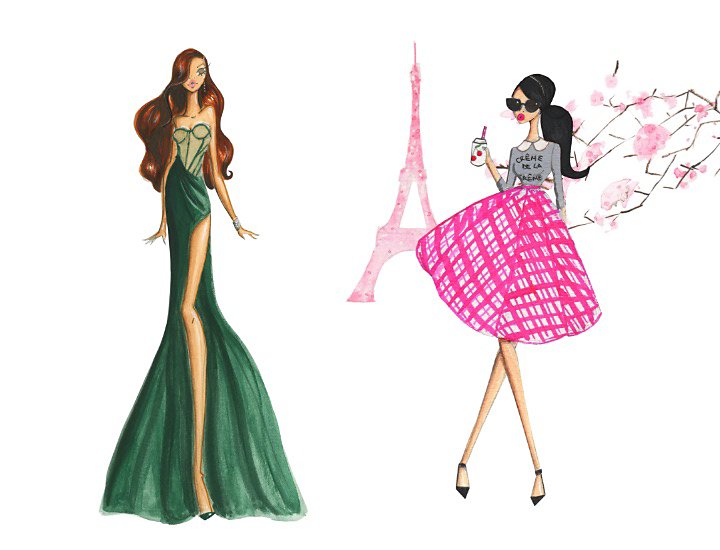
Images by Josefina Fernandez
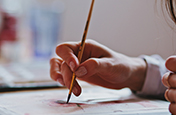
Set up your drawing surface.
Digital tools like Adobe Fresco make it easier than ever to create fashion drawings. Use multiple layers and reserve one for your croquis and others for your garment designs. This allows you to edit each layer without erasing your figure drawing or your design and makes for a more streamlined process than using a simple fashion sketchbook.
"If you have a certain signature style, you can find brushes that let you achieve similar results digitally,” says fashion illustrator Josefina Fernandez. With the watercolour effects and charcoal brushes, for example, you can still get the look of a physical drawing without tracing paper or messy tools. Plus, you can import photos and position them on your canvas to reference as you draw.
Sketch your figure drawing.
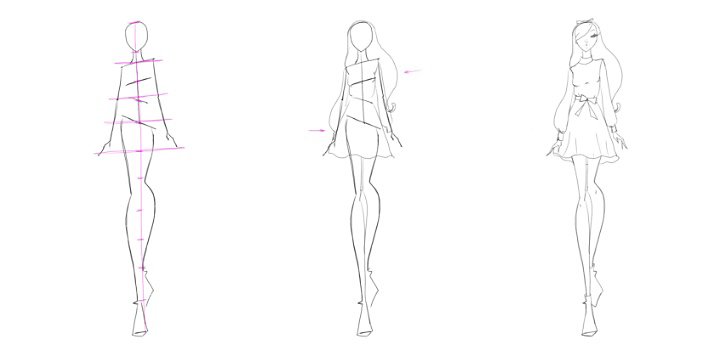
1. Start with a straight line.
Draw a vertical line across your page to represent the spun of your figure from head to toe.
2. Divide your figure into equal sections.
Evenly mark along the line so it’s divided into sections. Since the first section will be the length of the head, the other sections are referred to as “heads” too. If it’s your first time drawing a croquis, make your figure ten heads tall. It’s an even number that’s easy to divide into smaller sections.
3. Proportion your figure.
Decide how long the torso, arms and legs should be. “The first section right on top is the head. Then the next is the neck. The torso is about two to three sections. The pelvis is one. And the rest of the sections are the legs and feet,” says Madra. This gives your croquis model a tall, elegant look.
4. Draw lines for the shoulders and hips.
Add in horizontal lines for the angles of the shoulders, chest, waist and hips. For a cute pose, draw the shoulder line and chest line angled one way and the neck and head angled the other. This is your time to refer to your reference drawings and experiment with different dynamic poses.
5. Fill in the full figure.
Once you have the angles in place, sketch in the full form of your model. Add curves to the hips and waist and flesh out the legs and arms. The hands should hit between the pelvis and mid-thigh. Sketch fingers on the hands and add the curves of the elbows and knees.
Images by Josefina Fernandez
6. Draw your fashion design.
Once you have a rough sketch of the body on one layer, add another layer to draw in your design. This way you can preserve the figure drawing to use again. Explore different Fresco brushes to achieve unique textures, mimic textiles and add colour to your garments. “If you’re drawing a chiffon blouse, you really want to portray that drape and that sheerness. So that’s where the detail comes in,” explains Doherty. Take your time sketching the flowing lines of your ensemble. After all, the fashion should be the focus of any croquis.
7. Sketch in facial features.
It’s up to you how detailed you want to be with your croquis. “I try to keep the face very minimalistic. I just add a big lash and pouty lips and two small dots for the nose,” notes Fernandez. Some artists choose to keep the face blank, while other designers add in sculpted, portrait-like faces. An easy way to start is to just add eyes to the face. This adds some humanity without stealing attention from the clothing.
8. Add more details.
Now’s the time to add hair and accessories. Use the hair to accentuate the pose of your figure. Tumble hair over the shoulder with gestural lines or pile it high on the head. Make sure the accessories add to the overall design instead of distracting from it.
9. Colour and shade.
Once everything is sketched in, it’s time to add colour (if you haven’t already). Use the Eyedropper tool to match the skin tone from your reference photo. Add colour to the hair, the clothing and the background. Use different layers and brush textures. Experiment with strategic colouring to make your clothing design stand out.
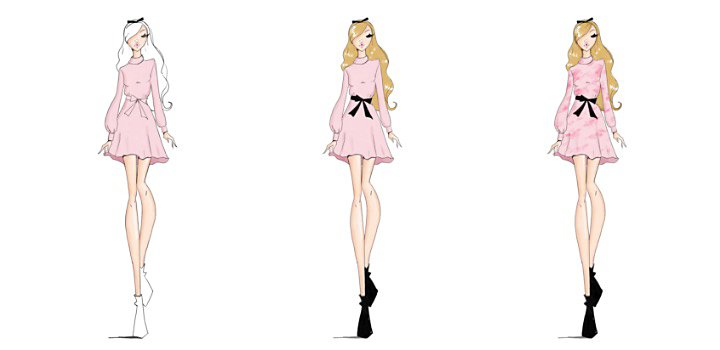
Images by Josefina Fernandez
Develop your own style.
Just as you put your own spin on designing clothes, you can put your own spin on drawing croquis. “Your eye changes over time. You hone your skills and you figure things out along the way,” notes Fernandez. Maybe you prefer croquis that are only eight heads tall with more natural body types. Maybe you like drawing figures with super long legs to show off the lines of the trousers you’re designing. As you draw more, you’ll find the styles you like best.
Contributors
Lynn Doherty, Saudamini Madra, Josefina Fernandez
You might also be interested in…
Fashion photography tips for beginners.
Learn what makes shooting fashion unique and see how to create stunning shots that shape culture.
Exploring watercolour techniques.
Capture the flowing brush strokes and rich texture of watercolours with these tips.
Try your hand at pencil sketching.
Pencil drawing is an essential first step for most artists. See how this skill can improve your art.
Honing your ability to draw faces and heads.
Get tips for drawing better facial features, from realistic portraits to cartoons.