



Scan the QR code to get the free app.

Key takeaways:
- Video transitions help connect clips and create smoother scene changes.
- Well-timed transitions can improve pacing, storytelling, and viewer engagement.
- Different transition styles suit different types of Reels, from travel and fashion content to tutorials and transformations.
- Simple, purposeful transitions often work better than using effects between every clip.
- Adobe Premiere on mobile makes it easy to add, customise, and preview transitions before publishing.
What is a video transition?
A transition is an editing effect that connects two video clips. Instead of cutting abruptly from one scene to another, transitions create a smoother flow that makes the final video feel more dynamic.
Some of the most popular transition styles used today include:
Why are transitions important for Instagram Reels?

Instagram users scroll quickly. Smooth transitions help stop viewers from swiping away by creating visual interest and anticipation. More than just visual effects, transitions help:
- Maintain continuity: Create a smooth flow between clips so viewers can easily follow the story.
- Show changes in time, location, or activity: Move naturally between scenes, outfits, camera angles, or stages of a process.
- Set the pace and mood: Add energy, excitement, or a cinematic feel that matches the content and music.
- Highlight key moments: Draw attention to transformations, festival outfit reveals, home makeovers, recipe results, before-and-afters, and important story beats.
- Improve perceived quality: Well-timed transitions make Reels feel more polished and intentionally edited.
How to add transitions to Instagram Reels with Adobe Premiere on mobile.
Step 1: Import your clips.
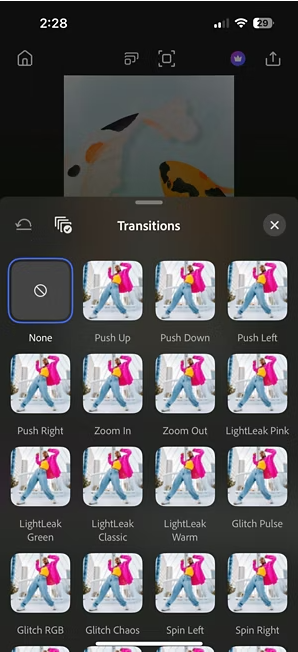
Open Premiere on mobile and add the clips you want to use in your Reel. Once your clips are arranged in the video timeline, you'll see a transition point (a rectangle icon) wherever two clips meet.
Step 2: Select a transition point.
Tap the transition icon between two clips in the timeline. This opens the transitions panel, where you can browse the available transition styles.
Step 3: Choose a transition.
Scroll through the transition library and preview different options. Tap a transition to see how it looks between your clips. Depending on the style of your Reel, you might choose Light Leak, Zoom, Push Up, Twist, Glitch, Shake, or others.
Step 4: Adjust the transition duration.
Once you've selected a transition, adjust how fast or slow it plays. Drag the duration slider left for a quicker transition or drag it to the right for a slower transition. For fast-paced Reels, such as Bollywood dance covers, Delhi or Mumbai street-food videos, and cricket highlight edits, shorter transitions often feel more natural.
Step 5: Apply additional transitions where needed.
Repeat the process for other transition points in your timeline. As you edit, think about where a transition genuinely improves the story. For example:
- Moving between locations in a travel Reel
- Switching between outfits in a fashion Reel
- Showing before-and-after transformations
- Jumping between steps in a recipe video
Step 6: Preview your Reel.
Play your Reel from start to finish and check that each transition feels smooth and intentional. If a transition feels distracting or unnecessary, remove it or replace it with a simpler option.
Step 7: Export and upload to Instagram.
Once you're happy with the transitions, export your video and upload it to Instagram Reels. Add captions and hashtags as needed.
Why use a dedicated mobile video editor to add transitions to Reels.
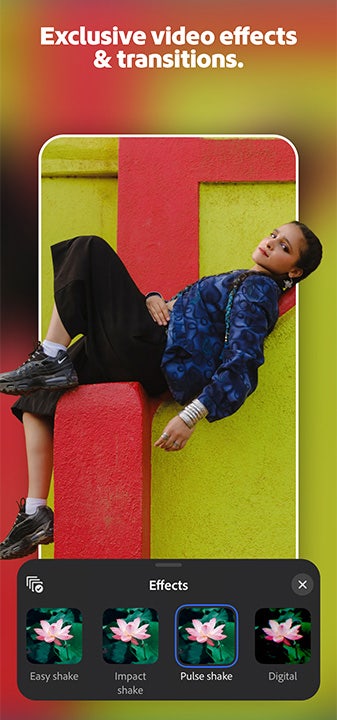
Instagram's built-in editor is great for quick edits, but if you're creating content regularly, editing in a dedicated video editor gives you more control over how your transitions look and feel before you publish. With Premiere on mobile, you can:
- Access a free library of transitions designed for short-form content
- Use social-first templates to speed up editing
- Edit on a multi-track timeline for greater creative control
- Export in 4K with no watermark
- Edit without ads or forced logins

Made for social - studio quality, now easy for Reels & Shorts
Best practices for adding transitions to Reels.
Effective transitions can help your Reel feel more cohesive and keep the visual flow aligned with your content. Use these best practices to make transitions feel intentional, smooth, and well-timed.
- Use transitions with a purpose: Every transition should support the story, highlight a key moment, or match the pace of the music. If it doesn't add value, a simple cut may work better.
- Stick to a consistent style: Choose two or three transition types and use them throughout the Reel. This creates a more cohesive viewing experience and helps your content feel intentional.
- Keep movement flowing: For movement-based transitions, such as hand swipes, spins, or turns, maintain smooth motion throughout the shot. Continuous movement helps create a more seamless transition between clips.
- Sync transitions with the music: Placing transitions on major beats, drops, or lyric changes can make your Reel feel more polished and engaging, even when using simple transition effects.
Common transition mistakes to avoid.
When creating or editing your Reels, avoid these common mistakes to keep your Reel clean, natural, and easy to watch.
- Using too many transitions: Adding a transition between every clip can make your Reel feel busy and distracting. Use transitions selectively to highlight key moments or scene changes.
- Mismatched framing: If your camera angle, distance or subject position changes between clips, the transition can look jarring. Keep your framing as consistent as possible when filming.
- Cutting after the movement stops: Transitions usually look smoother when you cut during the action, not after it. For example, switch clips while turning, jumping, or swiping rather than when you're completely still.
- Overcomplicating transition styles: Flashy or outdated effects can pull attention away from your content. In most cases, simple transitions like zooms, light leaks, pushes, and match cuts look more modern and professional.
- Not previewing the final Reel: Always watch your Reel from start to finish before posting. What looks good at an individual clip level may feel too fast, too slow or out of place when viewed as a complete video.
Frequently asked questions.
You may also like


