How to convert from TIFF format to a JPG file.
Learn to take your images from large TIFF files to smaller, web-friendly JPGs in Adobe Photoshop.

When to convert files to JPG format.
TIFF images (tagged image file format) are raster graphics that use lossless compression, which means they’re typically used for large files that contain a lot of visual information. TIFF file size, while ideal for high-quality prints made from 300 dpi+ resolution art, can be unruly on the web. That’s when you want to convert TIFFs to JPGs (joint photographic experts group). JPG images are a lossy compression, but when you convert files from TIFF to JPG properly you still get a good quality image at a much lower file size, better for use online or as an email attachment.
Make your TIFF images into JPGs.

Choose File and select Save As. Or, choose File, then Export, and Save for Web (Legacy). Either process can be used to save CMYK, RGB, or grayscale images.
Note: JPGs support only 8-bit images, so the bit depth will automatically be lowered on anything with a 16-bit image quality.

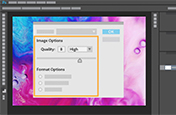
In the JPG Options dialog box, make any additional selections.

Click OK.
After this process, you’ll have a JPG file ready for uploading to a website or on social media platforms. JPGs can also be used across all Adobe systems.
Learn more about choosing between popular formats like PNG, JPG, and TIFF to help you find the right file extension for your next conversion.t.
Do more with Adobe Photoshop.
Create beautiful images with Photoshop brushes, Content-Aware Fill, Photo effects, Neural Filter, Sky replacement, and the many tools photographers rely on.
Explore the Photoshop family of apps.
You might also be interested in…
Grab attention with a fun animation.
Add drama to a high-contrast image by infusing it with color.
Compress an image.
Learn which photo file types and sizes work best for editing, posting, sharing, and printing.


