Explore clever green screen video shooting and post-production tips.
The green screen is a versatile asset for filmmakers working on a budget or in the world of genre filmmaking. Learn more about green screen compositing with Adobe Premiere Pro.
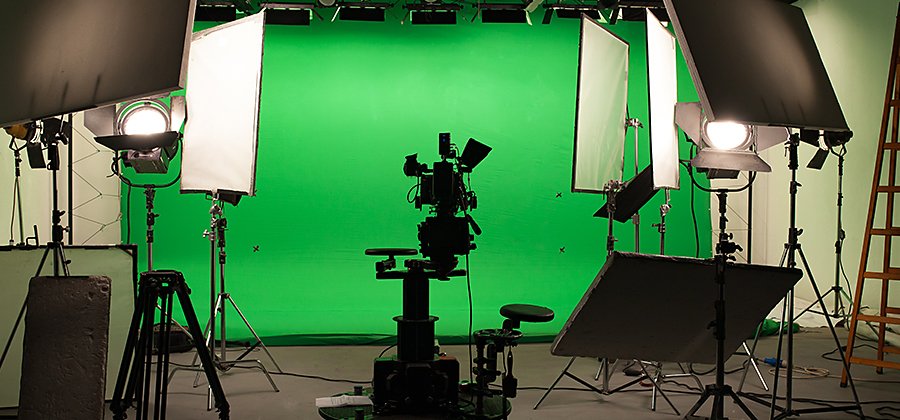
Green screen video footage, defined.
If you’ve ever seen a movie with special effects, whether it’s a creature feature or a science fiction opera, you’ve encountered a green screen. But if it was done well, you probably had no idea. Shooting on location is desirable for many productions, but often, the budget doesn’t allow it. “Filming on location is ideal, but the disadvantage is that you have to bring the whole circus — the crew, actors, trailers, and equipment — to where you’re going to shoot,” says director and cinematographer Steven Bernstein.
When you have big ideas but a smaller budget, the green screen will be your best bet.
Green screens let you replace your scene backgrounds with something else, like a different environment or motion graphics. Green screens don’t have to be fancy or sophisticated — the screen itself is often simple green fabric, used because it’s easy to remove and replace in post-production with tools like Adobe Premiere Pro.
Green screens are a subset of chroma keying techniques, which largely refer to the “compositing” or layering of two images or video streams into one another. For example, if you’ve got some brave adventurers crossing a barren landscape, compositing might include laying in a fantasy backdrop or a castle in the background, interlacing it with your talent.
Videos that need green screen backgrounds.
Each film shoot presents its own challenges. Getting every single shot will often be impossible due to budget, location, or time constraints. Green screens are powerful tools that allow you to dodge those constraints and tackle a variety of challenges.
Explainer videos and how-tos.
A subject talking to the camera, like in a teaching or explainer video, is perfect for green screen effects. Try compositing in a backdrop of motion graphics or a complementary piece of stock video.
Smaller backgrounds and movement.
If you’re shooting a scene that takes place in a building that has windows or open doors in the background that need removing, a green screen can be a useful tool — especially if the view out the window features a distracting billboard or scenery, for example. For driving sequences (or the interior of a sci-fi cockpit), a green screen is a must to convey motion and a sense of place. Additionally, green screens are often used for phone screens, with the filmmaker creating an overlay for the screen of an iPhone.
Special effects and objects.
Special effects (SFX) artists and cinematographers use green materials on clothing and for motion capture for video that has special effects or computer generated imagery (CGI) creatures, people, or animals — a person clothed in green can be replaced with a CG character. When an object or prop needs the application of special effects, objects themselves can be coated in green material for later coverage in post.
As far as selecting the right color and shade, there’s no standard. Typically, the person responsible for the post-production work prefers a certain shade of green (often called “green screen green”), which is then incorporated into a shot list so the crew getting the footage has the proper information.
When to avoid a green screen.
If you are working with performers, it’s a good idea to use green screens only if you have to, or if the green screen forms components of a scene that actors won’t be interacting with. “It's not easy to act opposite green,” Bernstein explains. It can be difficult for talent to work together with the pieces of the scene if too many of them are represented by abstract green colors and objects. However, if the shoot requires it, make sure to brief the actors.
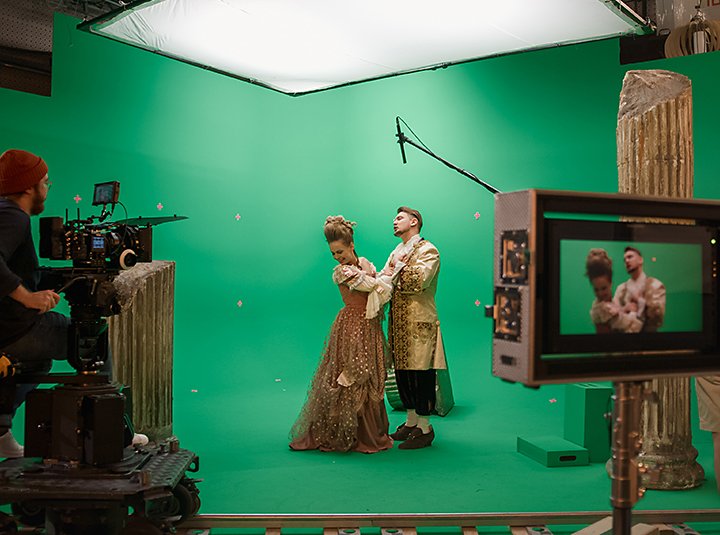
There are many technical details for you to keep on track when using a green screen. Quality green screen work requires a skilled hand behind the camera.
For example, if you need to film a scene where an actor’s head shrinks to a tiny size, your cinematographer will need to be precise about the camera movement, because the scene will need to be filmed twice. It will be filmed once with the actor’s head in front of a green screen to make the effect work, and once again without the actor but with the exact same camera movement, so space behind the actor’s head won’t be distorted or negatively affected. This is why any camera movements — especially zooms and quick pans with green screen shoots — need extreme precision.
If you’re working with smoke or other practical effects, a green screen might not be the right choice, as those effects can distort the color of the green screen, dramatically increasing the editing time.
When to use blue screen video.
Blue screens can function exactly like green screens but are less common. This is for a pretty simple reason: Green is a color that shows up less often in scenes. However, if you have a lot of green in a scene, like plants, trees, and other foliage, you’ll want to introduce blue screening, as it will make the editing and post-production a lot easier to manage. The contrast between your screen and the objects you are filming in front of it is essential for adding video effects.
Make the shoot come to life with Premiere Pro.
Premiere Pro features video editing tools that make compositing easier, especially the Ultra Key effect, which is the primary green screen compositing tool in Premiere Pro. If you plan to do more sophisticated graphics or SFX work, working in Adobe After Effects before moving your polished effects into Premiere Pro is a good idea.
Ultra Key for background composites.
To achieve a solid background composite, you’ll need two things: your footage with a green screen background and the video or effect that will be behind the foreground element, replacing the screen screen, also sometimes called a plate.
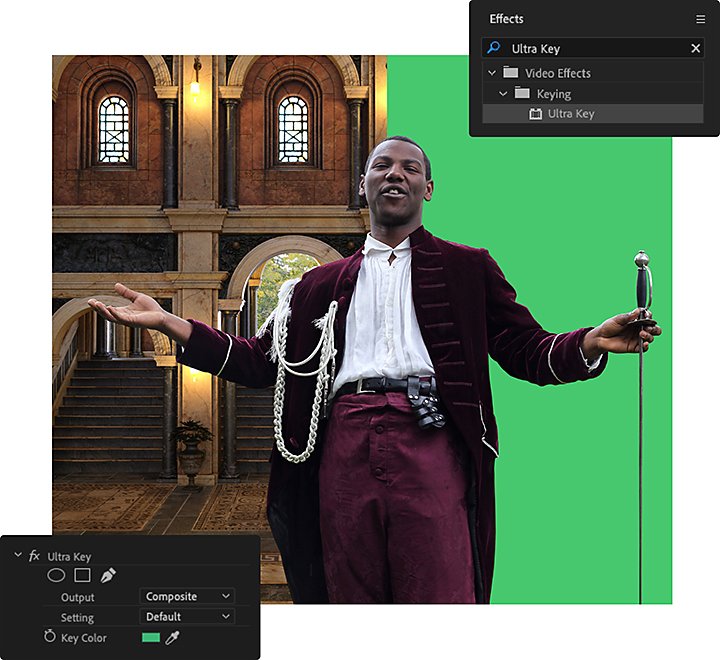
Try using one of the video clips, templates, or stock green screen videos in the Adobe Stock library to learn. Then, follow these steps:
1. Drop the Ultra Key effect onto your green screen clip in the timeline. Your green-screened clip should sit above the track with the background element. You can make additional tracks in Premiere Pro by right-clicking on your editing timeline and selecting Add Video Track, but the timeline usually has three in place to start, so you don’t usually need to worry about this.
2. With your clip selected in the timeline, choose the Effect Controls panel in the Source window.
3. Locate and select the Eyedropper tool in Effect Controls and click the green key color in your clip on the Program Monitor.
4. Then, drop the background image or effect into the V1 track and line up the clip lengths.
5. Add in the necessary blur effects and use Lumetri Color to match the color palette of the two clips.
Replace a smaller object with Ultra Key.
Editors can use Ultra Key to replace smaller areas of the frame, rather than the entire background. Follow the tutorial steps above, but then adjust or scale your background using the Scale setting in the Effect Controls window. Blur effects are especially useful here, as a smaller object might stick out more if not properly integrated into the “real” scenery.
Adjust for effect.
When using Ultra Key, you might need to fine-tune your adjustments in the settings. One of the most common settings to adjust is the Matte Cleanup menu option underneath Ultra Key in the Effect Controls panel. Adjust the Soften setting in this menu to clear up rough-looking edges that might look odd with the green screen.
Experimentation is key.
When it comes to special effects, a quality mixture of costuming, clever camera work, editing, and green screen is essential. If you rely solely on green screen, it can give your film an air of artificiality. On the other side of the coin, if your practical effects aren’t believable, they can look worse than a green screen. The goal is synthesis. You want to incorporate as many different camera tricks, physical terrain and scenery, and different forms of special effects as possible to build convincing depth into your footage.
“The more effects you add of different types, the more believable each individual effect is because the human mind can only process so much information,” says Bernstein. “The quality of individual provisions are crucial to the believability of an image.”
When you work on your film projects, create a variety of different effects and blend them with the cinematography, sound design, and editing to create a seamless and entrancing combination of techniques that we call movie magic. Premiere Pro makes this possible — start exploring how.
Contributor
Do more with Adobe Premiere Pro.
Make visually stunning videos virtually anywhere — for film, TV, and web.
You might also be interested in…
Learn about the dynamic range of your camera and how to manipulate it to create the images you want.
See how this technique can help bring a stylized and evocative effect to your work.
How to add video transitions to your film.
Learn how to add transitions to your video in Adobe Premiere Pro.
Introduction to video editing.
Learn the principles of video editing and practical tips for both big and small screens.
Get Adobe Premiere Pro
Create flawless productions with the industry-leading video editing software.
7 days free, then NIS 81.00/mo.
