Explore the undersea world of dolphin drawings.
Understand the features and shape of the dolphin so you can create your own sleek, wise swimmers with this step-by-step drawing tutorial.
Breach the surface of dolphin drawing.
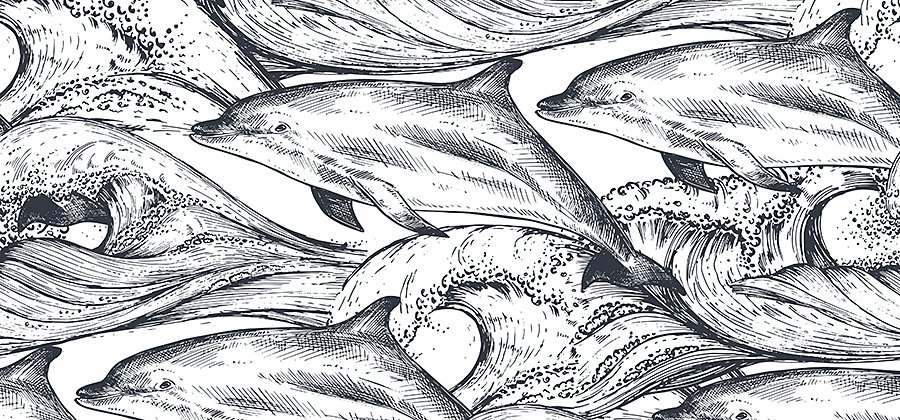
Everyone’s favorite small-toothed cetacean, the dolphin, can be a fun challenge to draw. How do you capture the elegance and personality of these creatures with just a few lines? From the dolphin’s head to its tail, learn to draw the grin of a bottlenose dolphin or capture the majesty of the killer whale, the largest member of the family, with these tips.
How to draw dolphins.
Gather reference images to help you get the details right for the specific species of dolphin you want to draw. Then, follow the first set of step-by-step instructions to use that reference to draw a cartoon dolphin, or follow the second set to sketch a realistic dolphin.
Cartoon dolphin drawing lesson.
Learn how artist Chioma Iloegbunam draws a cartoon dolphin in five simple steps.
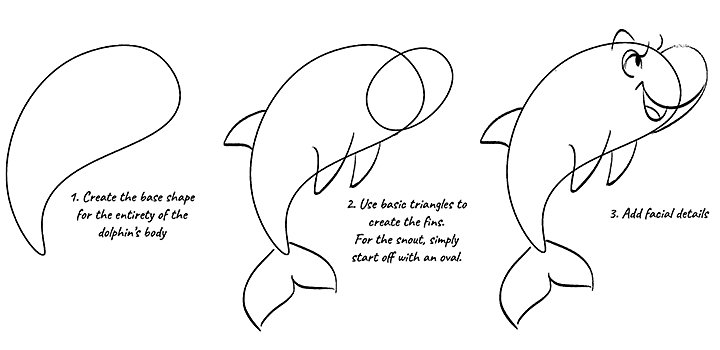
Image by Chioma Iloegbunam
1. Start with the base shape.
“Dolphins have this very elongated, but tapered, banana-like shape,” Iloegbunam says.
2. Add to the base shape with fins and snout.
“Their fins are all triangular shapes, and the snouts are typically rounded, so draw an oval shape for the front of the face, especially if you’re going for a more cartoony look,” Iloegbunam says.
3. Add a small circle for the eye and some curving lines for the mouth and tongue.
Real dolphins have eyelids, but cartoon dolphins also get to have pretty eyelashes.
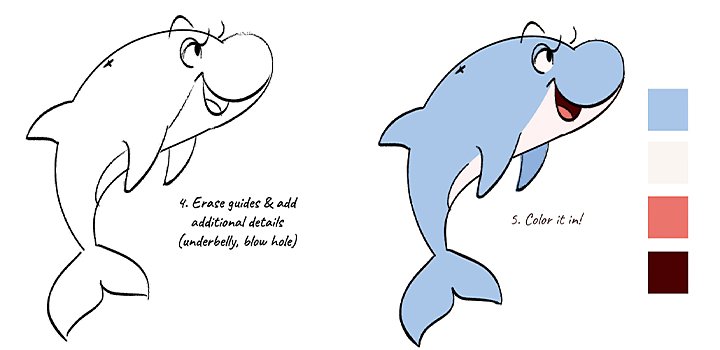
Image by Chioma Iloegbunam
4. Erase your guidelines (or hide that layer if you’re drawing digitally).
Add the blowhole, which is near the dorsal fin in the back, and draw lines from the corners of the mouth down for the underbelly.
5. Color it in.
Keep it simple. With just four colors, Iloegbunam creates a dolphin with a lot of personality.
Realistic dolphin drawing lesson.
Artist Spencer Nugent offers these helpful instructions for drawing a dolphin,as well as some general artistic wisdom.
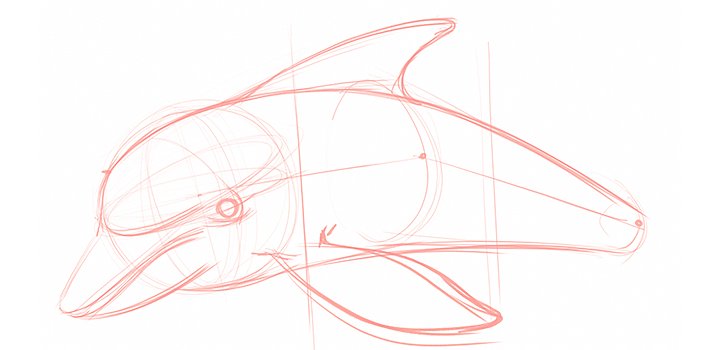
Image by Spencer Nugent
1. Break the subject down into simple shapes.
“Looking at the dolphin’s forehead, I see a ball or sphere. Looking at the body, I see a tapered cylinder that is curving,” Nugent says. First draw a circle for the head, and divide that circle vertically and horizontally. Nugent also recommends sketching a quick profile view of the dolphin on the same page for reference. “The first sketches are usually very rough and unsure because you’re essentially communicating with yourself, and that’s okay,” he says.
2. Refine the body shape.
Draw curves over the cylinder lines to represent the curvature of the dolphin’s body. Then draw an ellipse around the center of your sphere. “This gives me a line where I can start to draw the mouth of the dolphin,” Nugent says. Let the mouth line overlap the body to give the dolphin a bit of dimension, and note how the head isn’t an exact sphere. Flatten it a little about three-fourths of the way up. Place the eye at the corner of the mouth, adding a small curve under it to show that there’s volume there.
3. Add fins.
The pectoral fins sit about a third of the way back from the head. This fin is just two opposite curves, but look at your reference images to see how to make the small indentation on the back of the fin. Add the dorsal fin on the top, continuing up the curve of the back.
Again, check your reference image to get the shape right. “Draw from observation so that you can draw from your imagination,” Nugent says. “When you draw from your observation, you’re storing symbols and ideas in your head.” For the dolphin’s horizontal tailfin, draw a line that, in perspective, is 90 degrees to the central axis. This will help you get the angle right for the curve of the tail.
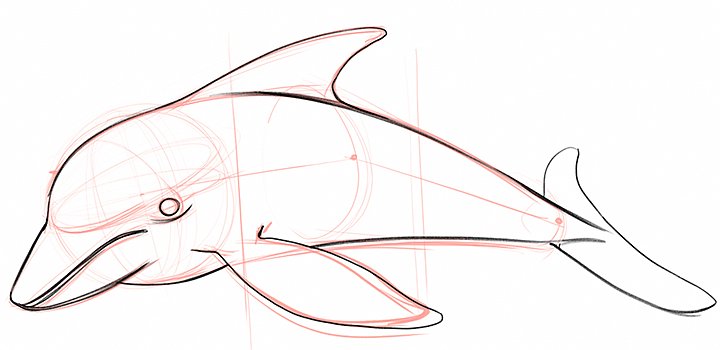
Image by Spencer Nugent
4. Refine your sketch.
If you’re drawing digitally, redraw on a new layer. “When I do an overlay, I try not to trace,” Nugent says. “I draw new, deliberate lines quickly, because the speed with which you draw your lines is going to convey a certain element of excitement.”
5. Make it 3D.
“To give it three-dimensionality, I need to add value, color, and texture,” Nugent says. If you’re using Adobe Fresco, you can select an airbrush for the base tone, and then go over the area again with a smaller brush to create more shadow. “Areas that are left unshaded will look like rim light or reflected light on the object,” Nugent says. “As a sketcher, my goal is not necessarily to achieve hyperrealism but to translate the complexity that we see all around us into symbols that are understood and accepted.” You might add pencil shading, cross hatching, or other details that give your dolphin the appearance of volume and weight.
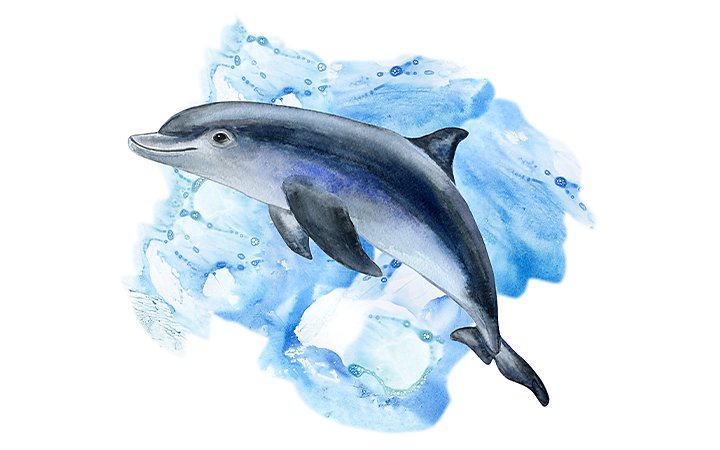
Explore an ocean of possibility with Fresco.
In addition to the convenience of using layers and opacity adjustments (and never having to use an eraser), Fresco gives you live brushes that look and behave like real paint. Experiment with Fresco to render your dolphin in oil paint or watercolor. Then try your hand at some other sea creatures, like fish or sharks. Or step onto land and paint a person or a horse.
Contributors
You might also be interested in…
Exploring watercolor techniques.
Capture the flowing brush strokes and rich texture of watercolors with these tips.
Get an introduction to the illustration style of Japanese comics.
How to become a professional illustrator.
Get tips on portfolio creation and art presentation to help you kick off a new career.


