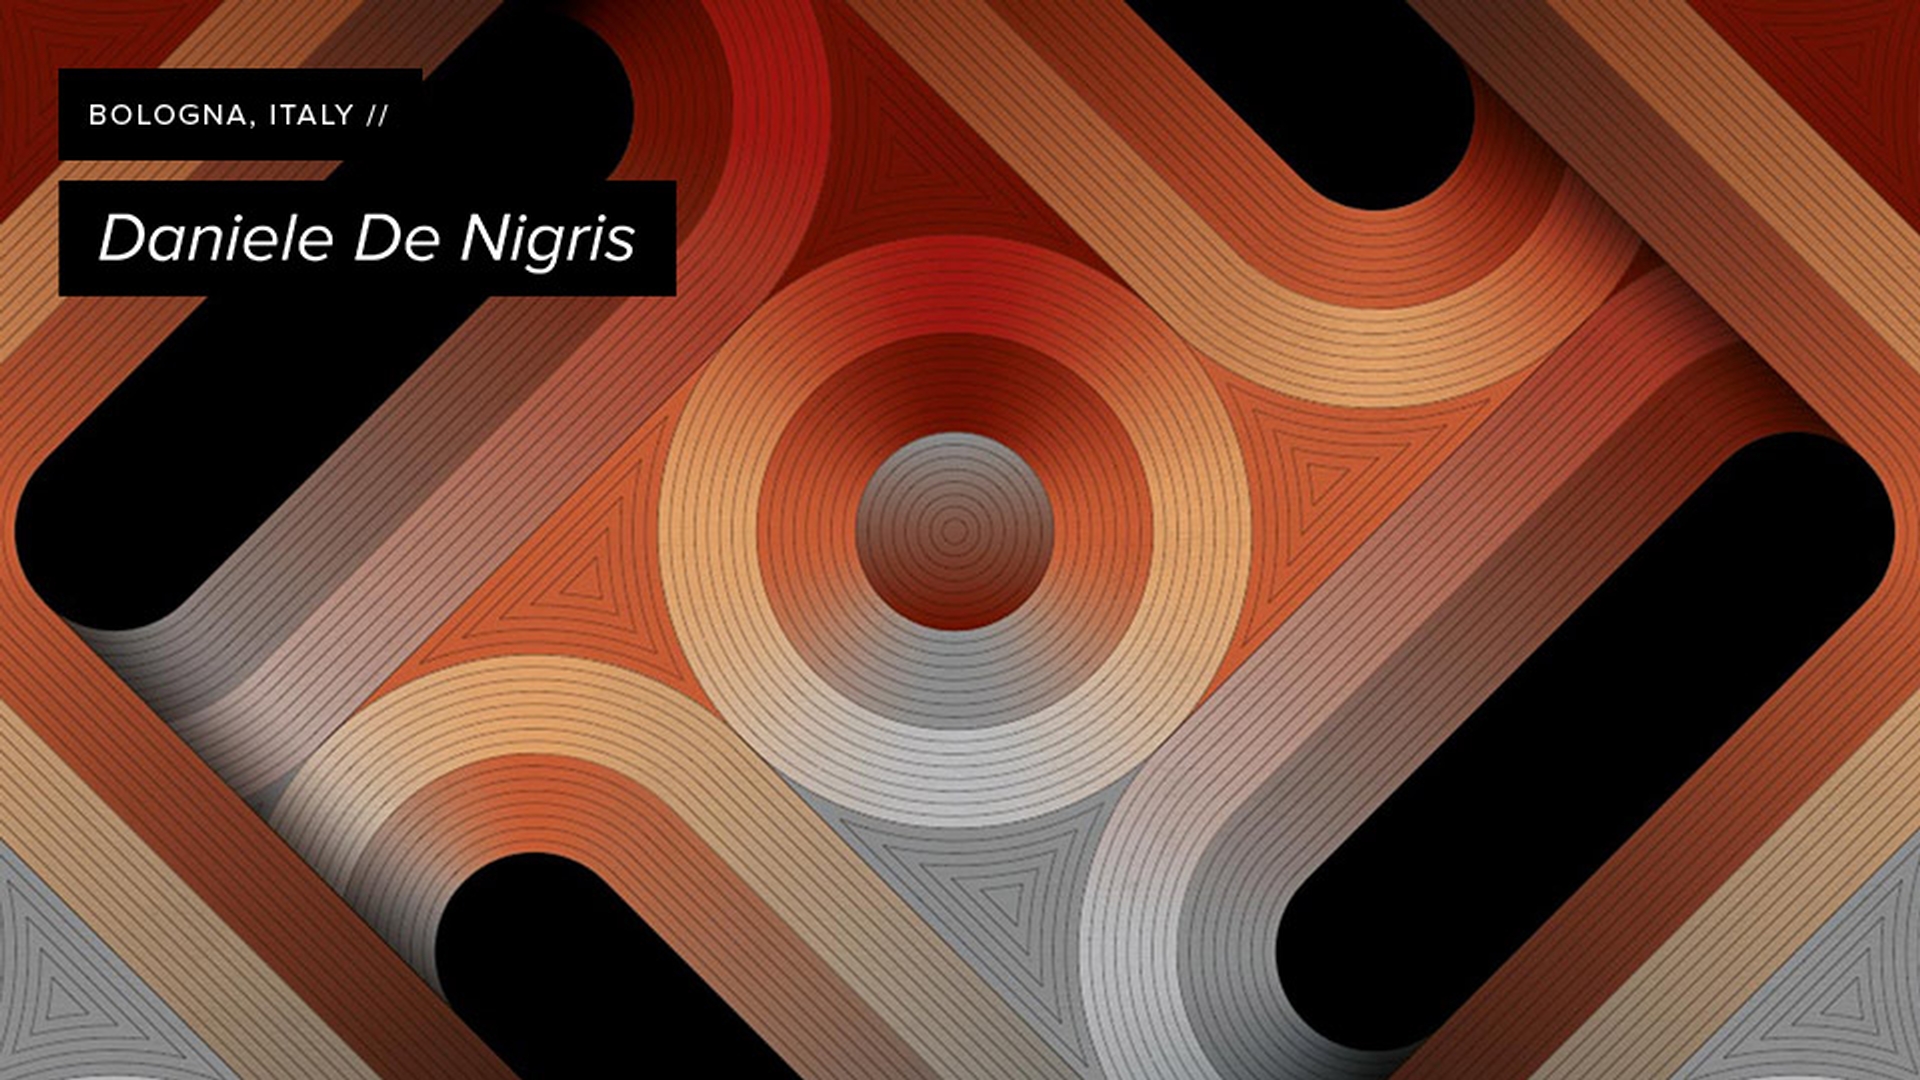
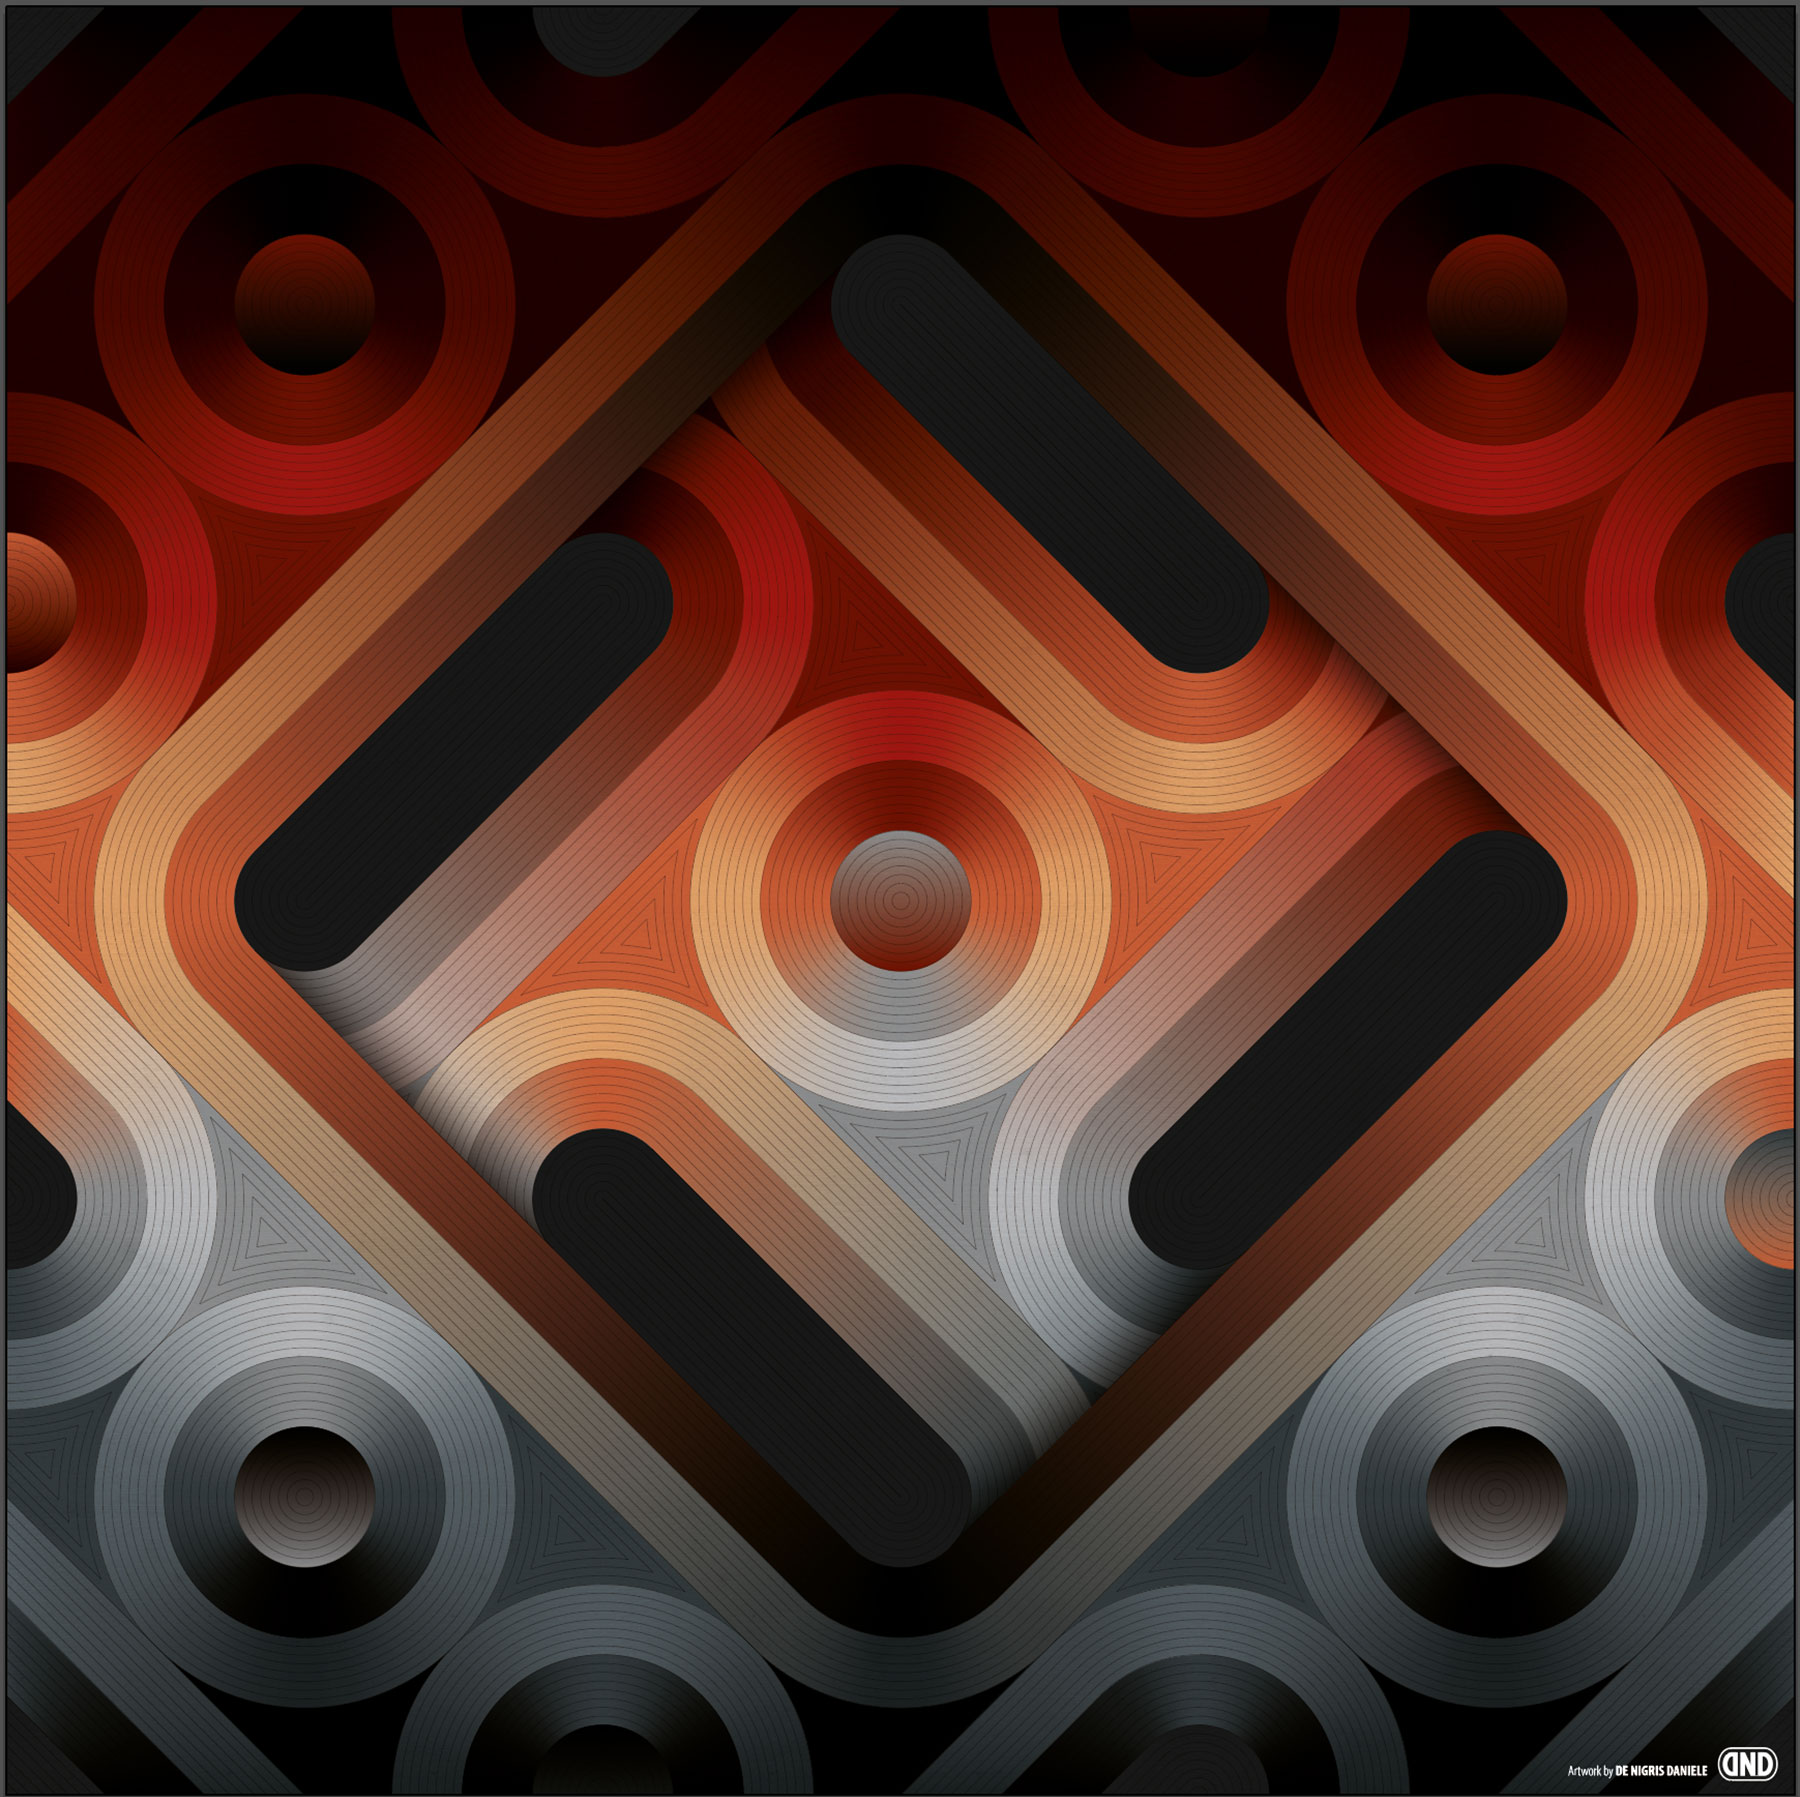
How Daniele De Nigris created “3/4 Decorative”
1 Design the base pattern
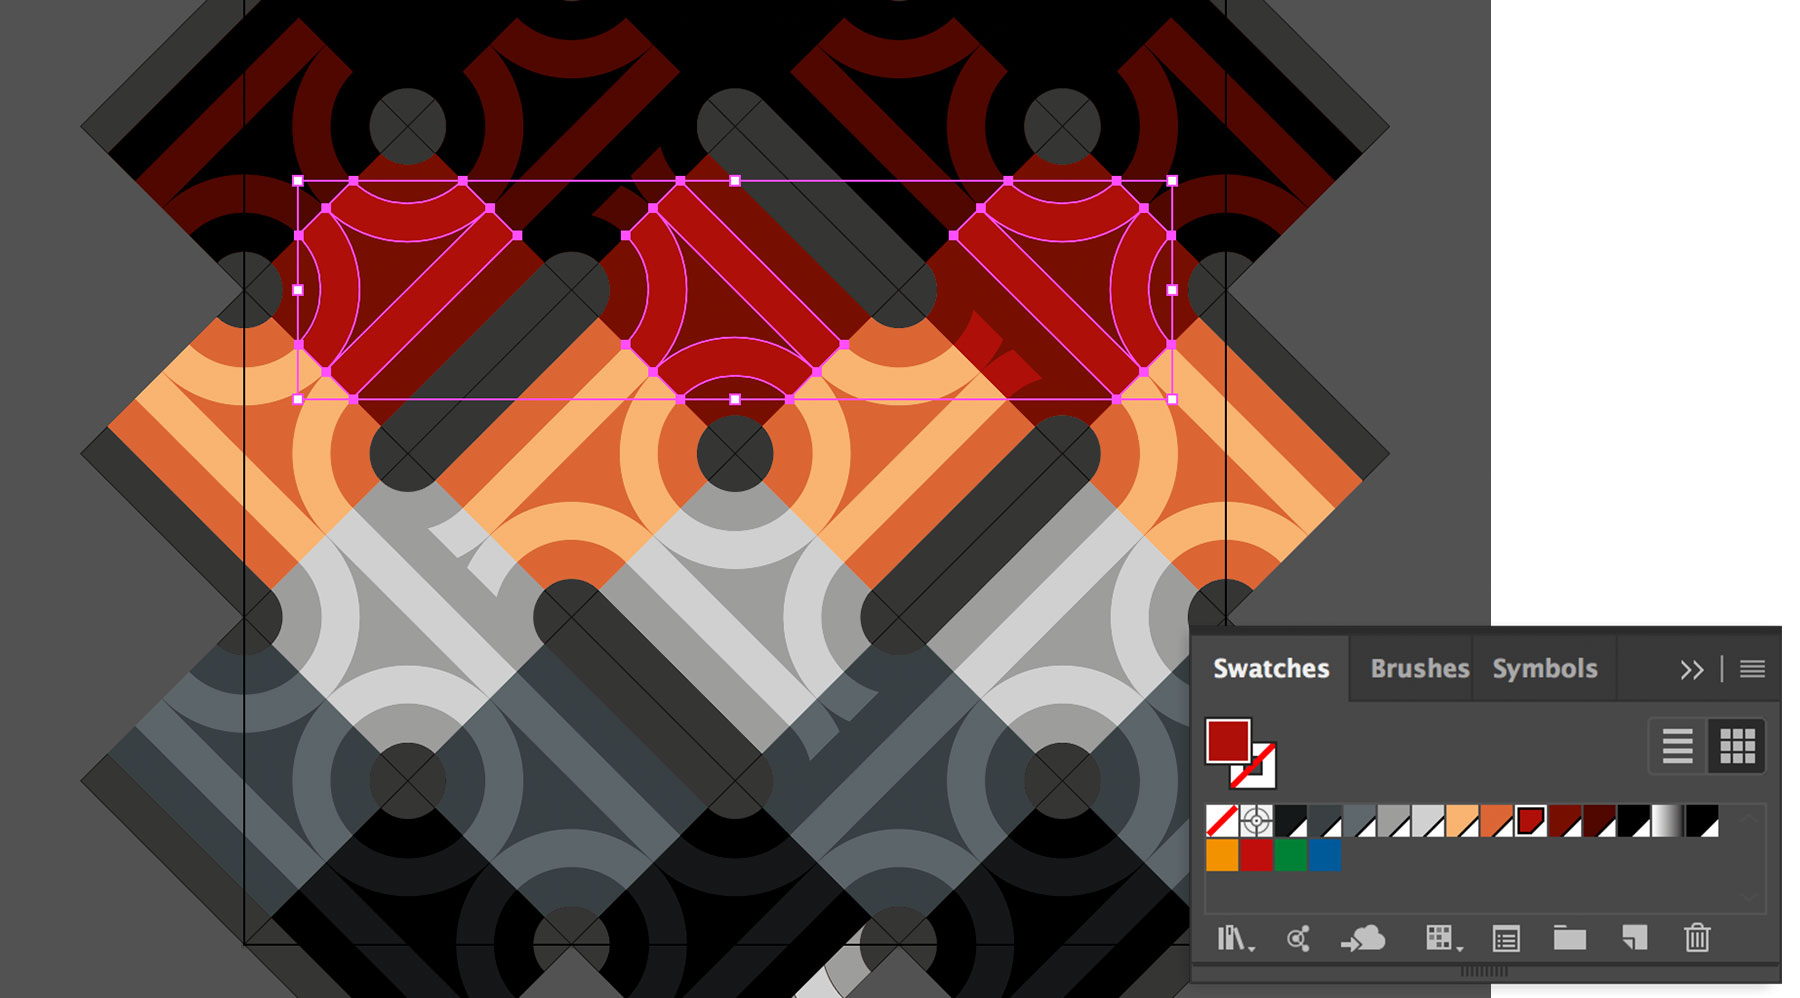
Daniele creates a square tile that includes points of engagement on three of the four sides — hence the “3/4” title of the piece. The foundation of Daniele’s design is this square pattern he repeats and rotates throughout the composition.
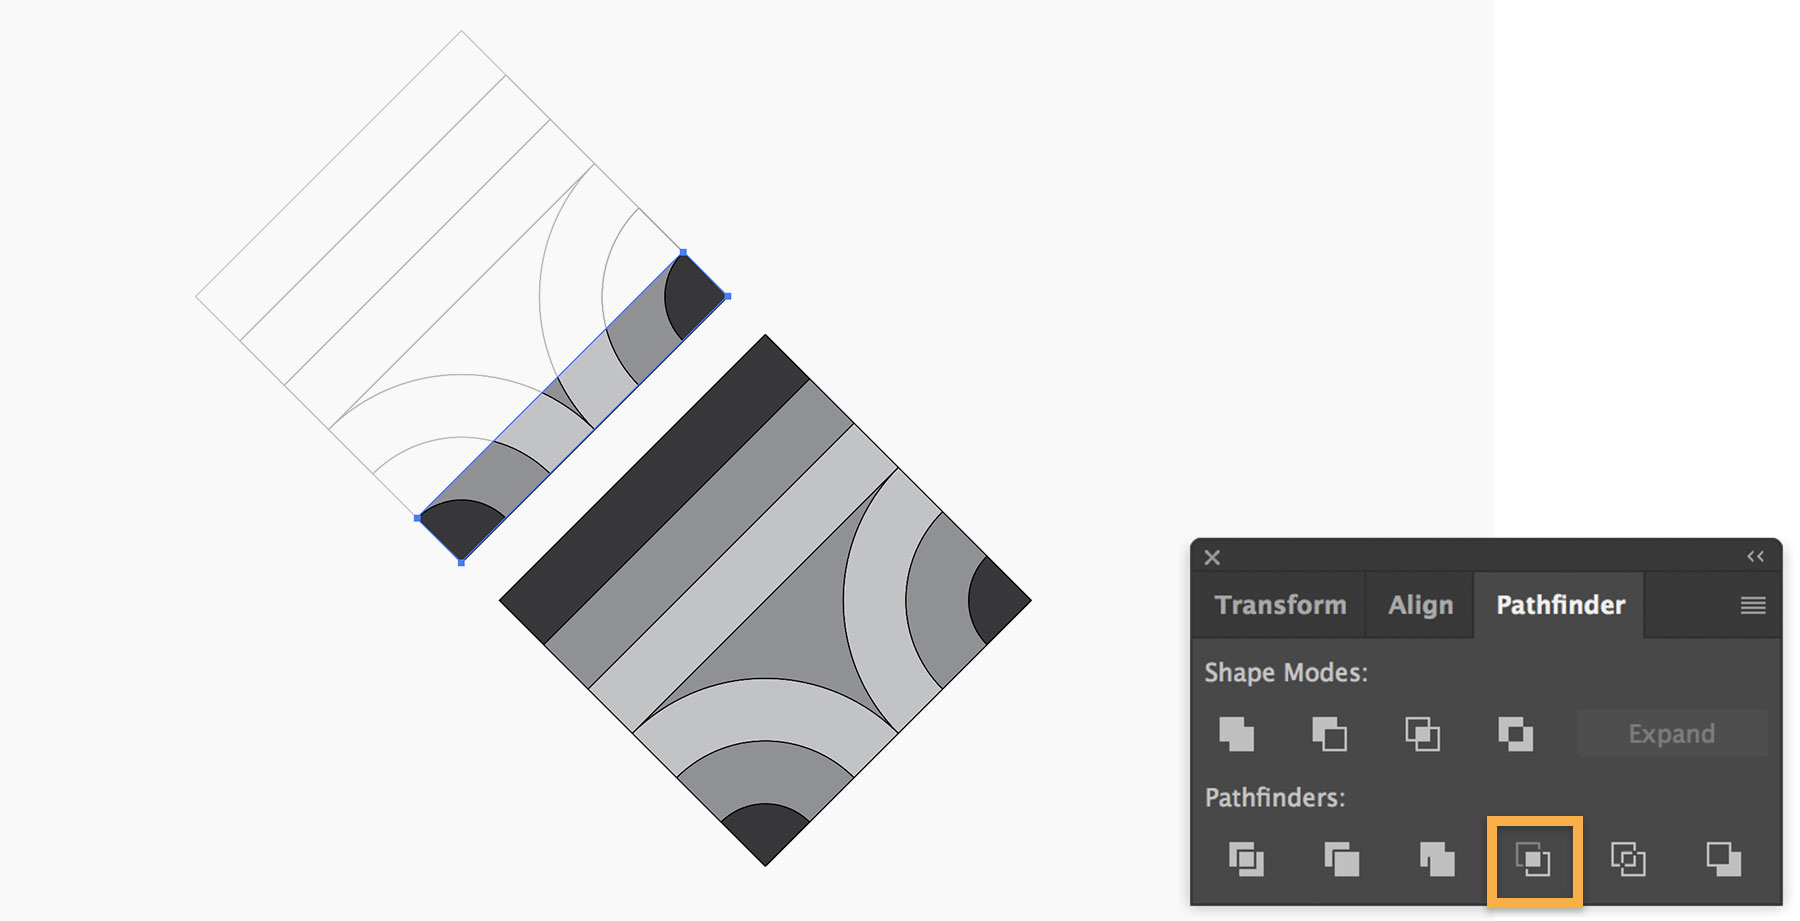
Daniele uses basic shapes — a rotated square containing concentric ellipses and lines — to form the base pattern. He then uses the Divide function in the Pathfinder tool to trim the concentric circle pattern that falls outside the square.
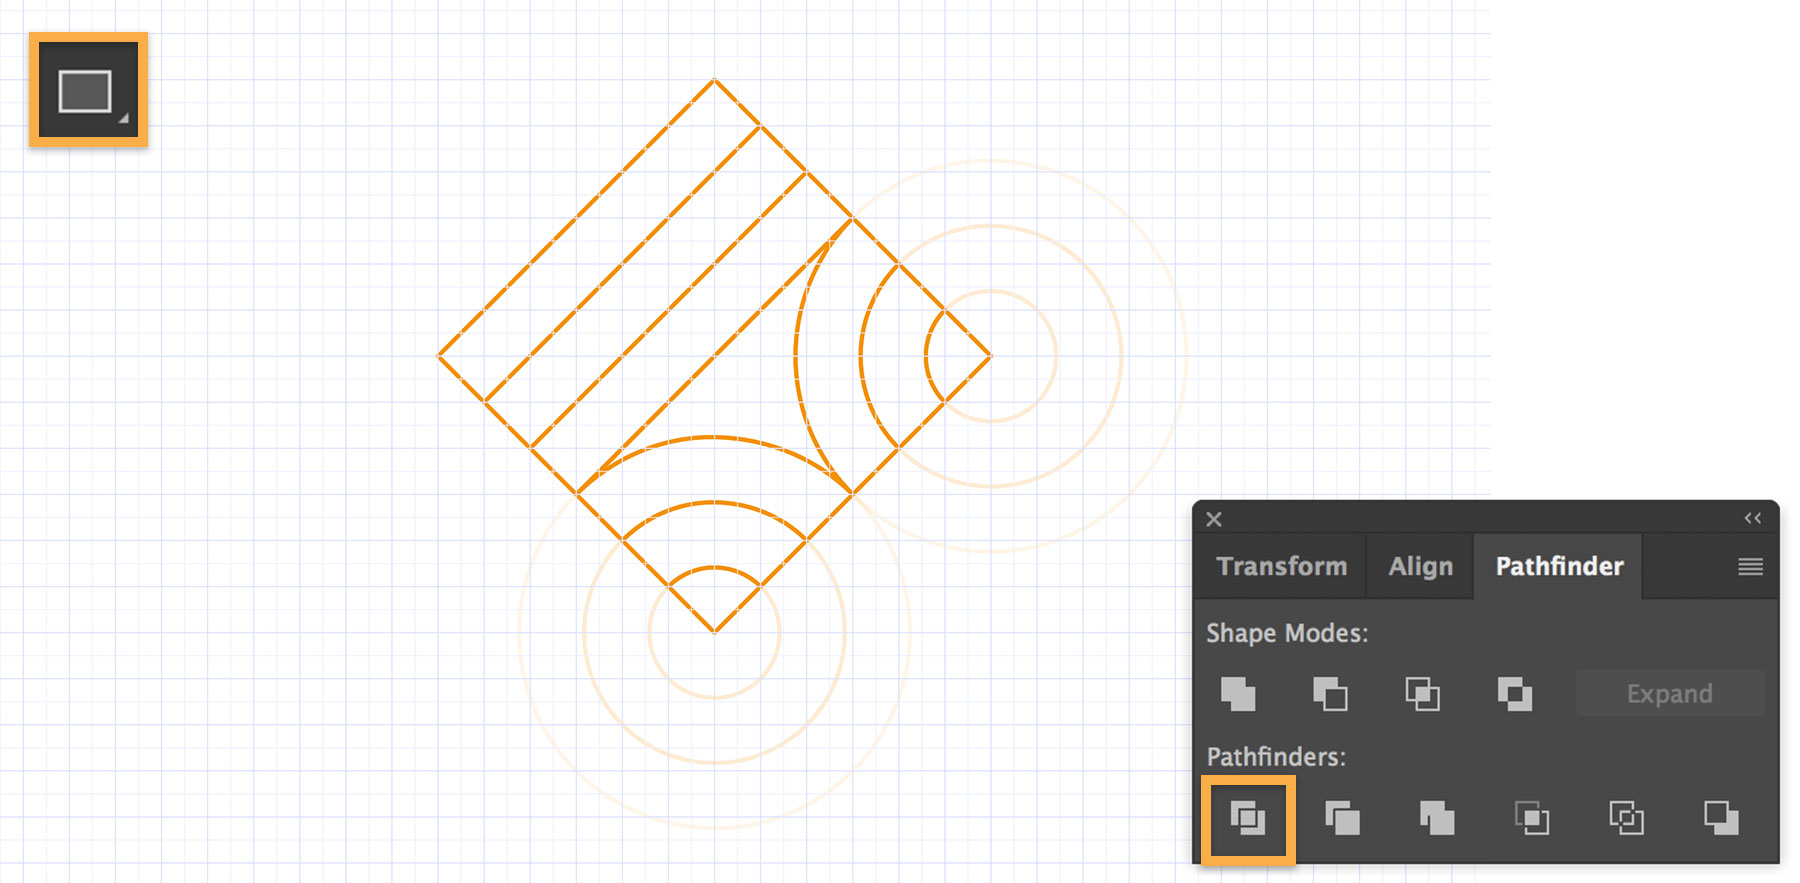
Daniele adds grayscale fills to distinguish parts of the pattern. He then creates a cross section of the base tile to connect larger sections of the pattern later in the project. To do this, he duplicates an empty rectangle from the top left of the tile, brings it to the front, and uses it to cover the bottom right side of the base pattern. Then, he uses the Crop function in the Pathfinder tool to create a portion of the main pattern. He hides this extra layer until he needs it.
2 Rotate and repeat to create a tiled effect
Daniele is now ready to create the larger pattern. He duplicates the original square pattern and rotates it -90 degrees. He repeats this process until there are four tiles to complete the internal square pattern.
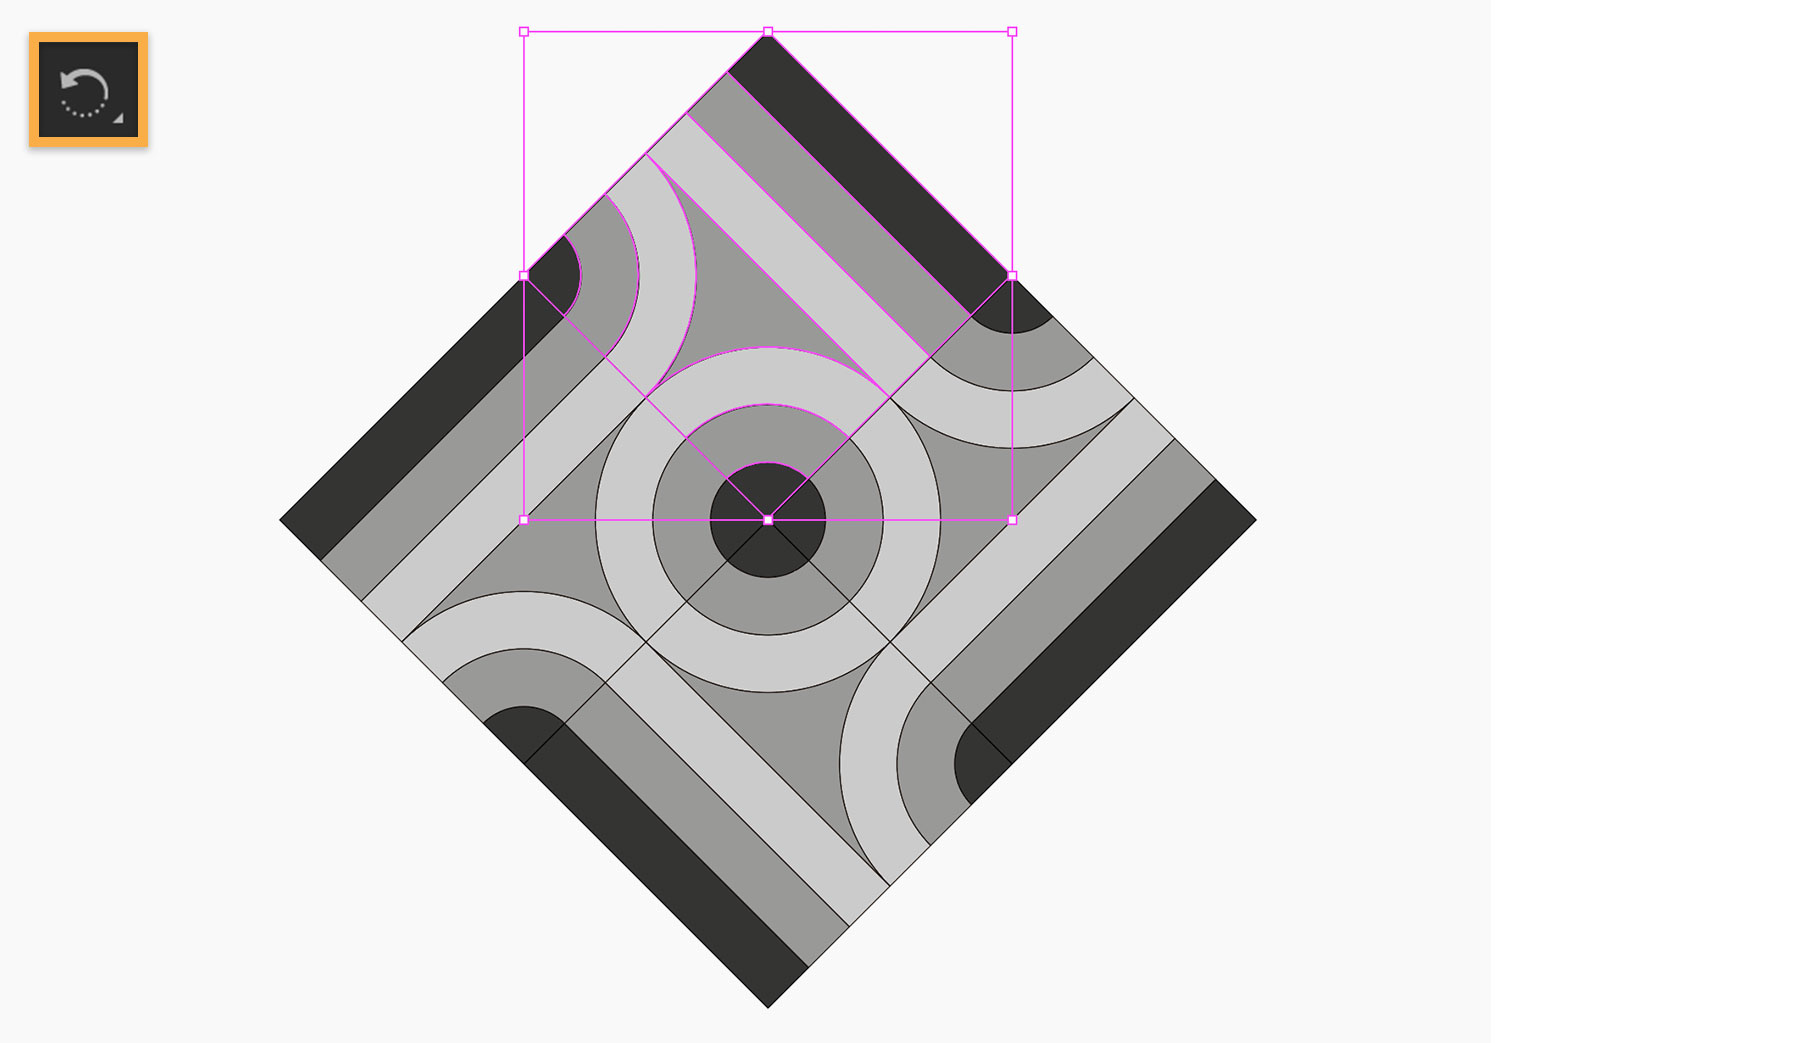
Daniele repeats the four-square pattern so it extends off the canvas. Then, he copies the cross-section layer, the portion of the main pattern he created earlier, and places it so it connects the internal four-square section to the layout just outside the area. To finish the layout, Daniele copies the connecting layer and rotates it for the remaining three corners.

3 Color the pattern
Daniele creates a palette of custom color swatches that he uses across multiple projects. Once he adds color, Daniele removes the black outlines from all the shapes.
4 Simulate dimension with gradient blends
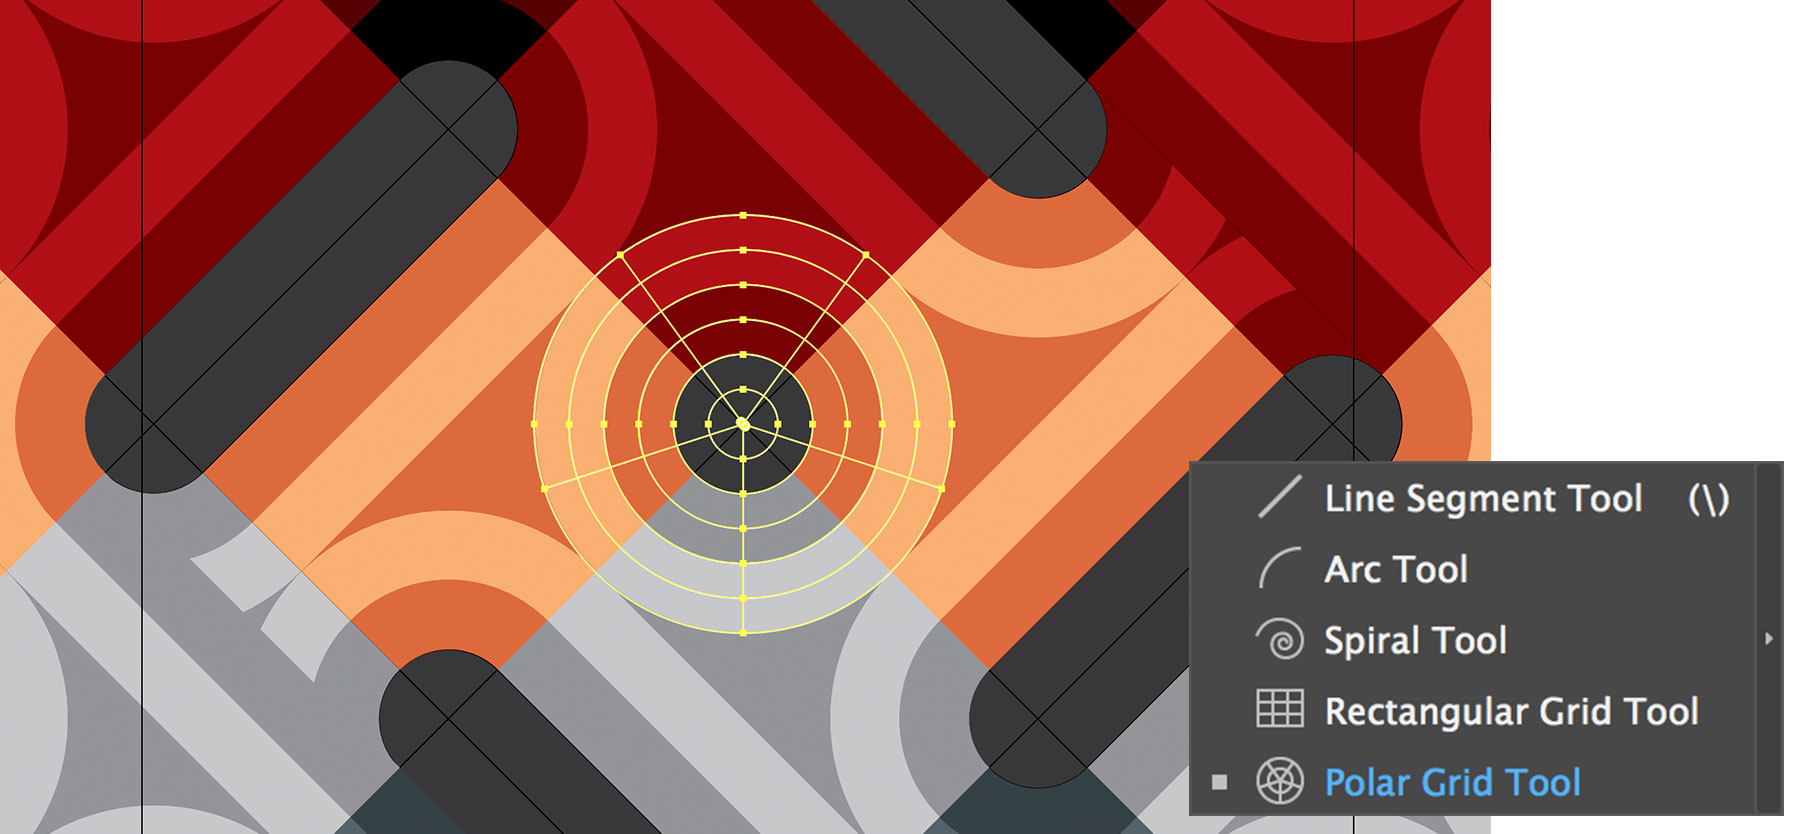
Daniele uses a system of applying gradients to individual path segments that combine to form the illusion of depth. It’s a multistep process. To begin, he creates a new layer and quickly creates concentric circles with the Polar Grid tool.
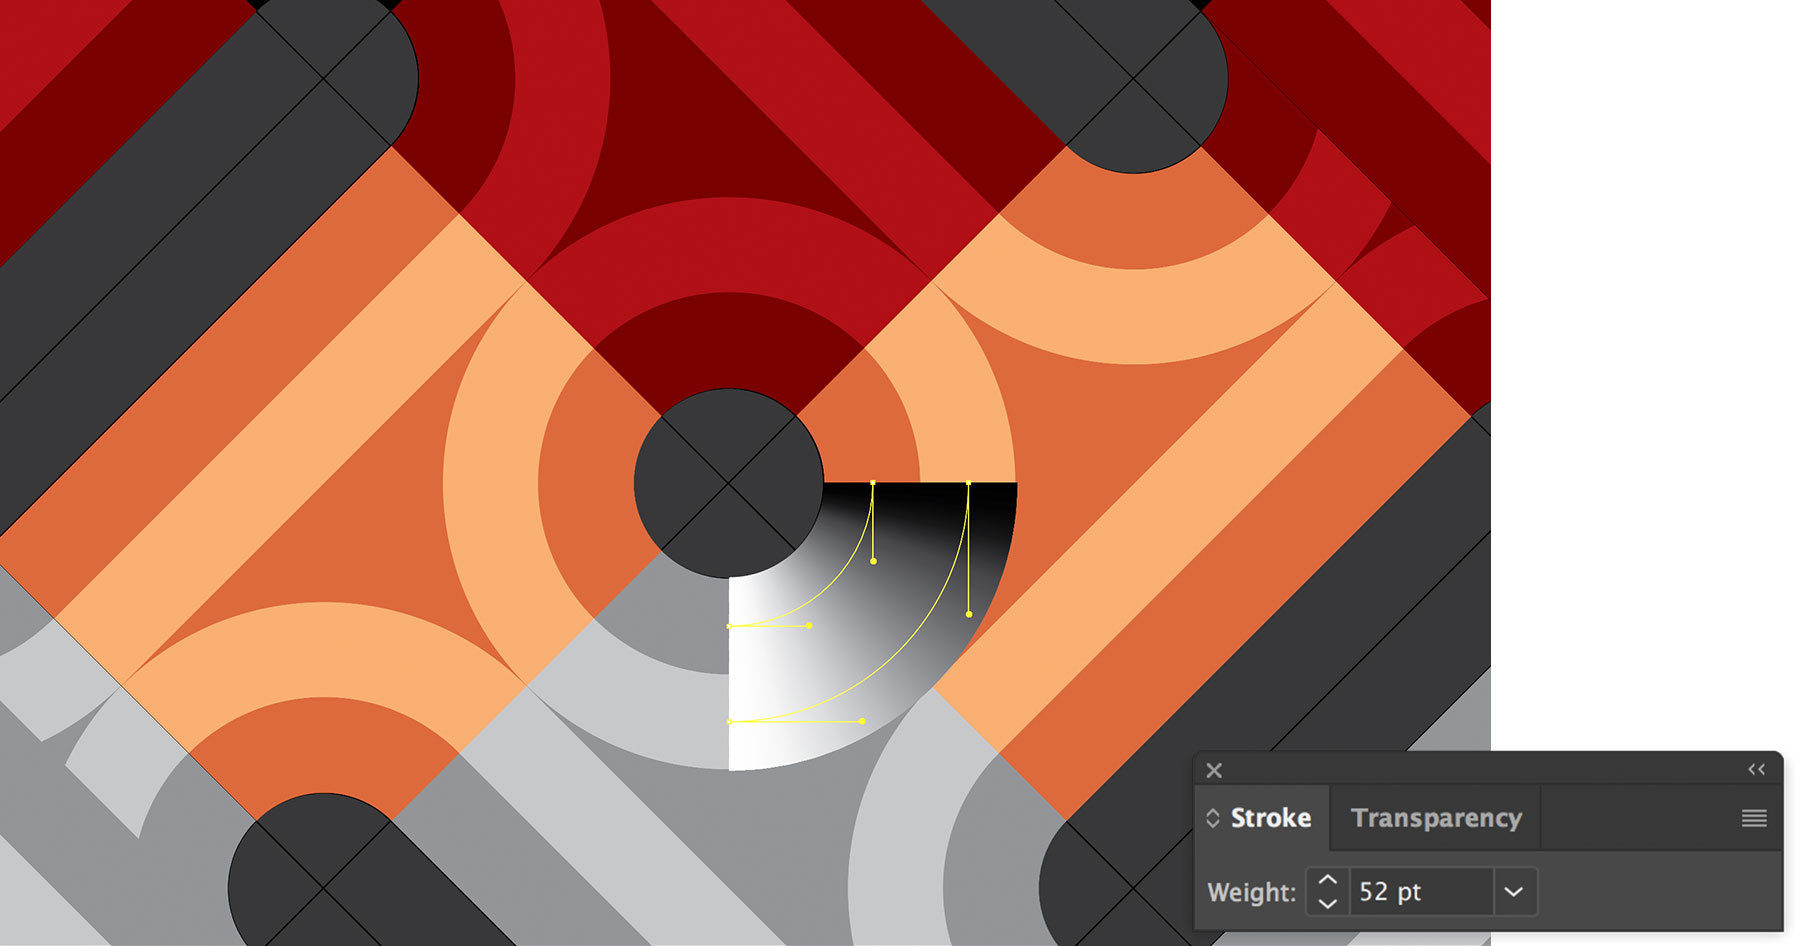
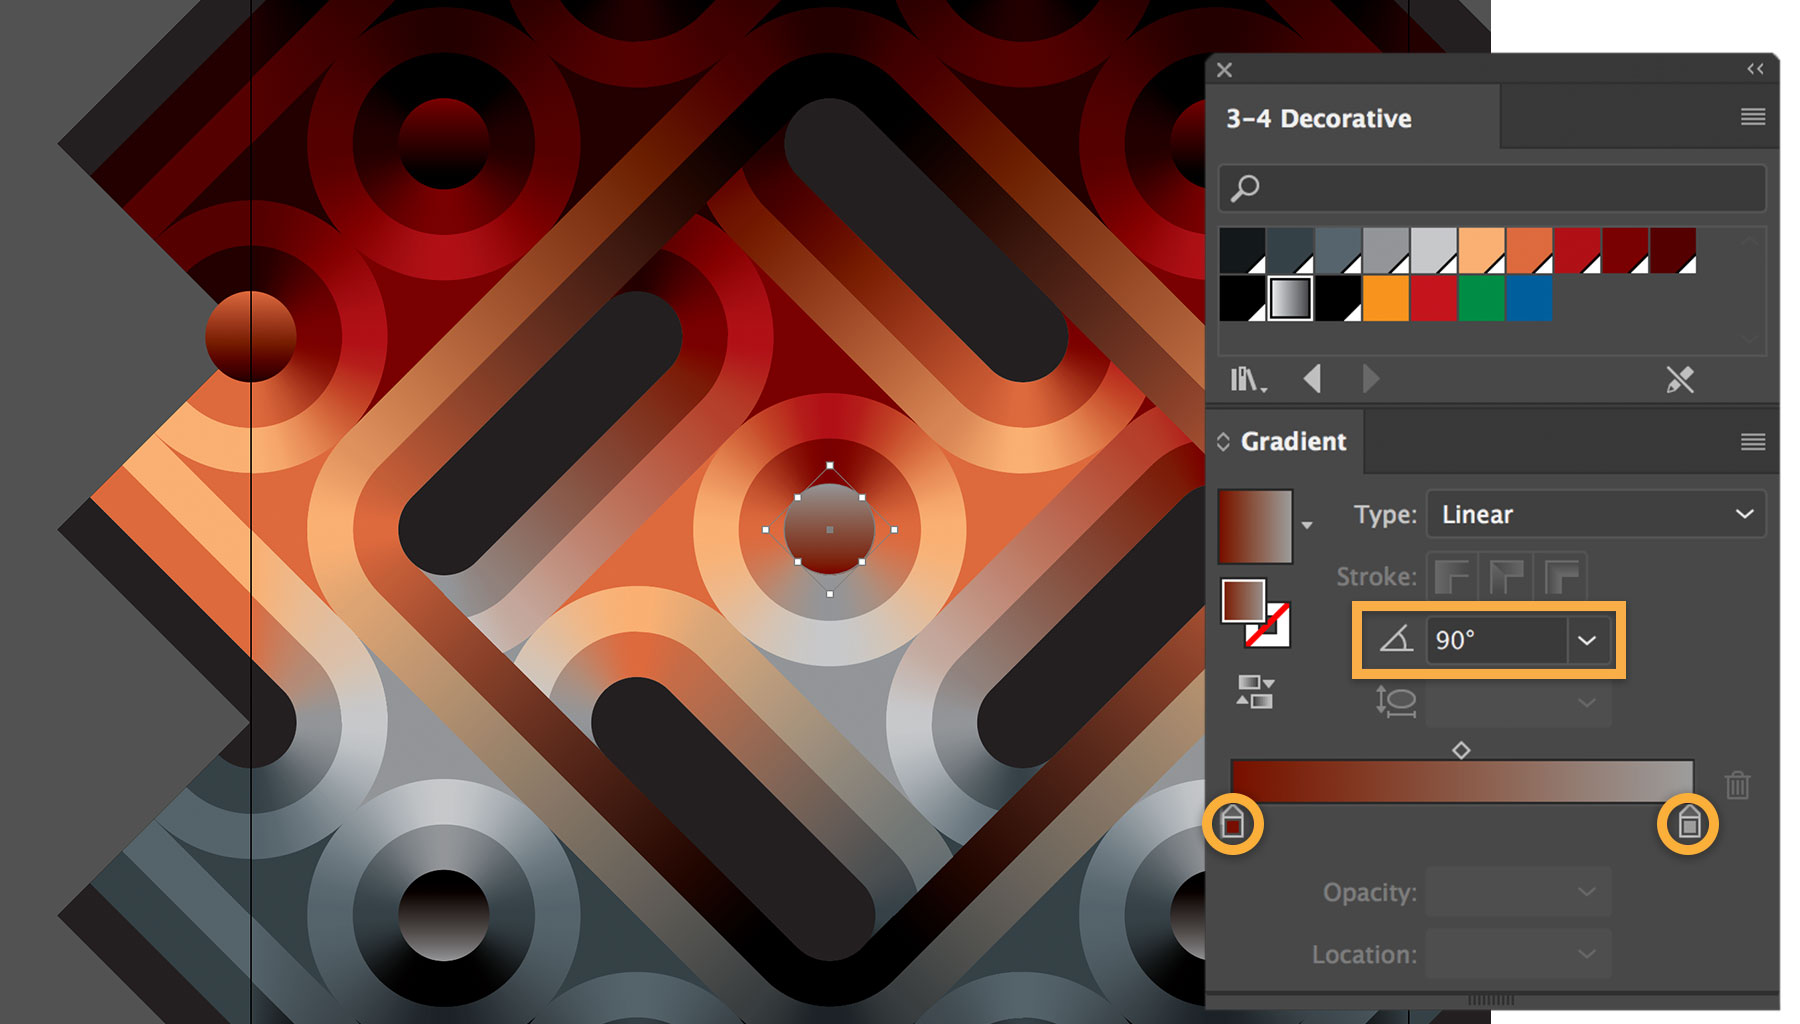
He eliminates all but the two arcs that bisect the colored part of the circle using the Divide function in the Pathfinder tool. Then, he changes the stroke color of those lines from the default, white, to a linear gradient with no fill. To create a smooth gradient, he sets the Location of the start of the gradient, white, to 1% (not 0%) and the end, black, to 99% (not 100%).

He increases the stroke weight to 52 points, so it fills the space between the two arcs and creates a smooth gradient.
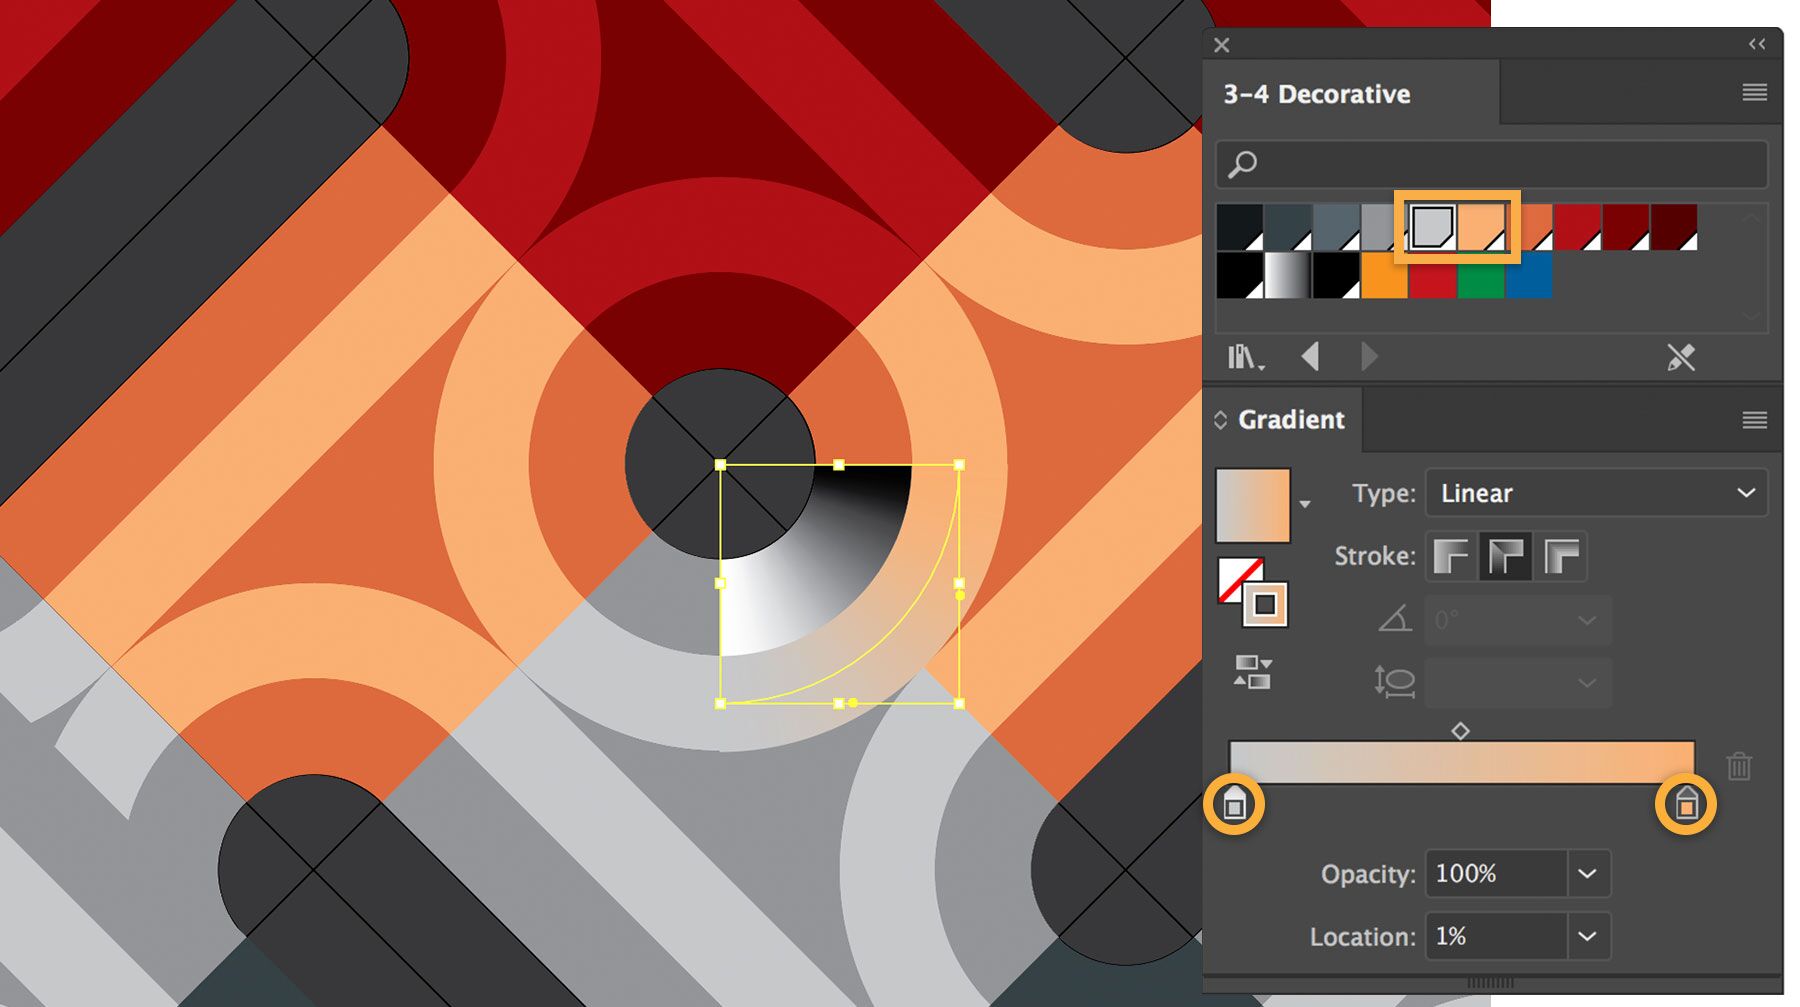
To blend the gradient, Daniele selects the color at the start and endpoint of each arc to create the gradient. He repeats this for the second arc.
He then reflects the two arcs vertically to create the other quarter circle, and repeats the process to add a gradient to the top half of the circle.
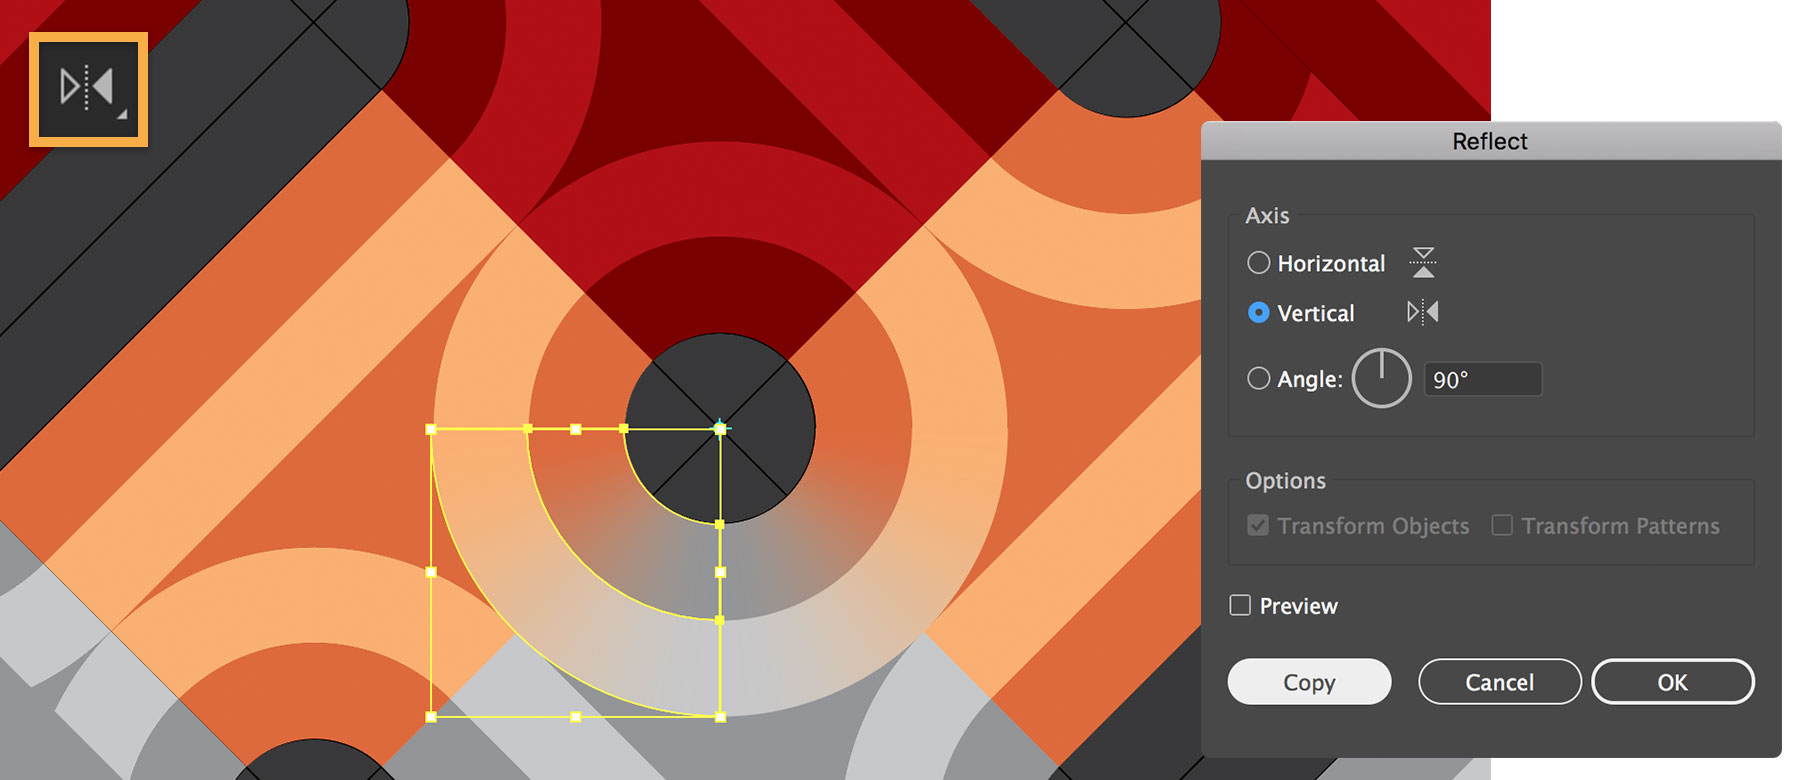
Daniele shades half the circles and then reflects them to fill in the other half of the pattern. He repeats the process on the curves of the long edges.

5 Add black holes for contrast and illusion
Daniele creates striking contrast when he fills portions of the design with black. To do this, he selects the elongated ovals, copies and pastes them to the top layer, deletes the original ovals, and colors the new ones black.

To create the illusion of depth, Daniele sets the circle at the center of the pattern with a gradient fill and no stroke. He replaces the black to white endpoint colors of the gradient with colors from the top and bottom of the circle, then reverses it to give the impression of depth. He repeats this for the rest of the circles in the pattern.
6 Make it 3D
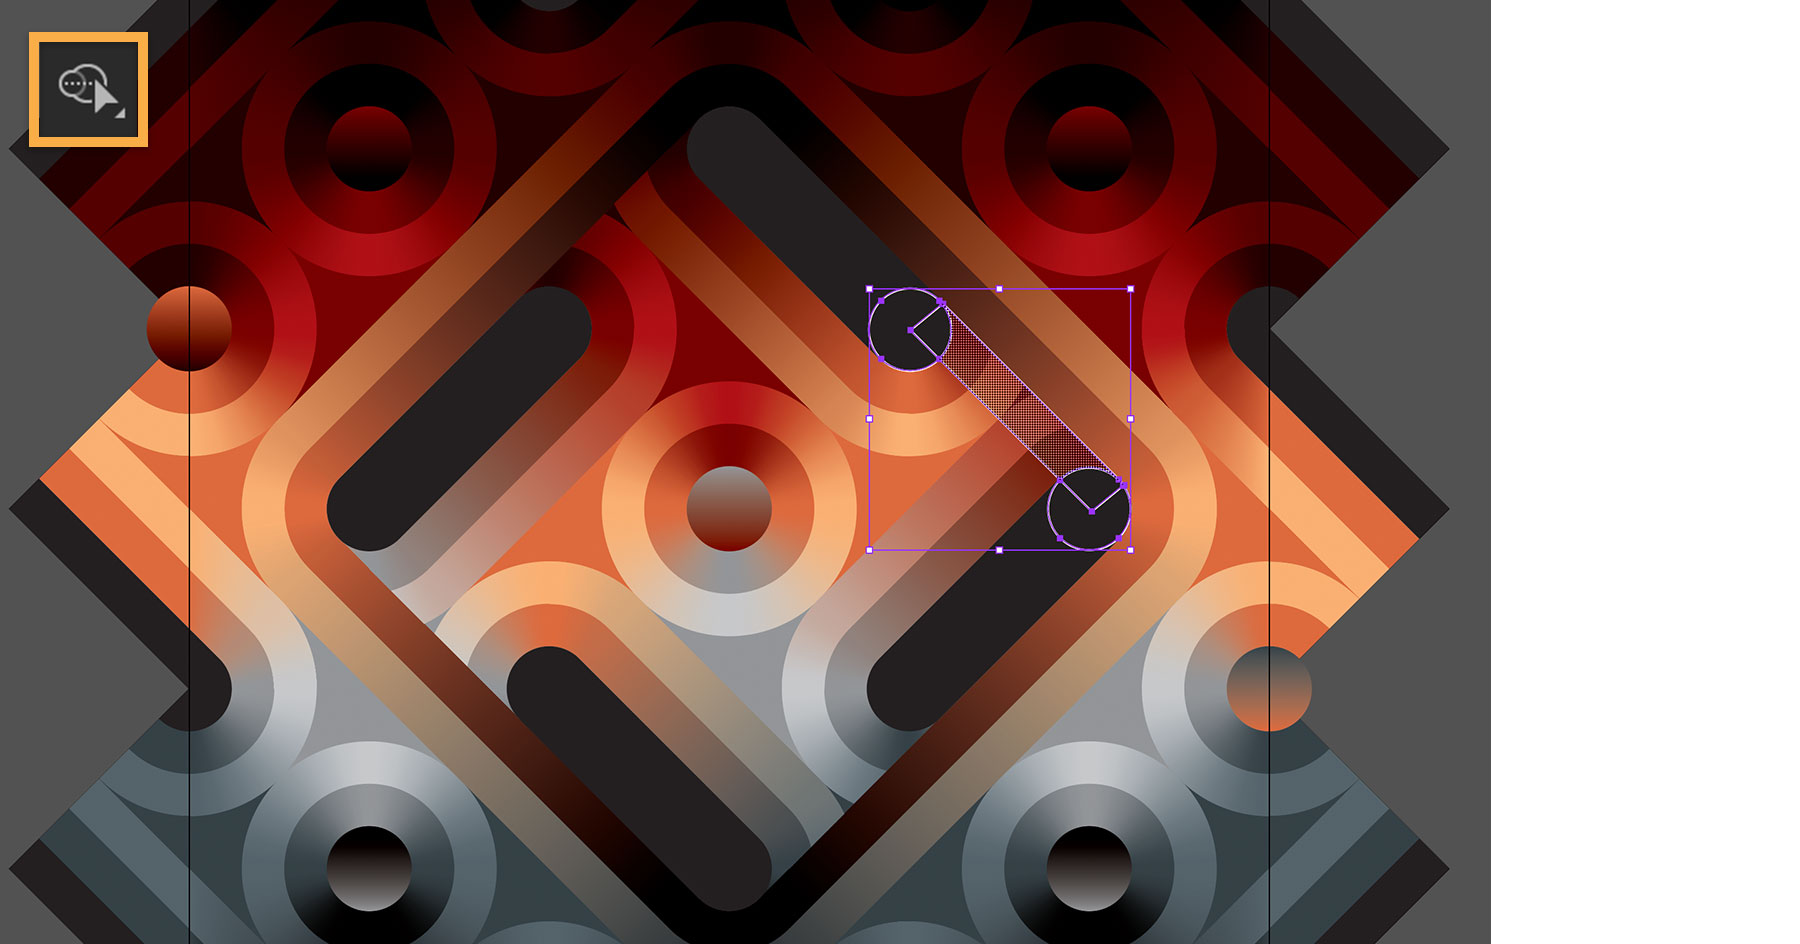
Daniele uses shadows to make the design appear three-dimensional. He draws two circles and overlaps them with a rectangle that intersects the center of the circles at a 45-degree angle. He uses the Shape Builder tool to select, or keep, the middle portion of the rectangle (the shaded area below), and deletes the remaining pieces.
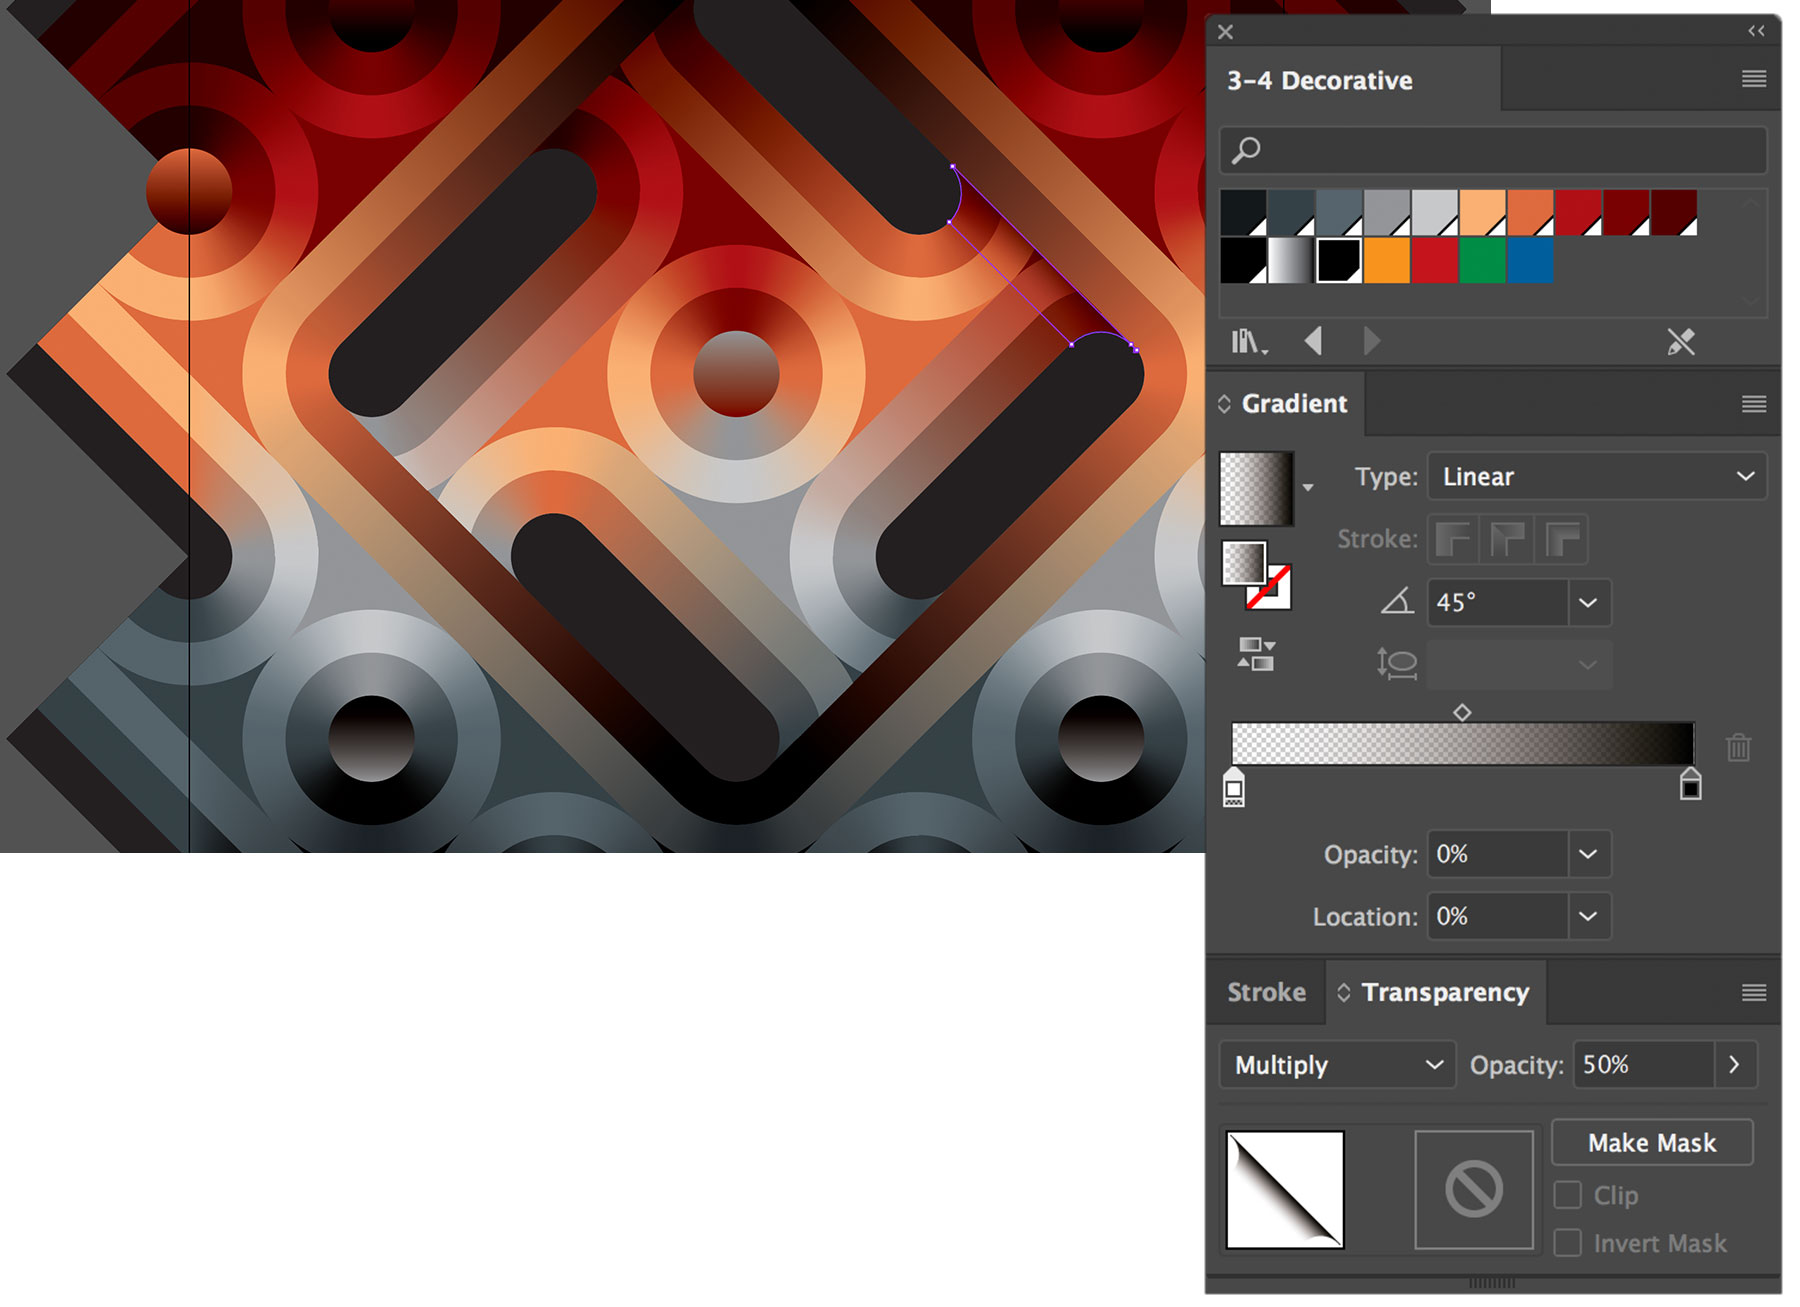
With the shape selected, Daniele colors it with a gradient set to black — 100% opacity at one end and 0% opacity at the other — set with a 45-degree angle. For the complete effect, he sets the Transparency setting to Multiply and 50% Opacity.
7 Add lines and texture
Daniele uses the Blend and Shape Builder tools to add concentric lines and circles, then adds a scanned paper texture to finish the piece.
Follow Daniele De Nigris
Map data:
Google