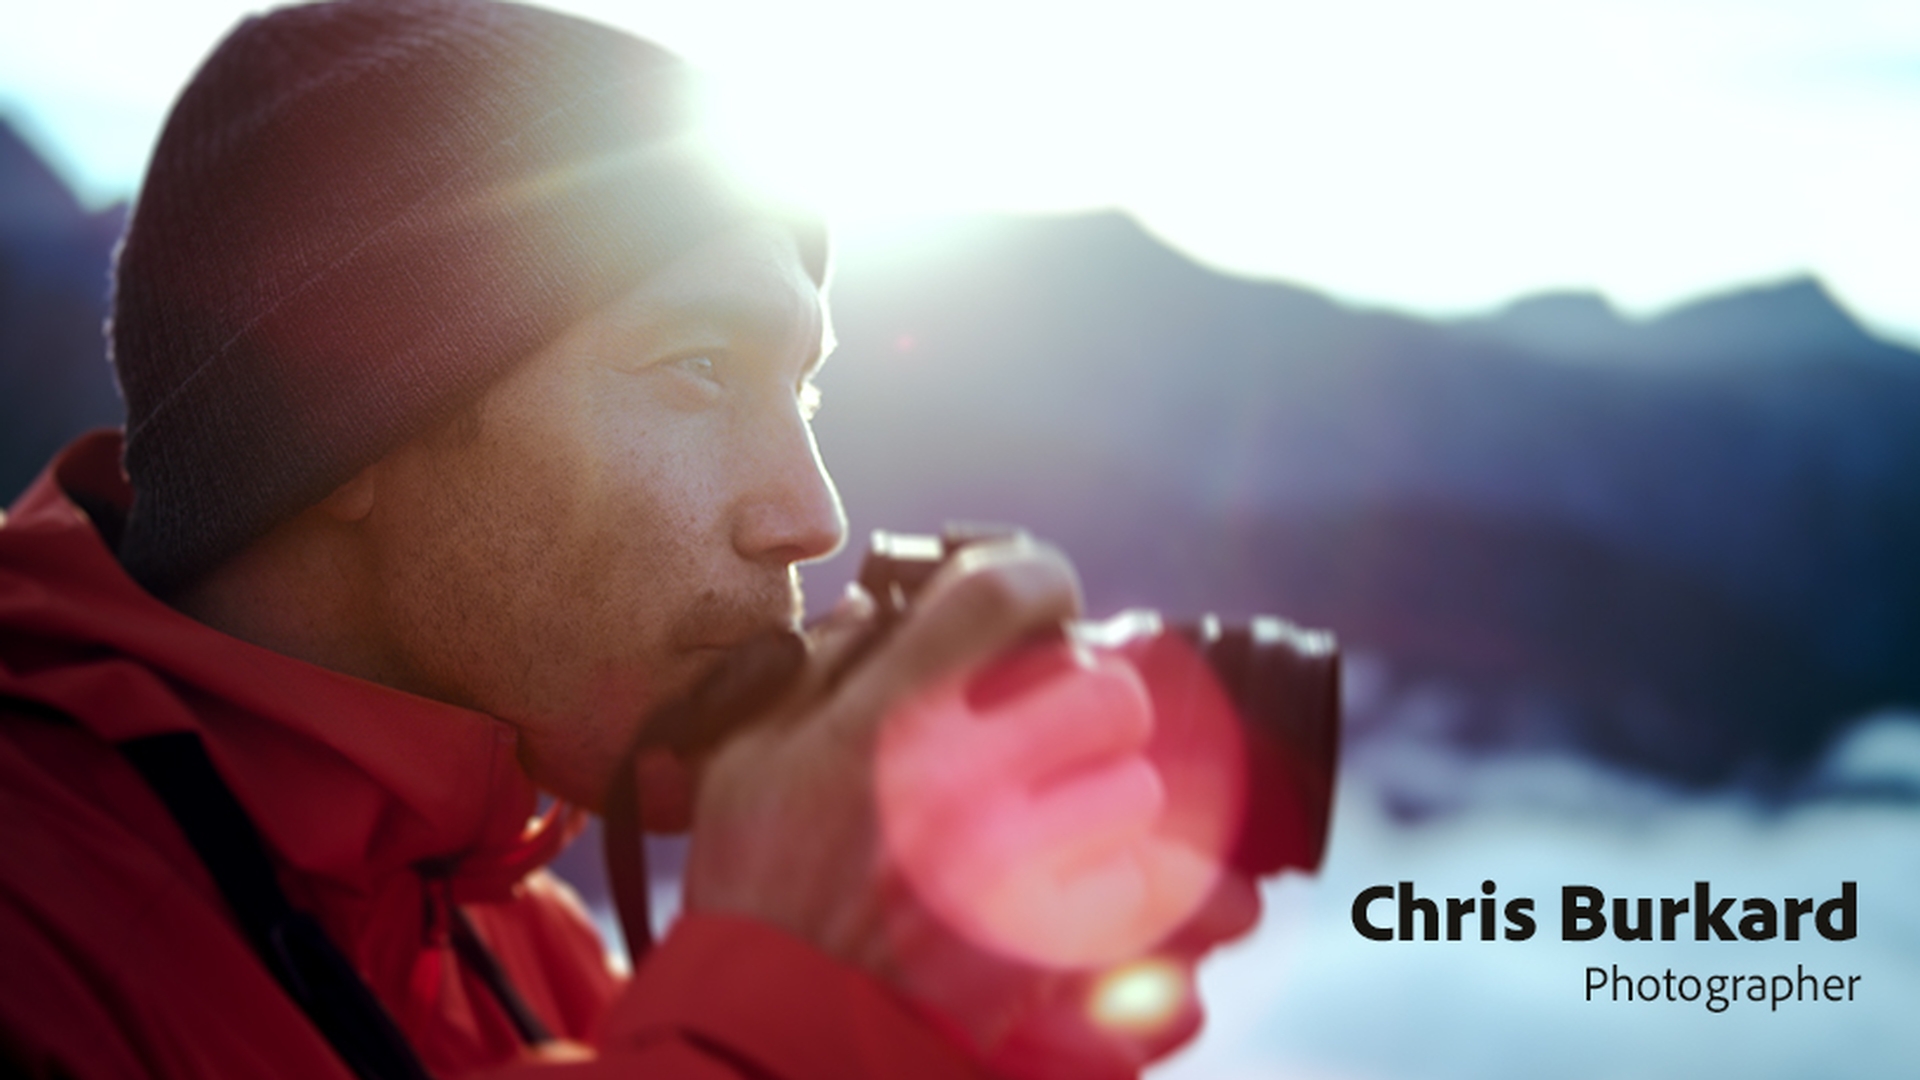
See how pro photographer Chris Burkard prepares for a landscape shoot, and get his tips for conveying scale and using perspective to make the difference between a good photo and a great one.
Published
Introduction
I grew up in this tiny town in the California coast.
Discovering photography as a path to exploration
I was inspired by wide open spaces.
I didn't grow up with a passport.
Never traveled anywhere.
For me I saw camera as a way to get me out of this small town and see the world.
When I'm approaching a place,
Approaching landscapes from multiple perspectives
I want to shoot it from a multitude of perspectives.
I want to be in the air, I want to be on land and I want to be in the water trying to bring a vision of each.
I actually feel like whatever this place is giving me I'm giving something back to it.
At the root of it all has always been this love and passion for landscapes.
Creating great images is really a two-part process.
The balance between field work and post-processing
Part of it is what you're doing in the field and the other part is that post-processing element where you're creating the most beautiful vision of what you saw.
Someone told me once
Finding creative light beyond golden hour
you're going to create all your best images 20 minutes after the sun rises and 20 minutes before the sun sets.
But in the middle of the day I found that if you just allow the Sun to hide itself behind some leaves it'll start to make a beautiful star shape.
Preparation, simplicity, and using scale to tell a story
I put in so much leg work before I even get to a location.
The more you know the less you need and that's a mantra that I've tried to apply in every facet of life, especially in photography.
The idea that I can pack a really intelligent camera kit that covers all my bases.
Nothing extra has changed the way that I've been able to move through these landscapes.
When you're shooting a waterfall that's miles away and there's 3000-foot tall cliffs that meet it, having scale helps immensely.
It can be really hard to judge just how big all of that is by having some bright object or subject that kind of separates you from that landscape that brings it all front and center and makes you feel like Wow!
Look at how huge that is.
In the beginning of my career I was out to collect stamps for my passport but at a certain point I realized that sharing my work became the reason that I wanted to do this.
I love creating something that could inspire a movement and feelings of wanderlust, the desire to get out and truly see the world.
Make your landscapes pop with basic edits
Fix camera lens distortions, use Auto Tone to make overall improvements, and move sliders to adjust exposure, haze, shadows, and more. Then bring out details with the Clarity and Sharpening sliders, and remove flaws with the Spot Healing Brush.
Introduction
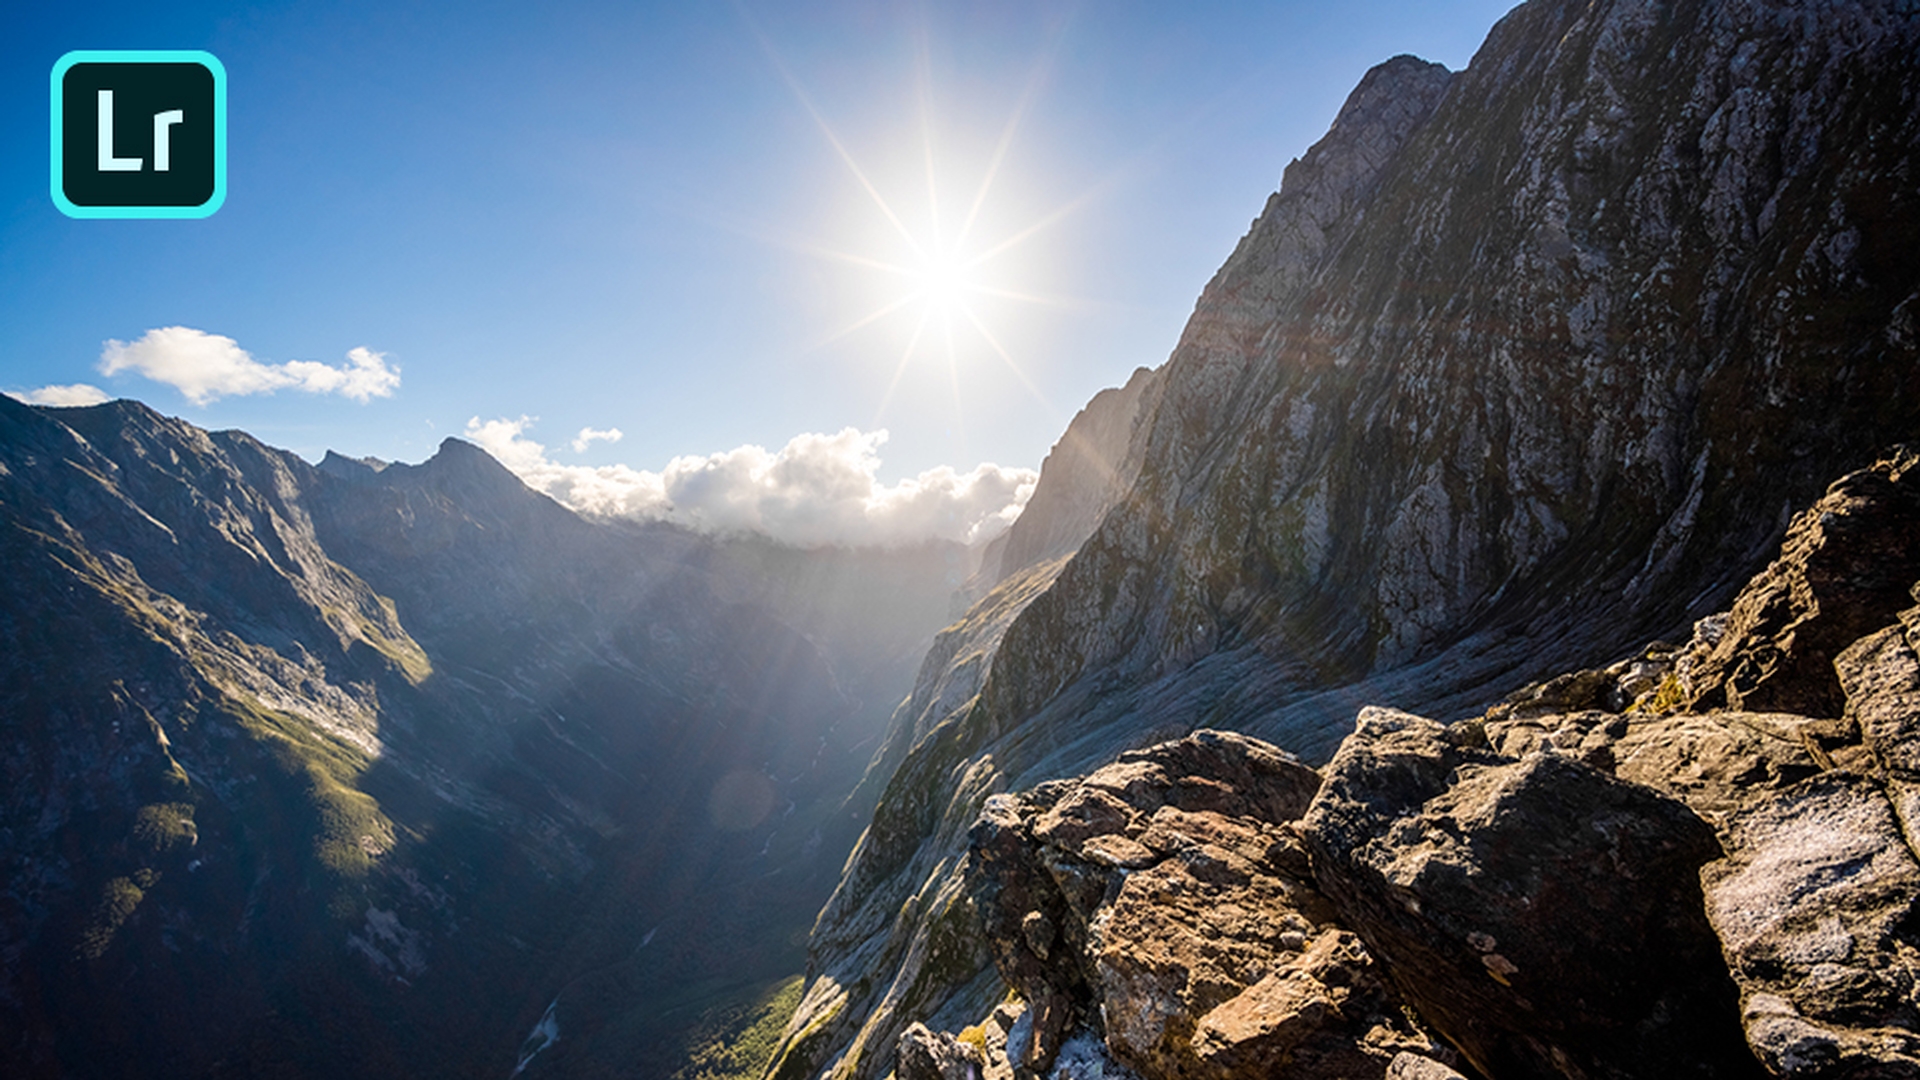
Here in Adobe Lightroom CC we can make our landscape photos look much better than they do when they come out of the camera.
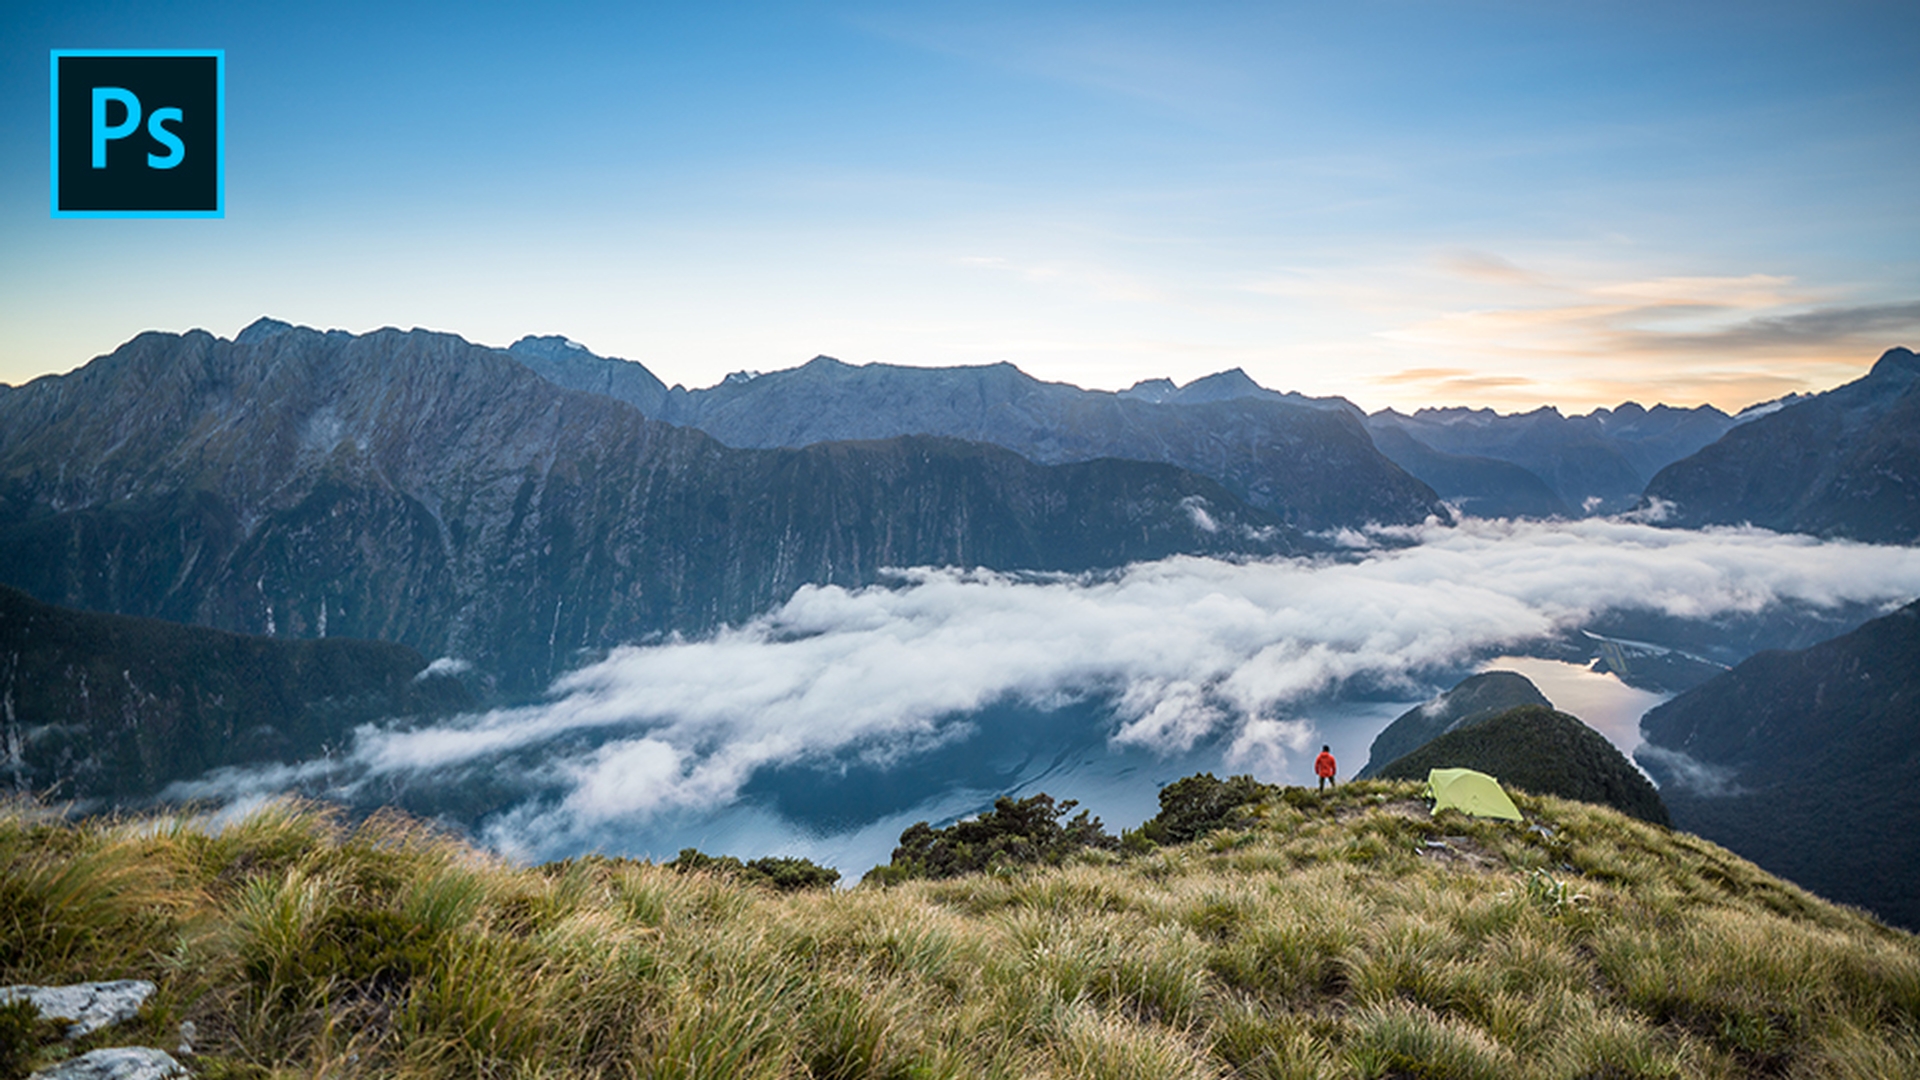
Pro photographer Chris Burkard captured this scene in New Zealand and I can see that there is some shadow detail here hiding in this photo.
In other words, there is a better photo just waiting to be exposed.
Correcting lens distortion with optics
I'm going to head over to the Optics panel and the first thing I always do is Enable Lens Correction, that will remove any lens distortion as well as vignetting caused by your lens and camera combination.
Now the next thing is, for a new Adobe Lightroom CC user, you may not know which sliders to start moving first.
So, you can get there, you get a much better starting point by clicking the Auto tone
Getting a strong starting point with auto tone
to get most of the adjustments going for you.
Now you may want to change some of those adjustments and I do.
I think the photo is now a bit overexposed but also part of the exposure problem is happening because of the haze in this photo.
Enhancing atmosphere and exposure with dehaze and tone controls
So, I'm going to go to the Effects and I'm going to just simply add a little Dehaze to the photo to bring down some of that atmospheric haze.
I also think that we can make the sun ray a little bit more detailed by bringing down the Highlights even a bit more, just to make that sun ray pop.
Now, we’ll bring down the Shadows a bit, we maybe will increase the Whites a bit more.
There we go, and we can also make it a little bit more dramatic by bringing the Blacks down just a bit more.
Now I notice that in this photo that there are a lot of rocks, there's a lot of detail here.
So, let's go back to our Effects panel and let's simply bring up the Clarity slider
Adding detail with clarity and sharpening
and look at what it does to those rocks.
We can really actually just... it's like you're bringing them more into focus.
We can also bring up the Detail panel and increase the Sharpening as well.
Now from there we can go back out and we can take a look at our photo but before we do that I notice there's one more thing up here.
Looks like a spot either on the lens or the sensor.
Removing distractions and finalizing the image
So, from there we'll just use our spot Healing Brush and with one click remove that spot.
Now we're ready to go from out of the camera to Wow!
here in Adobe Lightroom CC.
Use the landscape profile and the Linear Gradient tool
Create a better starting point for your edits by applying the Adobe Landscape remove color profile and using Auto Tone for general enhancements. Adjust lighting, bring out details, remove haze, and fix crooked horizons. Then make specific areas like skies stand out with the Linear Gradient tool.
Introduction
With Adobe Lightroom CC we can take our landscape photography to the next level.
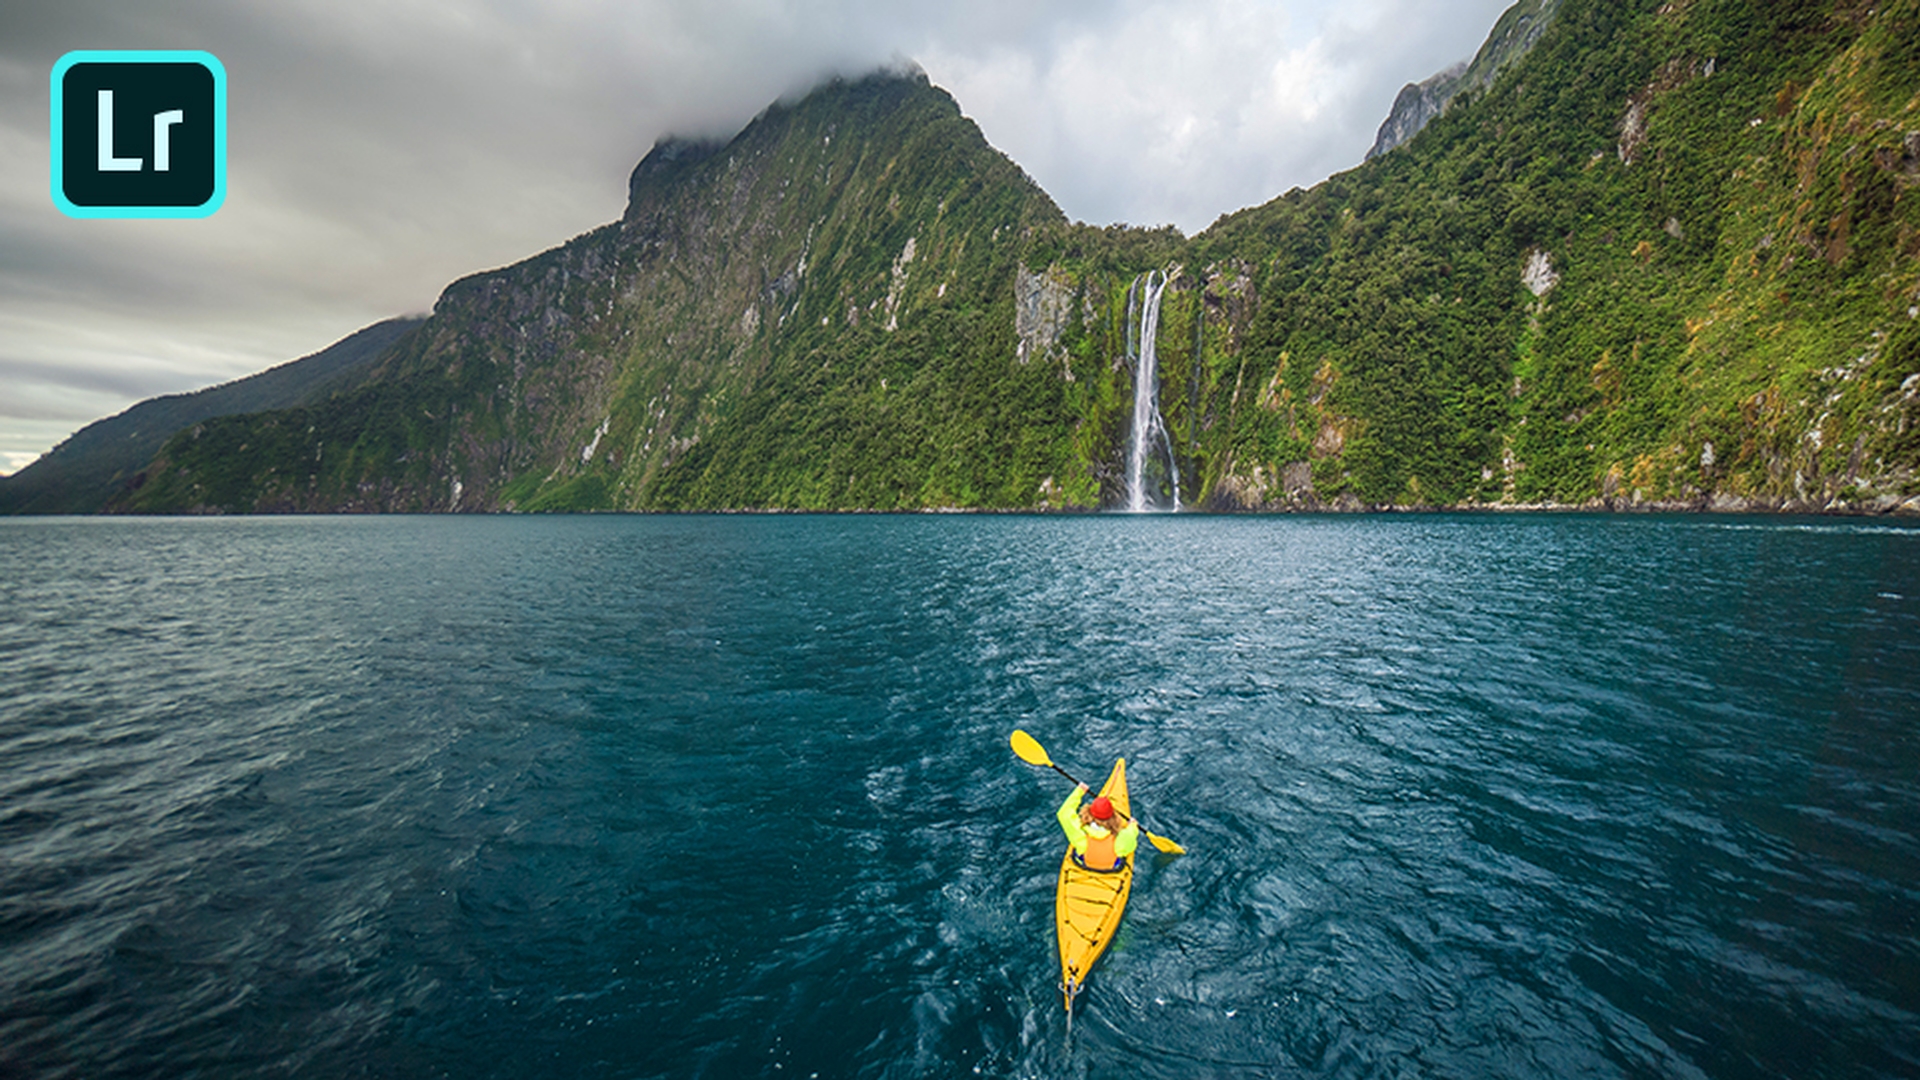
Here's a photo from pro photographer Chris Burkard capturing this amazing scene in New Zealand.
However, this image is right out of the camera as a camera raw file.
What I'm going to do is simply start with a better starting point.
Choosing the right profile for landscape color
I am going to go to Profile and I am going to switch from Adobe Color or Adobe Standard to Adobe Landscape and that already starts to bring out the colors in this photo.
Getting a strong base edit with auto tone and light controls
Next, we're going to go to the Light panel where I have the AI based Auto tone button.
While I can move all of the sliders manually, just simply clicking Auto tone will detect the image and use machine learning and AI based controls to give me a better starting point.
Now I may not agree with all of them.
So, for example, I'm just going to bump up the Contrast just a bit more.
And I'm also going to bring the Highlights down a bit more to bring out a little bit more detail on those clouds.
Next up I'll head down to the Effects panel
Adding clarity and dehaze for atmosphere and detail
where I have the ability to apply a bit more Clarity and a bit of Dehaze to the photo.
Last but not least
Straightening the horizon with crop tools
I notice that the horizon isn't perfectly straight, but we can fix that by simply going to the Crop tool and clicking Auto.
And if that's not getting it just the way you want you can still rotate the image which brings up an automatic grid to where you can align the image and get it just the way you want.
Now last but not least
Enhancing the sky using a linear gradient
I notice that the sky can come out a little bit more.
So, let's go in to our Linear Gradient where I brought the Temperature down a little bit.
I've also brought the Exposure down a little bit.
I've added just a tad bit more Dehaze and a tad bit more Saturation.
So, I'm just going to go up to the upper left corner and pull in diagonally to bring in my Linear Gradient to make the sky really pop.
So, now we've gone from out of the camera to our finished photo here in Adobe Lightroom CC with just a few simple clicks.
Use Lightroom on mobile for landscape photography
Edit your JPEGs or raw files anywhere you are. Apply the Adobe Landscape profile to make colors stand out. Use Auto Tone, then lighten shadows and adjust lighting. Edit specific areas with the Linear Gradient, and then sync your edits across all your devices.
Introduction
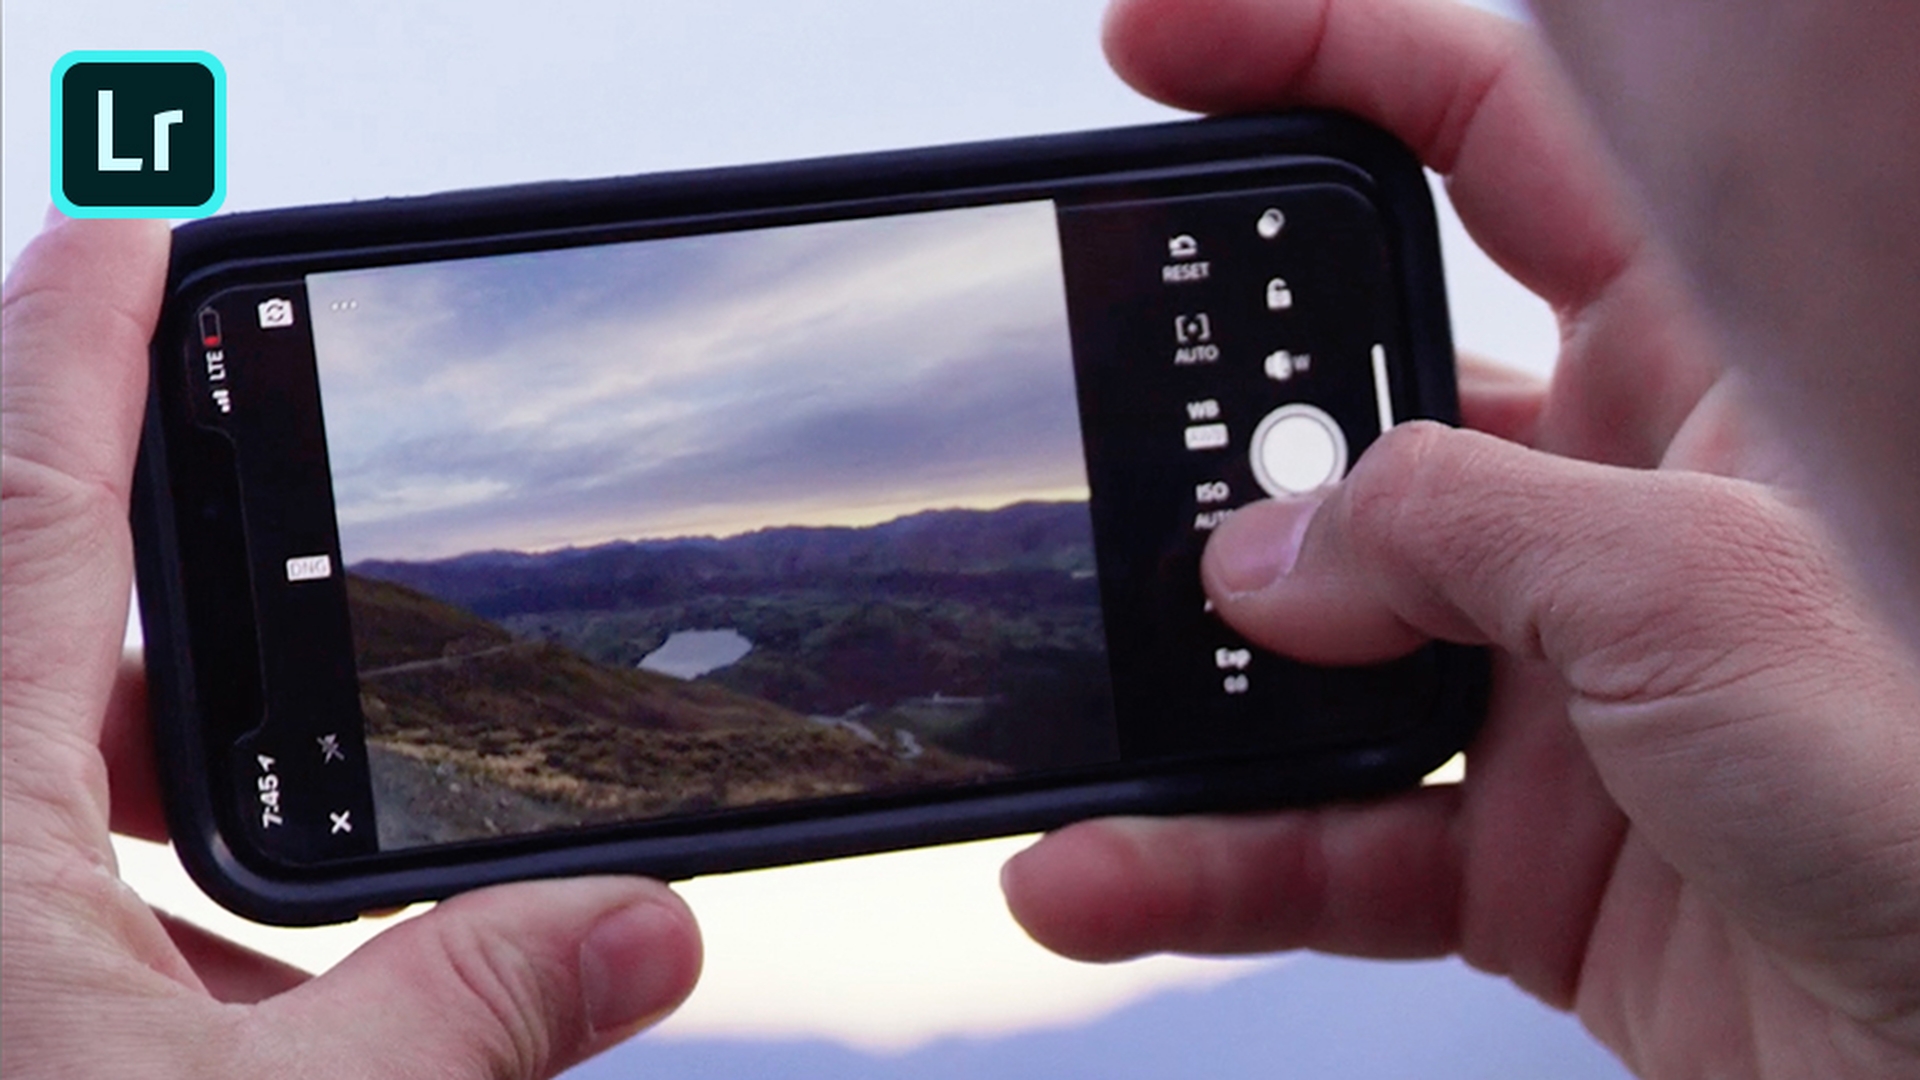
With Lightroom CC on your mobile device you can shoot in jpeg or raw.
Pro photographer Chris Burkhardt can even use professional settings bound on his DSLR to capture the perfect image on his mobile device.
Now that I have those same images that Chris captured in New Zealand here on my desktop in Lightroom CC as well as on my mobile device in Lightroom CC, I can begin the editing process no matter where I am.
So, the first thing I'd love to do is try out the new profiles
Choosing profiles and presets for a strong starting look
for landscape photos.
Instead of using Adobe Color or Adobe Standard I'm just going to switch to Adobe Landscape.
I can already start to see the colors come out.
I still need to bring up some of that shadow detail so I'm going to switch to the presets where I've got a nice preset on the Curve category called Lift Shadows.
Now that I've done that we're going to go ahead and apply the AI based auto tone
Improving exposure with auto tone and light controls
to bring out that cloud detail.
And now we just have a couple of finishing touches left to go.
First, I'd love to bring up the Light panel and from here I'm going to increase the Shadows a bit more as well as bring down the Highlights to bring out the clouds and also bring up the Exposure just a bit more.
Now that I've done that I still want to bring out that foreground.
Enhancing the foreground with selective edits
So, I'm going to do a Selective Edit.
And from here I'm just going to hit the plus sign, tap on linear gradient just like I would on a desktop I'm going to pull from the direction that I want the linear gradient to go in.
And now I can go back to light and simply adjust the Exposure just in that one area to bring out that foreground even more.
So now I've gone from a camera raw file
Syncing mobile edits across the Lightroom ecosystem
that started out on the mobile device to a finished product on the same mobile device here in Lightroom CC.
And of course, once I'm done editing my edits will sync back up to Lightroom CC in the cloud and down to all my devices including my desktop.
Any changes I make here are replicated throughout the entire Lightroom CC ecosystem.
Composite your landscape photos with Photoshop
Straighten your photos using the Content-Aware Crop tool to automatically fill in details at the edges. Remove distracting elements with Content-Aware Fill. And easily replace the sky from one photo with the sky from another using Quick Select, copy/paste, and Free Transform.
Introduction
While I love editing my landscape photos in Lightroom CC there are times I need to do more.
Knowing when to move from Lightroom to Photoshop
And that's where Photoshop CC comes in.
I've got Photoshop CC open with this amazing scene captured in New Zealand by pro photographer Chris Burkhart.
There are a few things I'd love to do to make this amazing photo even better.
Straightening the image with content-aware crop
The first thing I'd love to do is just simply straighten the photo a bit.
It's a little tilted to the right and we're going to go ahead and fix that by switching to the Crop tool.
But you'll also notice that I've got Content-Aware enabled.
What that means is that when I go ahead and tilt this image and it normally gives us those dreaded white spaces I don't have to run from them, I don't have to pull them in I can actually go the other way.
Because once I click Commit it will actually build the missing spaces using Content-Aware fill.
Now that I've got that in place the next thing I'll do is remove any distracting elements
Removing distracting elements with content-aware fill
- his campsite here and we no longer need it so I'm just going to go ahead and make a quick selection of it with the Lasso tool - as you can see I don't have to be very exact.
Because once I hit Shift Delete on my keyboard and bring up Content-Aware Fill I can just simply click OK and it will remove that scene as if it wasn't there.
Replacing the sky using selections and paste into
Now the next thing I'd love to do is replace the sky.
The sky is pretty good, but Chris actually captured a better sky in this scene.
So, what I'd love to do is first of all switch to my Quick Select tool and with Quick Select just with one simple drag I can go ahead and select the existing sky.
Now we'll head over to the better sky and will just simply Copy it.
Once we head back to the original image, we can simply do a Paste, but not a regular paste.
We're going to do a Paste Special, Paste Into because that'll do a couple of things, it will generate its own layer and layer mask and when I zoom out a bit I can use free transform to scale the sky up and get it just in place the way I want.
Once I get it where I want I can go ahead and click Commit, zoom back in and I can take a look at my finished photo.
Reviewing the before and after result
Here's my before and here's my after here in Photoshop CC.
You can control how Adobe websites use cookies and similar technologies by making choices below. But note that if you disable cookies and similar technologies entirely, Adobe websites may not function properly.
Cookies are small text files stored by your web browser when you use websites. There are also other technologies that can be used for similar purposes like HTML5 Local Storage and local shared objects, web beacons, and embedded scripts. These technologies help us do things like remembering you and your preferences when you return to our sites, measure how you use the website, conduct market research, and gather information about the ads you see and interact with.
You can make choices in the menu below about what cookies and other technologies you want us to use on Adobe sites when you visit them from this browser. You can always change those choices later by clicking on the Cookie Preferences link at the bottom of the page.
If enabled:
We can improve your experience by tailoring the site and the content to things we think might be of interest
We can better keep track of your preferences — like what language you prefer to use
We will better understand your likely interests so we can provide you more relevant Adobe ads and content on non-Adobe websites and in non-Adobe apps
It will help us improve the performance of our website and those of our partners who use the Adobe Experience Cloud
If disabled:
We won’t be able to remember you from session to session so the experience may not be tailored to your interests
You’ll still have access to the content of the site but certain features that depend on cookies may not function
You’ll still see ads, they just may not be as relevant to you
General information
You can control how Adobe websites use cookies and similar technologies by making choices below. But note that if you disable cookies and similar technologies entirely, Adobe websites may not function properly.
Cookies are small text files stored by your web browser when you use websites. There are also other technologies that can be used for similar purposes like HTML5 Local Storage, web beacons, and embedded scripts. These technologies help us do things like remembering you and your preferences when you return to our sites, measure how you use the website, conduct market research, and gather information about the ads you see and interact with.
You can make choices in the menu below about what cookies and other technologies you want us to use on Adobe sites when you visit them from this browser. You can always change those choices later by clicking on the Cookie Preferences link at the bottom of the page.
If enabled:
We can improve your experience by tailoring the site and the content to things we think might be of interest
We can better keep track of your preferences — like what language you prefer to use
We will better understand your likely interests so we can provide you more relevant Adobe ads and content on non-Adobe websites and in non-Adobe apps
It will help us improve the performance of our website and those of our partners who use the Adobe Experience Cloud
If disabled:
We won’t be able to remember you from session to session so the experience may not be tailored to your interests
We’ll still count your use of our site and services
You’ll still have access to the content of the site but certain features that depend on cookies may not function
You’ll still see ads, they just may not be as relevant to you
Operate the site and core servicesOperate site and measure engagement
Always active
These cookies are required, and they are used to enable the site and related services core functionality. Without them the site could not operate, so they cannot be disabled.
These cookies enable the site and related services’ core functionality and collect statistics about user engagement, such as counting active use to help us understand trends. These cookies cannot be disabled.
Measure performance
These cookies are used to analyze site usage to measure and improve performance. Without them Adobe cannot know what content is most valued and how often unique visitors return to the site, making it hard to improve information we offer to you.
These cookies are used to analyze site usage to measure and improve performance. Without them Adobe cannot know what content is most valued, making it hard to improve information we offer to you.
Extend functionality
These cookies are used to enhance the functionality of Adobe sites such as remembering your settings and preferences to deliver a personalized experience; for example, your username, your repeated visits, preferred language, your country, or any other saved preference.
Personalize advertising
These cookies are used to enable Adobe and our partners to serve ads more relevant to your interests. Without them you will still see ads, but they might not be as relevant to you.
Personalize advertising
These cookies are used to enable Adobe and our partners to serve ads more relevant to your interests. Without them you will still see ads, but they might not be as relevant to you.