How to draw trees: A step-by-step tutorial.
Draw trees to branch out your skills and learn the basics of landscape drawing. Follow this drawing tutorial to learn how to sketch a tree from trunk to branches.
Discover the art of the arbour.
There are over three trillion trees on earth, each with its own character and unique appearance, so it’s no wonder trees are among the most common yet beautiful subjects to draw. You might be surprised at how easy drawing a realistic tree is. Give it a try and see for yourself.
Six steps for a realistic tree drawing.
Follow along as artist and illustrator Spencer Nugent shows you an easy and effective way to draw a deciduous tree, step by step.
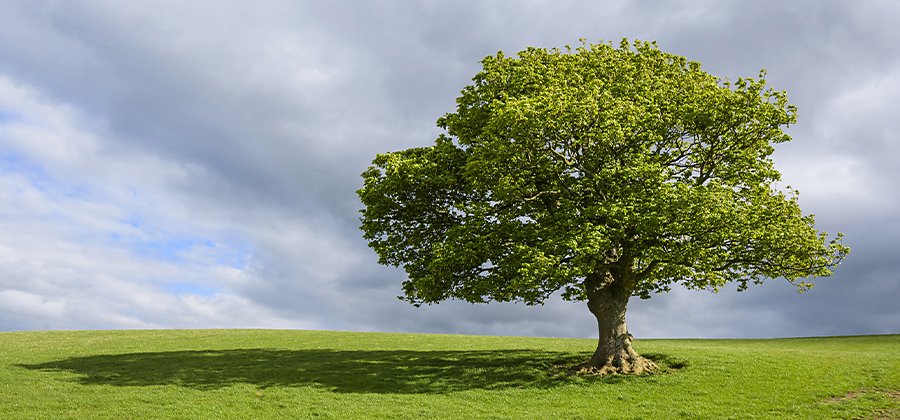
1. Draw the basic structure.
Start out with a few leading lines to indicate the general shape and guide the direction of the tree branches. For this tree, Nugent chose to start with a graphite pencil in Adobe Fresco for a pencil drawing style. Pen and ink will also work well with this method, but you may want to save the watercolours or coloured pencils for later in the process.
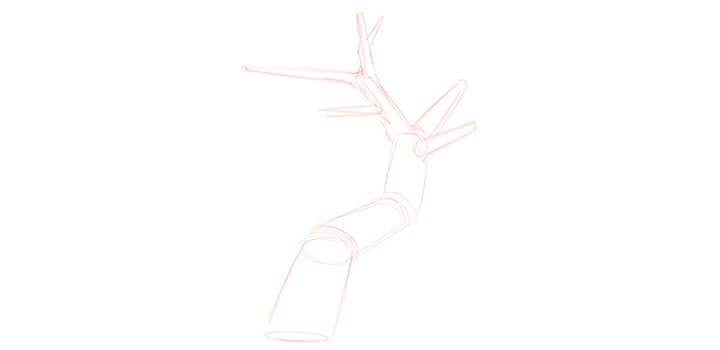
Image by Spencer Nugent
2. Draw cylinders over the lines to form the tree trunk.
In their most basic shape, trees are cylindrical forms. Draw cylindrical shapes over your structural lines to fill in the roots, trunk and main branches for a more 3D appearance. “It’s always helpful to look at real trees to understand how the branches work,” says Nugent. “Typically with branches, you’ll find that the tree trunk is thicker and there’s a tapering that happens as you move further into the branches of the tree.”
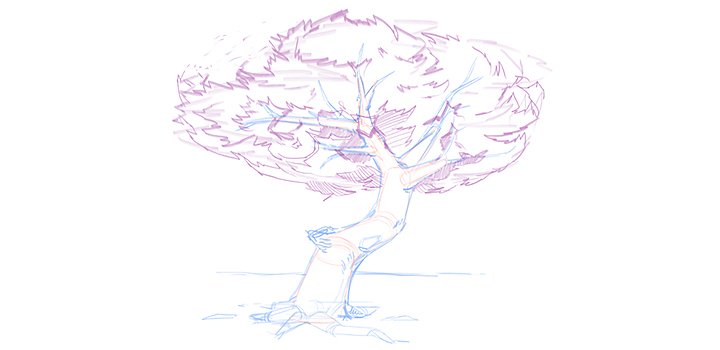
Image by Spencer Nugent
3. Fill in branches with foliage and leaves.
Sketch a rough outline for the foliage of your tree, also called the tree crown. “Introduce a jitter or some undulations to your lines. That’s going to give your tree a bit more of a natural feel,” says Nugent. You don’t necessarily have to draw individual leaves for your tree to look realistic. Make sure that you vary the weight of your strokes as you go. Brushes in digital drawing apps like Adobe Fresco are pressure sensitive, so you can easily switch up the weight and thickness of your strokes.
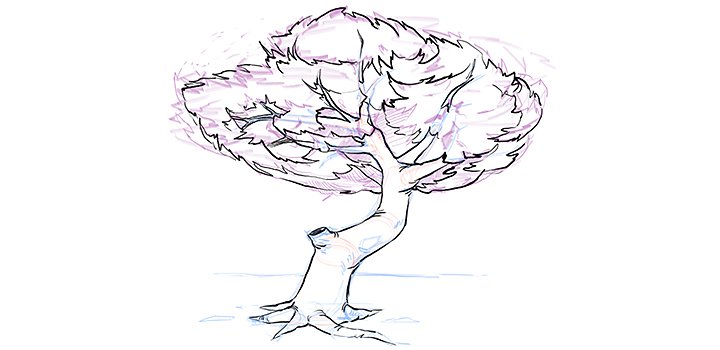
Image by Spencer Nugent
4. Trace your final outline.
On a new layer, trace over your final outline of the tree with a thicker black pen or marker. Once this is done, you can hide all layers underneath your new outline to keep your workspace clean.
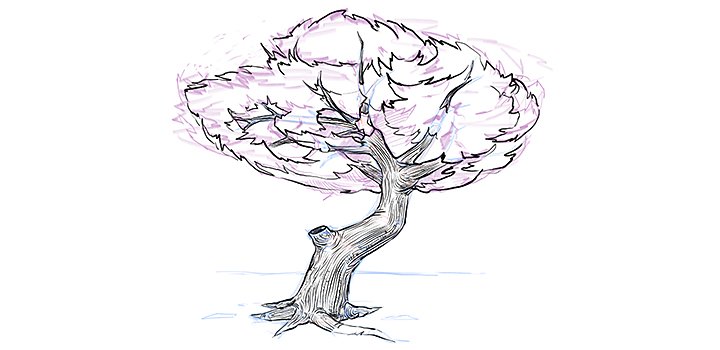
Image by Spencer Nugent
5. Fill in bark on the tree trunk.
It’s important to vary your line weight in the trunk as well. Make sure to contour your lines to the shape of the trunk you outlined; your placement will help to suggest and bring definition to the shape without overdrawing the pattern.
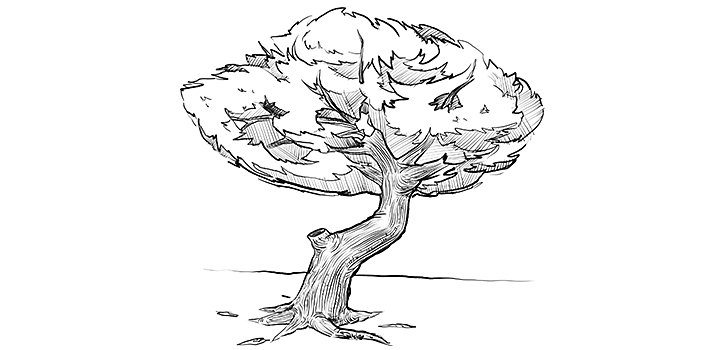
Image by Spencer Nugent
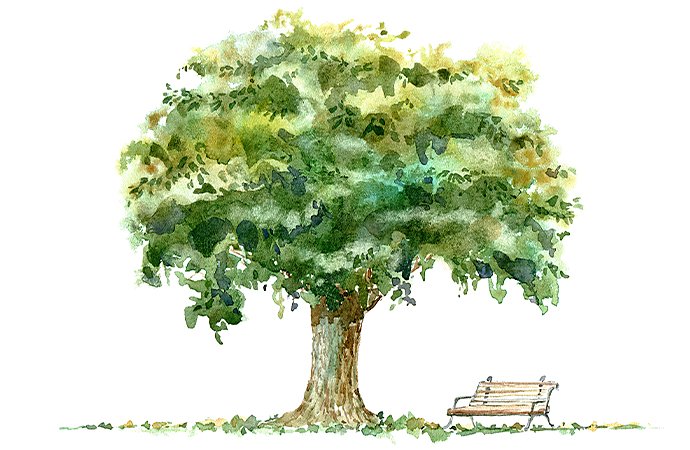
6. Add shading and finishing details.
Shade your tree to give it dimension. Typically, boughs closer to the trunk will be in shadow, while boughs at the top of the tree will be more exposed to light. You can also fill in your shading and highlights with a light source in mind for more directional detail work. “If you’re not sure you’re achieving enough contrast, squint your eyes and look at your sketch. It’s like having a conversation with your drawing,” says Nugent. Add any finishing touches to the trunk, roots or surrounding ground and your tree is complete.
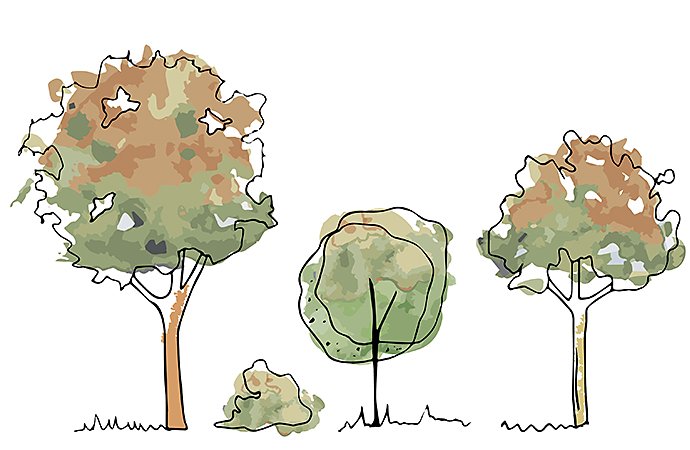
Tips for drawing different types of trees.
If you want to go beyond the basic trunk and bush-like foliage, you’ll want to notice how different trees look and model yours on a specific type of tree. For example, a pine tree will require different crown drawing techniques than an oak tree. An old tree might have deeply defined trunk details and gnarls while a young tree should have a cleaner, less marked trunk. Find inspiration for any type of tree from the reference photos available in Adobe Stock.
No matter what kind of tree you set out to draw, keep these six steps in mind. If your tree isn’t looking as good as you’d like, don’t give up. Use your eraser as needed, but try to draw through each stroke if you can. Your lines may not be perfect, but they’ll retain their continuity and energy, which is important when drawing organic shapes.
Contributor
You might also be interested in…

How to draw birds of any feather.
Learn the basics of drawing birds digitally with this step-by-step tutorial.

Take your skills to the next level with drawing exercises and advice from professional illustrators.

How to become a professional illustrator.
Get tips on portfolio creation and art presentation to help you kick off a new career.

Working with digital pens and other digital drawing tools.
See how you can bring the freedom and convenience of digital drawing technology into your workflow.