Resurrect images with old photo restoration in Photoshop.
Learn how to restore vintage photos to their former glory with these image editing enhancements in Photoshop.
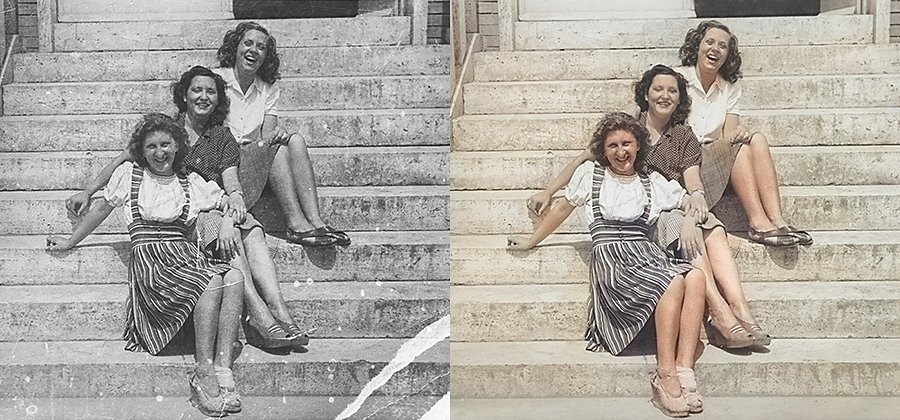
Breathe new life into old images.
Whether you want to fix old family photos or perform digital restoration on film prints, it’s time to dig out that old shoebox or photo album from yesteryear and get to retouching.
Photo restoration services or enhancement services by professional retouchers can get expensive fast. Luckily you don’t need to take your old photographs to a digital photo repair specialist to give them the love they deserve. You can enhance, retouch, and colorize your images and get high-quality results using a few simple photo editing techniques in Adobe Photoshop.
How to restore old pictures in Photoshop.
1. Import your original photo into Photoshop.
Bring your scanned image into Photoshop. Your image will be your background layer. Lock it and make no adjustments to this layer.
This empty layer is where you will make all your adjustments. When you place your adjustments on a separate layer from the original image it means you can make nondestructive edits — they will not alter the original image, just lay adjustments on top of it.
3. Use the Spot Healing Brush to erase creases, fix tears in the photo, or even remove blemishes caused by water damage and mold damage.
In the options in the top toolbar, click Sample All Layers and select Content Aware from the available types. Then, use the Spot Healing Brush to go over the areas you want to heal.
4. Use the Clone Stamp tool to smooth over fine details or areas with a lot of texture.
Hold Alt (or Option on Mac) and click on the area you want to sample. Make sure you select “Current layers and below” as you use this tool so you can work nondestructively.
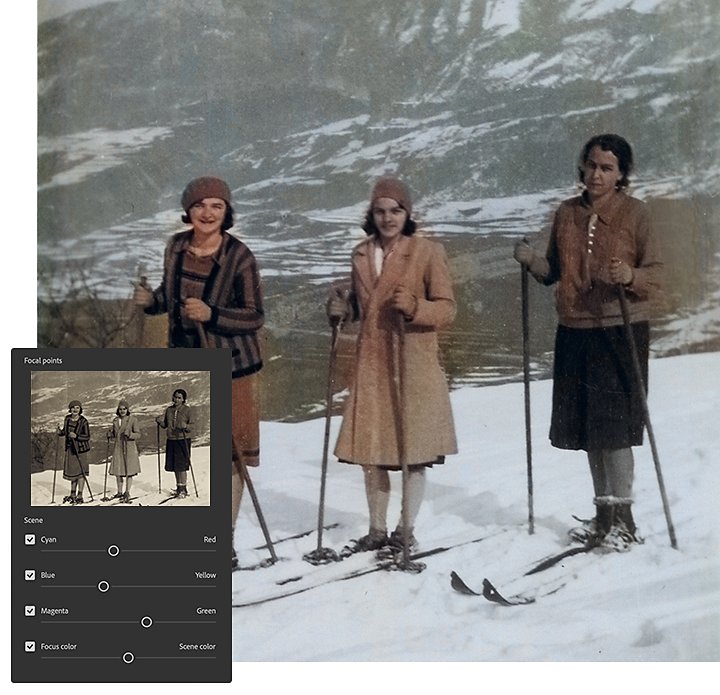
5. Colorize your photo using Neural Filters.
If you have a sepia or black-and-white photo that you want to colorize, create a new layer that contains all your previous layers by clicking Control + Alt + Shift + E on Windows, or Command + Option + Shift + E on Mac. Then click Filter › Neural Filters › Colorize. Set the blending mode to Color so you can make nondestructive edits on the new, colorized layer.
6. Export your restored photo.
You can save your image as a JPG, TIFF, PNG, or other image file format of your choice.
Pro tips for photo retouching.
To get the most out of your photo enhancements, follow these expert tips.
Photoshop expert and educator Jesús Ramirez recommends you use a digital pen and tablet with the Spot Healing Brush and Clone Stamp tools. It’s much easier to make natural strokes and fine adjustments with a pen than with a mouse or trackpad.
“It’s better if you have a small brush and make small strokes instead of painting over giant areas all at once,” says Ramirez. This helps your adjustments look as natural as possible.
Instead of keeping all your adjustments on a single layer, Ramirez recommends separating them out to keep things organized. The more you can organize different adjustments, the easier it will be to go back and make specific edits later. “You might have one layer for the face, one for the hair, one for the background, and so on,” says Ramirez about working on a portrait.

Refine your color corrections.
In many cases, the Neural Filter will do an excellent job of colorizing your photo all on its own. But if you want to take your colorization techniques to the next level, you can use the Color Balance tool to adjust the tones in your image. You can make a Curves adjustment layer to control contrast. Or you can let Photoshop do work for you. To do this, create a Curves adjustment layer, select Auto Color Correction Options, and click Bind Dark & Light Colors. Make sure to select Snap Neutral Midtones, then click OK.
Don’t let time win the war against old photos. Use these simple tips to ensure classic images can inspire nostalgia for years to come.
Contributor
Do more with Adobe Photoshop.
Create beautiful images with Photoshop brushes, Content-Aware Fill, Photo effects, Neural Filter, Sky replacement, and the many tools photographers rely on.
Explore the Photoshop family of apps.
You might also be interested in…
Lightroom vs. Photoshop: When to use each image editing program.
Learn the differences between these industry-leading photo editors and discover your ideal editing workflow.

Find your truth in fine art photography.
Follow your passions and explore the conceptual layers of creating artistic photos.

Learn to create surreal images by compositing two photographs.
Go analog with film photography.
Explore the roots of analog photography and learn how to shoot, develop, and print your photos.