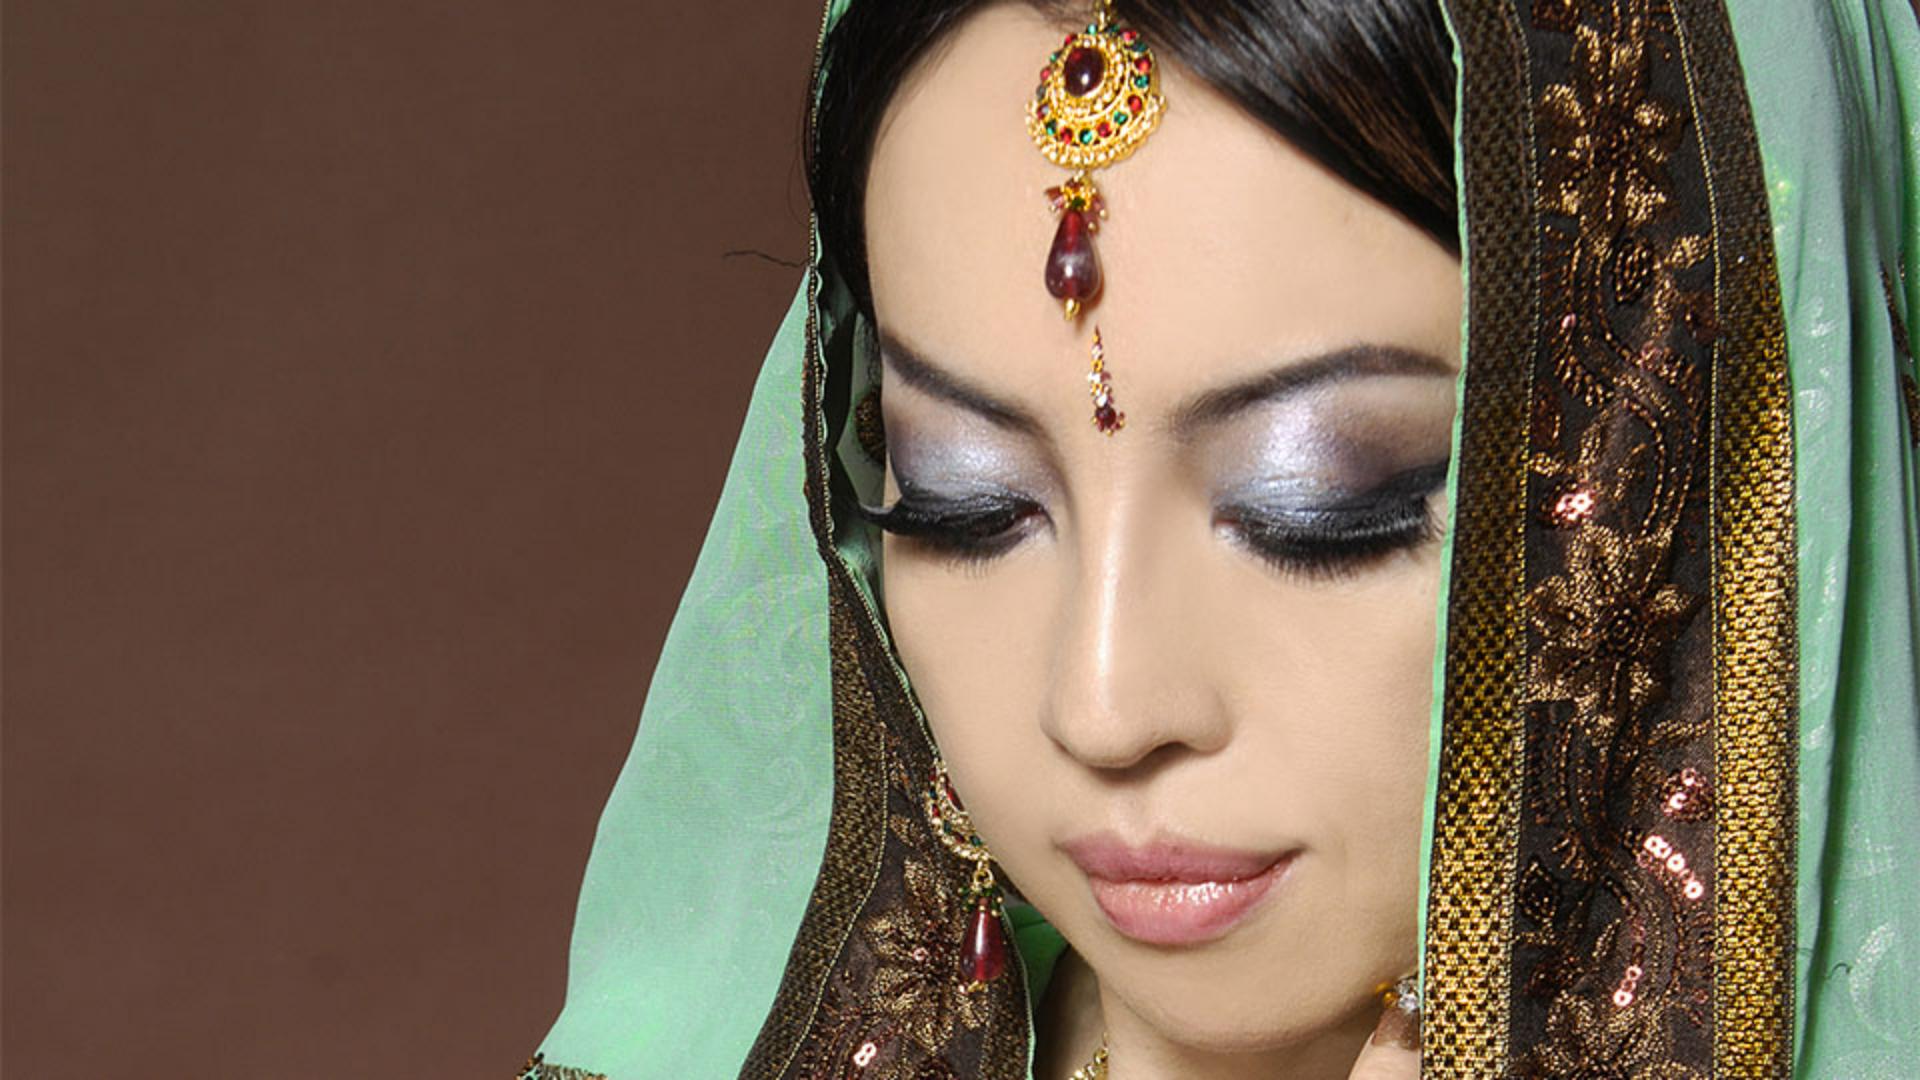
If the colors in a photograph do not look quite right to you, it could be something as simple as a lack of color saturation.
That can make a photo look a little dull or washed out.
In that case, try adding an extra pop of color saturation in just the right places as we will do in this tutorial to take this photo from this to this.
Using vibrance to boost color while protecting skin tones
When you want to intensify colors in a photo that features a person like this, it is a good idea to try a vibrance adjustment first because a vibrance adjustment protects colors found in skin tones from getting too saturated.
To add a vibrance adjustment, go to the bottom of the Layers Panel and click this Black & White circle icon and choose Vibrance...
That adds a Vibrance Adjustment Layer above the selected layer and whatever adjustment you make on this Vibrance Layer, will affect all the layers below.
That also popped out the Properties Panel.
In the Properties Panel, if you increase Saturation, notice how quickly the model's face gets oversaturated.
So I am going to put that back to 0 and let us try moving the Vibrance Slider to the right instead.
I can drag Vibrance way over, Increasing the intensity of the blue in the scarf and some of the other accent colors without overdoing the saturation in the model's face.
If you like that result then you are done.
But what if you want to target certain colors in the photo to make just those colors more saturated?
Targeting specific colors with hue and saturation
For that ,you will add a different kind of Adjustment Layer, a Hue/Saturation Adjustment Layer.
So, I am going to go over to the Layers Panel and click the eye icon on the Vibrance Layer to turn that layer off for the time being and then go down to the bottom of the Layers Panel, click the Black & White circle icon and choose a Hue/Saturation adjustment.
That creates a new Adjustment Layer in the Layers Panel and it opens the Hue/Saturation Controls in the Properties Panel.
There is a Saturation slider here and dragging that to the right is going to make the skin tones oversaturated.
So let us do this another way.
I am going to select this tool called the Targeted Adjustment Tool
Using the targeted adjustment tool for precise color control
and I move into the image and I am going to click on the green veil and notice that that changed this menu to greens.
What this means, is that when I drag the Saturation Slider to the right, only the greens in the photo will get the additional saturation.
The changes we just made, affect the greens wherever they appear in the photo.
But what if you wanted to get even more precise about where you are saturating colours?
Refining color changes with adjustment layer masks
In that case you can make use of the Layer Mask that comes with every Adjustment Layer.
To practice that, let us go down to the bottom of the Layers Panel again, click that Black & White icon and choose Hue/Saturation.
And here, there is a new Hue/Saturation Layer.
With that new Hue/Saturation Layer selected, I will go to the Properties Panel and this time I am going to choose to saturate the yellows and I will drag the Saturation Slider over to the right.
I like the way that looks on the bracelets and on the scarf but not so much on the model's skin.
So, let us hide the adjustment from the entire photo and then paint it in just where we want it.
I will make sure that I have black as the foreground color down here at the bottom of the toolbar and then to fill that Layer Mask with the foreground colour I will press Option + Delete on the Mac or Alt + Backspace on Windows.
Now there is no yellow adjustment showing anywhere on the photo.
Let's switch the foreground color to white by clicking this double pointed arrow or just pressing X on the keyboard.
Select the Brush Tool and move into the image and paint with white wherever you want to bring back that yellow saturation.
Here and here.
Maybe here.
I am going to go ahead and do that in a few different places and then by the magic of movies, I will skip ahead to show you my final.
Reviewing the final color-enhanced result
Adding just those little pops of saturation to specific colors has taken this photo to here from back here where we started.
Giving it a few pops of color that really bring it to life.
This sample file is an Adobe Stock asset you can use to practice what you learn in this tutorial. If you want to use the sample file beyond this tutorial, you can purchase a license on Adobe Stock. Check out the ReadMe file in the folder for the terms that apply to your use of this sample file.
What you learned: Increase the intensity of colors in a photo
Try increasing the vibrance of muted colors
Click the Create new adjustment layer button at the bottom of the Layers panel. Choose Vibrance in the pop-up menu to create a Vibrance adjustment layer.
In the Properties panel, drag the Vibrance slider to the right to about +80. This increases the intensity of the colors that need it most, without oversaturating the skin tones.
Click the Eye icon on the Vibrance adjustment layer to hide this adjustment so you can try some Hue/Saturation adjustments instead.
Add saturation to greens throughout the photo
Click the Create new adjustment layer button at the bottom of the Layers panel and choose Hue/Saturation to create a Hue/Saturation adjustment layer.
In the Properties panel, click the Targeted Adjustment Tool icon. Then click a green area of the scarf and drag the Saturation slider to the right to about +60. This adds saturation to the greens only, and it affects the greens not only where you clicked, but throughout the photo.
Add extra punch to some of the gold embellishments
Click the Create new adjustment layer button again to create another Hue/Saturation layer.
In the Properties panel, click Master and choose Yellows in the drop-down menu. Drag the Saturation slider to the right to about +60 to add saturation to only the yellows throughout the photo.
Make sure the layer mask on this Hue/Saturation adjustment layer is highlighted with a white border.
Set the Foreground color box in the Toolbar to black. Then press Option+Delete (MacOS) or Alt+Backspace (Windows) to fill the layer mask with black. This hides the Hue/Saturation adjustment you made to the yellows throughout the photo.
Press X to switch the Foreground color to white. With the layer mask on this Hue/Saturation adjustment layer still selected, paint with white over the gold jewelry and some of the trim on the scarf. This reveals the increased yellow saturation in only those areas, adding pops of saturated yellow for visual interest.
Save your work
Choose File > Save as to save the photo in PSD format with the adjustment layers intact, so you can edit them in the future if you need to.
You can control how Adobe websites use cookies and similar technologies by making choices below. But note that if you disable cookies and similar technologies entirely, Adobe websites may not function properly.
Cookies are small text files stored by your web browser when you use websites. There are also other technologies that can be used for similar purposes like HTML5 Local Storage and local shared objects, web beacons, and embedded scripts. These technologies help us do things like remembering you and your preferences when you return to our sites, measure how you use the website, conduct market research, and gather information about the ads you see and interact with.
You can make choices in the menu below about what cookies and other technologies you want us to use on Adobe sites when you visit them from this browser. You can always change those choices later by clicking on the Cookie Preferences link at the bottom of the page.
If enabled:
We can improve your experience by tailoring the site and the content to things we think might be of interest
We can better keep track of your preferences — like what language you prefer to use
We will better understand your likely interests so we can provide you more relevant Adobe ads and content on non-Adobe websites and in non-Adobe apps
It will help us improve the performance of our website and those of our partners who use the Adobe Experience Cloud
If disabled:
We won’t be able to remember you from session to session so the experience may not be tailored to your interests
You’ll still have access to the content of the site but certain features that depend on cookies may not function
You’ll still see ads, they just may not be as relevant to you
General information
You can control how Adobe websites use cookies and similar technologies by making choices below. But note that if you disable cookies and similar technologies entirely, Adobe websites may not function properly.
Cookies are small text files stored by your web browser when you use websites. There are also other technologies that can be used for similar purposes like HTML5 Local Storage, web beacons, and embedded scripts. These technologies help us do things like remembering you and your preferences when you return to our sites, measure how you use the website, conduct market research, and gather information about the ads you see and interact with.
You can make choices in the menu below about what cookies and other technologies you want us to use on Adobe sites when you visit them from this browser. You can always change those choices later by clicking on the Cookie Preferences link at the bottom of the page.
If enabled:
We can improve your experience by tailoring the site and the content to things we think might be of interest
We can better keep track of your preferences — like what language you prefer to use
We will better understand your likely interests so we can provide you more relevant Adobe ads and content on non-Adobe websites and in non-Adobe apps
It will help us improve the performance of our website and those of our partners who use the Adobe Experience Cloud
If disabled:
We won’t be able to remember you from session to session so the experience may not be tailored to your interests
We’ll still count your use of our site and services
You’ll still have access to the content of the site but certain features that depend on cookies may not function
You’ll still see ads, they just may not be as relevant to you
Operate the site and core servicesOperate site and measure engagement
Always active
These cookies are required, and they are used to enable the site and related services core functionality. Without them the site could not operate, so they cannot be disabled.
These cookies enable the site and related services’ core functionality and collect statistics about user engagement, such as counting active use to help us understand trends. These cookies cannot be disabled.
Measure performance
These cookies are used to analyze site usage to measure and improve performance. Without them Adobe cannot know what content is most valued and how often unique visitors return to the site, making it hard to improve information we offer to you.
These cookies are used to analyze site usage to measure and improve performance. Without them Adobe cannot know what content is most valued, making it hard to improve information we offer to you.
Extend functionality
These cookies are used to enhance the functionality of Adobe sites such as remembering your settings and preferences to deliver a personalized experience; for example, your username, your repeated visits, preferred language, your country, or any other saved preference.
Personalize advertising
These cookies are used to enable Adobe and our partners to serve ads more relevant to your interests. Without them you will still see ads, but they might not be as relevant to you.
Personalize advertising
These cookies are used to enable Adobe and our partners to serve ads more relevant to your interests. Without them you will still see ads, but they might not be as relevant to you.