Sharpen your photos
Learn how and when to sharpen an image and the best sharpening technique at each point in your workflow.
Published

Even in-focus images can use sharpening. See how.
Almost every digital image needs at least a little bit of sharpening. Learn how to apply capture sharpening to remove the fuzziness you get from the camera’s anti-alias filter. The best way to get the sharpest images possible is to sharpen twice: first when you pull images off your camera and later after you’ve applied all of your edits.
Hello everyone!
This is George Jardine, I'm an Adobe Community Professional and a Lightroom instructor who blogs at Mulita.com.
In these two videos we are going to take a look at a few of the different options that are available for sharpening in Camera Raw and Photoshop.
To follow along with the sample files, click the blue download button at the top of this web page.
Once the files have downloaded, locate the zip file and extract it to your desktop.
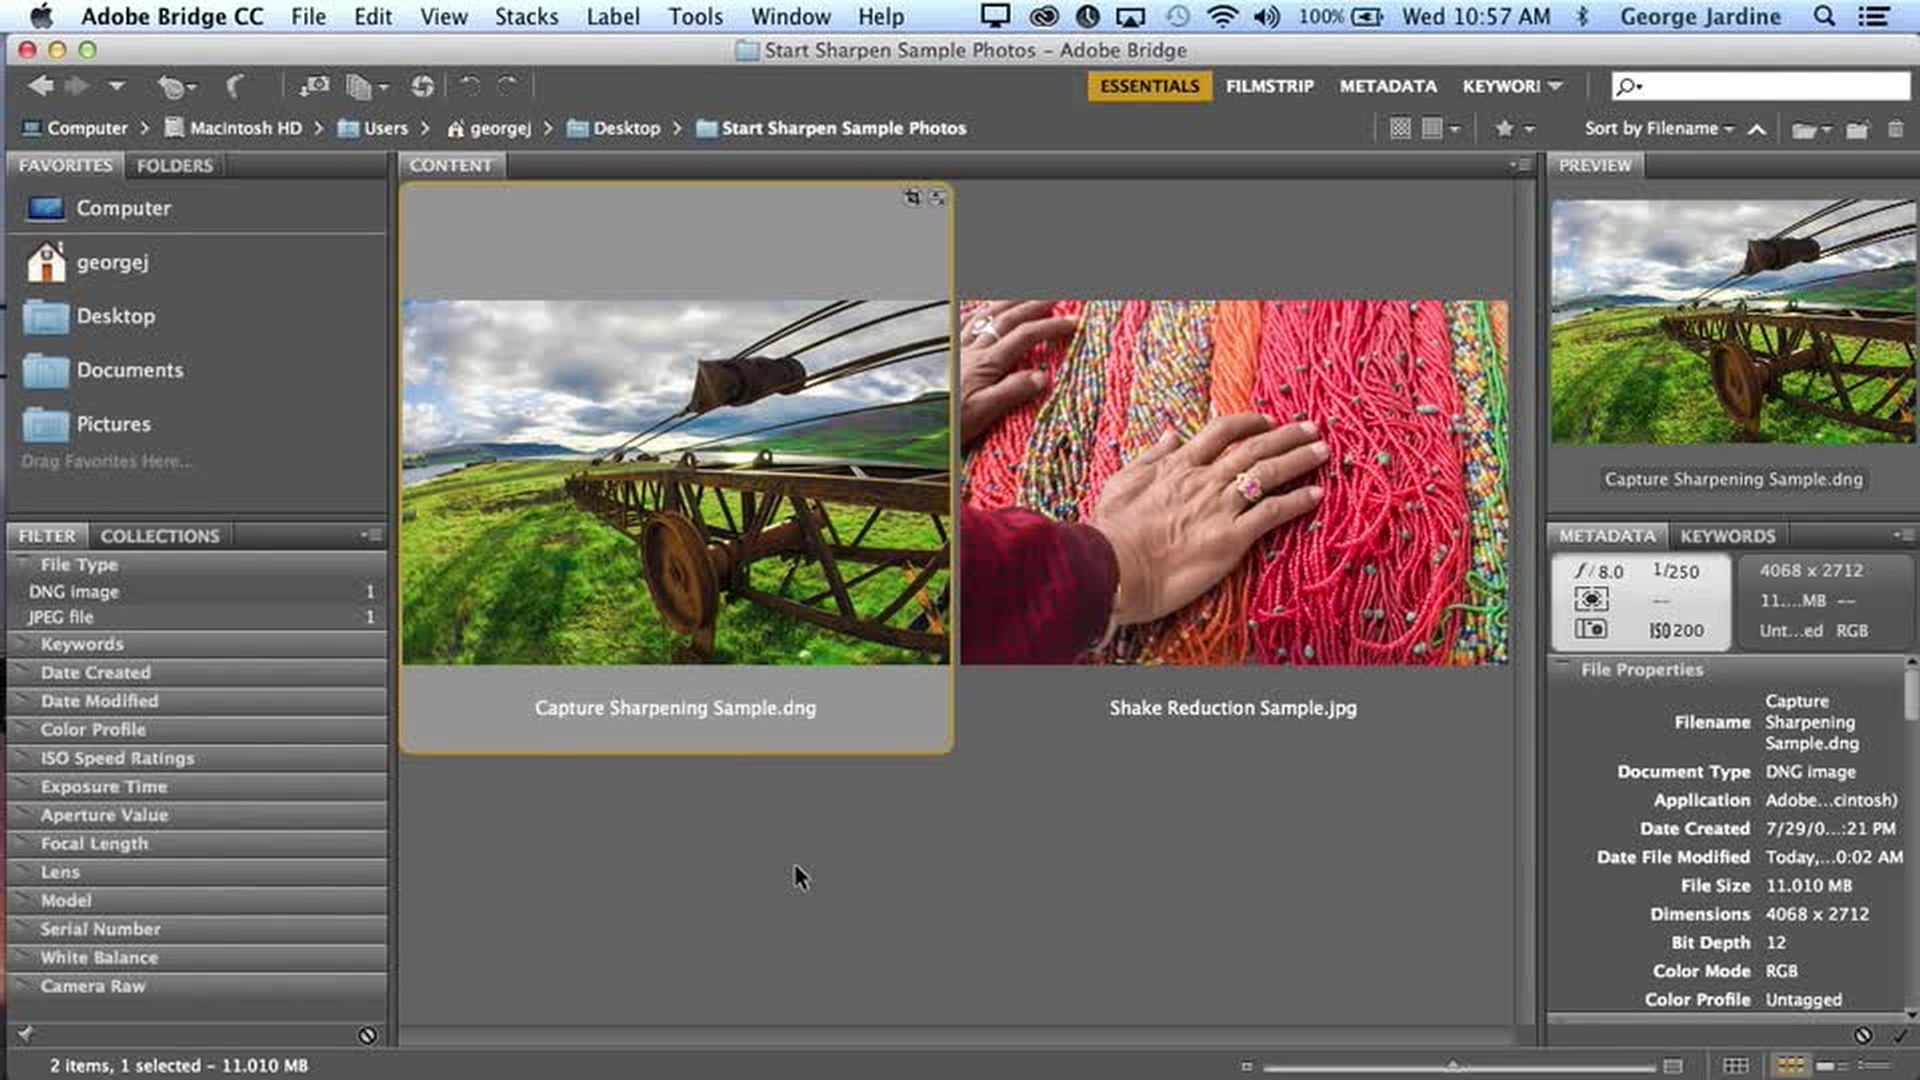
I have opened the extracted folder in Bridge and then double clicking the Capture Sharpening Sample.dng file.
In this video we are going to focus on the very first stage of image processing, using the detail controls in Camera Raw.
Normally you would use the detail controls on a Raw file, but they can be used on any image now that Photoshop CC allows you to use Camera Raw as a filter.
In this exercise, we'll be using the detail controls on this Raw dng-file.
You find the detail panel here under the third tab.
If you're working on a Raw file, you'll notice that there are some defaults for the sharpening amount and color noise reduction.
If you haven't changed these default settings, this small amount of sharpening and noise reduction is applied to every Raw image you process in Camera Raw.
And that's a good thing.
Almost every Raw capture needs at least a little bit of Sharpening and color noise reduction and that brings us to the basic definition of capture or Input Sharpening.
Input Sharpening and noise reduction is applied at the full resolution of your capture to clean up the minimum amount of imperfection that naturally goes hand in hand with digital capture, and to create the very best possible starting point.
And so, by design, it is not intended to be very heavy-handed.
In the second video we will look at Output Sharpening which is an entirely different thing.
Output Sharpening is applied at the final output size and resolution and is generally stronger to give your JPEGs or prints their maximum apparent sharpness.
To start looking at the capture sharpening for this image, I would first zoom in to at least 100 percent and sometimes I work at 200 percent as well.
I'm using the zoom tool which is the first tool in this row of tools across the top of the Camera Raw window.
You can use the zoom tool to change magnification or you can use this control down here.
To move around the image, I will use the space bar to momentarily change to the hand tool, like this.
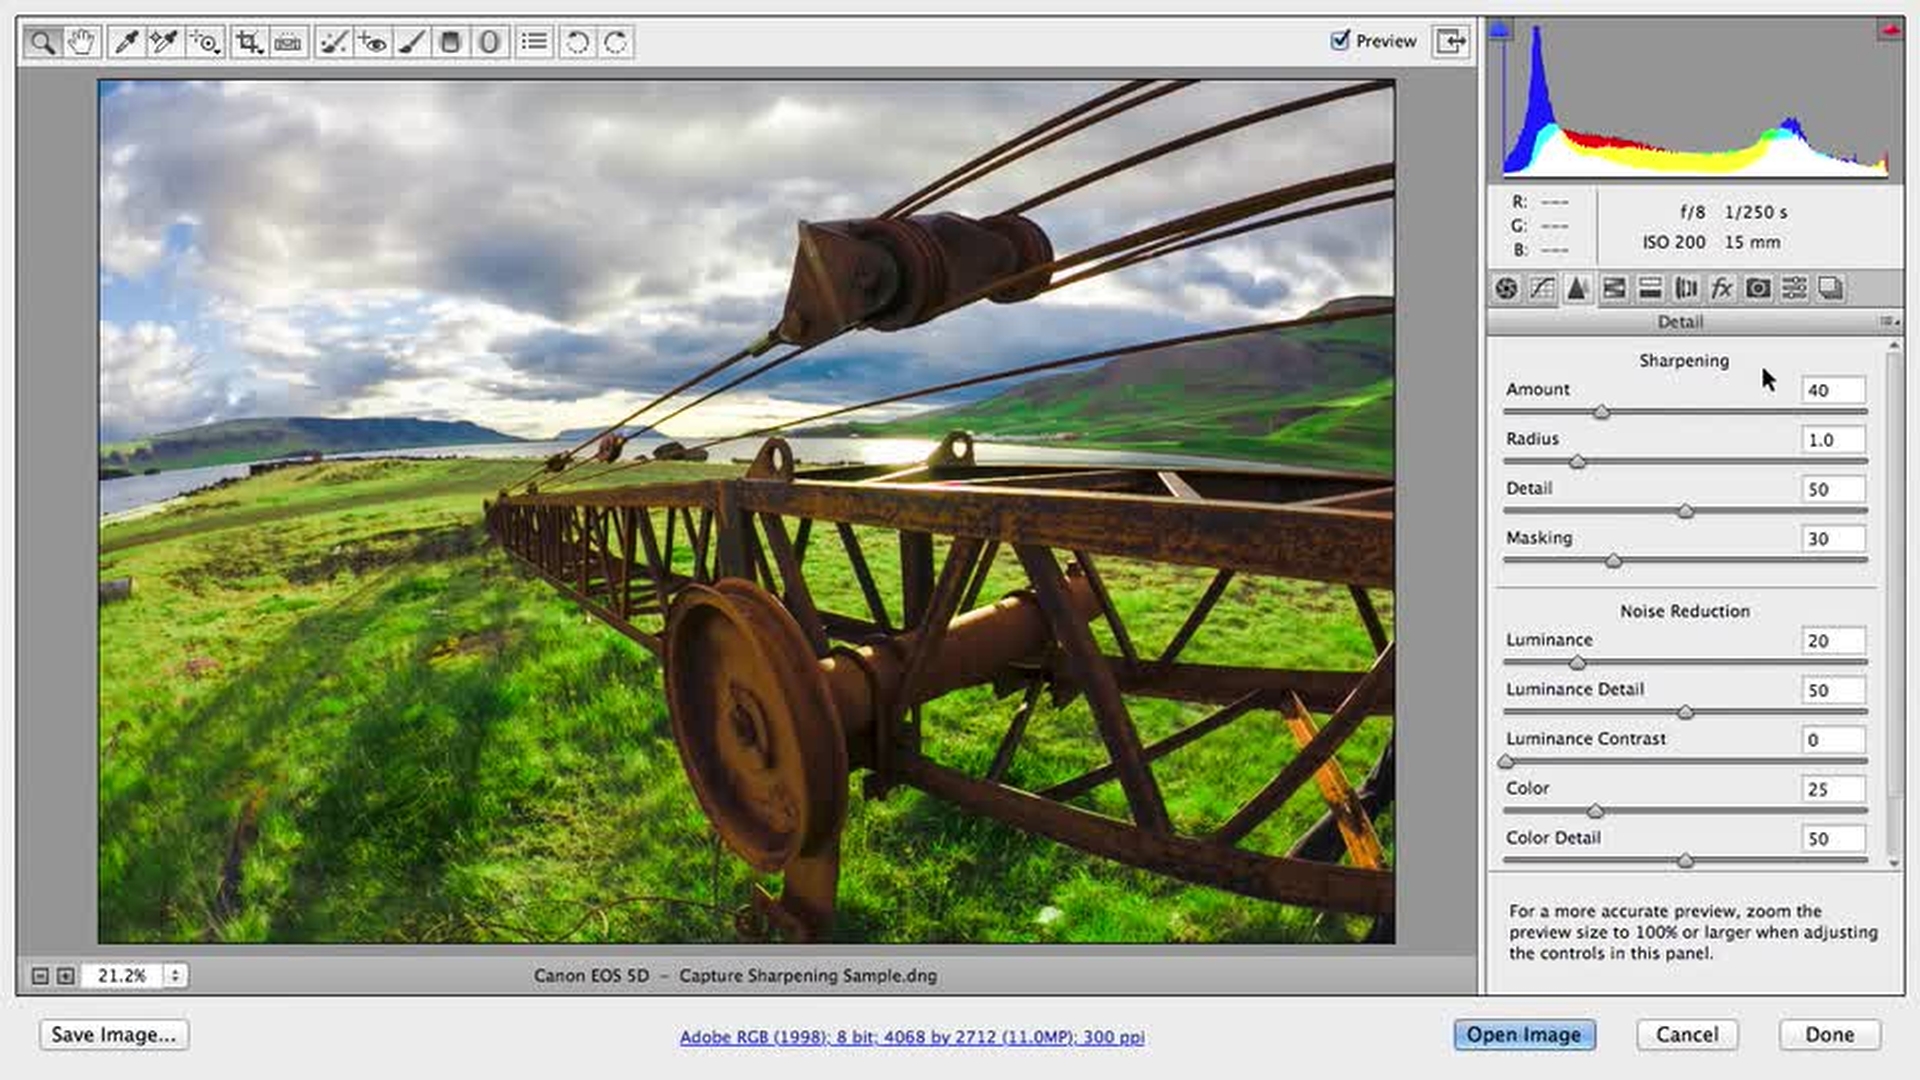
I want to zoom into the part of the image that has the sharpest focus which is probably right up here in these metal cables.
This part of the image shows us the texture of the cables, but also the noise in the sky which you see all through here.
The other thing you start to see when I zoomed in here, is the role of the default sharpening amount of 25.
Sharpening creates better image acuity by increasing the contrast of edge details.
If you look carefully along the bottom edge of the cables, you see a faint white outline or halo.
That halo is coming from the default sharpening setting of 25.
If I increase that to 50 or so, you should be able to see how the halo becomes much stronger in this video.
If you can't see it in the video, the sharpening will be easy to see using the sample file on your own system.
The other thing that you see right away, is how pushing up the sharpening also increases the noise in the image, especially in the darker parts of the sky.
And so, this is where you start to see how sharpening and noise reduction are so closely related.
Anytime you're working on sharpening, you have to take the image noise into account and vice versa.
For this image, I want to bring out the best detail that I can from aerials like these pulleys and the cables without making these small details down here in the water seem unnaturally sharp or this texture of the rust in the metal.
At the same time, I want to get rid of as much noise as I can.
So my strategy for sharpening this image will be to first, adjust the amount until I feel that I'm getting a strong enhancement of the edges, but not so high that I'm overdoing it.
For this image, that would be up to maybe 40.
Then, before I finish the sharpening with the radius detail or masking controls, I want to see how much noise I can get rid of without actually removing any real image detail.
Pushing the luminance noise reduction up to about 30 you start to see the sky becoming a lot smoother.
So, that's good.
But when you look up here in the shadows of the pulleys, you also see how the noise reduction is starting to reduce actual image detail which is what you want to avoid.
Watch as I double click the Noise-Reduction control to set it back to zero.
Double clicking, this is with no noise reduction and then typing command Z or control Z on Windows for undo – you see the effect.
To go for as much noise reduction as I can without harming real image detail, I'll go up to about 25.
Once I feel that I balanced the sharpening with the noise, I'll go back and finesse the Sharpening controls.
The default for the radius control is 1 pixel and pushing that up higher, makes the sharpening halos larger.
Unless your image is quite soft or much higher resolution than this 11 mega pixel capture, that won't help.
So, I'm going to leave the radius at 1 for this image.
The sharpening detail control can help to emphasize the finer image details, so for landscapes a higher setting will frequently help here.
For this image, I can go to 50 or so.
For portraits – lower settings on the detail control will usually be better.
Higher detail settings for landscapes will help preserve very fine image details, but it will also make image noise more noticeable just like the amount will, so use it carefully.
And if you have an image like this with noise in the sky, masking will also help produce that.
For this image a masking setting of around 30 helps quite a bit.
Those are the basics of Capture Sharpening in Camera Raw.
If you're using Lightroom, you'll see that the controls are identical and in both Camera Raw and Lightroom all of the work you do to raw images is completely non-destructive.
In the next video we'll look at the new shake reduction filter and Output Sharpening.
Sharpen again after editing and see your images pop.
Use Smart Sharpen to apply output sharpening at the final output size and resolution (for example, you apply different settings for an e-mail, a web page, or for print). This video also gives you a peek at Camera Shake Reduction, a feature new in Photoshop that lets you reduce image blur caused by camera motion.
Hello Everyone!
This is George Jardine, I'm an Adobe Community Professional and a Lightroom Instructor who blogs at Mulita.com.
In this video, we are going to take a look at Output Sharpening in Photoshop and we will also look at an amazing new filter in Photoshop CC that can help reduce blurring caused by camera shake.
In the first video we discussed Capture or Input Sharpening.
Capture Sharpening is meant to be a subtle effect applied to the full resolution of the image to clean up the minor softness and noise that comes along with any digital capture.
On the other hand, Output Sharpening is done at the final output size and resolution for image delivery.
This would be for JPEGs that are meant for on-screen viewing, such as in an email or on a web page.
It would also be for exports that you might be sending out for printing.
Picking it up where we left off in the last video, let's look at the basic work flow for sizing, sharpening and compressing our sample photo to send out in an email.
I have made all my correction to this photo and I'm ready to go to Photoshop.
So, I'll click Open Image and this would be exactly the same work-flow as I would use for creating a web version of this image.
First, I would make sure the full resolution of the corrected image was saved.
If I simply choose "File", "Save", Photoshop wants me to create a new file because the original dng is being treated non-destructively.
In this case, psd is fine, so I'll click "Save".
Next, I want to resize for email, so that's "Image", "Image size" and for email I like 800 pixels in width and 72 pixels per inch for the resolution.
The remaining settings here are fine, so I'll click "Ok".
For the Output Sharpening, I'll use "Smart Sharpen" under the filter menu, that "Sharpen", "Smart Sharpen".
To adjust the Sharpening, I like to keep an eye on the image back here at 100 percent and I usually zoom this part of the filter window up to 200 percent, centering it on an important part of the image.
Then, looking at things, my first instinct is that the defaults are pretty strong for this image.
A basic rule of thumb for Output Sharpening is that you want the image to appear in perfect focus, but you don't want to be able to actually see the Sharpening at a normal viewing distance.
With these defaults, you can definitely see the sharpening in the actual size, so that's too much.
Adjusting the amount visually, it starts to look much more natural back here at around 90 or 100, but you can still plainly see the actual Sharpening halos along the cables, even over here in the 100 percent view.
At this point, I think the overall sharpening is about right, but the radius is too wide.
So reducing that down to about 0.7 looks much better.
If the sharpening is not apparent in the video, you should see it clearly on your own system following along with the sample file.
I don't think that noise is going to be an issue for this image because we applied noise reduction during Capture Sharpening in Camera Raw, and if you don't need it, don't use it.
So, I'll drag this control to zero.
As I go along, I'll always check my work in the main image window by turning off and on the preview check box.
So, this is before – with no sharpening and then this is after – with the current settings.
In general, Lens Blur would be the best choice here, and if you have an image that requires less sharpening in the shadows or the highlights, you can open up the bottom part of this dialog and fine tune these settings.
For instance, if you felt that this image needed the sharpening to be stronger in the shadows than in the highlights, you can push up the Fade Amount for the highlights.
This moderates the sharpening in the highlights which I think works pretty well for this picture.
Once you're sure you like the results, click "Ok" and the sharpening is applied.
The final step in the work-flow is to save and compress the image.
For both email and web JPEGs, I always use the "Save for web" dialog which you will find under the file menu.
First, make sure this is set to JPEG and for very high quality, set this to 70 or 80.
You do want an Optimized JPEG with an Embedded Color Profile and you do want Photoshop to convert the image to sRGB for on-screen viewing.
The rest of the settings here are fine, so I'll click "Save", I'll give the new file a name if needed and I'm done.
For our last item, we are going to take a quick look to the new Shake Reduction filter.
There are times when a small amount of camera movement can ruin your best pictures, and that's what happened in this case.
When I zoom in, you clearly see right in the most important part of the image how the camera moves slightly during the exposure.
When you see this type of camera movement, it's always worth trying Shake Reduction.
It's under the Filter menu here at the top of the Sharpen menu.
When you choose Shake Reduction, you'll notice that the filter automatically tries to select the best area to analyze.
The defaults are doing an amazing job, but there are several things that we can do to improve the results.
For this photo, I found that centering the area of analysis right over the ring, gives me the best result.
Adding one or two more Blur Trace Regions will also usually improve the results.
To do that, you can click and drag on an important part of the image or you can have Photoshop add a suggested region by clicking here.
For this photo, I found that adding up to three new suggested regions, improves the results quite a bit.
Every photo will be different, so a bit of experimentation with the controls in this plug-in will usually be worth the effort.
Click "Ok", and you'll see the finished product.
Choosing Undo and Redo once or twice and you can see how affective this filter can be.
Those are the basics for Output Sharpening.
If you need more help, you'll find many additional resources on the Creative Cloud Learning Center.
Contributor
George Jardine