How to draw cars: Two step-by-step tutorials.
A car drawing can be just as captivating as the car itself. Discover two different approaches to kick your car drawings into high gear.
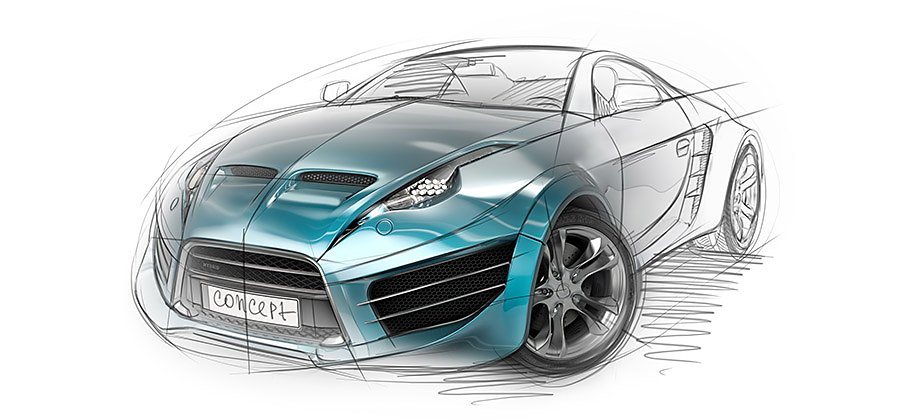
Boost your skills from bumper to bumper with drawing tutorials.
As any gearhead will tell you, cars can take on a life of their own. The same goes for car drawings; how you decide to draw a car determines its character. In this article, you’ll learn two distinct approaches for drawing a car step by step: a realistic, detailed sketching method and a more conceptual method used by car designers and animators.
Drawing a Volkswagen Bug in three-quarter perspective.
For the first approach, artist Ben House outlines six steps to recreating this iconic vehicle using perspective. Be sure to have a reference on hand when drawing your car, whether it’s a photo, a die-cast model on your desk, or a car on the street.
Images by Ben House
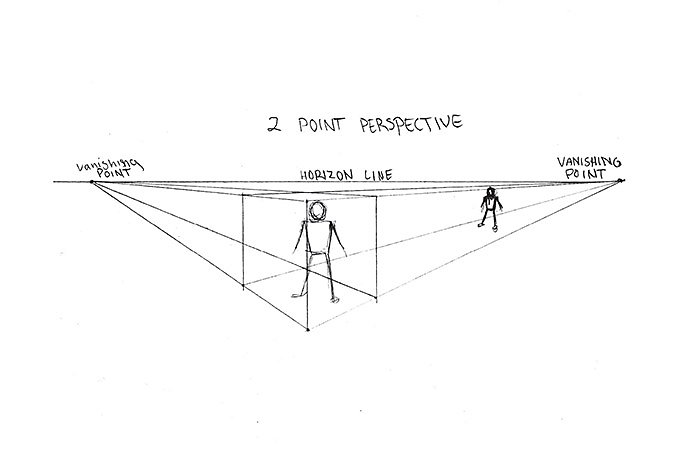
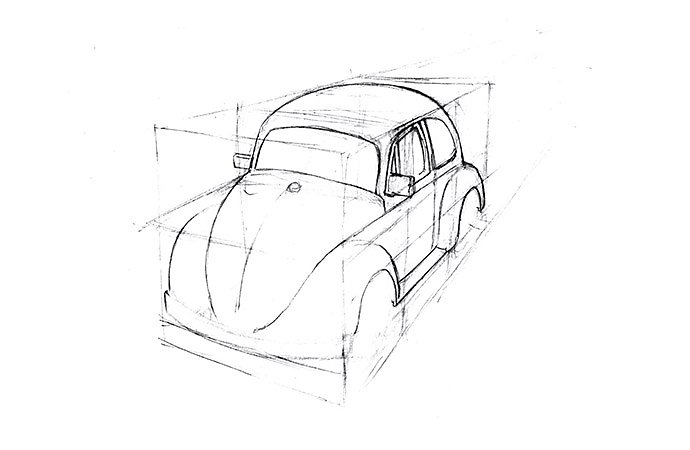
1. Establish your perspective guidelines.
The most important step in depicting a realistic car happens before you even start drawing it: establishing perspective. “Not using perspective would be like being a carpenter without a saw,” says House. For this three-quarter view, House uses a basic two-point perspective grid. Get an in-depth lesson on drawing perspective grids in Adobe Illustrator.
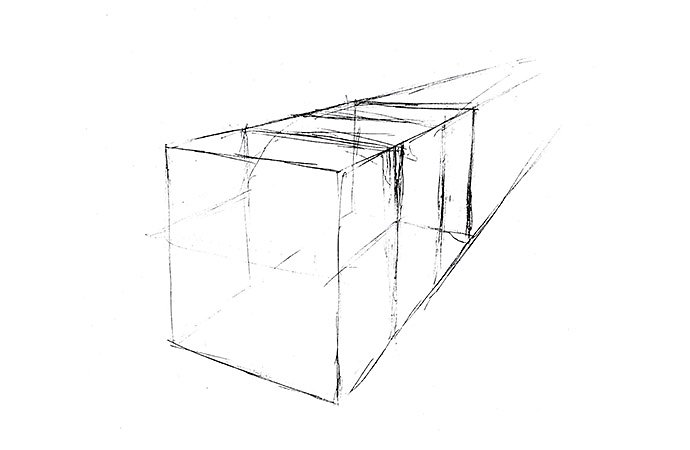
2. Sketch out a box.
The next step is to simply sketch a box inside your grid that will fit your car. Within the box, House divides the car into three basic shapes: hood, cab, and tail. This helps break up the space and lay the groundwork for the correct proportions.
Images by Ben House
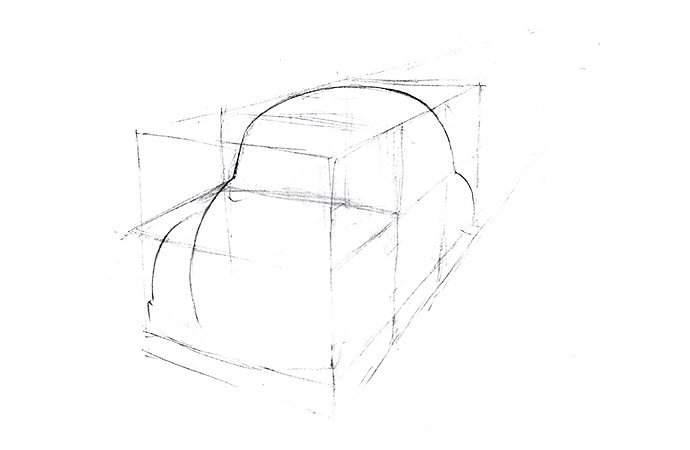
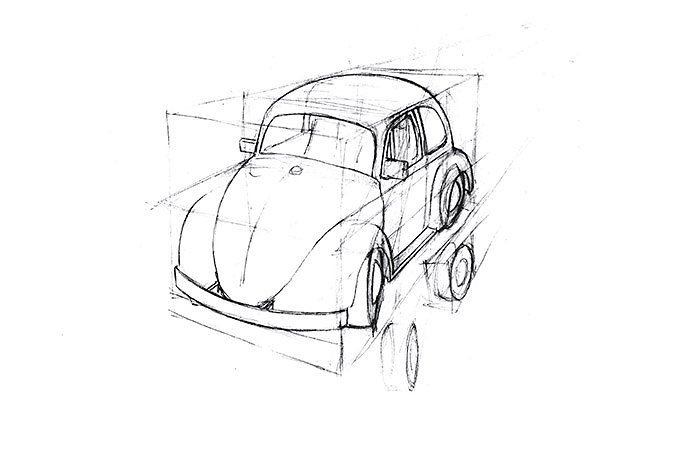
3. Draw in marker lines for large sections.
Find the lines of the car body. “I like to think of it as a block of clay you’re carving a car out of,” says House. Sketch out a front quadrant to designate where the hood and windshield go. Then mark the front bumper. Drawing the right curved lines can be tricky; it will likely take a few attempts to create strokes that balance the shapes.
4. Establish your ground line and refine the shapes.
Draw a ground line, which simply marks where the rubber meets the road. Use lines to define major features like fenders, side sills, and windows. “Start with the big shapes, and the smaller shapes will become easier to find,” advises House.
Images by Ben House
5. Add wheels.
This step can be a trouble spot for car drawings, but it’s important to put in the time to get it right. “Your ovals will really sell it,” says House. “Think of them in the same way you think of the car as a whole. Fit the wheels in a block and use perspective lines to carve out your wheel.” You can turn the front wheels out a bit to add some movement to your drawing. Begin to darken your final lines and start shading your drawing.
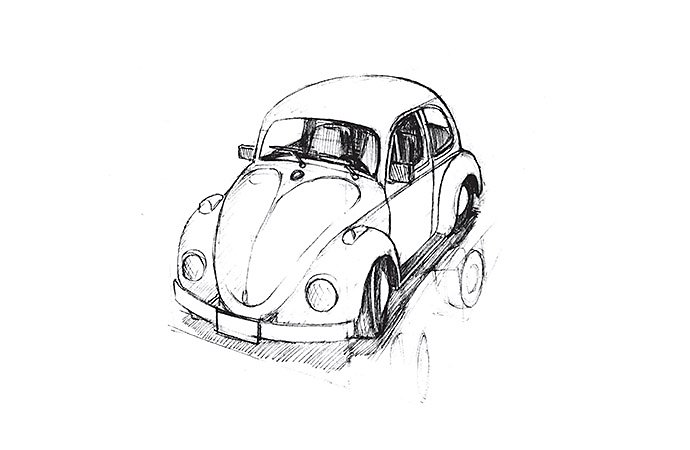
6. Hone the details and shade for dimension.
“Every little detail counts toward making a car recognizable,” says House. Features like a license plate, door handles, and cross-hatching on the headlights will go a long way toward boosting the realism of your car. Be sure to give your drawing a ground shadow, and don’t neglect interior details. Sketching the steering wheel and seats in darker shades gives depth to the inside of the car. To really make it pop, add highlights and shadows to show where the light hits the car.
Drawing a conceptual car from the side view.
In this second art lesson, designer Jay Shuster lays out a guide to the rough-and-ready drawing style that car designers use. Follow along with Shuster’s step-by-step drawing instructions to get your own results in minutes.
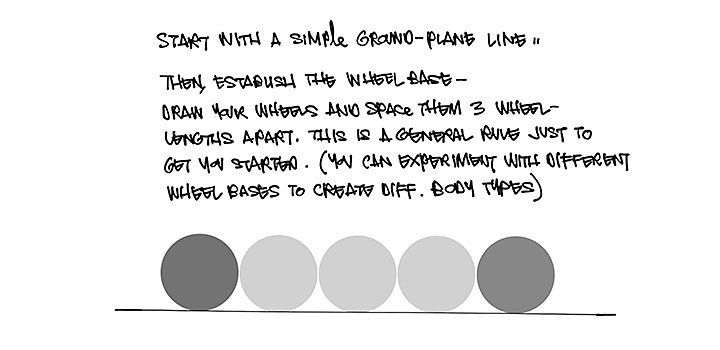
Image by Jay Shuster
1. Establish your ground line and wheels.
A general rule of thumb is to place the wheels three wheel lengths from each other.
The sill line refers to the bottom edge of the car. From a side-view angle, it is a relatively straight line across the page, drawn whatever distance from the ground suits your car. Mark your wheel cutouts at this point.
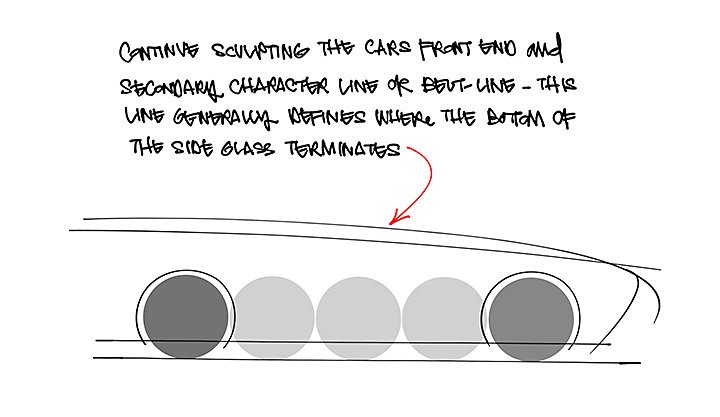
Image by Jay Shuster
3. Draw a character line through the body.
Also known as the beltline, this is the line of energy your car will follow through its whole body. “It dictates the attitude of the car,” says Shuster. For a sports car or race car, a more dramatically angled line can give it an aggressive stance.
4. Add a secondary character line.
Use this second defining stroke as a marker for where the windows end. Don’t get hung up on details yet. “Car designers generally draw from their shoulders and keep it really loose. There’s not a lot of meticulous ‘from the wrist’-style drawing. It’s all big shapes,” says Shuster.
Images by Jay Shuster
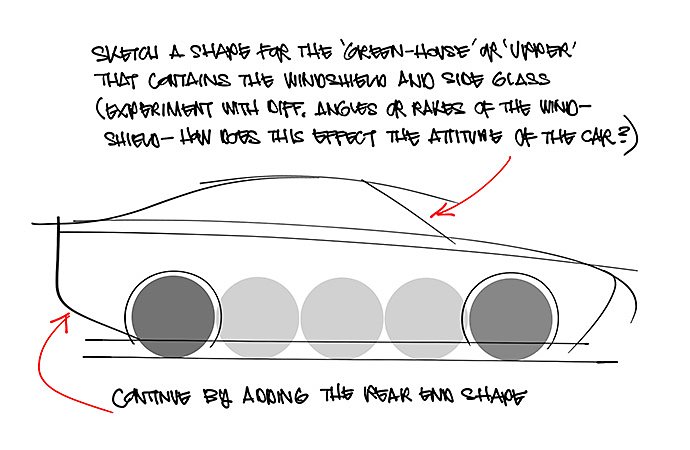
5. Sketch a shape for your greenhouse.
The greenhouse refers to the roof, windshield, and side and rear windows of the car. Also known as the upper, the greenhouse is another chance to align your angles with the desired attitude of the car.
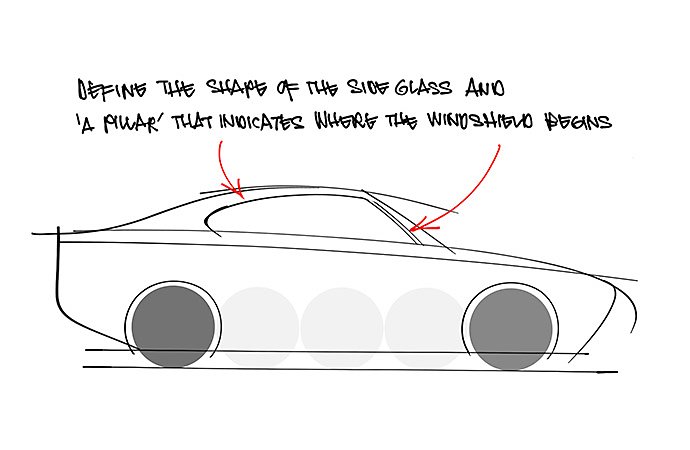
6. Carve out a shape for your window glass and add an A pillar.
The A pillar is the front support beam that marks where the front window ends and the windshield begins. Don’t worry about perfecting your lines as you go. “I keep some of these ends loose because it lends the sketch a bit more energy,” says Shuster.
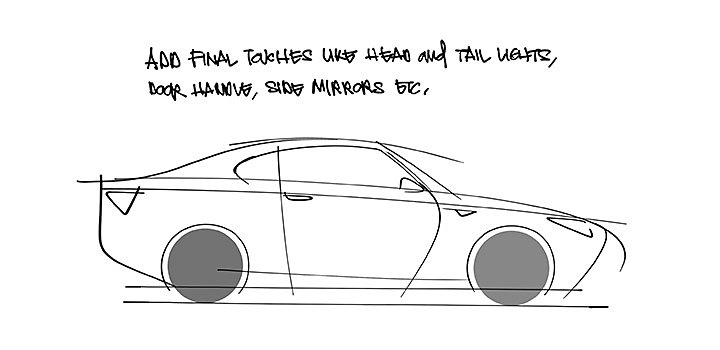
Image by Jay Shuster
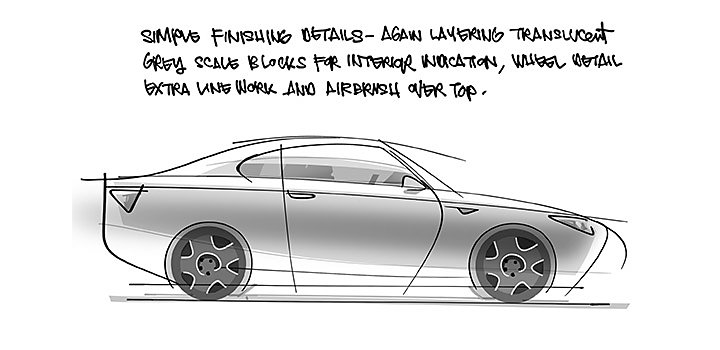
Image by Jay Shuster
9. Sculpt shapes with shading.
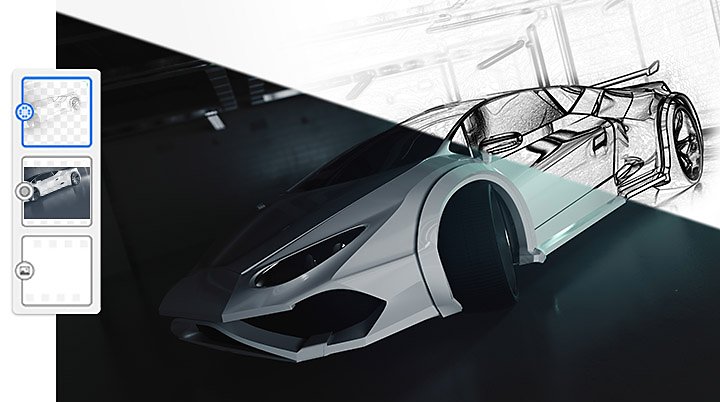
If you’re using a digital drawing program such as Adobe Fresco, like Shuster, you can layer in translucent gray blocks to give dimension to your car. This can also help emphasize the tires, which you can further define by adding smaller circles within your wheels to sketch out hubcaps.
Fine-tune any details you want at this stage and add color. Learn how to use pixel brushes to draw with colored pencils, ink pens, crayons, and more in Adobe Fresco. Shuster applies an airbrush gradient to help sculpt his car and give it a finished look.
Tips to accelerate your drawing.
It can be tempting to stop and refine your lines as you go, but try to keep your foot on the gas. “I see people work and rework a sketch, and sometimes it just loses all its life. I try to go with the first stab,” says Shuster.
Use layers to your advantage. “You can layer on top of a sketch, then slide the opacity down so it’s basically a tracing paper and drawing paper combo. Then, when you’re happy with the shape, you can go in and nail the final line with one stroke,” advises Shuster.
No matter what approach you take to draw your car, the key is to start with a solid outline and stick with it. “Leaving yourself a good roadmap will save you time in the end,” says House.
Now that you’ve absorbed a few car drawing lessons, take your skills for a test drive and see what you can make today.
Contributors
You might also be interested in…

Take your skills to the next level with drawing exercises and advice from professional illustrators.

How to become a professional illustrator.
Get tips on portfolio creation and art presentation to help you kick off a new career.

Learn more about creating art and illustration with this versatile file type.

Explore the art of sequential storytelling and learn how to hone your skills to work in this exciting medium.