Photography (20GB)
US$9.99/mo
Lightroom on desktop and mobile, Lightroom Classic, and Photoshop on desktop and iPad. Learn more
See how you can convey a specific point of view by changing the proportions in your image with Adobe Photoshop.
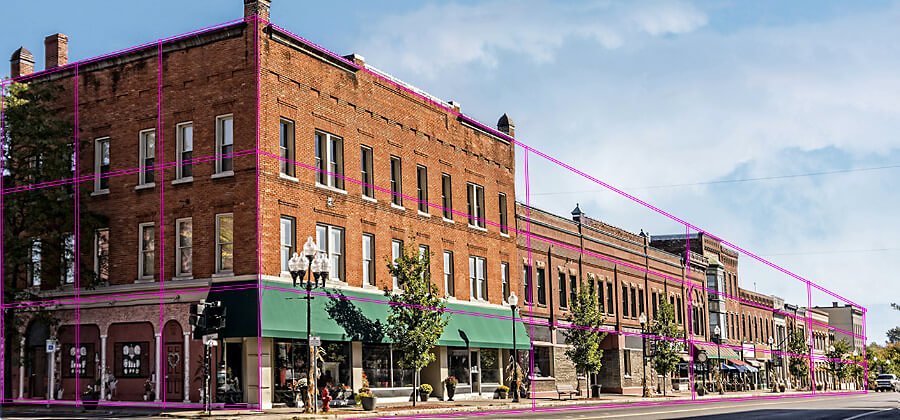
In person, perspective is informed by human visual perception. How the eyes and brain work together gives objects the proper scale of reference based on context. It’s how you know a tall building in the distance is many stories high even if it looks smaller than a human standing next to you. Cameras use focal length to mimic this — making most photographs appear realistic. But photographers don’t always want to portray the realistic. Sometimes the goal of an image is to draw people in with wonder and leave them curious about how the photo was taken. This is where forced perspective, sometimes called false perspective, comes in. If you’ve ever seen a photo that makes it look like a person’s hand is holding the Eiffel Tower or supporting the Leaning Tower of Pisa, you’ve seen forced perspective. But this technique can be used for so much more.
Forced perspective takes into account depth perception and normal perspective and challenges the viewer’s sense of size, position, scale, and proportion. The Tower of Pisa example is a common one in photography, but perspective techniques can be applied to filmmaking, as well — it’s how hobbits appeared much shorter than humans in the Lord of the Rings movies.
These types of photos involve shooting and framing tricks before image capture. Forced perspective can also be very useful in post-production. Lens distortions can alter the perspective of an image, causing it to look different from what the photographer intended when they composed and shot the image. A wide-angle lens, for instance, makes subjects in the background appear smaller, while objects on the edge of the frame may appear distorted. In these scenarios, Adobe Photoshop can help you adjust the perspective in your image and bring your true vision to life.
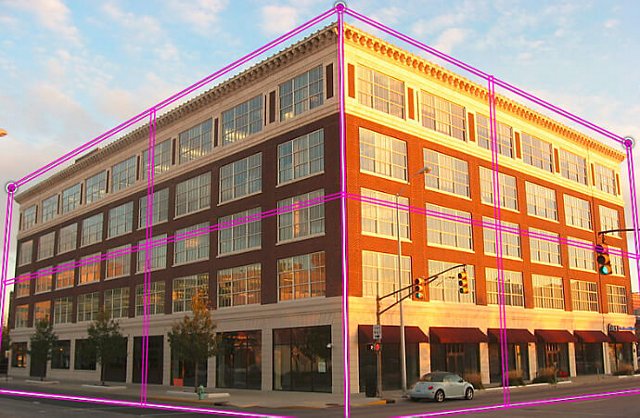
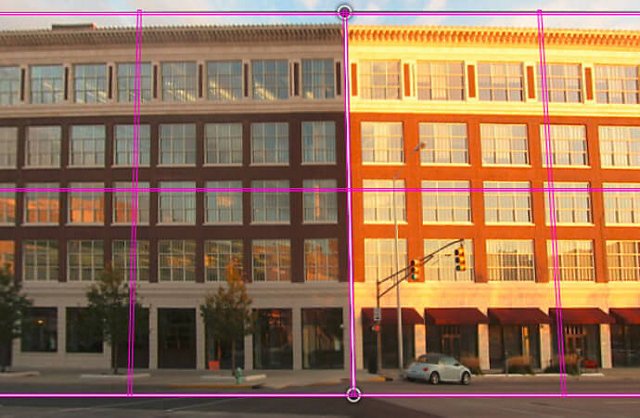
Using the Perspective Warp tool in Photoshop.
You can create a forced perspective to help convey the sense of scale — or to portray the perspective that best suits your narrative — using the Perspective Warp tool. This tool is most effective when used on buildings and objects with straight lines. Buildings and other architectural elements tend to get distorted when photographed with a wide angle lens, and yet the sheer size of buildings often requires a wide-angle lens to fully capture them. The Perspective Warp tool can help you overcome this challenge by straightening distorted lines using advanced image processing to adjust the angle at which an object is shown.
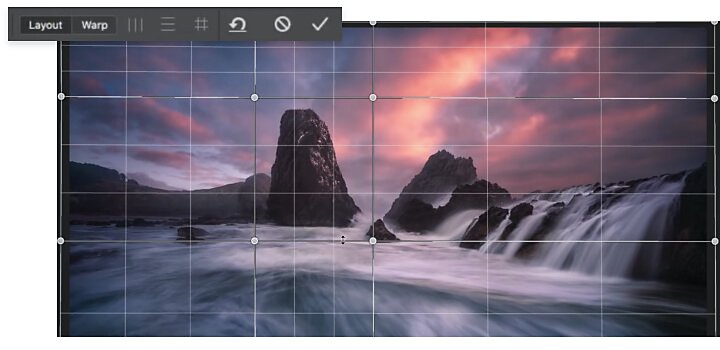
There are many uses of the Perspective Warp tool. It can help you create realistic-looking image composites. After importing an object into a scene, you can use it to make sure the object fits perfectly and looks believable. You can also use the Perspective Warp tool to help enhance your landscape and nature photography. Accentuate trees, rocks, or waterfalls by adjusting their size and positioning while maintaining a realistic perspective relative to the rest of your image.
Taking forced perspective photos can be fun and educational, pushing you to think critically and creatively about camera angles, subject placement, and more. Use these photography tips to begin shooting with a forced perspective:
Another set of eyes.
You might need a model or someone to give you a different perspective — or both — so bring a friend along to help capture your perspective images.

Play with scale.
Move large objects into the background and bring smaller subjects into the foreground to experiment with size and scale. This helps minimize the different sizes between subjects, allowing you to create fun optical illusions. Use this effect to make subjects look smaller or larger than life.
Experiment with vantage points.
Shooting from an unexpected angle helps force a new kind of perspective. You may want to shoot from a low angle to exaggerate your foreground, or you can shoot from an aerial view to give your image a 2D feel.

Use props and cutouts.
Make your frame more interesting by adding props to your image. You can use toys, stickers, or custom-made cutouts. Remember that scale can be easily distorted by adjusting the position of different elements, moving them between the foreground and the background. Don’t be scared to experiment.
With these tools and techniques, you’ll be able to create compelling and intriguing forced-perspective photography. And then, learn more about how you can create interesting images with focus stacking and photo composites.
Use the Path Blur tool to bring out dynamic motion in your images.
Add drama to a high-contrast image by infusing it with color.
Create a double exposure effect.
Combine two of your photos for one head-turning look.
Journey to a new world and make small subjects larger than life with macro photography tips.
Find the Creative Cloud plan that’s right for you.
US$9.99/mo
Lightroom on desktop and mobile, Lightroom Classic, and Photoshop on desktop and iPad. Learn more
Photography (20GB)
Lightroom on desktop and mobile, Lightroom Classic, and Photoshop on desktop and iPad. Learn more
US$9.99/mo
US$22.99/mo
Get Photoshop on desktop and iPad as part of Creative Cloud. Learn more
Adobe Photoshop Single App
Get Photoshop on desktop and iPad as part of Creative Cloud. Learn more
US$22.99/mo
US$57.99/mo
Get Photoshop on desktop and iPad, plus the entire collection of creative apps. Learn more
All Apps
Get Photoshop on desktop and iPad, plus the entire collection of creative apps. Learn more
US$57.99/mo
US$19.99/mo.
Save over 60% on the entire collection of Creative Cloud apps. Learn more
Students and teachers
Save over 60% on the entire collection of Creative Cloud apps. Learn more
US$19.99/mo