Request e-signatures
You can now get documents signed by others using Acrobat Reader mobile app’s new Request e-signatures tool. The tool allows you to create e-signatures that comply with e-signature laws in many countries around the world.
Non-enterprise users can use the Request e-signatures tool with subscription to any one of the following plans:
PDF Pack
Acrobat Standard
Acrobat Pro for Individuals/Teams
Acrobat Pro with e-sign for Individuals/Teams
Acrobat Pro with enhanced e-sign for Individuals/Teams
Note
Acrobat Reader app’s Request e-signatures tool is currently available only for non-enterprise users. If you want to get documents signed using your enterprise account, we suggest using Acrobat web or desktop.
Supported file types
Currently, Request e-signatures feature is supported only for PDF files.
Send documents for e-signature
To send documents for signature:
From the list of files, tap
 > Request e-signatures for the file that you want to send for signature.
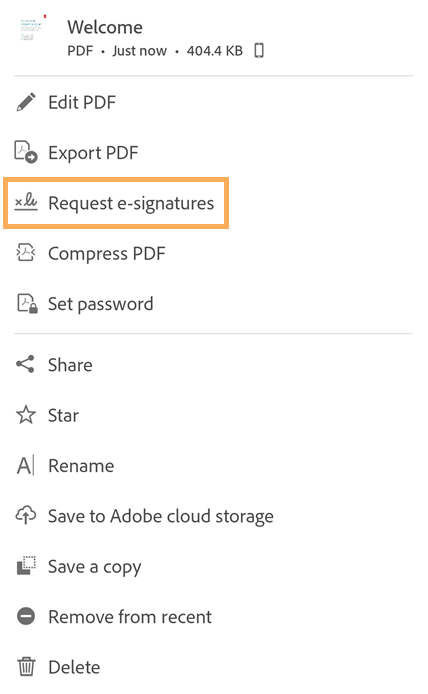
Alternatively, you can open the file and then select the e-signatures tool.
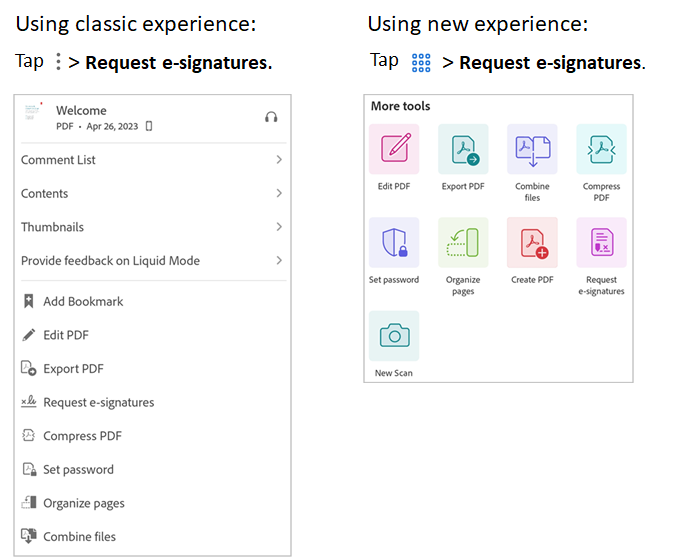
We recently rolled out our new and more intuitive experience. Take one of the following actions based on the interface that you are experiencing:
In the Add recipients dialog that opens, add the email addresses of the recipients. The added recipients appear in the list below. The order of the recipients in the list is the order in which they are required to sign the agreement.
To change the order of the recipients, tap
 next to a recipient and move it up or down the list.
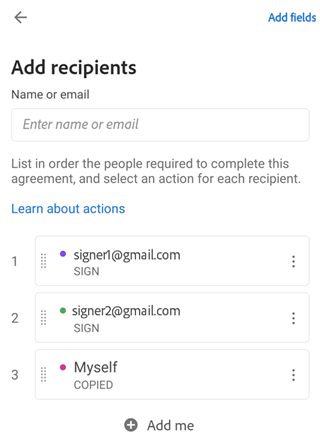
To include yourself as a signer of the document, tap Add Me.
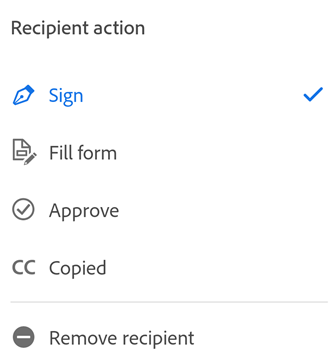
To change the role of the added recipients, tap
next to a recipient’s email address and select one of the following options:Sign - This is the default recipient role. Each signer on a transaction needs to have at least one required signature field assigned to them. If the system does not find a signature field for the signer, it automatically generates a signature block at the end of the document.
Fill form - This role is available only for Acrobat Pro and Advanced E-Sign subscribers. Form fillers can be designated within a signature cycle but are not required to apply a signature of any kind. All field types including the signature fields can be assigned to a form filler.
Approve - This role is available only for Acrobat Pro and Advanced E-Sign subscribers. An approver can be assigned for a document that needs a review before sending it off to the signers. Approvers are not required to sign or interact with any field; they only need to enter their name before sending the transaction to the signers. You may also assign few fields to the approver, which requires the approver to fill them out.
Copied - Copied recipients receive a copy of the initial request and the completed signed agreement for information purposes only.
Remove recipient - Select this option to remove the recipient from the list.
Once you add all the recipients in the desired order and assign appropriate roles, tap Add fields from the top right corner.
Tap anywhere on the document to add form fields.
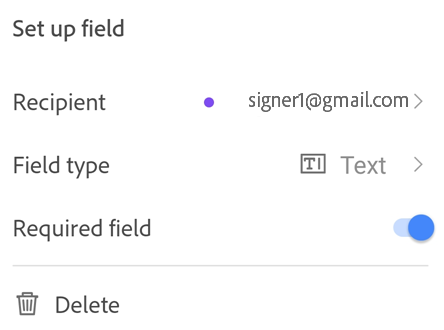
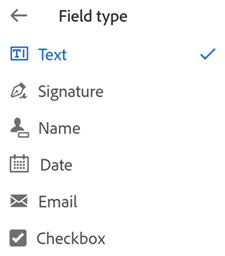
In the Set up field dialog that appears, tap the Field type field and select a field type.
Acrobat supports following field types: text, signature, name, date, email, and checkbox. By default, the added fields are assigned to the first recipient.
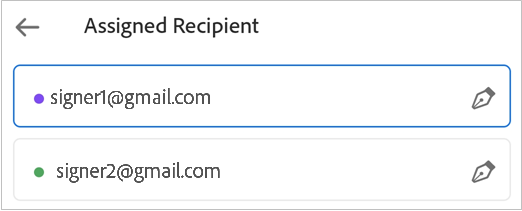
To change the assigned recipient, tap the field and select another recipient from the pop-up menu. Note that only the recipients with Sign role appear in the list of signers here.
To remove an unwanted form field, tap the field and tap Delete.
Once the fields are assigned, tap Review.
In the Review agreement dialog that opens, you can change the file name, write a message for the recipients, and review the document.
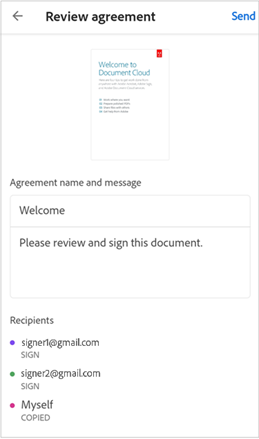
Tap Send.
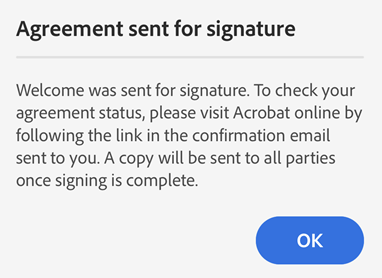
You receive a confirmation message to verify that the agreement is sent for signature.
Manage agreements
You can view or manage an agreement from a web browser by logging in to your account. You can also access the direct agreement link from your email that opens the agreement in the mobile web browser.