Files and folders
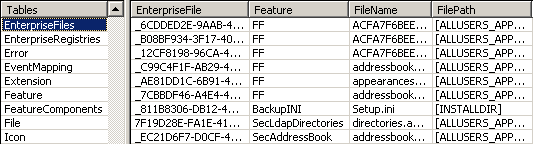
The Customization Wizard contains a list of files to be installed by the installer. You can add or remove files from the installation list. Files are stored in the transform (.mst) file. Any changes you make are recorded in the EnterpriseFiles table.
Installer table modifications: Enterprise Files
The Files and Folders feature allows you to import files and folders from a repository or an already configured machine for installation on the destination system. You can add or remove files from the installation list and modify file records. This feature is particularly useful when migrating to a newer version and you want to leverage existing assets such as:
Company-wide address books
Custom plugins
Fonts
JavaScripts
Templates
Watermarks and signature logos
Redaction code sets
Note
Adobe strongly recommends that you do not make changes to the Files and Folders feature unless you are knowledgeable about editing and troubleshooting Microsoft Windows file lists. Improper use of this feature can result in the corruption of critical system files. Large files will inflate the binary table of the transform and the installer may take a long time to load.
Add files and folders
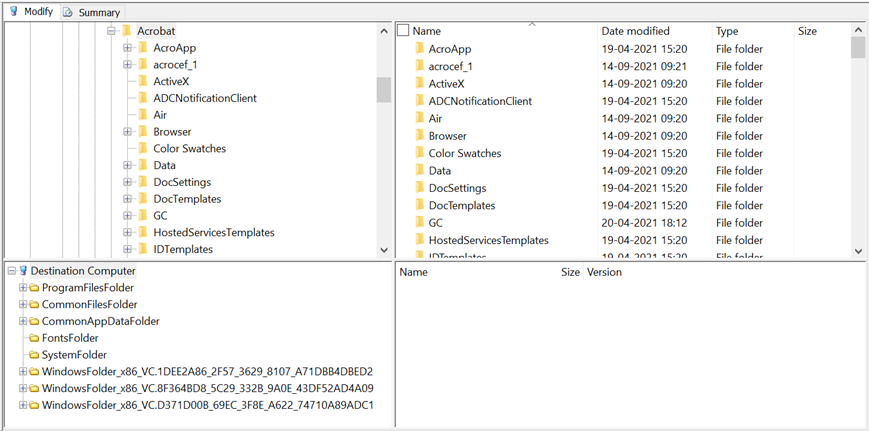
The main work area contains four panes. The upper-left pane contains the directory tree for the source computer, which contains the installation files. The lower-left pane contains the directory tree for the installation files to be installed by the installer on the destination system.
View files to install
To add a file or folder:
Choose the Modify tab.
Navigate to a directory in the upper-left pane to view its contents in the upper-right pane.
Verify you can see the files or folders you want to add in the upper-right pane.
Select one or more files or folders in the source directory, and drag it to the destination directory.
The added items will appear as red icons and will be itemized in the Summary tab.
Remove files
Removing a file deletes the data table entry and prevents the item from being installed.
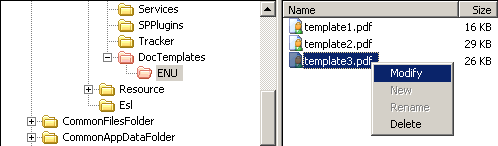
To remove a default file:
Navigate to the directory in the lower left hand pane.
Right click on the file in the lower right hand pane.
Choose Modify.
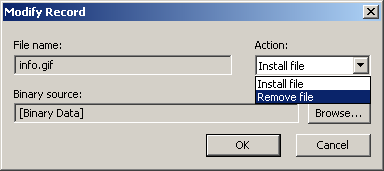
Select Install file or Remove file from the Action list.
In the Binary source field, choose Browse and select a binary source file. The Binary source field allows you to provide a different source file name in the File name text box.
Choose OK.
Modify and remove default files
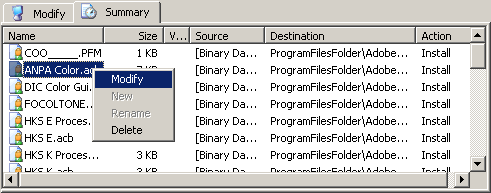
Summary view of file and folder changes
View a summary of file changes
The Summary tab contains a list of files on the source computer that you have added to or removed from the destination directory.
To view your changes:
Choose the Summary tab. A list of installation files that you have added or removed appears.
Optional: To change a file record, right-click the file name, and select Modify. In the Modify record dialog box, you can rename files and add or remove them from the installation list.
You can also modify files from this page in the same way.
Summary view of file and folder changes
Use case: Digital signature files
Click on Files and Folders to open a directory of files on the source computer that enables copying existing files to the destination system. You can add or remove files from the installation list and modify file records. Copy preconfigured files from an existing installation from the top window to the appropriate folder in the bottom window under Destination Computer.
Copy needed files. Paths vary by application, version, and user. For example, on Windows, drag and drop all acrodata files from
C:\Documents and Settings\<user name>\Application Data\Adobe\Acrobat\<application version>\SecuritytoCommonAppDataFolder\Adobe\<application>\<version>\Replicate\Security. Acrodata files could include:addressbook.acrodata: Populates the Trusted Identity Manager with certificate data. This file can be used to distribute a trust anchor for signature validation.
directories.acrodata: Populates the directory server list in the Security Settings Console. This file can be used to configure connections to an LDAP server used as a certificate repository.
appearances.acrodata: Stores signature appearances. Unless there is a shared company appearance, do not use this file.
security-policy.acrodata: Populates the security policy list in the Security Policy Manager. This file can be used to distribute common document security policies.
Copy other needed files to a custom or existing directory. For example, expand the Destination Computer directory
ProgramFileFolder\Adobe\Acrobat\<version>\Acrobat\and create a new folder called Security. Some common files that may be distributed this way include:PKCS11 drivers: If you use smart cards, you can distribute drivers that end users can import via the Security Settings Console.
Custom security handlers: If you have developed a custom handler for signing or document security, install it in the application’s plugin directory.
Some files, such as SignatureLogo.pdf, should reside in a user’s directory. To create a watermark or logo on each employee signature, create the logo and manually copy the file to the Documents and Settings Directory under their username; for example, on Windows 7,
C:\Users\(user name)\AppData\Roaming\Adobe\Acrobat\(version)\Security
Note
The tuned installer will copy these files to the matching location.