PHOTOSHOP FEATURES
Make smarter edits with Photoshop Neural Filters.
Explore the power of AI and machine learning in Adobe Photoshop. Colorize black-and-white photos, properly capture skin tones, and perform style transfers in a few clicks.
What are Neural Filters?
Located under the Filters tab in Adobe Photoshop, Neural Filters are a fun and easy way to create compelling adjustments and speed up your image editing workflows. Powered by artificial intelligence and machine learning engine Adobe Sensei, Neural Filters use algorithms to generate new pixels in your photos. This allows you to add nondestructive edits and explore new creative ideas quickly, all while keeping the original image intact.
“Machine learning can help you do a lot of things that would have taken many steps in the past,” says photo editor Jesús Ramirez. “In some cases, with just one click. In other cases, it gets you 80% of the way there.”
The different types of Photoshop Neural Filters.
Once you open your image in Photoshop, there are five featured filters ready for you to use. Choose one to enhance your shot or try them all and see what works best for you.
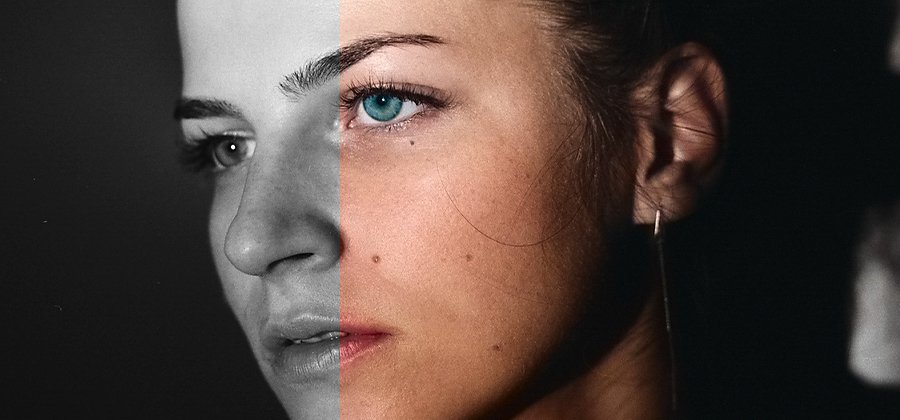
Smooth it over with Skin Smoothing.
Brush and touch up your subjects’ skin effortlessly with the Skin Smoothing filter. Simple sliders for Smoothness and Blur allow you to remove tattoos, freckles, scars, and other elements on faces and skin in an instant.
Excavate unwanted items with JPEG Artifacts Removal.
The more times you save a JPEG file, the more likely your image will look fuzzy or pixelated. You may see artifacting (obvious visual anomalies) due to the compression algorithms used to reduce the file size. Reverse the process with this filter and fine-tune it by adjusting the edge of your image with either a high, medium, or low level of blur.
Switch it up with Style Transfer.
Just like it sounds, this filter allows you to take the look of one image — the color, hue, or saturation — and put it on another. Sliders for Style Strength, Brush Size, and Blur Background as well as checkboxes like Preserve Color and Focus Subject let you customize how much of the look your picture ends up with.
Super Zoom
Zoom in closely on a subject while keeping details sharp. Enhance facial features, reduce noise, and remove compressed artifacts to let your subject — whatever it is — shine through in extreme close-up.
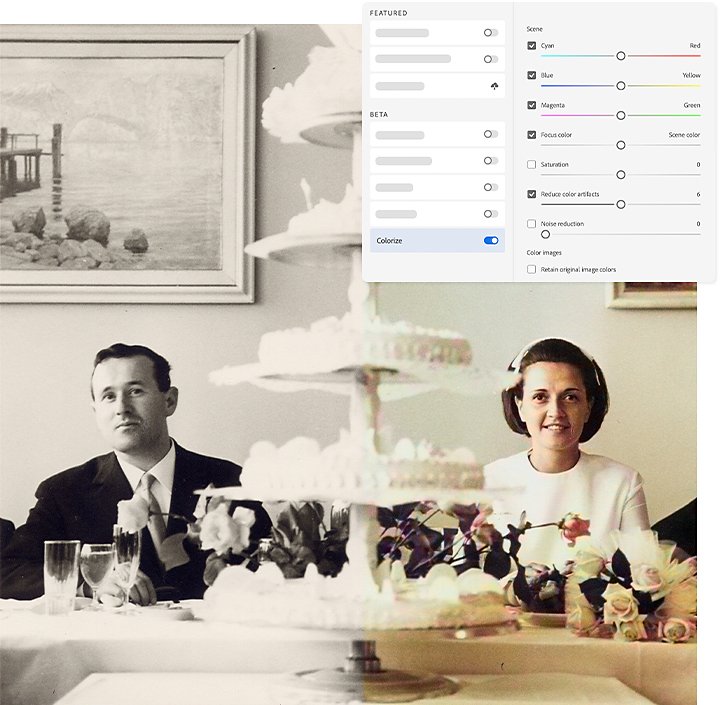
Colorize
Quickly convert black-and-white photos to eye-popping color in a flash. Designate which colors you want to appear in your capture, and Adobe Sensei will automatically fill the image. Focus points let you add more color to specific areas to fine-tune the filter.
Take beta Neural Filters to the max.
In addition to the primary Photoshop Neural Filter categories, you can also experiment with innovative beta filters that save you time on edits and help you get the image you want.
Smart Portraits
Change your subject’s expressions, position, facial age, and any other fine details with the adjustable sliders in this filter. Create and customize masks to place on your subject to make minor tweaks to appearance or even craft surreal moods. With the Retain Unique Details slider, keep what makes your subject stand out in the midst of all the adjustments.
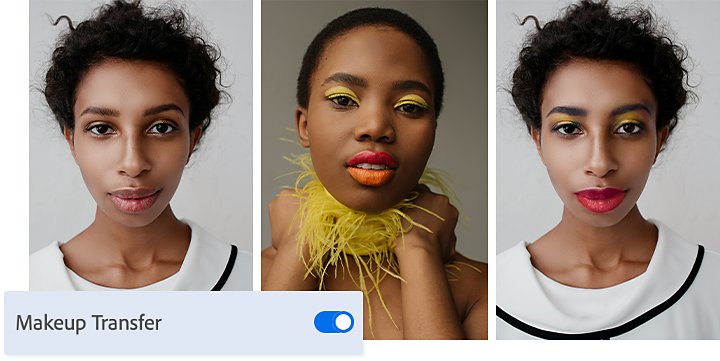
Makeup Transfer
Apply the same makeup settings to various faces with this useful tool. Add new makeup to a photo or completely change your model’s current makeup in post-production to get exactly the right look for your shot.
Depth Blur
Add haze to your photo automatically. Mask out the foreground, add a layer of haze, and adjust accordingly. Use the ready-made sliders in Photoshop to tone up or down the amount of haze, as well as its color temperature, tint, saturation, and more.
Landscape Mixer
Bring the best of two images together to create totally unique landscapes. Start with your landscape photo, then choose a reference landscape shot. Landscape Mixer will pull elements from both photos to create a new image. Use the Winter, Spring, Summer, Fall, and Sunset sliders to control the appearance of the time of day and season.
Color Transfer
Pour gorgeous colors from one photo to the next in just a few seconds. Use Color Transfer to apply the color palette from any reference image onto the photo of your choosing. Play with infinite reference photo options, experiment with color moods, and breathe new life into old photos.
Harmonization
Match the look of one Photoshop layer to another for natural-looking photo compositing. The Harmonization filter looks at your reference image and applies its color and tone to any layer. Adjust the sliders, add a mask, and enjoy the color harmony.
As new features of Photoshop, beta and new Neural Filters will continually be updated to help you produce stronger, more intuitive work.
Filter it out with Photoshop.
No matter what Neural Filter you choose, Adobe makes it simple to try it on for size.
1. Upload or drag and drop an image into Photoshop.
2. Click Filters › Neural Filters.
3. Choose from the list of Neural Filters on the right-hand side.
4. Depending on the filter you pick, adjust its settings to your liking.
5. Select a method of output — either Duplicate Layer, Duplicate Layer Masked, New Layer, or Smart Filter — then click OK.
Note that Smart Filter is a great output method because you can easily go back in and make changes to your neural filters.

Make the most out of Neural Filters in Photoshop.
When applying a Neural Filter, make sure to always add a duplicate layer on your image to preserve the original source image. “What I recommend people to do on output is select Duplicate Layer so you have another layer that has all your colors and edits,” says Ramirez.
If your filters are meant for your subject’s face, implement a layer mask manually for smoother blending between layers. “Sometimes the filter just overlays pixels, and they don’t look as good on top of the original image,” Ramirez explains. “You can definitely do it by hand in some instances and you probably get better results.”
Before you make any changes, see what they would look like on your image with the Preview button. Or if you don’t like the direction your photos take with filters on, click Reset and start over again.
Photoshop has all the smart tools you need to make what’s in your mind’s eye possible.
Contributor
Frequently asked questions.
The best method of output depends on your project goals. Converting the current layer to a Smart Object allows you to apply those filters as an editable smart filter, which is the recommended option. You can save the output to the current layer or as a new unmasked or masked layer. If you want, you can even output the filter as an entirely new Photoshop document.
You can download filters from the cloud and use them to start editing. Click Filter > Neural Filters. Inside this panel, you can find all featured or beta neural filters in one place. By selecting the All Filters tab, you can see all current available options. Future Neural Filter options can be found under the Wait List tab.
Update your Photoshop application to the newest version in the Creative Cloud app. This should give you access to all available neural filters.
You can remove neural filters by accessing them at the correct file location. Each subfolder contains a single model:
- MacOS: ~/Library/Application Support/Adobe/UXP/PluginsStorage/PHSP/23/Internal/com.adobe.nfp.gallery/PluginData
- Windows: %appdata%\Roaming\Adobe\UXP\PluginsStorage\PHSP\23\Internal\com.adobe.nfp.gallery\PluginData
Yes, you can share your feedback about neural filters. Submit your feedback via the Photoshop Feedback portal or contact Adobe Support directly.
Find the Creative Cloud plan that's right for you.
Adobe Photoshop Single App
Get Photoshop on desktop and iPad as part of Creative Cloud.
Learn more
Creative Cloud All Apps
Get 20+ Creative Cloud apps, including Photoshop on desktop and iPad.
See what's included | Learn more
Students and teachers
Save over 60% on Creative Cloud All Apps.
See terms | Learn more
Purchase by phone: 800-585-0774