Fast Texturing in Painter with Generators and Substance 3D Assets Scans
During a production, Substance 3D Designer and Painter can be very efficient for material creation - both for a regular surface (like plaster) or a patterned one (you know, brick walls!).
Those materials are applied on a surface to provide detail that didn’t exist on the geometry in the first place.
But sometimes, the opposite can happen, and it would make more sense to need and have to sculpt those details. When making a stone wall, it is necessary to work with a 3D object, if we want to break it or introduce some rubble at its base.
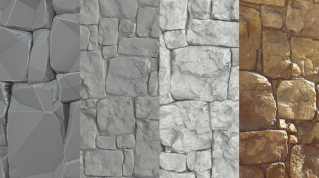
How to take advantage of the iterative freedom of Substance Designer and Painter while working with a hand-sculpted input? Third part
Now that you have completed thefirst part in Zbrush and thesecond part in Substance 3D Designer , here is the last part where you will be coloring your tiling stone wall in Painter with generators and using Substance 3D Assets scans.
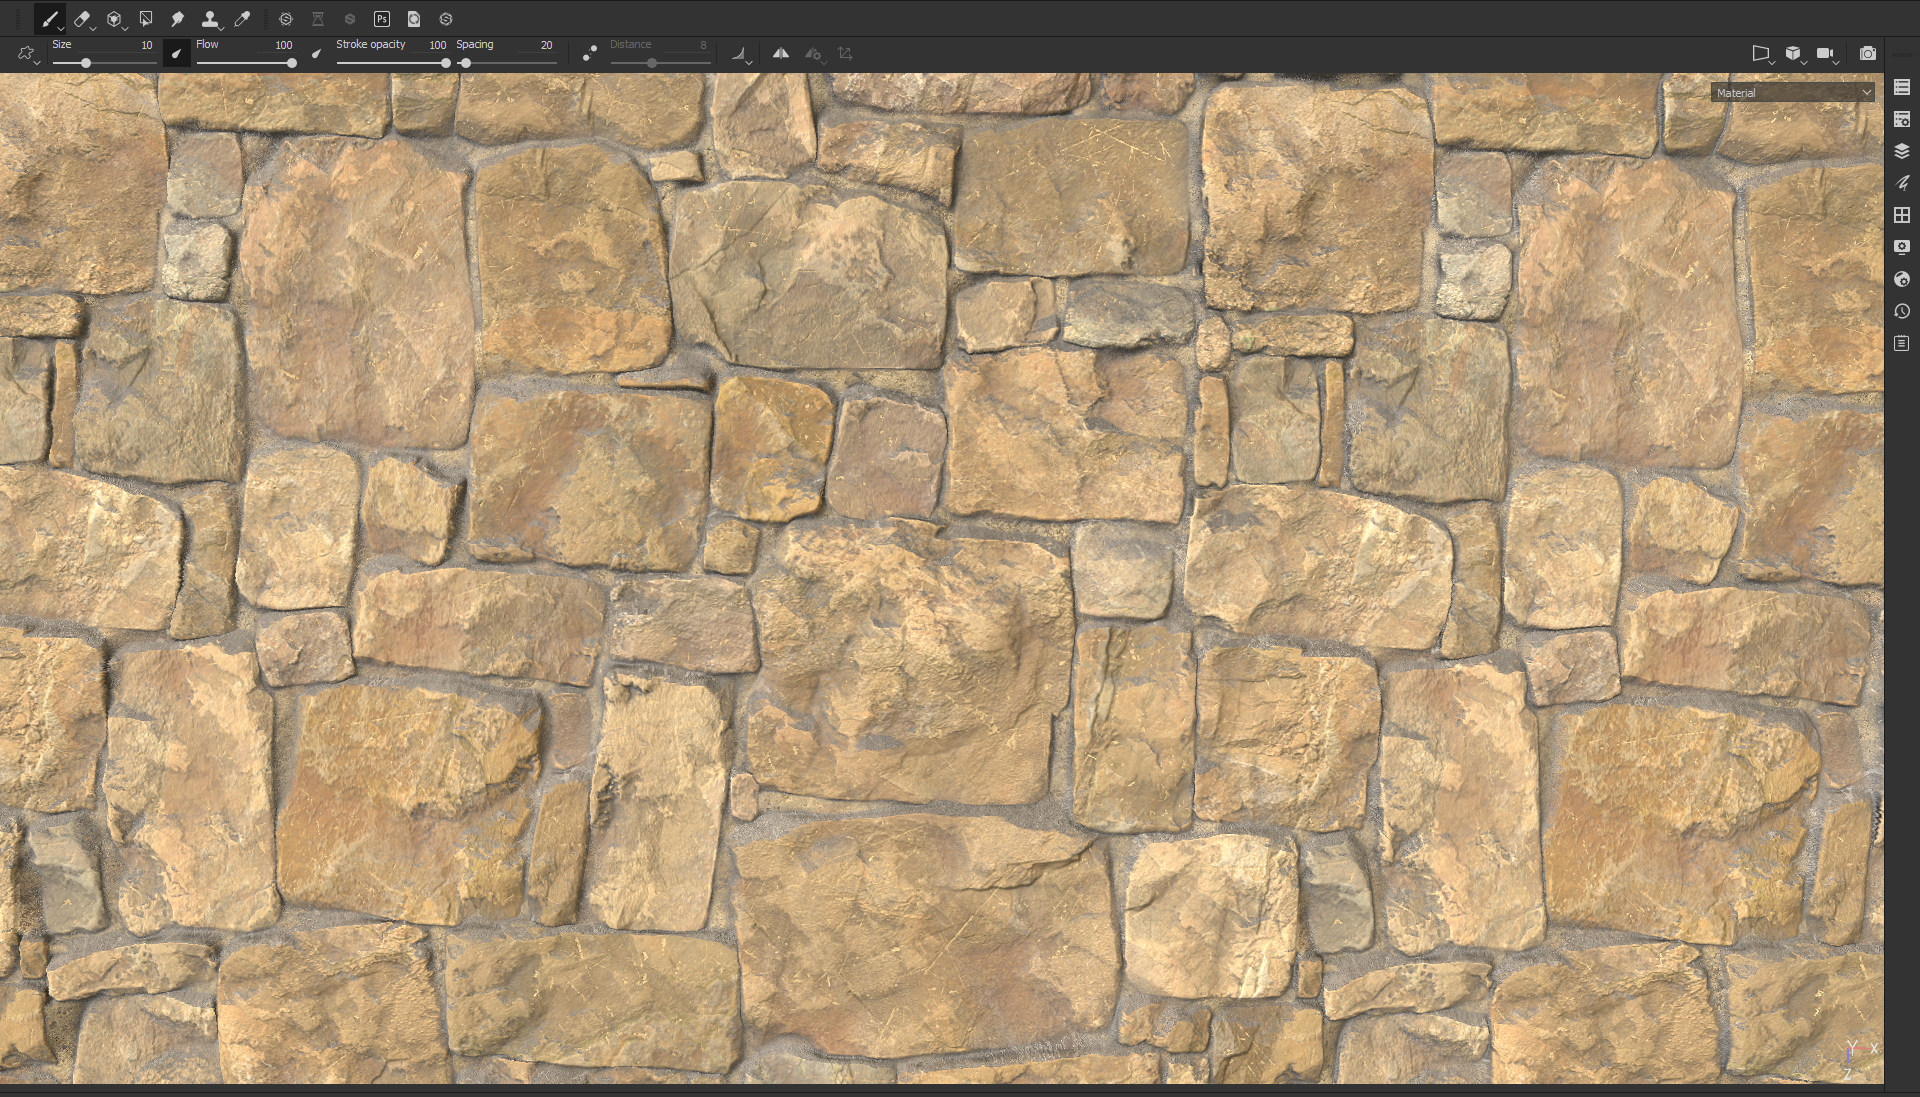
You can start with opening the Tiling Material sample. It makes for a good asset to check that tiling is still working, and has enough geometry to work with Displacement too. Save the opened scene.
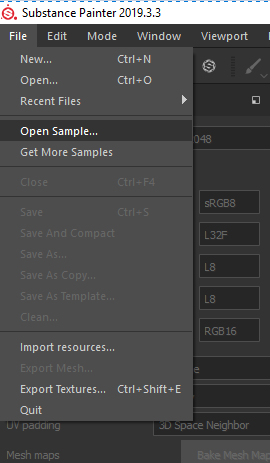
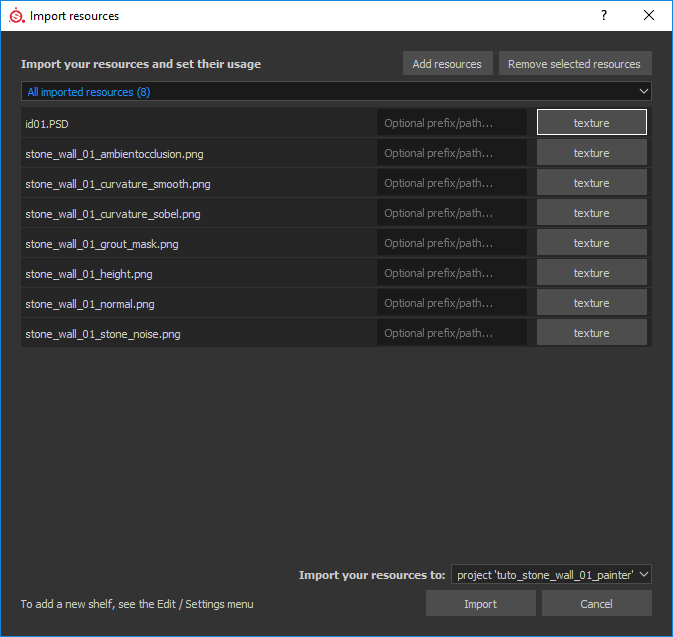
Let’s remove all the existing layers (they are here only for demo purposes) and import our textures from Designer by drag&dropping them in the shelf. Import your resources as Texture and to Project so you can Reload them if you update any wall-related resources in either Zbrush or Designer.
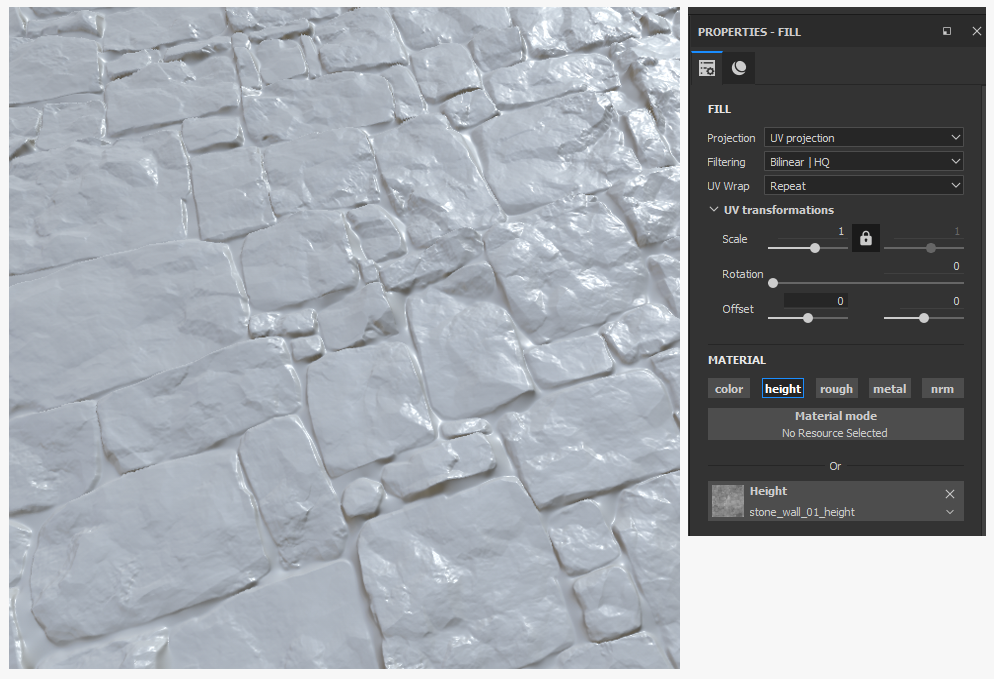
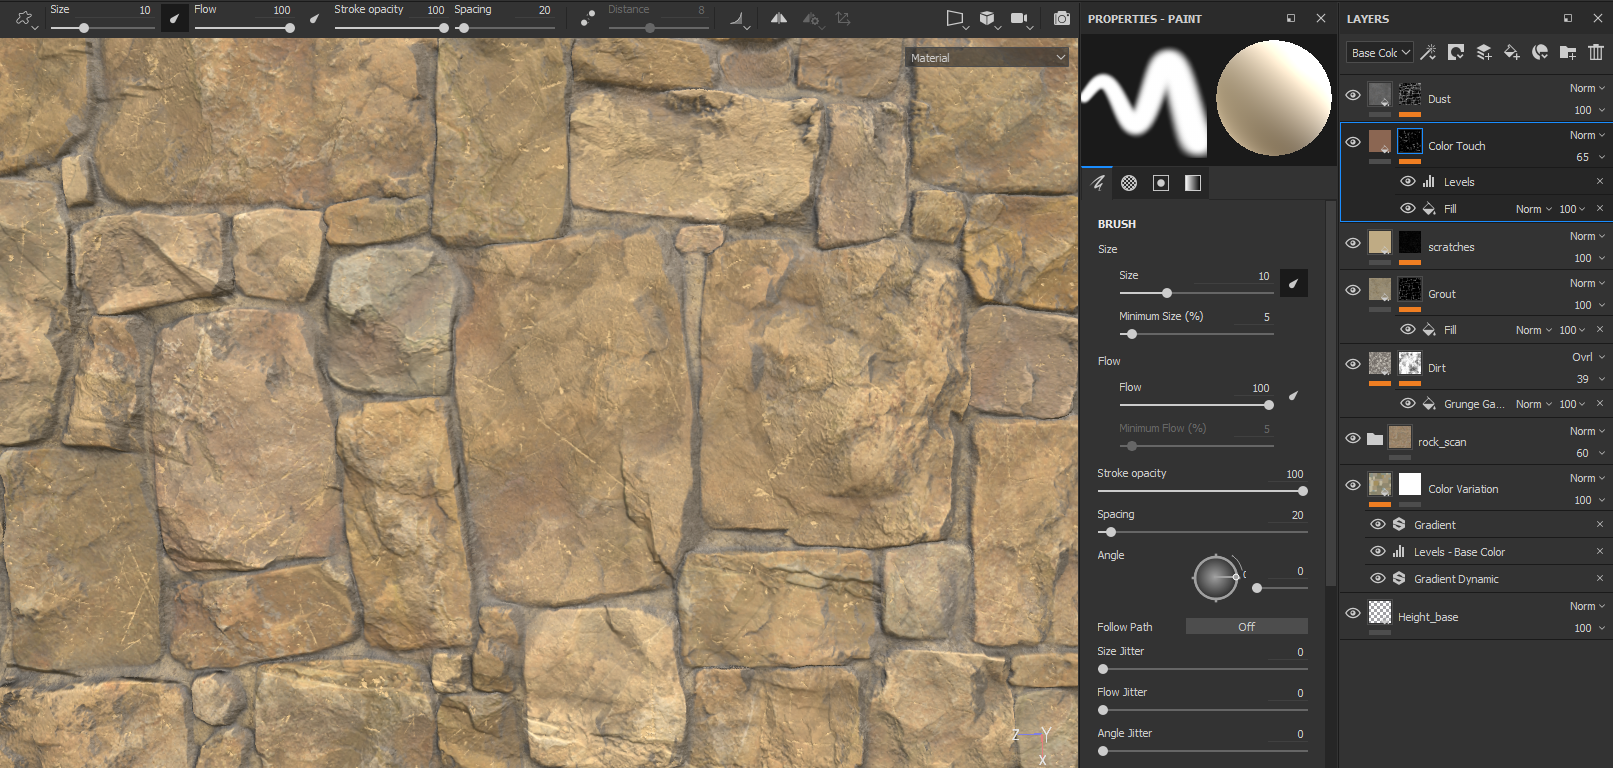
Now we can drag and drop our Normal, ID, Ambient Occlusion and Curvature
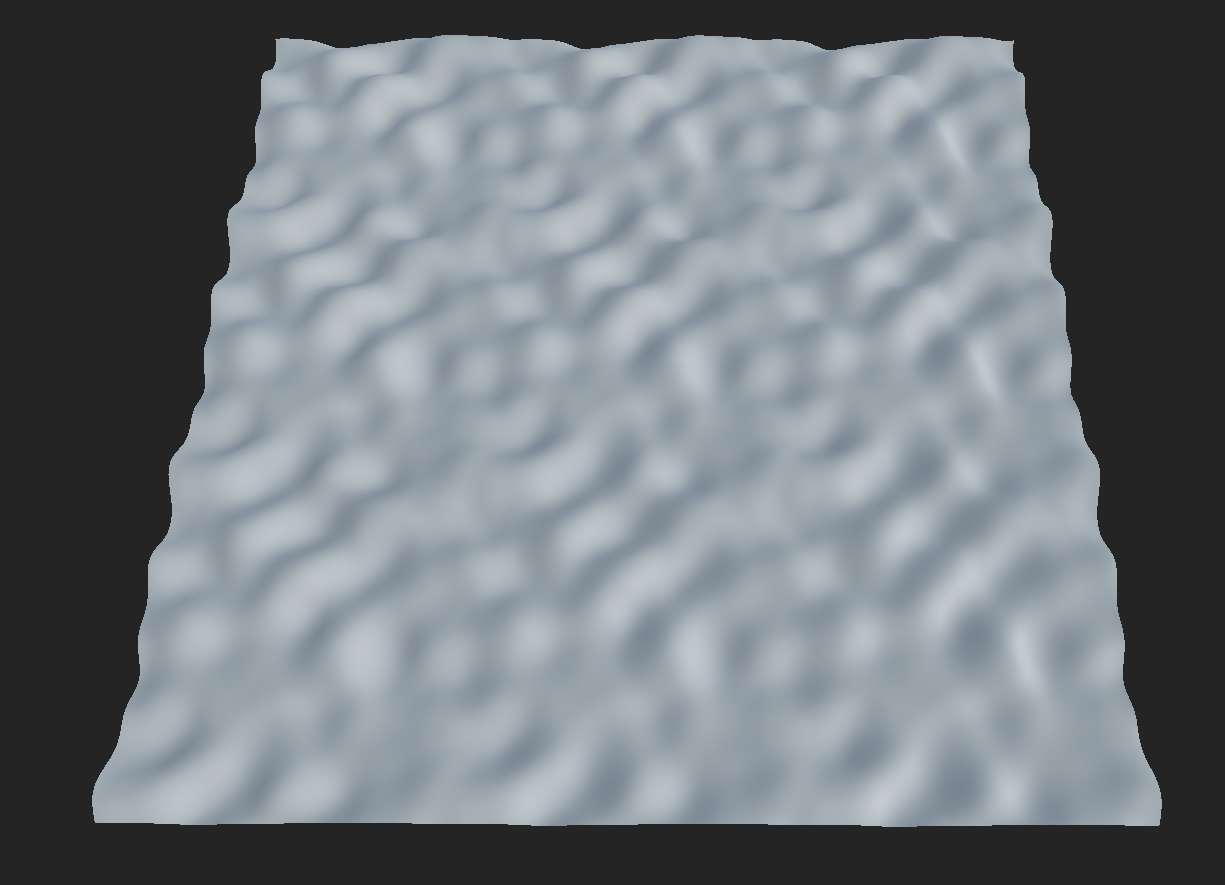
in the right Mesh Maps slots. The stone wall should start to appear. However we do not yet have height information. Just create a fill layer and put the height in the Height slot (Figure A) then adjust the Displacement Scale in the Shader settings to reduce the crazy displace look of the wall (Figure B).
Alright,
we are now ready to start.
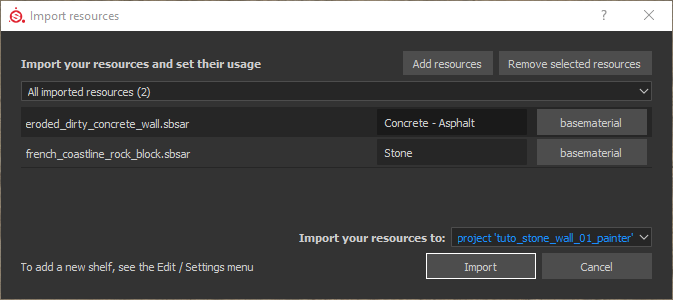
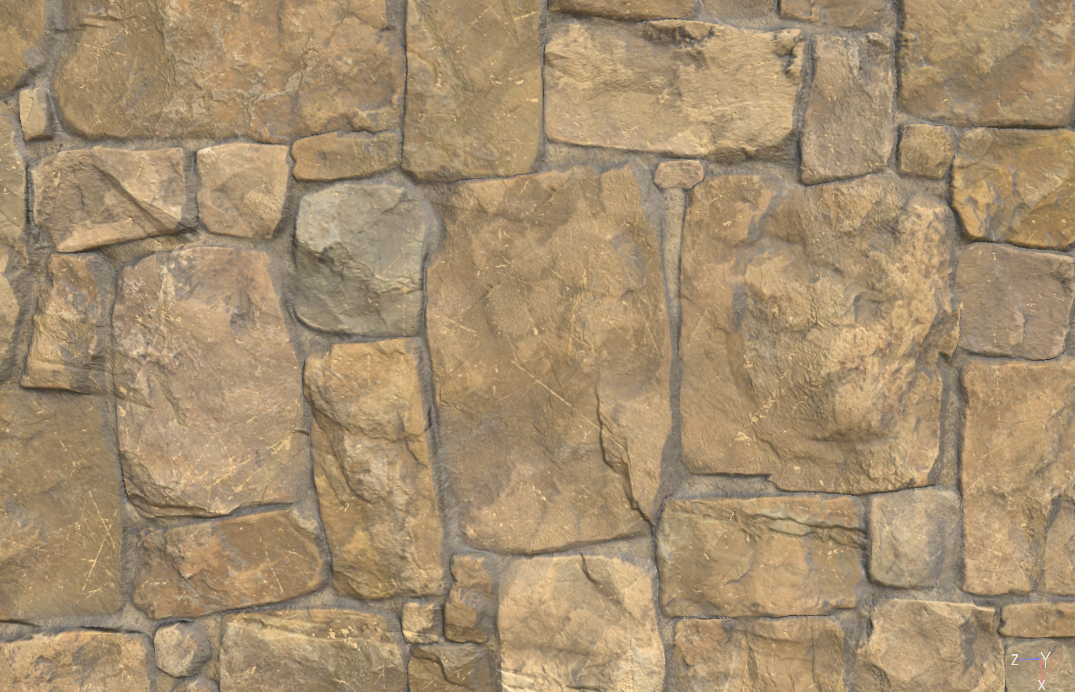
For this kind of material, we can try to quickly fill each block with a generic rock cliff scans or concrete materials from Substance Source. Let’s import them as a Basematerial to our project.
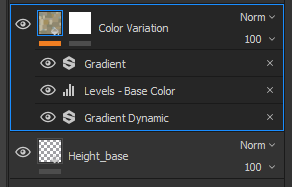
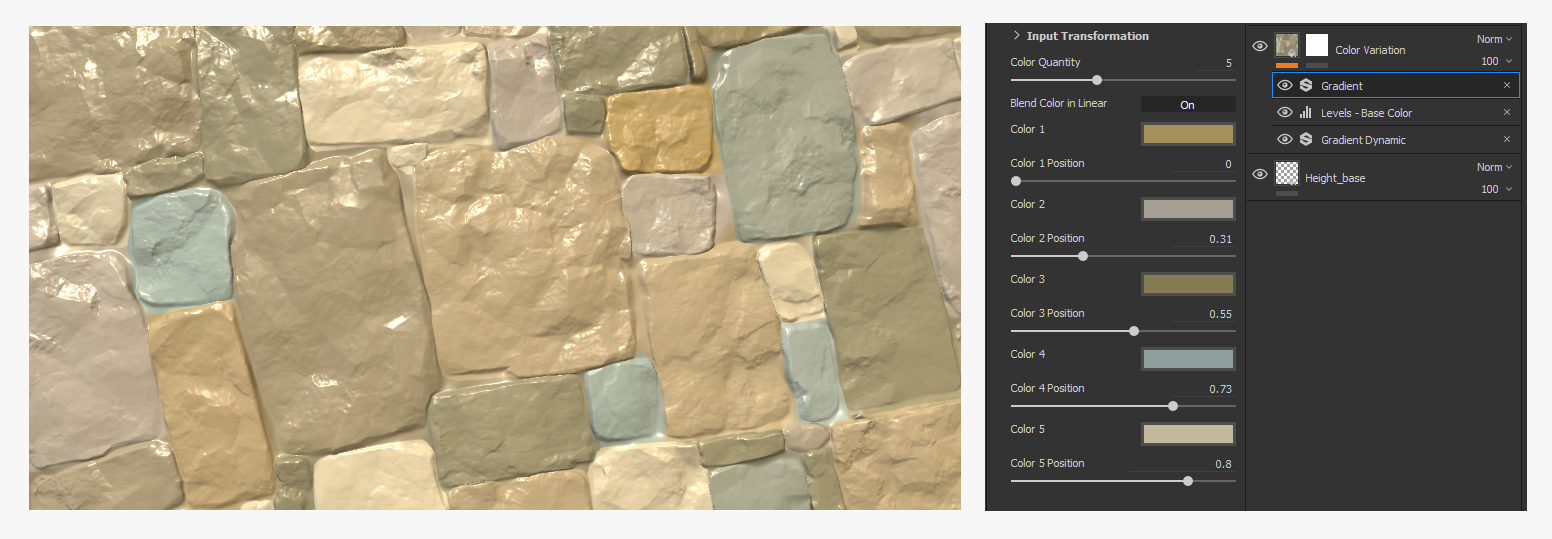
Before applying them, we can generate color variation for each stones with the ID map and a few filters. * Using a Gradient Dynamic and any input noise you prefer, change the original colors of the ID map to random grayscale values; * Let’s add a Level to boost the white and black values; * With a Gradient, let’s apply the color we like.
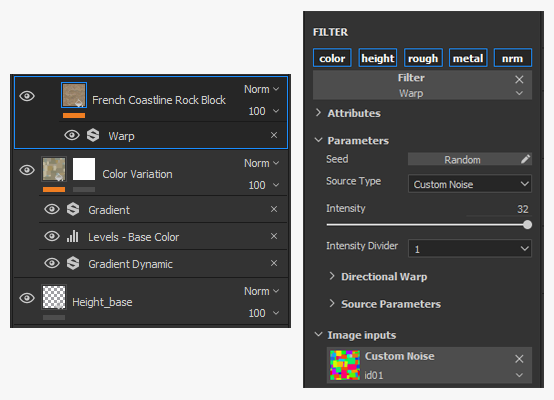
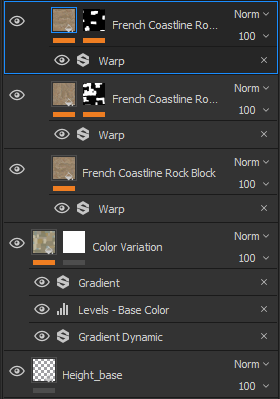
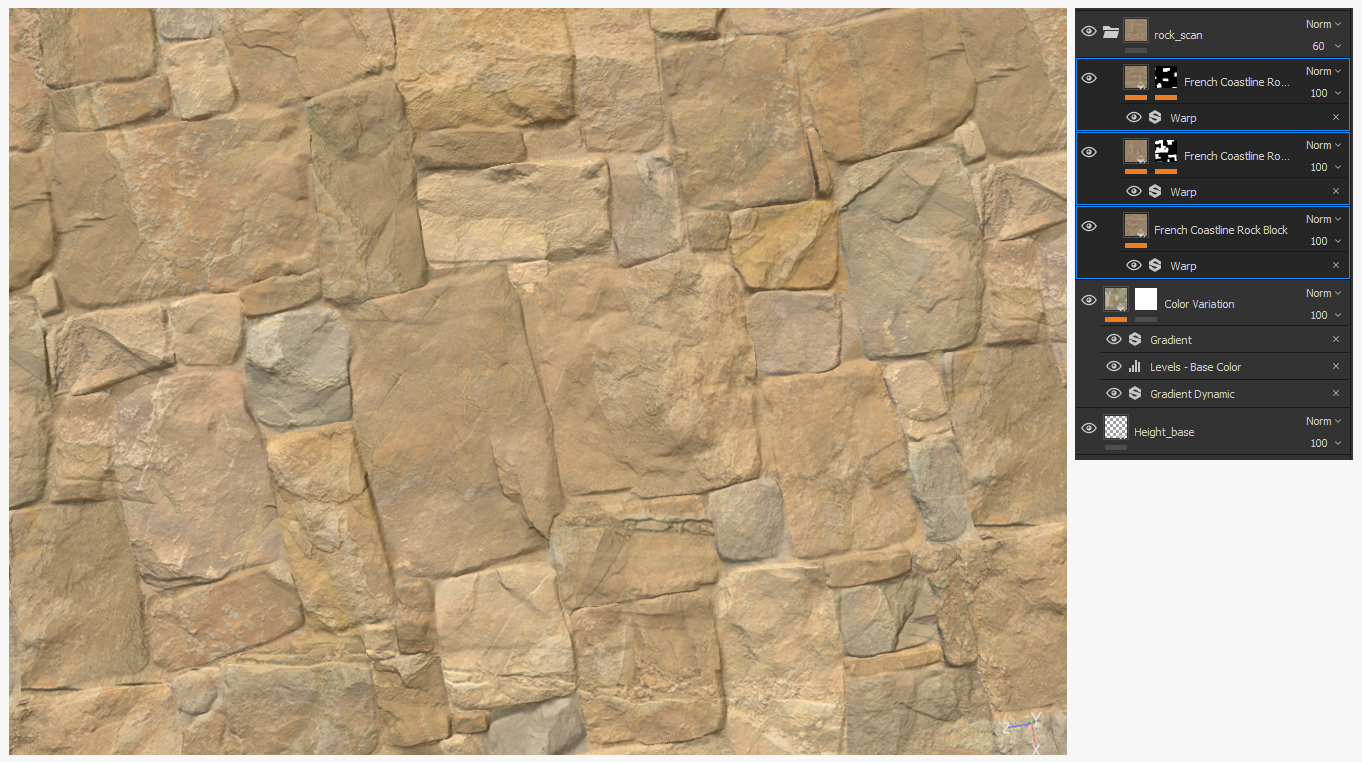
For this second step, we can use the pretty French Coastline stone scan and combine it with the colors. The trick here is to use the ID map in the Warp filter to offset the material randomly across the blocks. It will allow us to break the material pattern according to the wall structure.
Don’t be afraid to do it several times using masks generated with the ID map. You can rotate (by 90 deg) and offset your material to get more variations.
Complete this step by moving the scan layers to a new folder and changing its opacity to ‘60’ so as to retain the cool colors you’d picked before.
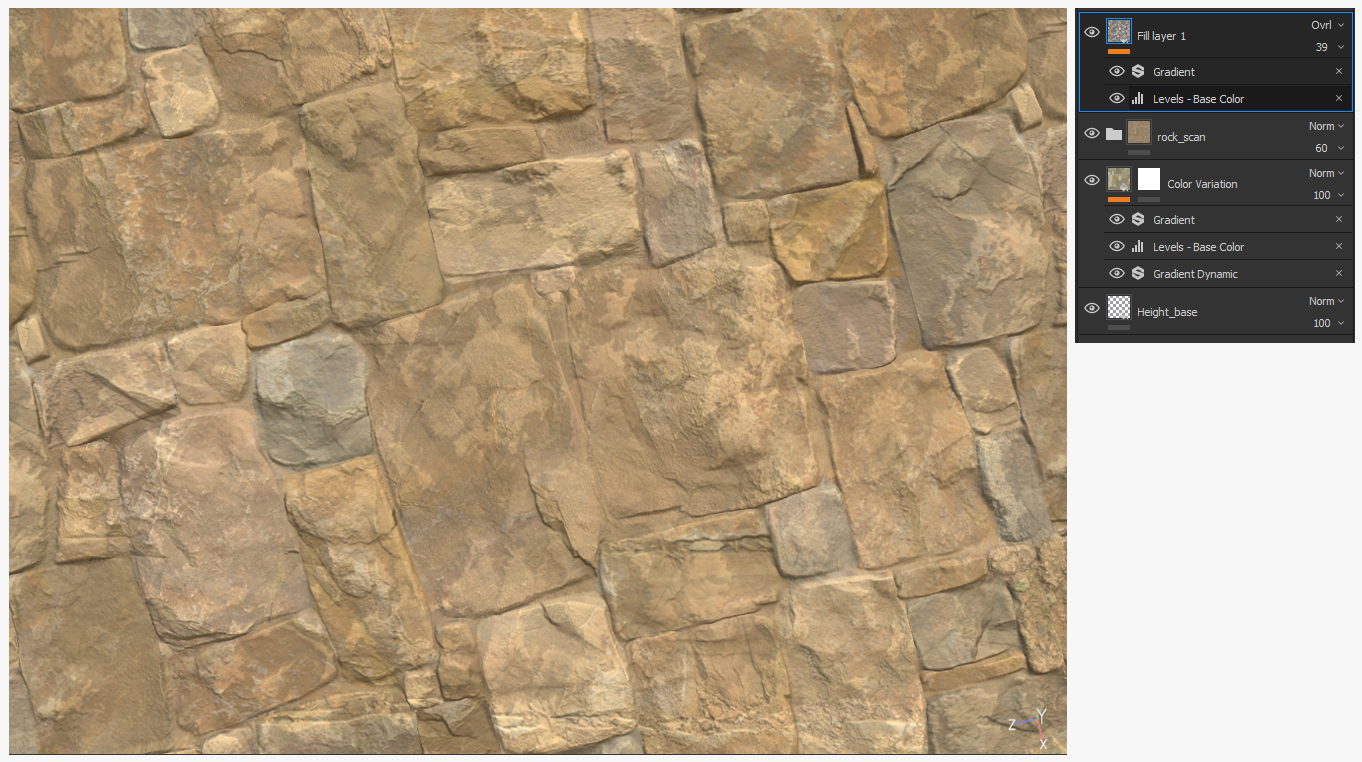
How about we add some dirt now? Let’s make Curvature Smooth work for us.
By inverting the texture and adding contrast with Levels, you can get an interesting base to use with a** Gradient Filter**. Switch the layer blend mode to Overlay and adjust the intensity to get a first pass. By quickly adding a mask and a randomly picked grunge to the layer, you can improve the results.
Now let’s add the grout layer. You can do that by using “Dirty Concrete Wall Eroded” material and the mask we exported from Designer. Adjust the material color parameters to get something that matches well with your stones’ colors, and it’s done. Fast, right ? Sometimes, it can be that simple.
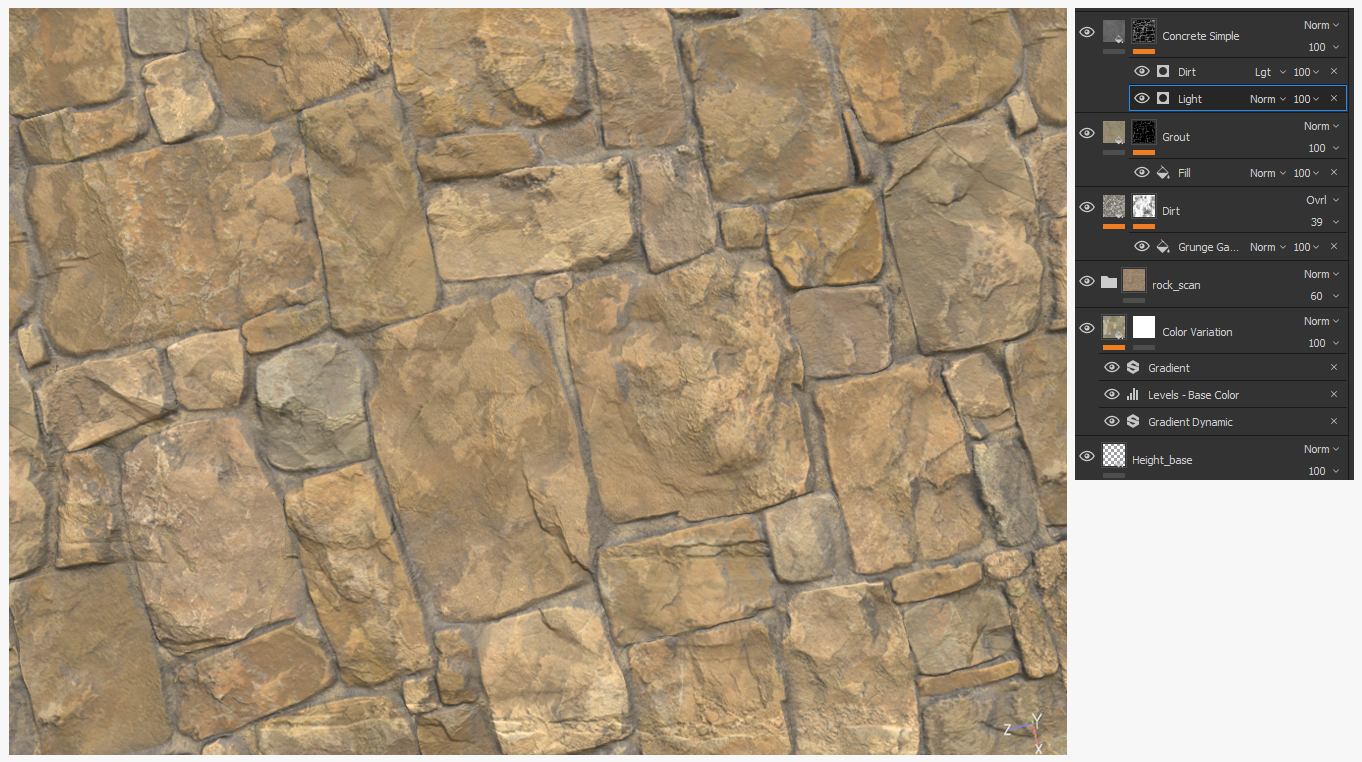
And next - the dust layer. You’ll see that it’s really easy to get a nice result in Painter. Just pick the “Concrete simple” material from your shelf, apply it to your material and create a mask.
We are going to use generators for that since we need the “topological” information of the material. * The Light Generator is very useful to project something in any given direction, for instance dust settled on the surface of the blocks. * The Dirt Generator will help you blend the dust in the cavities without any effort. For this kind of material, it’s better to not add too much grunge in the mask as we are working with a rather noisy surface already. Keep things simple.
/! If you want a really thick cover of dust, don’t forget to change the blending mode of the Normal channel (Normal Detail to Normal) to slightly diminish the stone relief /!
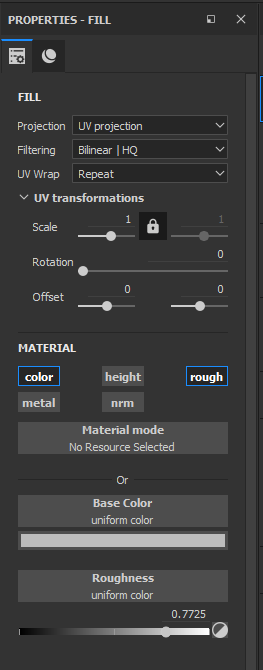
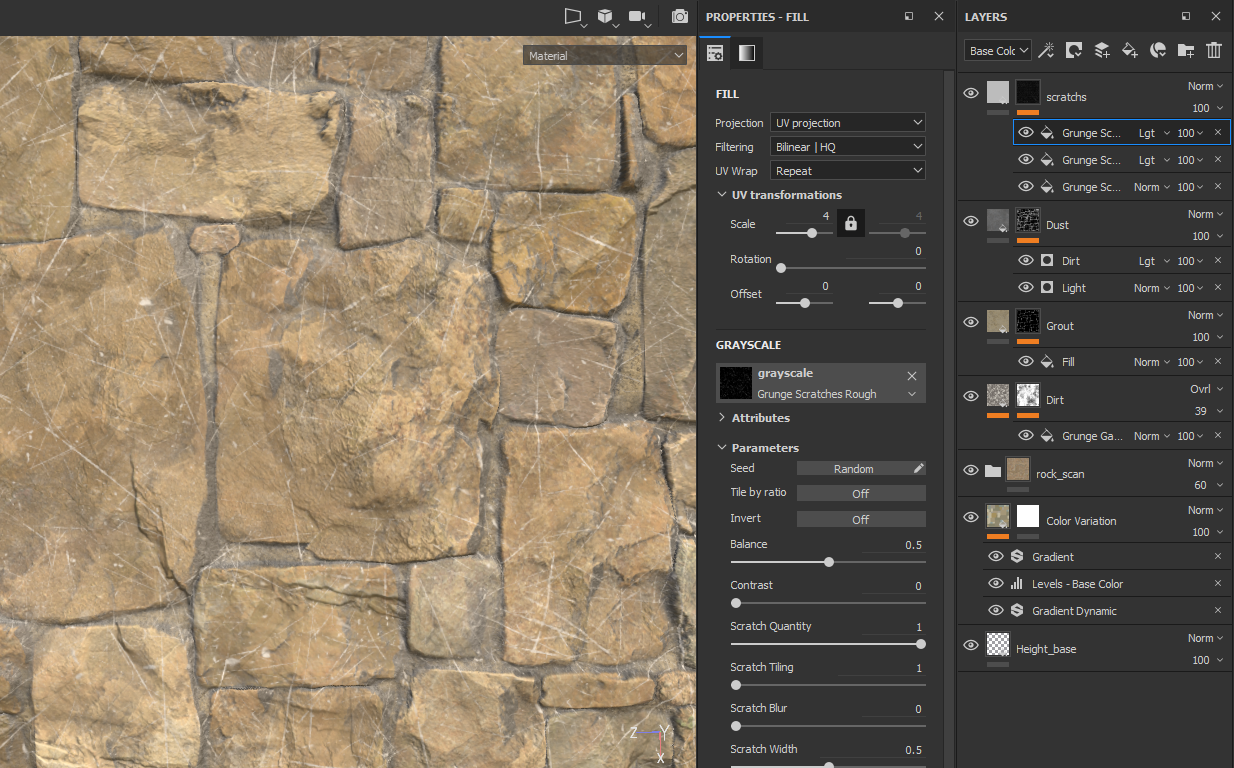
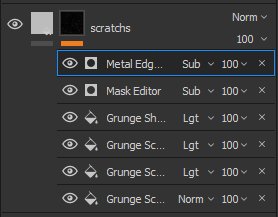
Now, we shall take care of the sharp details. With a bright Fill layer, we are going to add a few scratches and some damage to those edges. Let’s just work with the Color and the Roughness channel for the moment.
We are going to create a mask to work on the position first.
The Grunge Scratches Rough is handy if we want to achieve such a result. We can add more scratches by mixing the same noise with different scaling and a “Max (lighten)” blending mode.
You can create another layer of random noise
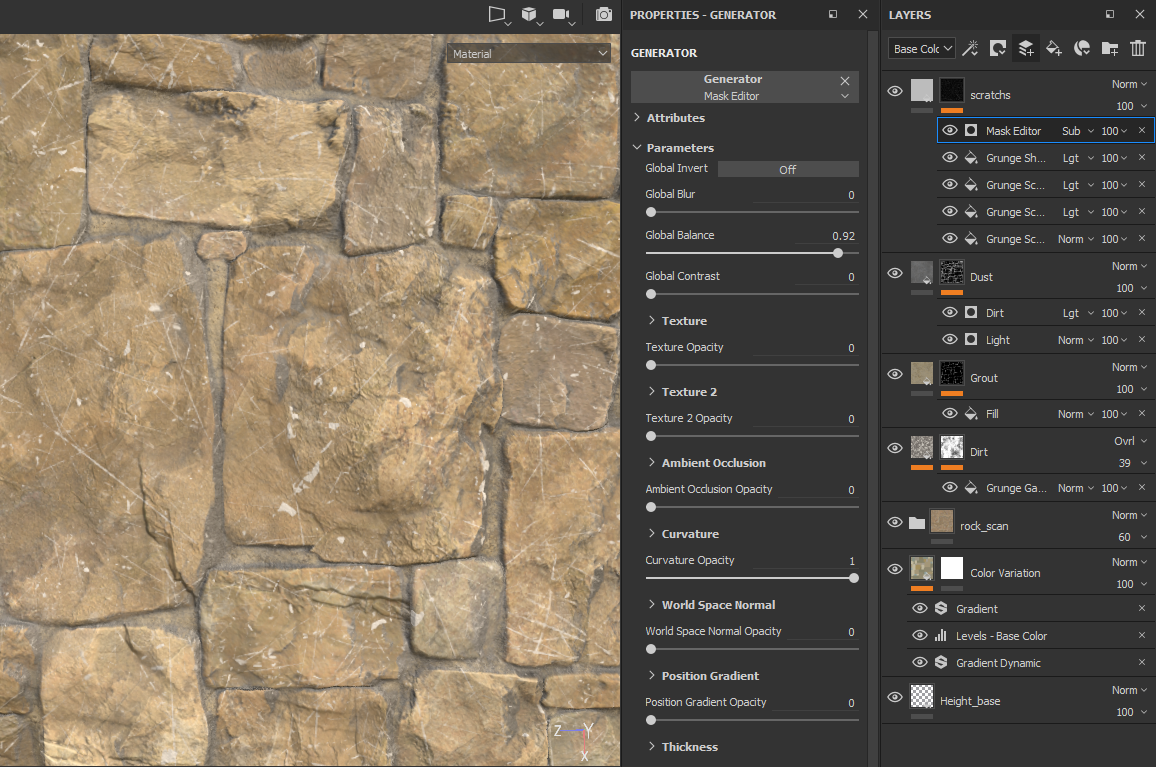
to get different shapes. Now, you can also make more layers to remove the scratches where you don’t want them - like in the cavities for example - as the surface there is less exposed to damage. Using a Mask Editor with the curvature map will help with that.
One last thing we can do is use a Metal Edge Wear Filter in Subtract mode, as we don’t want our scratches to be too obvious.
Adjust the color and the roughness to taste (a brighter variation of your stone color will do) and turn on the Height of the Scratches Fill Layer just to add a small cavity. Since dust is supposed to cover the blocks, it should cover the scratch too - you can move your scratch layer under the Dust one.
Do you remember the
Stone Noise we exported? What about using it to generate more colors on the wall? Using a Fill layer, placed right under the Dust (again), with just a Red color (no other information but Color), a mask with the Stone noise and a level to add contrast, you will get a nice touch of color on your material.
We are now nearly done.
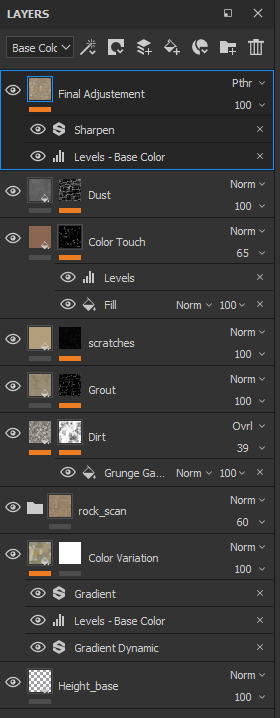
When a material is too dark or not sharp enough, it can be annoying to update the entire layer stack. This is why we are going to use an empty Layer set to Passthrough
with a Level and a Sharpen filter. When you use the Passthrough Blend mode, Painter will look at the result of all the previous layers and send it to your empty layer so the adjustment you make there can be updated at any time when you change what you did so far.
Again, adjust the Sharpen intensity and the levels according to your taste - there isn’t any more magic than what your eye sees and enjoys. Congrats, you completed your material!
You can check the second Painter scene joined to this tutorial to check the finished material.
Final Words
As you saw, you can freely use the software of your choice to get great quality. Combining a sculpting tool with Designer and Painter can quickly produce nice results and avoid you technical problems. And that, without losing time or the power of fast iteration since we are just exporting 2 textures from Zbrush. You also learned an easy way to improve a sculpted texture with Designer by generating a procedural stone surface.
Don’t be afraid to make the Substance suite communicate with the other software tools you’re comfortable with!
I also would like to thank Dimitri Alexis, Texture Artist from Ubisoft, for his professional input on this tutorial.
If you have any questions or want more informations about any steps, please, feel free to contact us on theSubstance Academy forum page where we’ll be more than happy to help you !
You can control how Adobe websites use cookies and similar technologies by making choices below. But note that if you disable cookies and similar technologies entirely, Adobe websites may not function properly.
Cookies are small text files stored by your web browser when you use websites. There are also other technologies that can be used for similar purposes like HTML5 Local Storage and local shared objects, web beacons, and embedded scripts. These technologies help us do things like remembering you and your preferences when you return to our sites, measure how you use the website, conduct market research, and gather information about the ads you see and interact with.
You can make choices in the menu below about what cookies and other technologies you want us to use on Adobe sites when you visit them from this browser. You can always change those choices later by clicking on the Cookie Preferences link at the bottom of the page.
If enabled:
We can improve your experience by tailoring the site and the content to things we think might be of interest
We can better keep track of your preferences — like what language you prefer to use
We will better understand your likely interests so we can provide you more relevant Adobe ads and content on non-Adobe websites and in non-Adobe apps
It will help us improve the performance of our website and those of our partners who use the Adobe Experience Cloud
If disabled:
We won’t be able to remember you from session to session so the experience may not be tailored to your interests
You’ll still have access to the content of the site but certain features that depend on cookies may not function
You’ll still see ads, they just may not be as relevant to you
General information
You can control how Adobe websites use cookies and similar technologies by making choices below. But note that if you disable cookies and similar technologies entirely, Adobe websites may not function properly.
Cookies are small text files stored by your web browser when you use websites. There are also other technologies that can be used for similar purposes like HTML5 Local Storage, web beacons, and embedded scripts. These technologies help us do things like remembering you and your preferences when you return to our sites, measure how you use the website, conduct market research, and gather information about the ads you see and interact with.
You can make choices in the menu below about what cookies and other technologies you want us to use on Adobe sites when you visit them from this browser. You can always change those choices later by clicking on the Cookie Preferences link at the bottom of the page.
If enabled:
We can improve your experience by tailoring the site and the content to things we think might be of interest
We can better keep track of your preferences — like what language you prefer to use
We will better understand your likely interests so we can provide you more relevant Adobe ads and content on non-Adobe websites and in non-Adobe apps
It will help us improve the performance of our website and those of our partners who use the Adobe Experience Cloud
If disabled:
We won’t be able to remember you from session to session so the experience may not be tailored to your interests
We’ll still count your use of our site and services
You’ll still have access to the content of the site but certain features that depend on cookies may not function
You’ll still see ads, they just may not be as relevant to you
Operate the site and core servicesOperate site and measure engagement
Always active
These cookies are required, and they are used to enable the site and related services core functionality. Without them the site could not operate, so they cannot be disabled.
These cookies enable the site and related services’ core functionality and collect statistics about user engagement, such as counting active use to help us understand trends. These cookies cannot be disabled.
Measure performance
These cookies are used to analyze site usage to measure and improve performance. Without them Adobe cannot know what content is most valued and how often unique visitors return to the site, making it hard to improve information we offer to you.
These cookies are used to analyze site usage to measure and improve performance. Without them Adobe cannot know what content is most valued, making it hard to improve information we offer to you.
Extend functionality
These cookies are used to enhance the functionality of Adobe sites such as remembering your settings and preferences to deliver a personalized experience; for example, your username, your repeated visits, preferred language, your country, or any other saved preference.
Personalize advertising
These cookies are used to enable Adobe and our partners to serve ads more relevant to your interests. Without them you will still see ads, but they might not be as relevant to you.
Personalize advertising
These cookies are used to enable Adobe and our partners to serve ads more relevant to your interests. Without them you will still see ads, but they might not be as relevant to you.