In this tutorial we will demonstrate how to create a peeled paint effect with the use of simple fill layers and anchor points.
1 - Prepping the Preview Sphere
To start, we will have to cleanup a bit one of the default sample project provided with Substance Painter : 1. Launch Substance Painter (if it is not already the case) 2. Click on the File menu then choose Open Samples. 2. Select and open the project " PreviewSphere.spp ". 3. Select all the existing layers in thelayer stack and delete them.
The project is ready, let's continue to the next step.
2 - Creating the base Metal
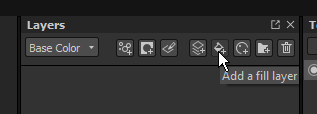
Create a newfill layer in the layer stack (by using the button at the top of the layer stack) :
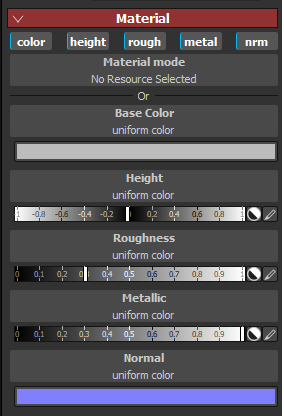
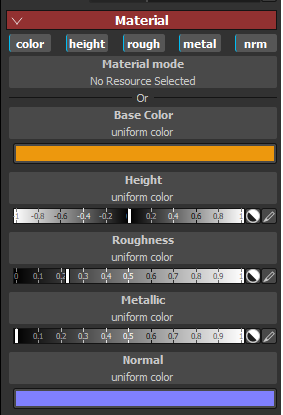
Rename it as "Base Metal" and set its parameters to the following to create a nice and shiny metallic surface :
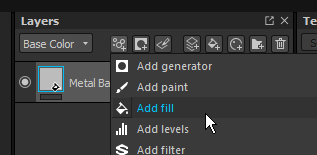
Now that the metal has been created, we will add some details on the surface to make it more interesting, we will use a grunge noise to add variations in the roughness. Start by adding a fill effect on the fill layer :
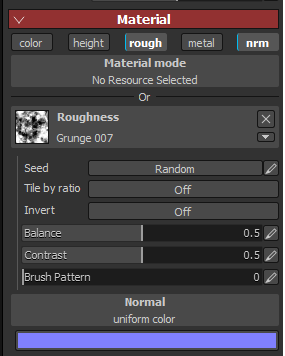
The fill effect will be used to apply the grunge noise over the base roughness value. Disable all the unnecessary channels in the properties window and keep the roughness enabled to load the grunge texture " Grunge map 007 " (findable in the Procedurals section of the Shelf) :
Now switch the channel mode at the top of the Layer Stack from Base Color to Roughness :
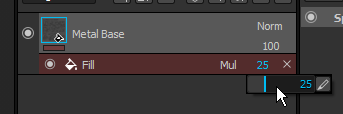
We can now finish by changing the blending mode of the fill effect to "Multiply" and changing its opacity to 25 :
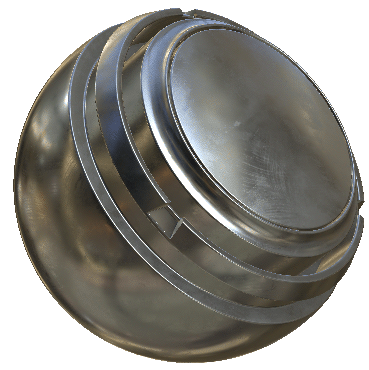
Here is the result :
3 - Creating the Paint material
Create a new fill layer above the Metal one. Set its properties to the following values, which emulate a sort of industrial paint surface :
Now that the paint has been created it covers all the surface, which we don't want. We now just need to mask it to reveal the metal underneath near the edges of the geometry.
This is possible thanks to the curvature texture already baked in the sample project and an advanced Mask generator.
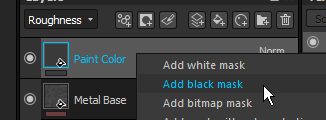
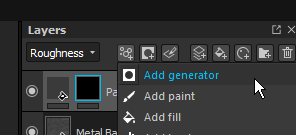
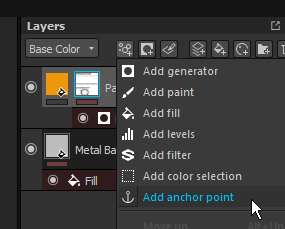
Right click on the Paint layer and add a black mask :
Now choose "add generator" :
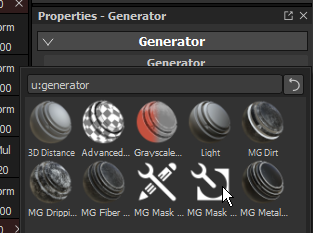
The properties window will now display the parameters for the generator, which is empty by default. Click on the button to open a mini-shelf and choose the "Mask Editor" generator :
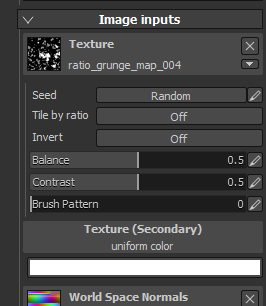
We now have the Mask Editor ready to be modified. Let's start by adding a grunge noise, which can be done by scrolling down the properties window until we reach the "Image inputs" section.
Click on the " Texture 1 " button and type "grunge map" to load the " Grunge map 004 " :
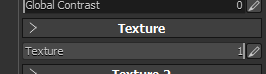
Scroll back up and change the " Curvature " slider from 0.5 to
1.0 to maximize its effect in the Mask Editor result :
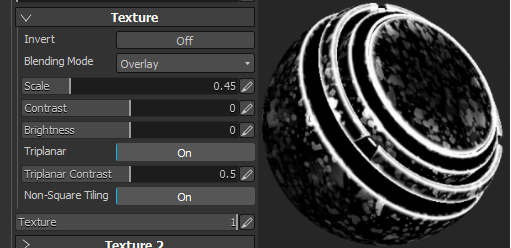
Scroll up again, but this time change the " Texture " slider from 0.0 to 1.0 to enable the grunge map we loaded :
Open the " Texture " group to change the scale parameter and enable the tri-planar projection. This will improve the effect of the noise :
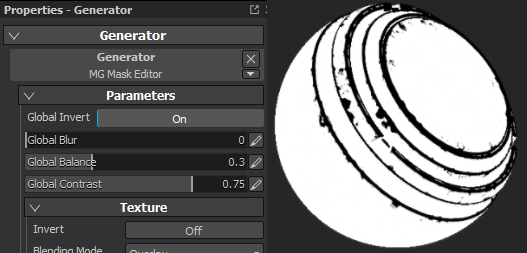
Finally, we need to contrast the mask and invert it to make the Paint visible everywhere except on the edges of the geometry. To do so, we can reduce the "global balance" parameter and crank up the "global contrast", then enable the "invert" setting :
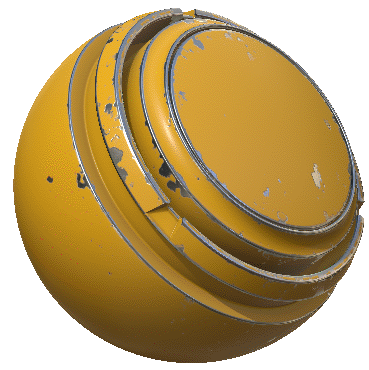
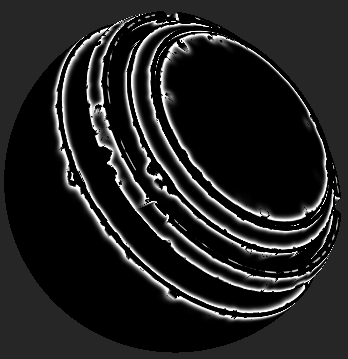
The current result in the viewport should look like this :
4 - Adding an anchor
To create the peeled effect around the holes of the paint surface we need to access the mask of the paint layer via other layers. This is possible withanchors which allow to create links between element of the layers stack.
Let start by adding an anchor above the mask of the Paint layer. Click on the mask, then add an anchor effect :
And we are done for this part ! :)
5 - Creating the peeled effect
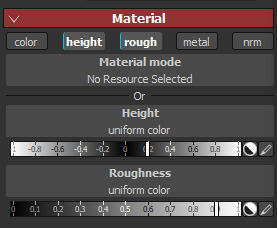
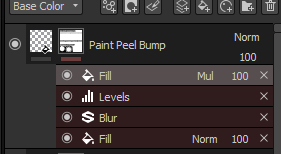
Create a new fill layer named " Paint Peel Bump ". Enable only the roughness and height channels with the following values :
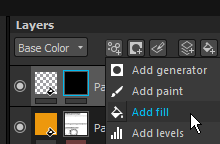
Add a black mask and also add a fill effect :
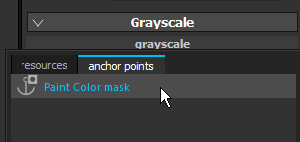
The fill effect will be used to load the paint mask that has been exposed via the anchors from the previous step. Click on the button in the fill effect to open the mini-shelf, but this time click on the "anchor points" tab to select the anchor :
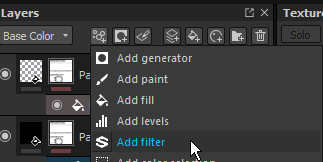
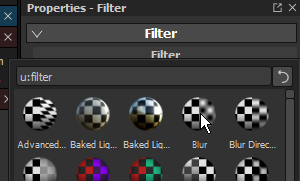
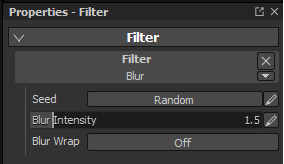
Now we will use a filter effect to apply a blur and set its intensity to 1.5 :
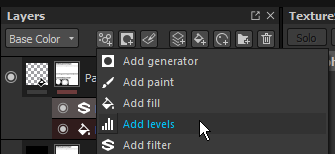
Next we add a level to contrast the result generated by the blur :
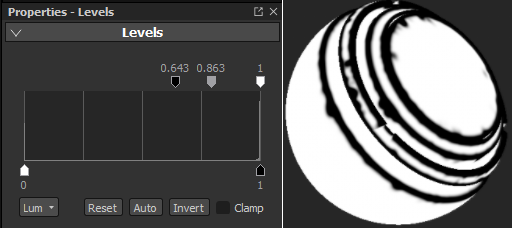
As you can see the top keys are moved to the right to contrast the black areas of the original mask and make them more visible. The bottom keys have been inverted with the "invert" button to flip the mask :
Finally, add another fill effect after the level. In this effect we will load again the Anchor mask from the Paint layer. Then change the blending mode to "Multiply" :
The effect in multiply mode will basically remove the original mask from the new one, allowing to only have a mask at the border of the paint. Because we blurred the first Anchor mask they are not identical anymore, therefore the border is the difference between the two masks.
6 - Final result
Now you can tweak the masks or the intensity of the height in the bump layer to adjust the final result :
You can also put all the layers inside a group and be save assmart material to re-use it across projects and texture-sets.
You can control how Adobe websites use cookies and similar technologies by making choices below. But note that if you disable cookies and similar technologies entirely, Adobe websites may not function properly.
Cookies are small text files stored by your web browser when you use websites. There are also other technologies that can be used for similar purposes like HTML5 Local Storage and local shared objects, web beacons, and embedded scripts. These technologies help us do things like remembering you and your preferences when you return to our sites, measure how you use the website, conduct market research, and gather information about the ads you see and interact with.
You can make choices in the menu below about what cookies and other technologies you want us to use on Adobe sites when you visit them from this browser. You can always change those choices later by clicking on the Cookie Preferences link at the bottom of the page.
If enabled:
We can improve your experience by tailoring the site and the content to things we think might be of interest
We can better keep track of your preferences — like what language you prefer to use
We will better understand your likely interests so we can provide you more relevant Adobe ads and content on non-Adobe websites and in non-Adobe apps
It will help us improve the performance of our website and those of our partners who use the Adobe Experience Cloud
If disabled:
We won’t be able to remember you from session to session so the experience may not be tailored to your interests
You’ll still have access to the content of the site but certain features that depend on cookies may not function
You’ll still see ads, they just may not be as relevant to you
General information
You can control how Adobe websites use cookies and similar technologies by making choices below. But note that if you disable cookies and similar technologies entirely, Adobe websites may not function properly.
Cookies are small text files stored by your web browser when you use websites. There are also other technologies that can be used for similar purposes like HTML5 Local Storage, web beacons, and embedded scripts. These technologies help us do things like remembering you and your preferences when you return to our sites, measure how you use the website, conduct market research, and gather information about the ads you see and interact with.
You can make choices in the menu below about what cookies and other technologies you want us to use on Adobe sites when you visit them from this browser. You can always change those choices later by clicking on the Cookie Preferences link at the bottom of the page.
If enabled:
We can improve your experience by tailoring the site and the content to things we think might be of interest
We can better keep track of your preferences — like what language you prefer to use
We will better understand your likely interests so we can provide you more relevant Adobe ads and content on non-Adobe websites and in non-Adobe apps
It will help us improve the performance of our website and those of our partners who use the Adobe Experience Cloud
If disabled:
We won’t be able to remember you from session to session so the experience may not be tailored to your interests
We’ll still count your use of our site and services
You’ll still have access to the content of the site but certain features that depend on cookies may not function
You’ll still see ads, they just may not be as relevant to you
Operate the site and core servicesOperate site and measure engagement
Always active
These cookies are required, and they are used to enable the site and related services core functionality. Without them the site could not operate, so they cannot be disabled.
These cookies enable the site and related services’ core functionality and collect statistics about user engagement, such as counting active use to help us understand trends. These cookies cannot be disabled.
Measure performance
These cookies are used to analyze site usage to measure and improve performance. Without them Adobe cannot know what content is most valued and how often unique visitors return to the site, making it hard to improve information we offer to you.
These cookies are used to analyze site usage to measure and improve performance. Without them Adobe cannot know what content is most valued, making it hard to improve information we offer to you.
Extend functionality
These cookies are used to enhance the functionality of Adobe sites such as remembering your settings and preferences to deliver a personalized experience; for example, your username, your repeated visits, preferred language, your country, or any other saved preference.
Personalize advertising
These cookies are used to enable Adobe and our partners to serve ads more relevant to your interests. Without them you will still see ads, but they might not be as relevant to you.
Personalize advertising
These cookies are used to enable Adobe and our partners to serve ads more relevant to your interests. Without them you will still see ads, but they might not be as relevant to you.