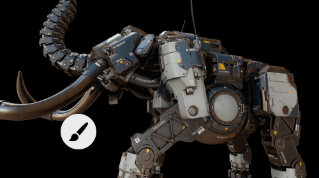
In this tutorial Damien Climent, who joined Allegorithmic 3 years ago as a Substance Demo Artist and trainer and has a 12-year-experience in film, both VFX and animation, will be demonstrating his take on Japanese animation style with Substance Tools.
Introduction
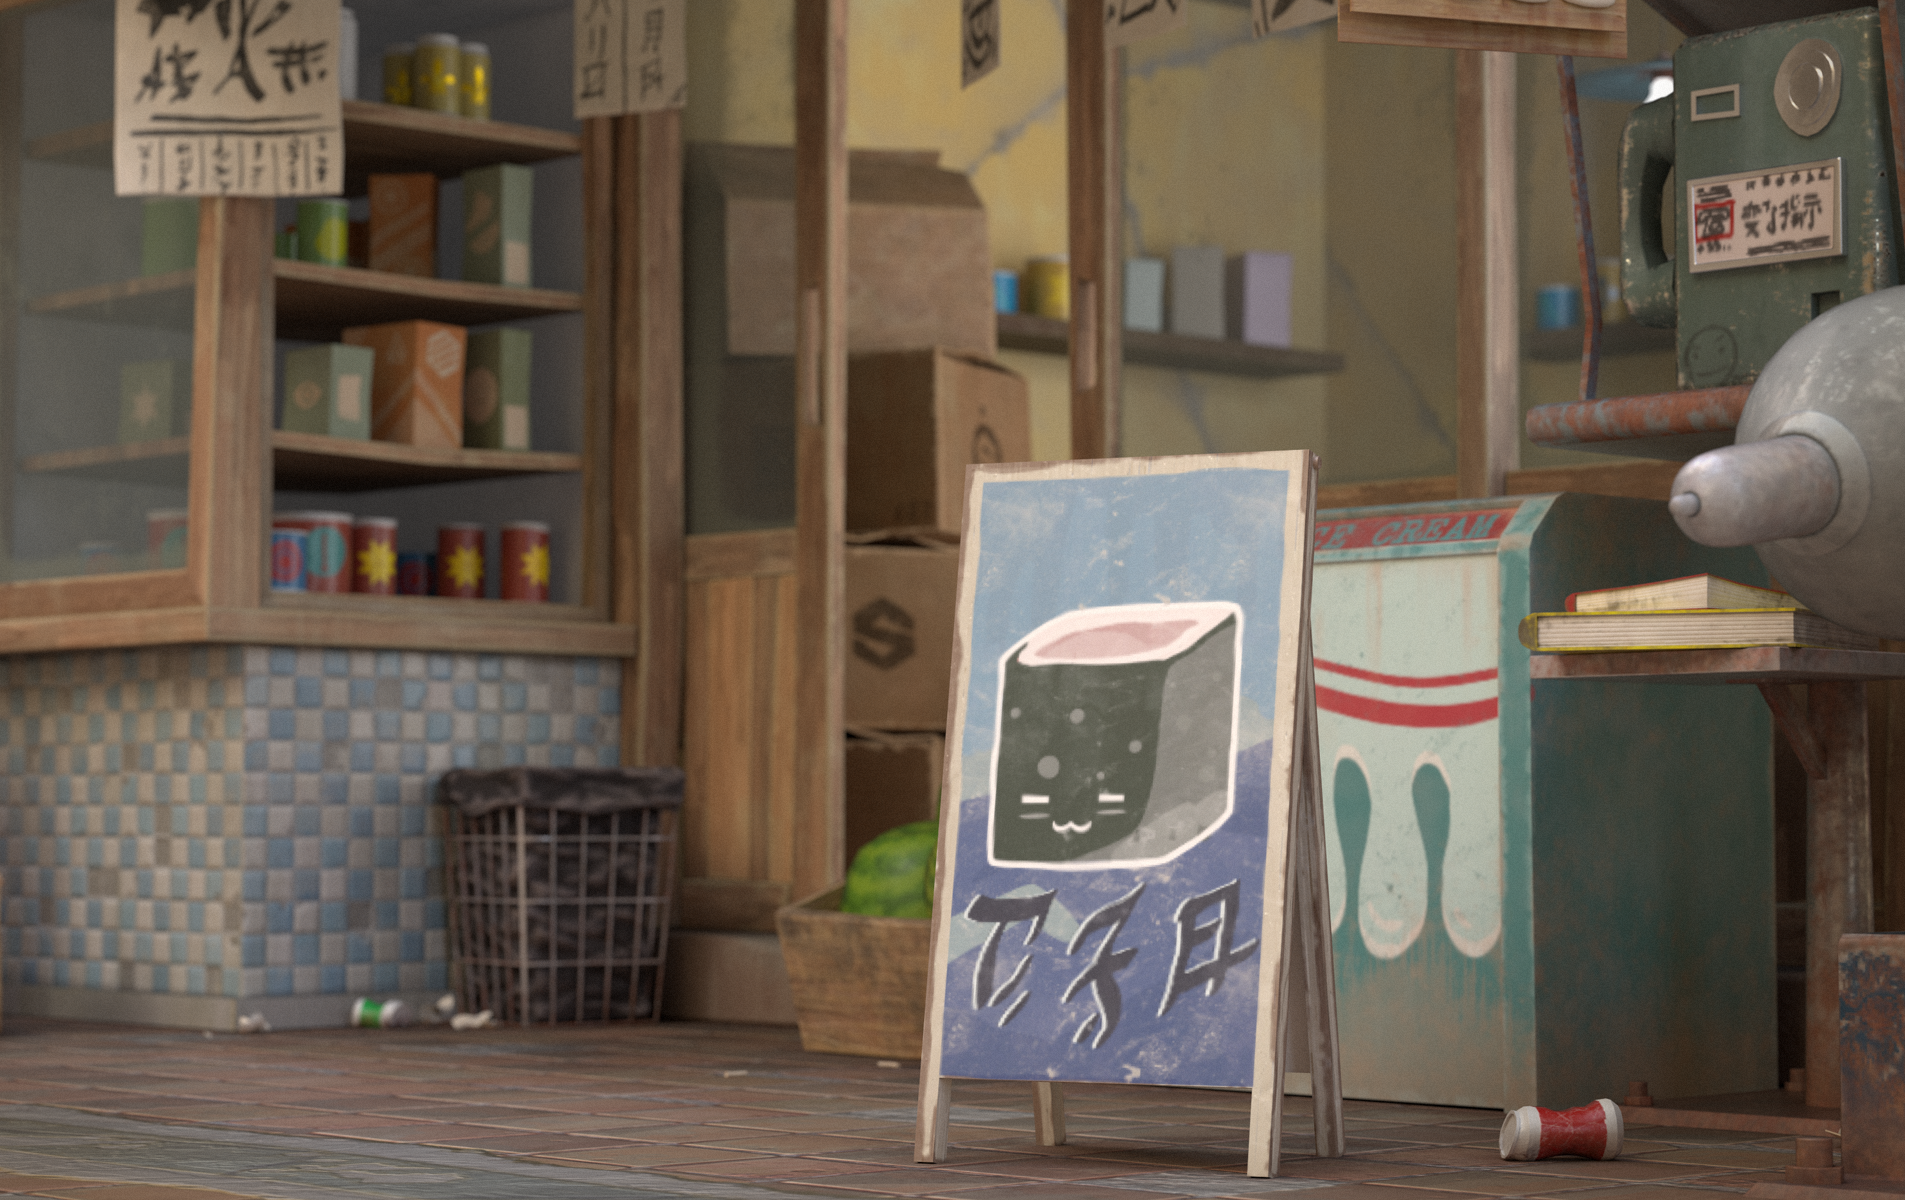
Substance Painter has a reputation as a tool for photorealistic PBR texturing – and this is accurate! But Substance Painter can also be used for a wide range of other uses – think of it as a texturing toolbox with what you need to create any style. In this tutorial, we’ll be using Substance Painter to create a traditional Japanese animation style.
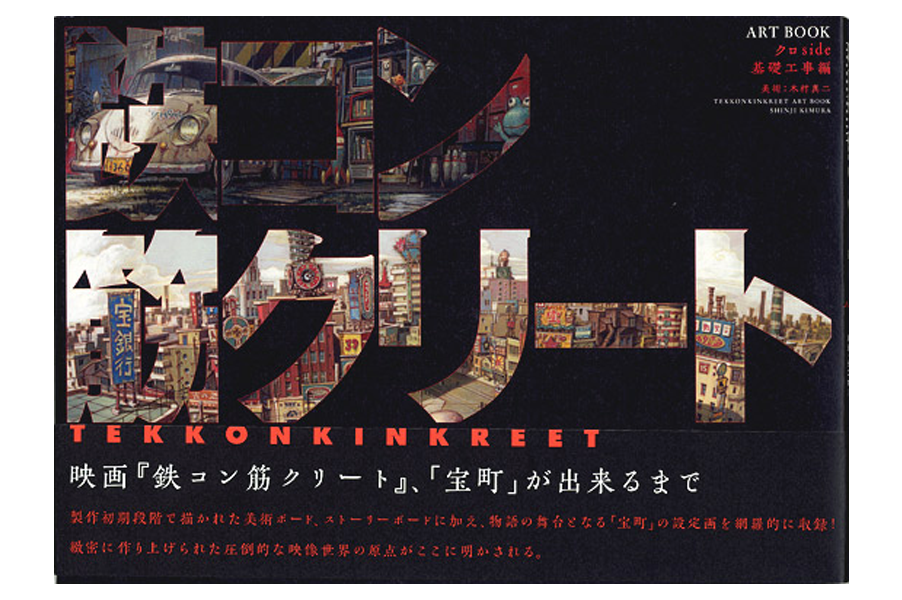
The idea is to match with the traditional Japanese animation style. For this type of art the artists tried to match realism as much as possible with traditional painting techniques. This project is an experiment to see what we can create without any pre-established workflows. I really want to show you what I have discovered through this experience. We will see what can be done with the default Substance Painter package or the resources available on Substance Share and what I have to create with Substance Designer. My references are clearly the work of 4C Studio and most specifically the job done on the movie Tekkon Kinkreethttp://www.studio4c.co.jp/works/en/pages/23.html .
Challenges
Reproduce the graphic 2D reference with 3D techniques;
Keep the PBR Metal/Roughness shader and workflow, because this pipeline is compatible with all current rendering engine;
Use UVs split by UDIM tiles in order to be in sync with the standard animation industry workflow;
Use the Instancing feature to easily manage multiple texture sets;
Create an Anchor point setup to save time and increase creativity.
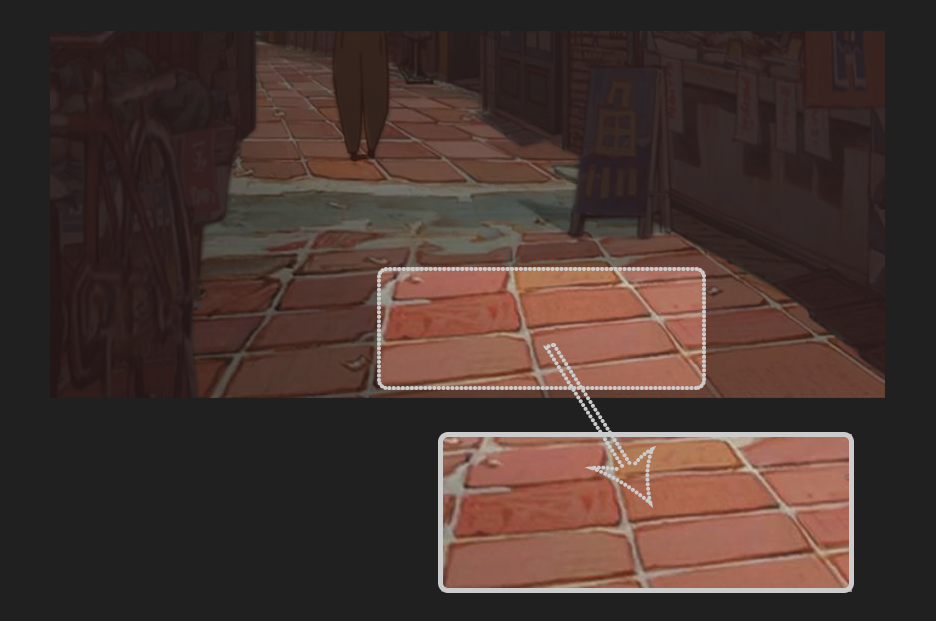
First, mood board creation
It is important when starting a project to know where you are going.Creating a moodboard is always a good idea! In these references the artists tried to match realism as much as possible with traditional painting techniques. If you look carefully, you can see Rust, Dust, Edge wearing - all the things that Substance Painter is able to manage easily.
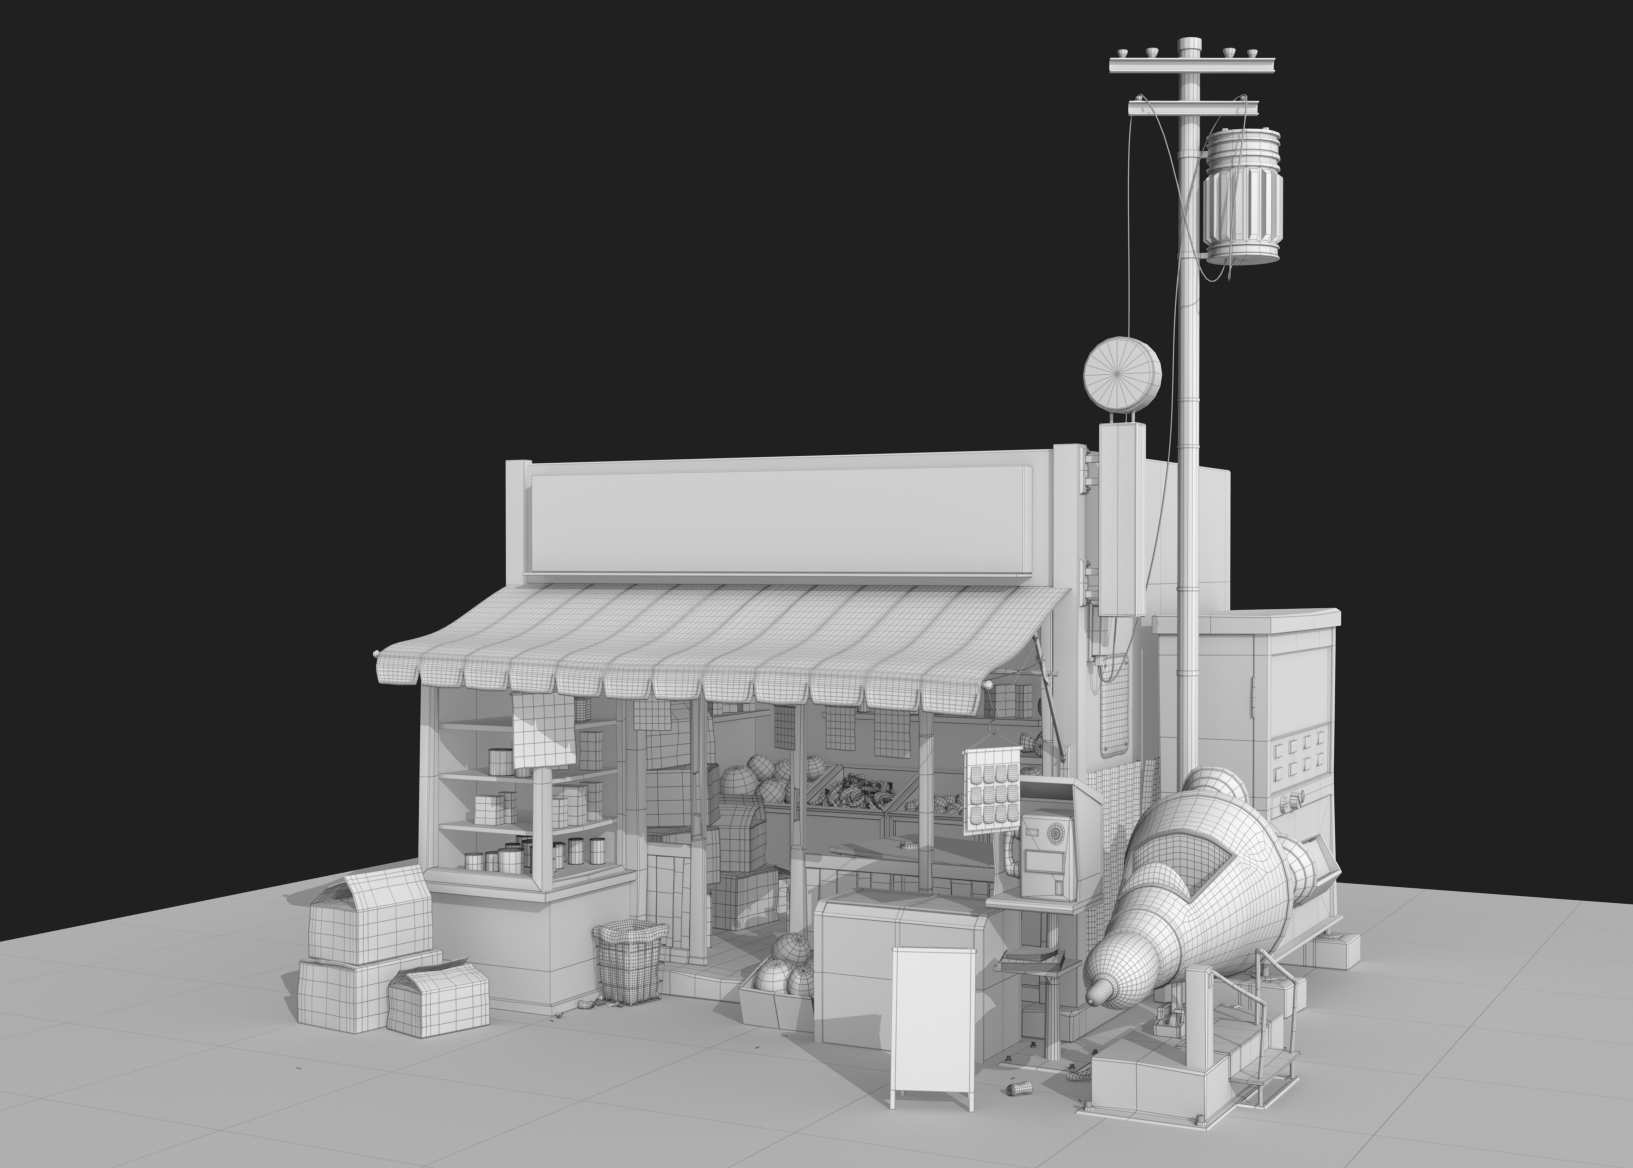
Modeling time!
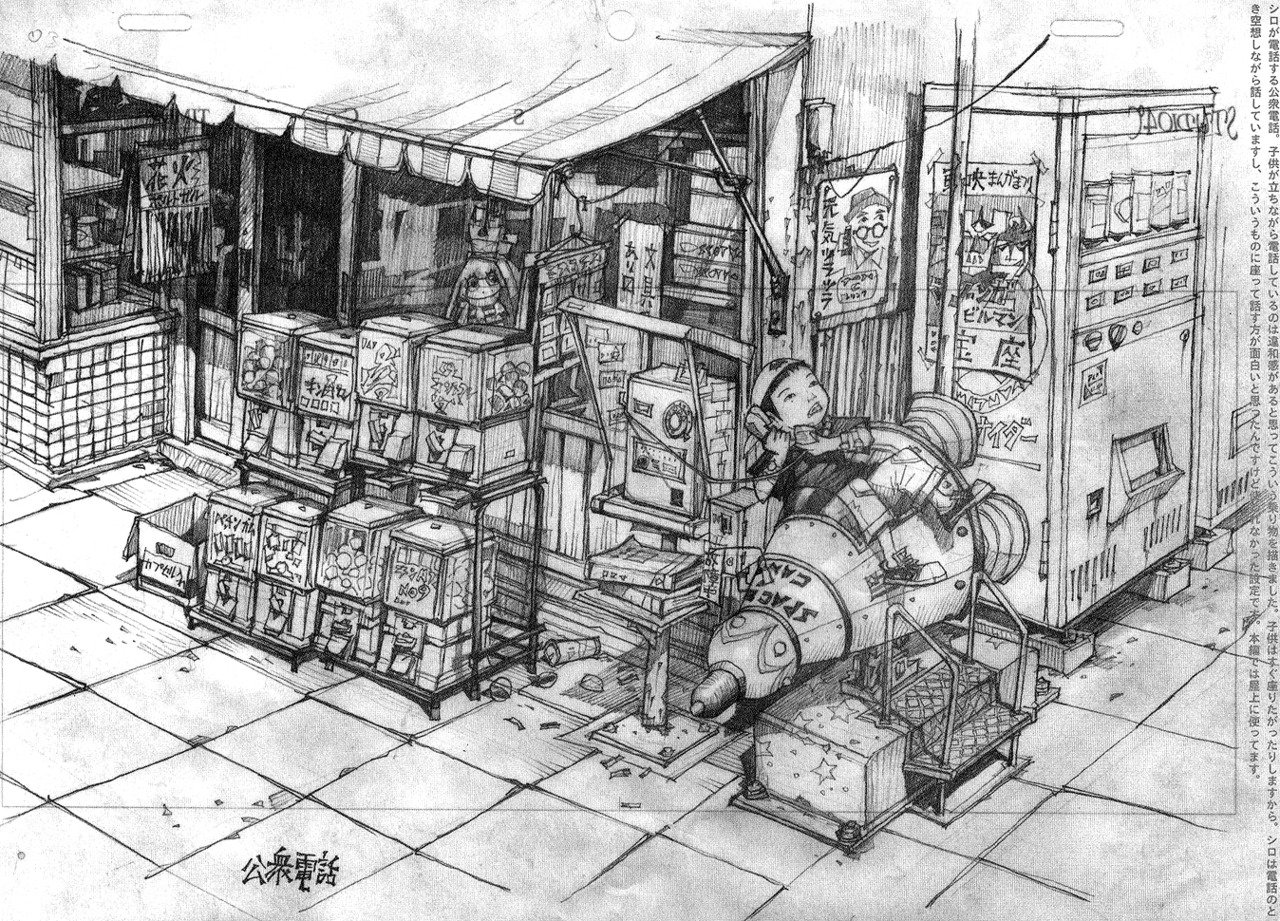
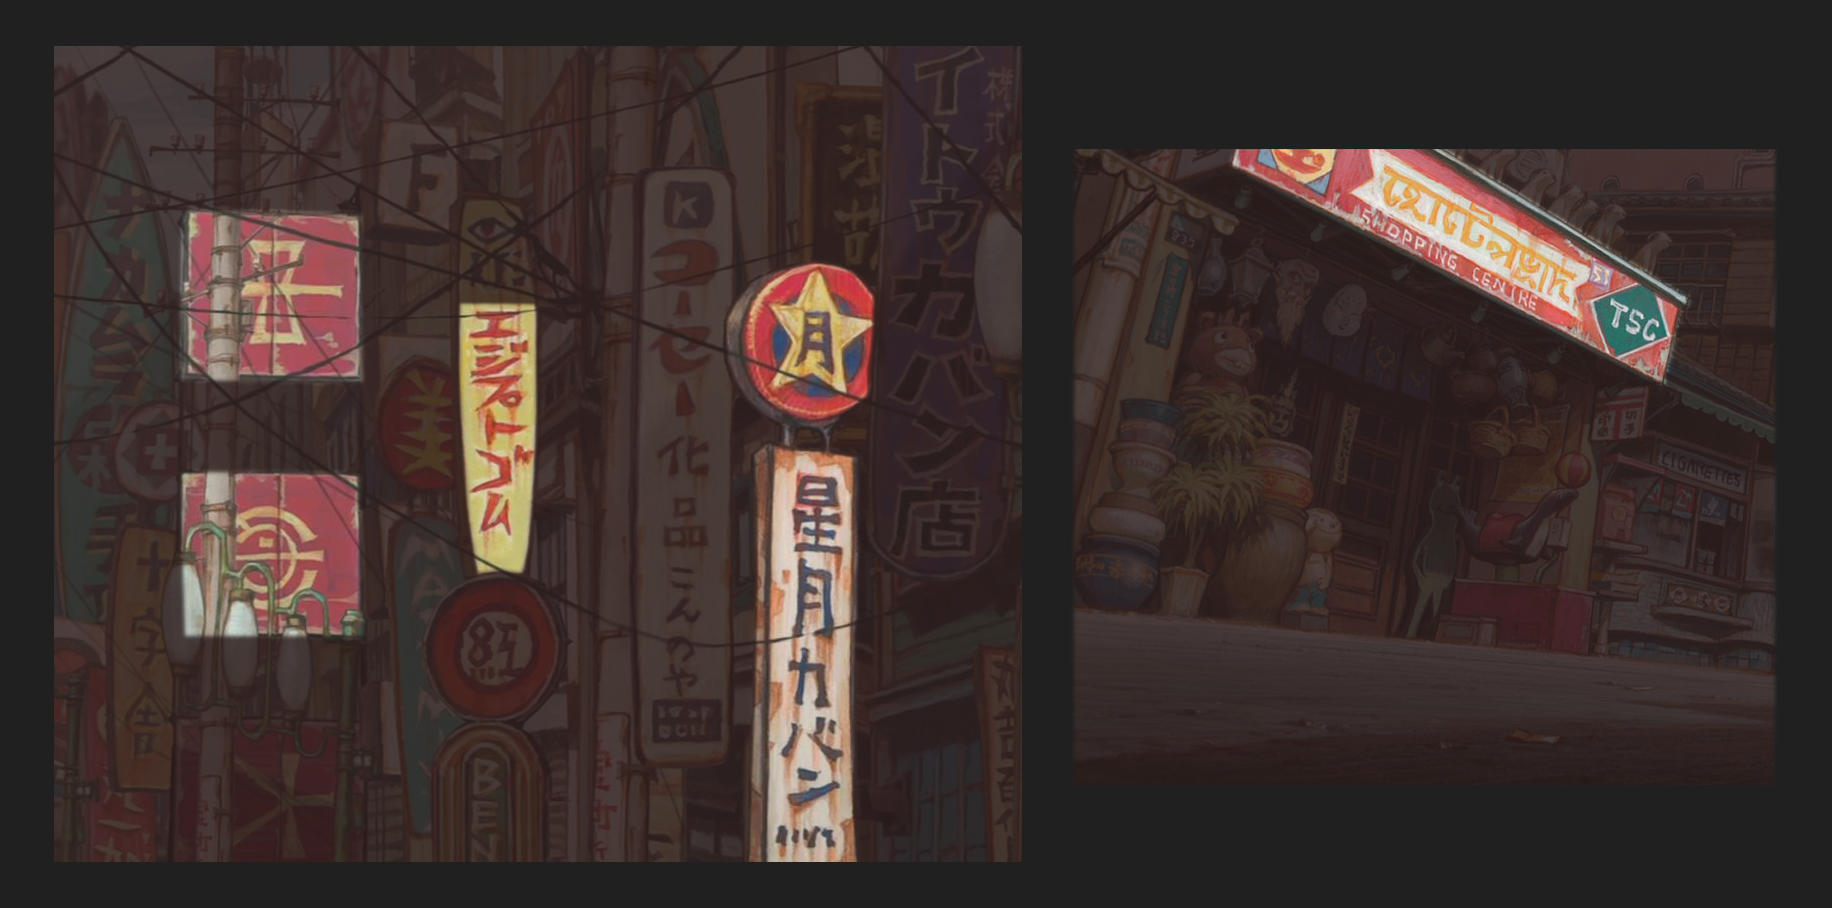
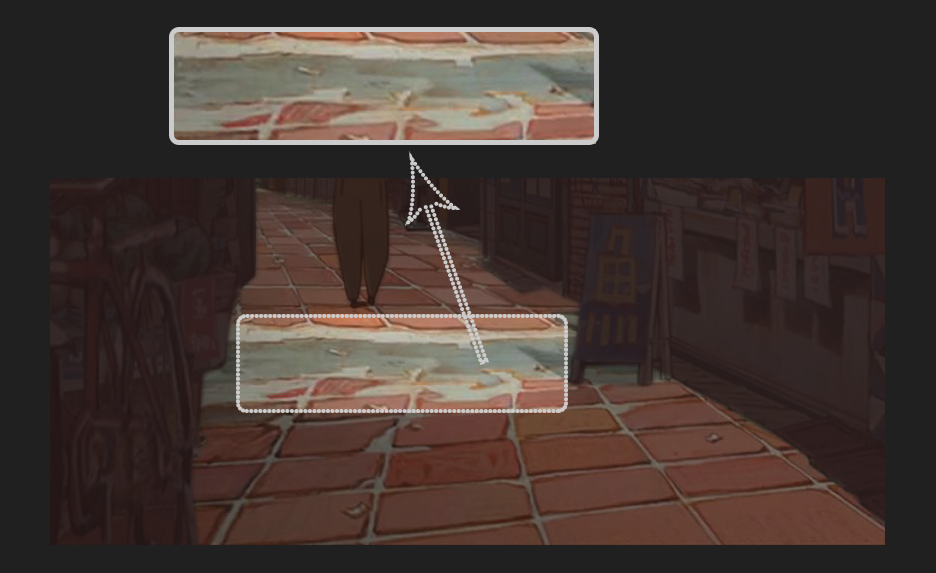
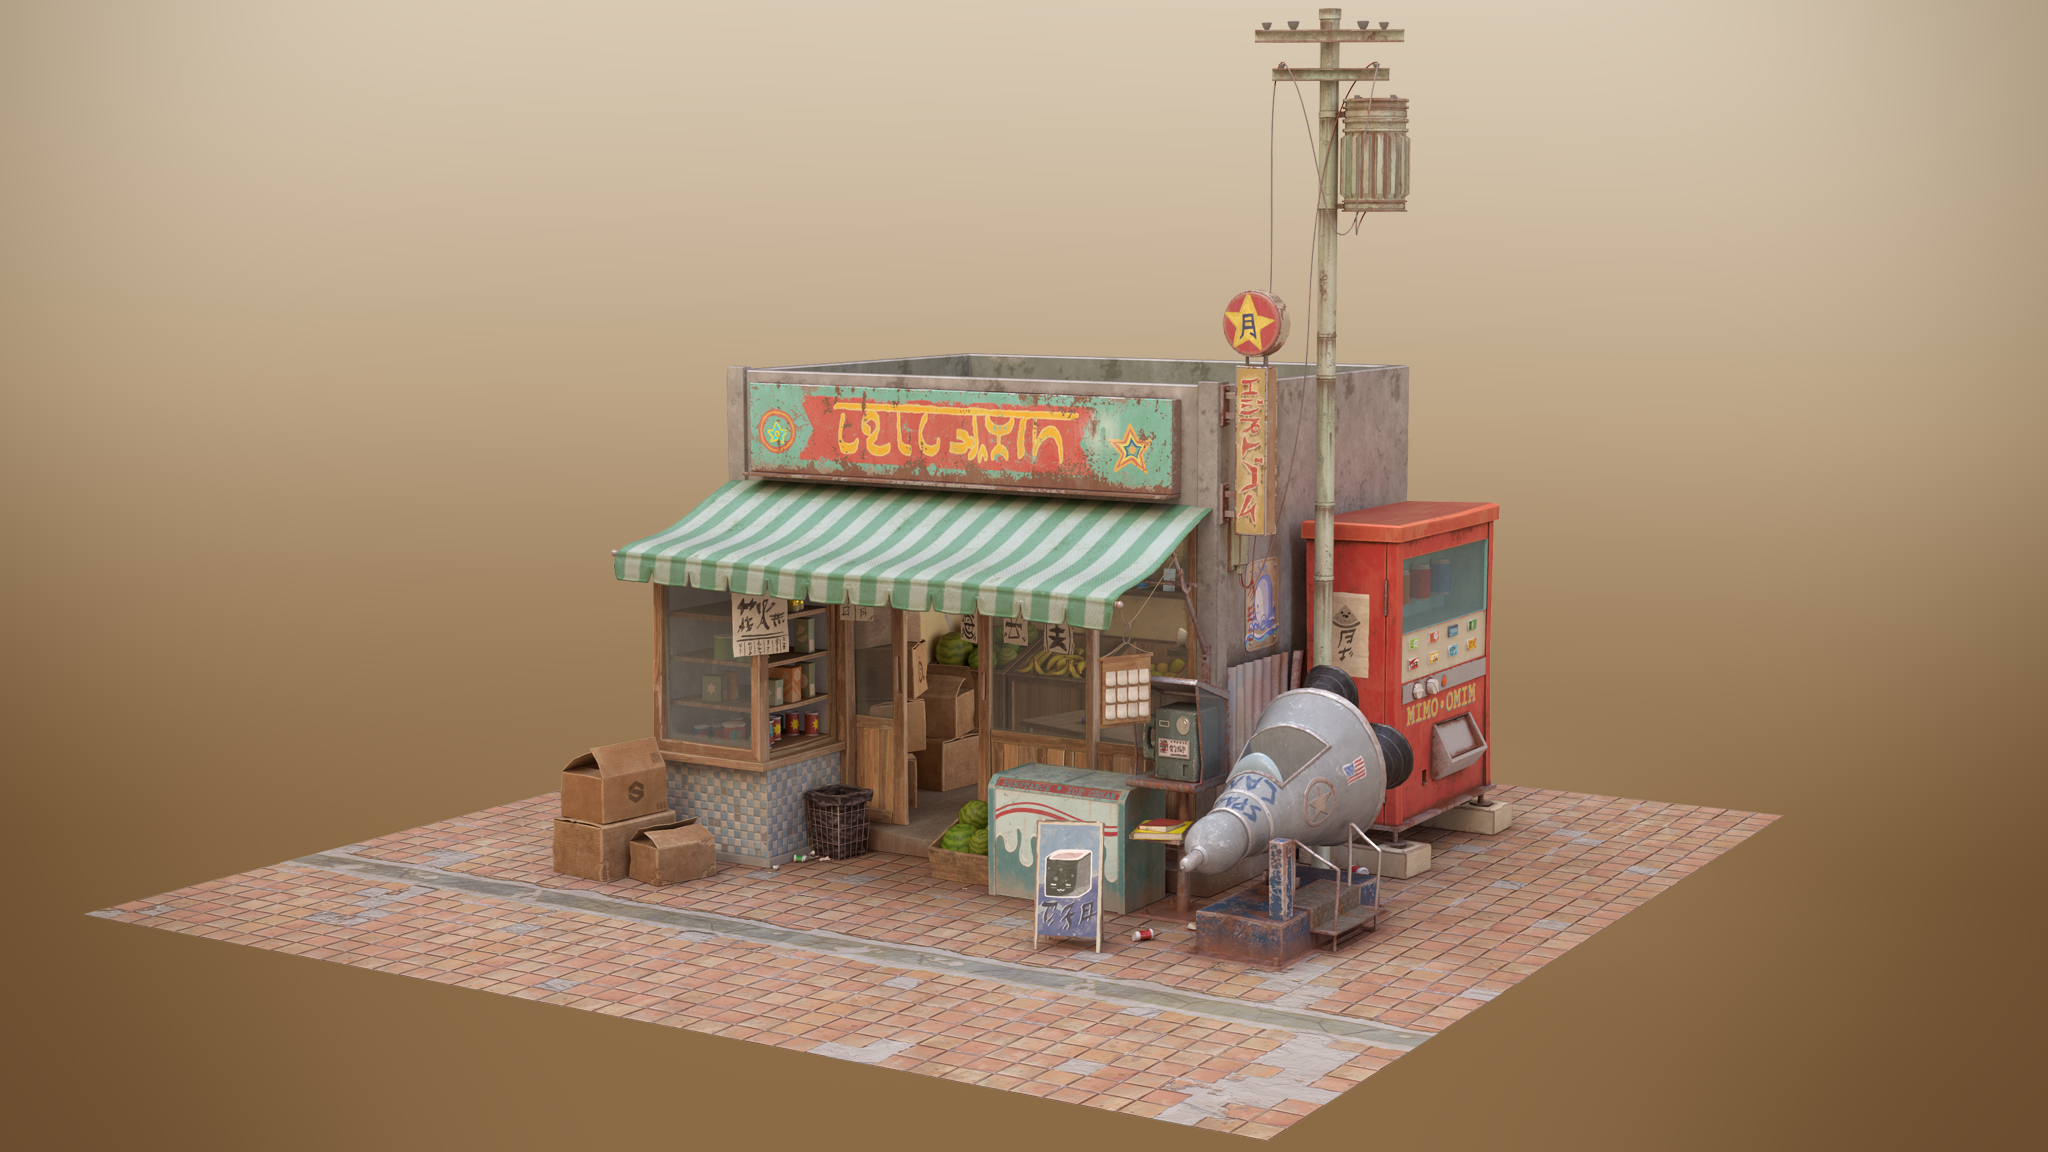
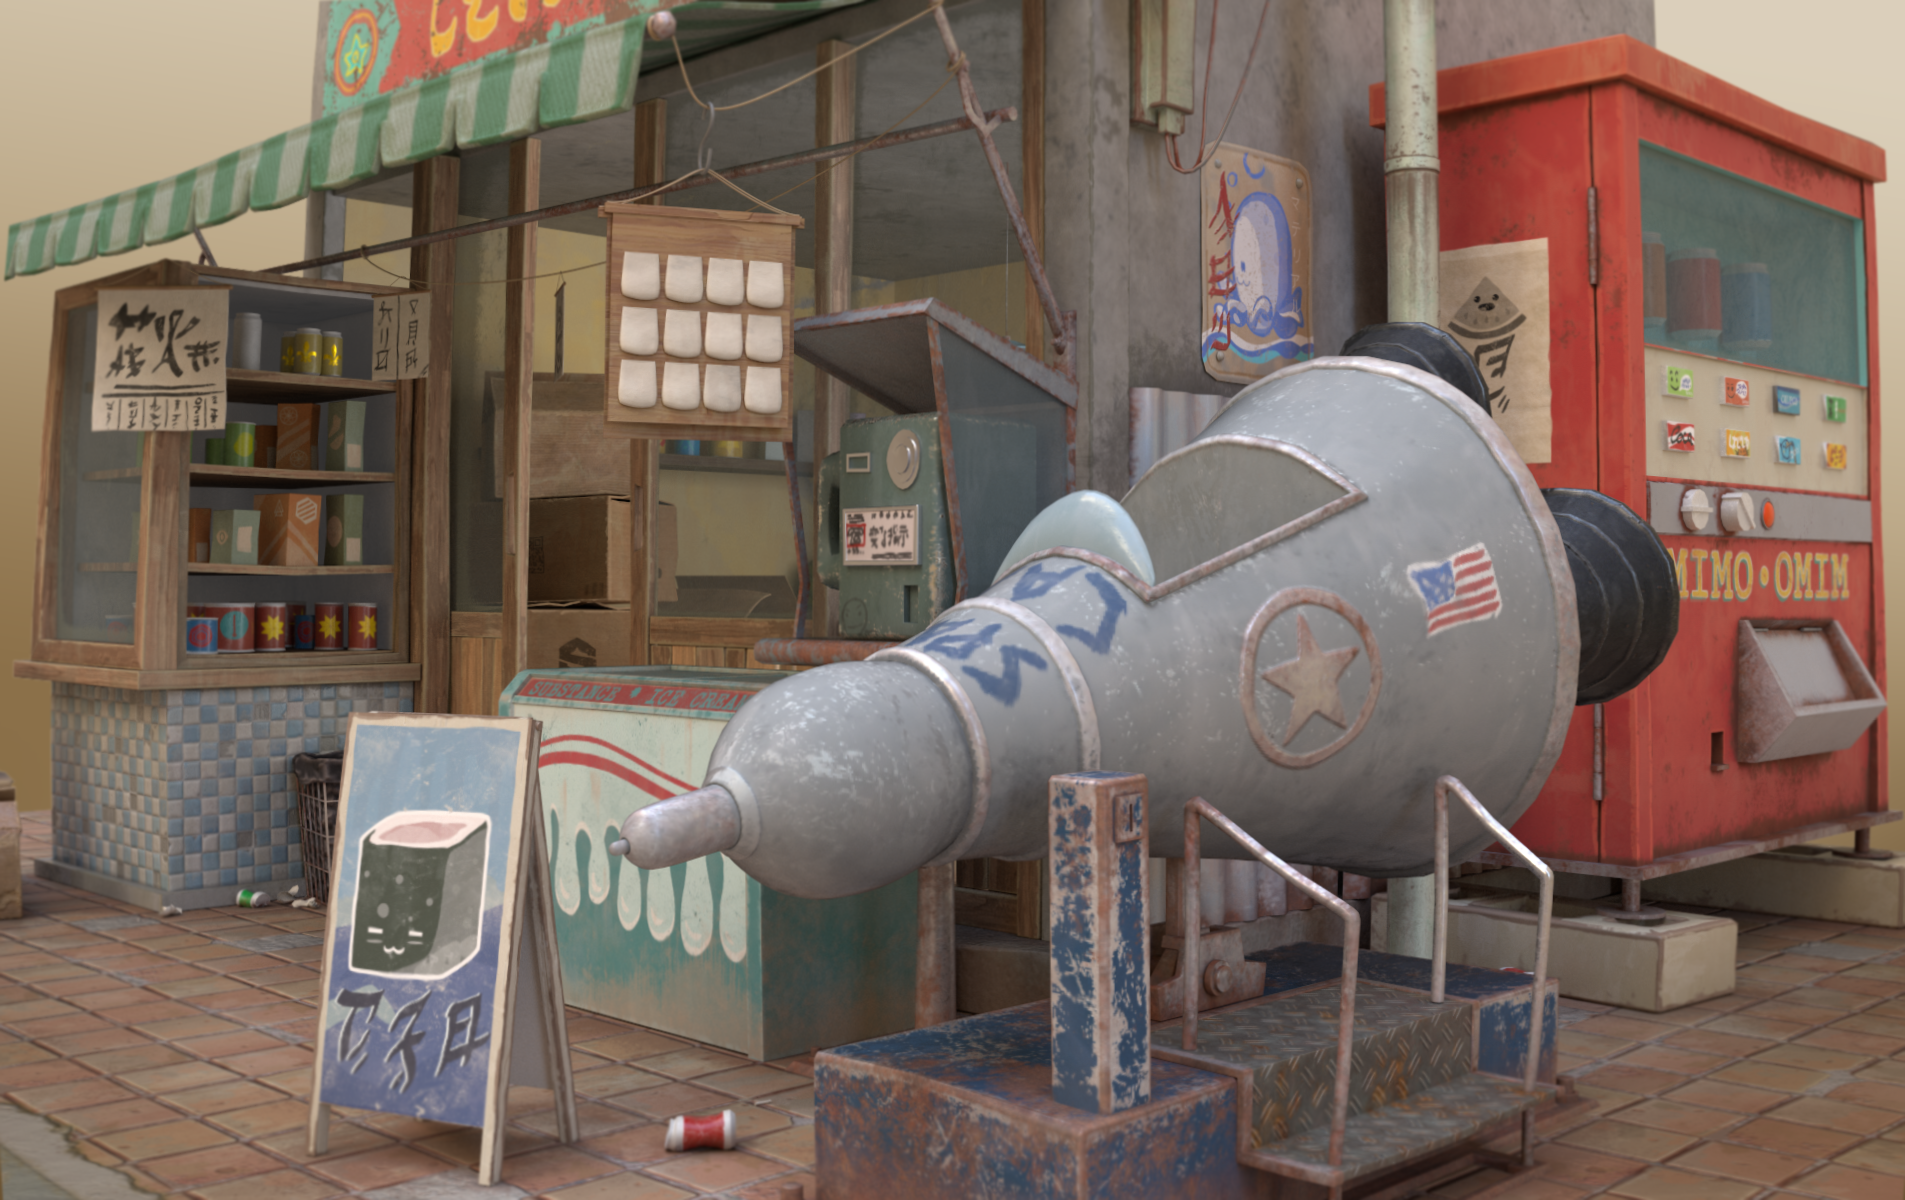
About the scene and my modeling reference. The goal was to recreate this specific scene of the movie set in 3D.
To do this I relied on the sketch above found on this amazing Tekkon Kinkreet artbook
Because I didn't do any sculpting in this project, I chose not to use the Low and High poly definition workflow and work on a single Mesh with a Medium definition.
Tips and Tricks:
Bevels
are important on 2D-like projects , because this will give you wider edges when baking the curvature map. Combining that with our mask generators you will be able to simulate linework.
Also a low level of tessellation gives you sharper details which are very close to most drawing techniques.
At the end, I usually apply a Lattice deformer on my modeling which slightly "breaks"the geometry’s regularity, and therefore comes closer to the charm of hand drawing.
Now my favorite part of the process: UV unwrapping and Layout
For the unwrap, I'll let you do it your way, but for the UV Layout I can give you some recommendations.
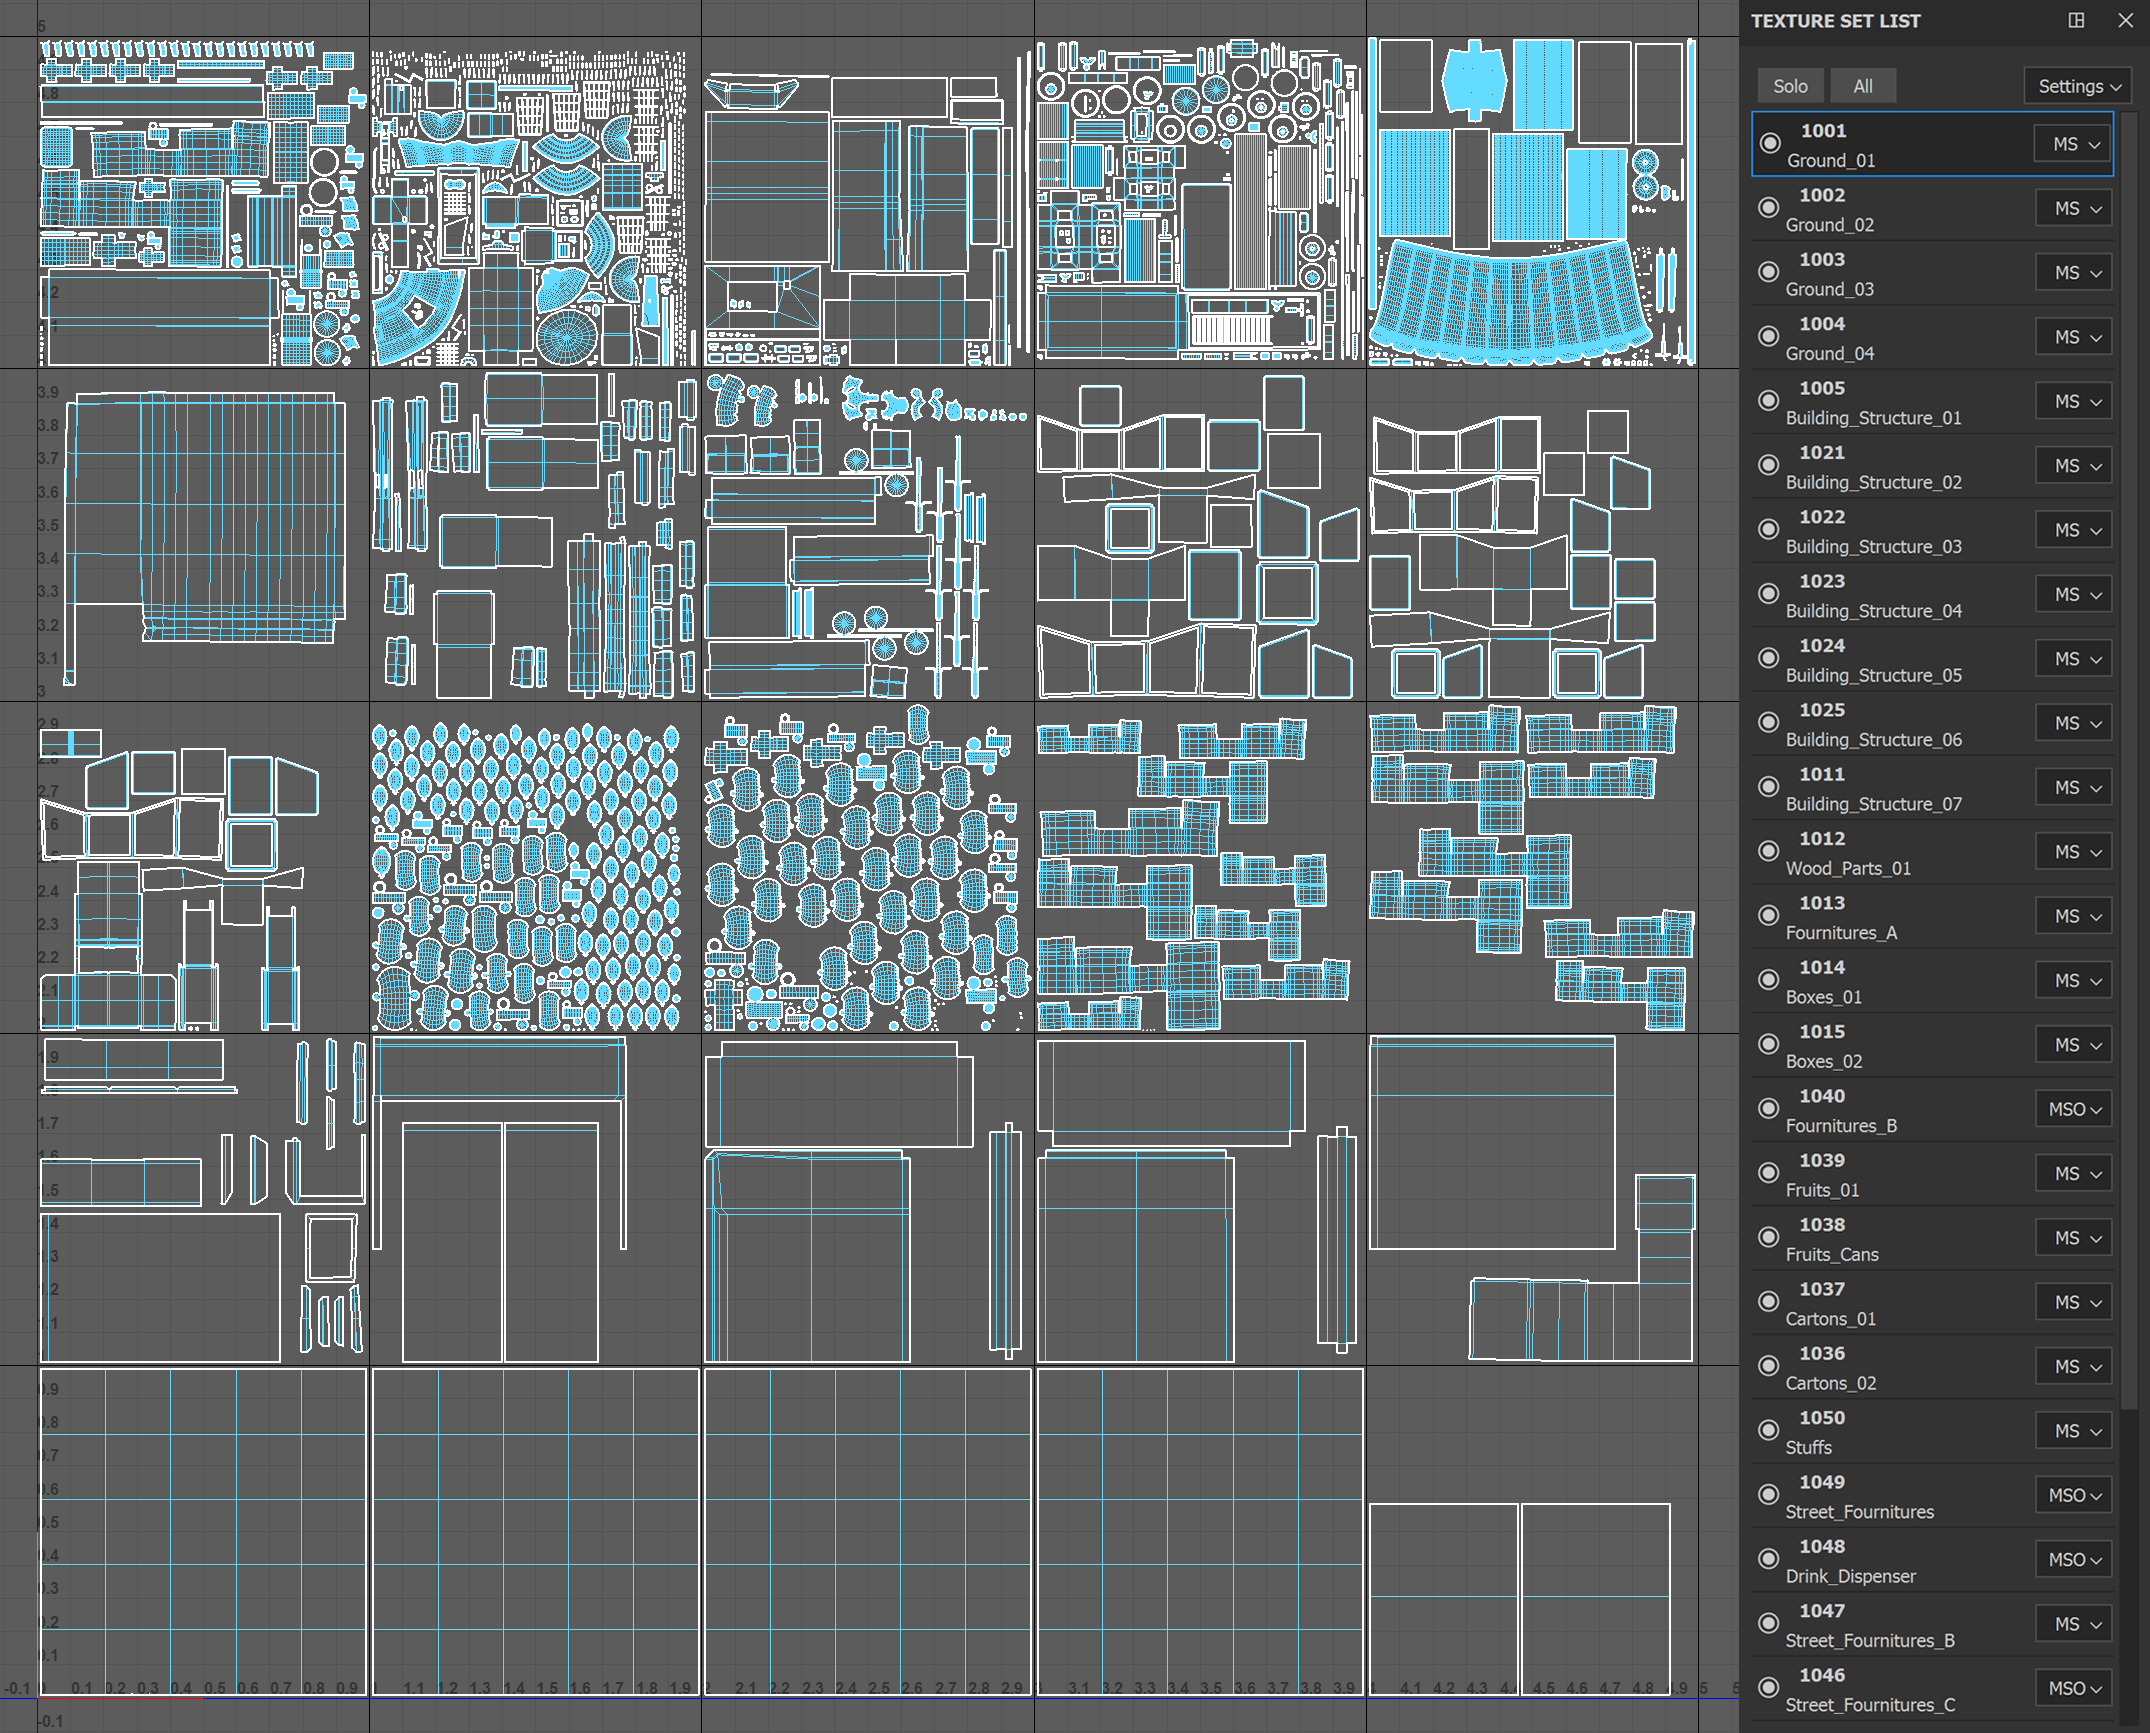
UDIM Layout and Texture Sets conversion.
Arrange your Layout in a logical way and anticipate the Texture Set conversion, as it will inform the shaders you assign in the future. For example, if you have some parts with opacity, you need to change the default PBR shader for an opacity one, for instance the PBR Alpha Blending, in which case it is better to arrange all the elements that require opacity in the same Texture Set in order to optimize your project.
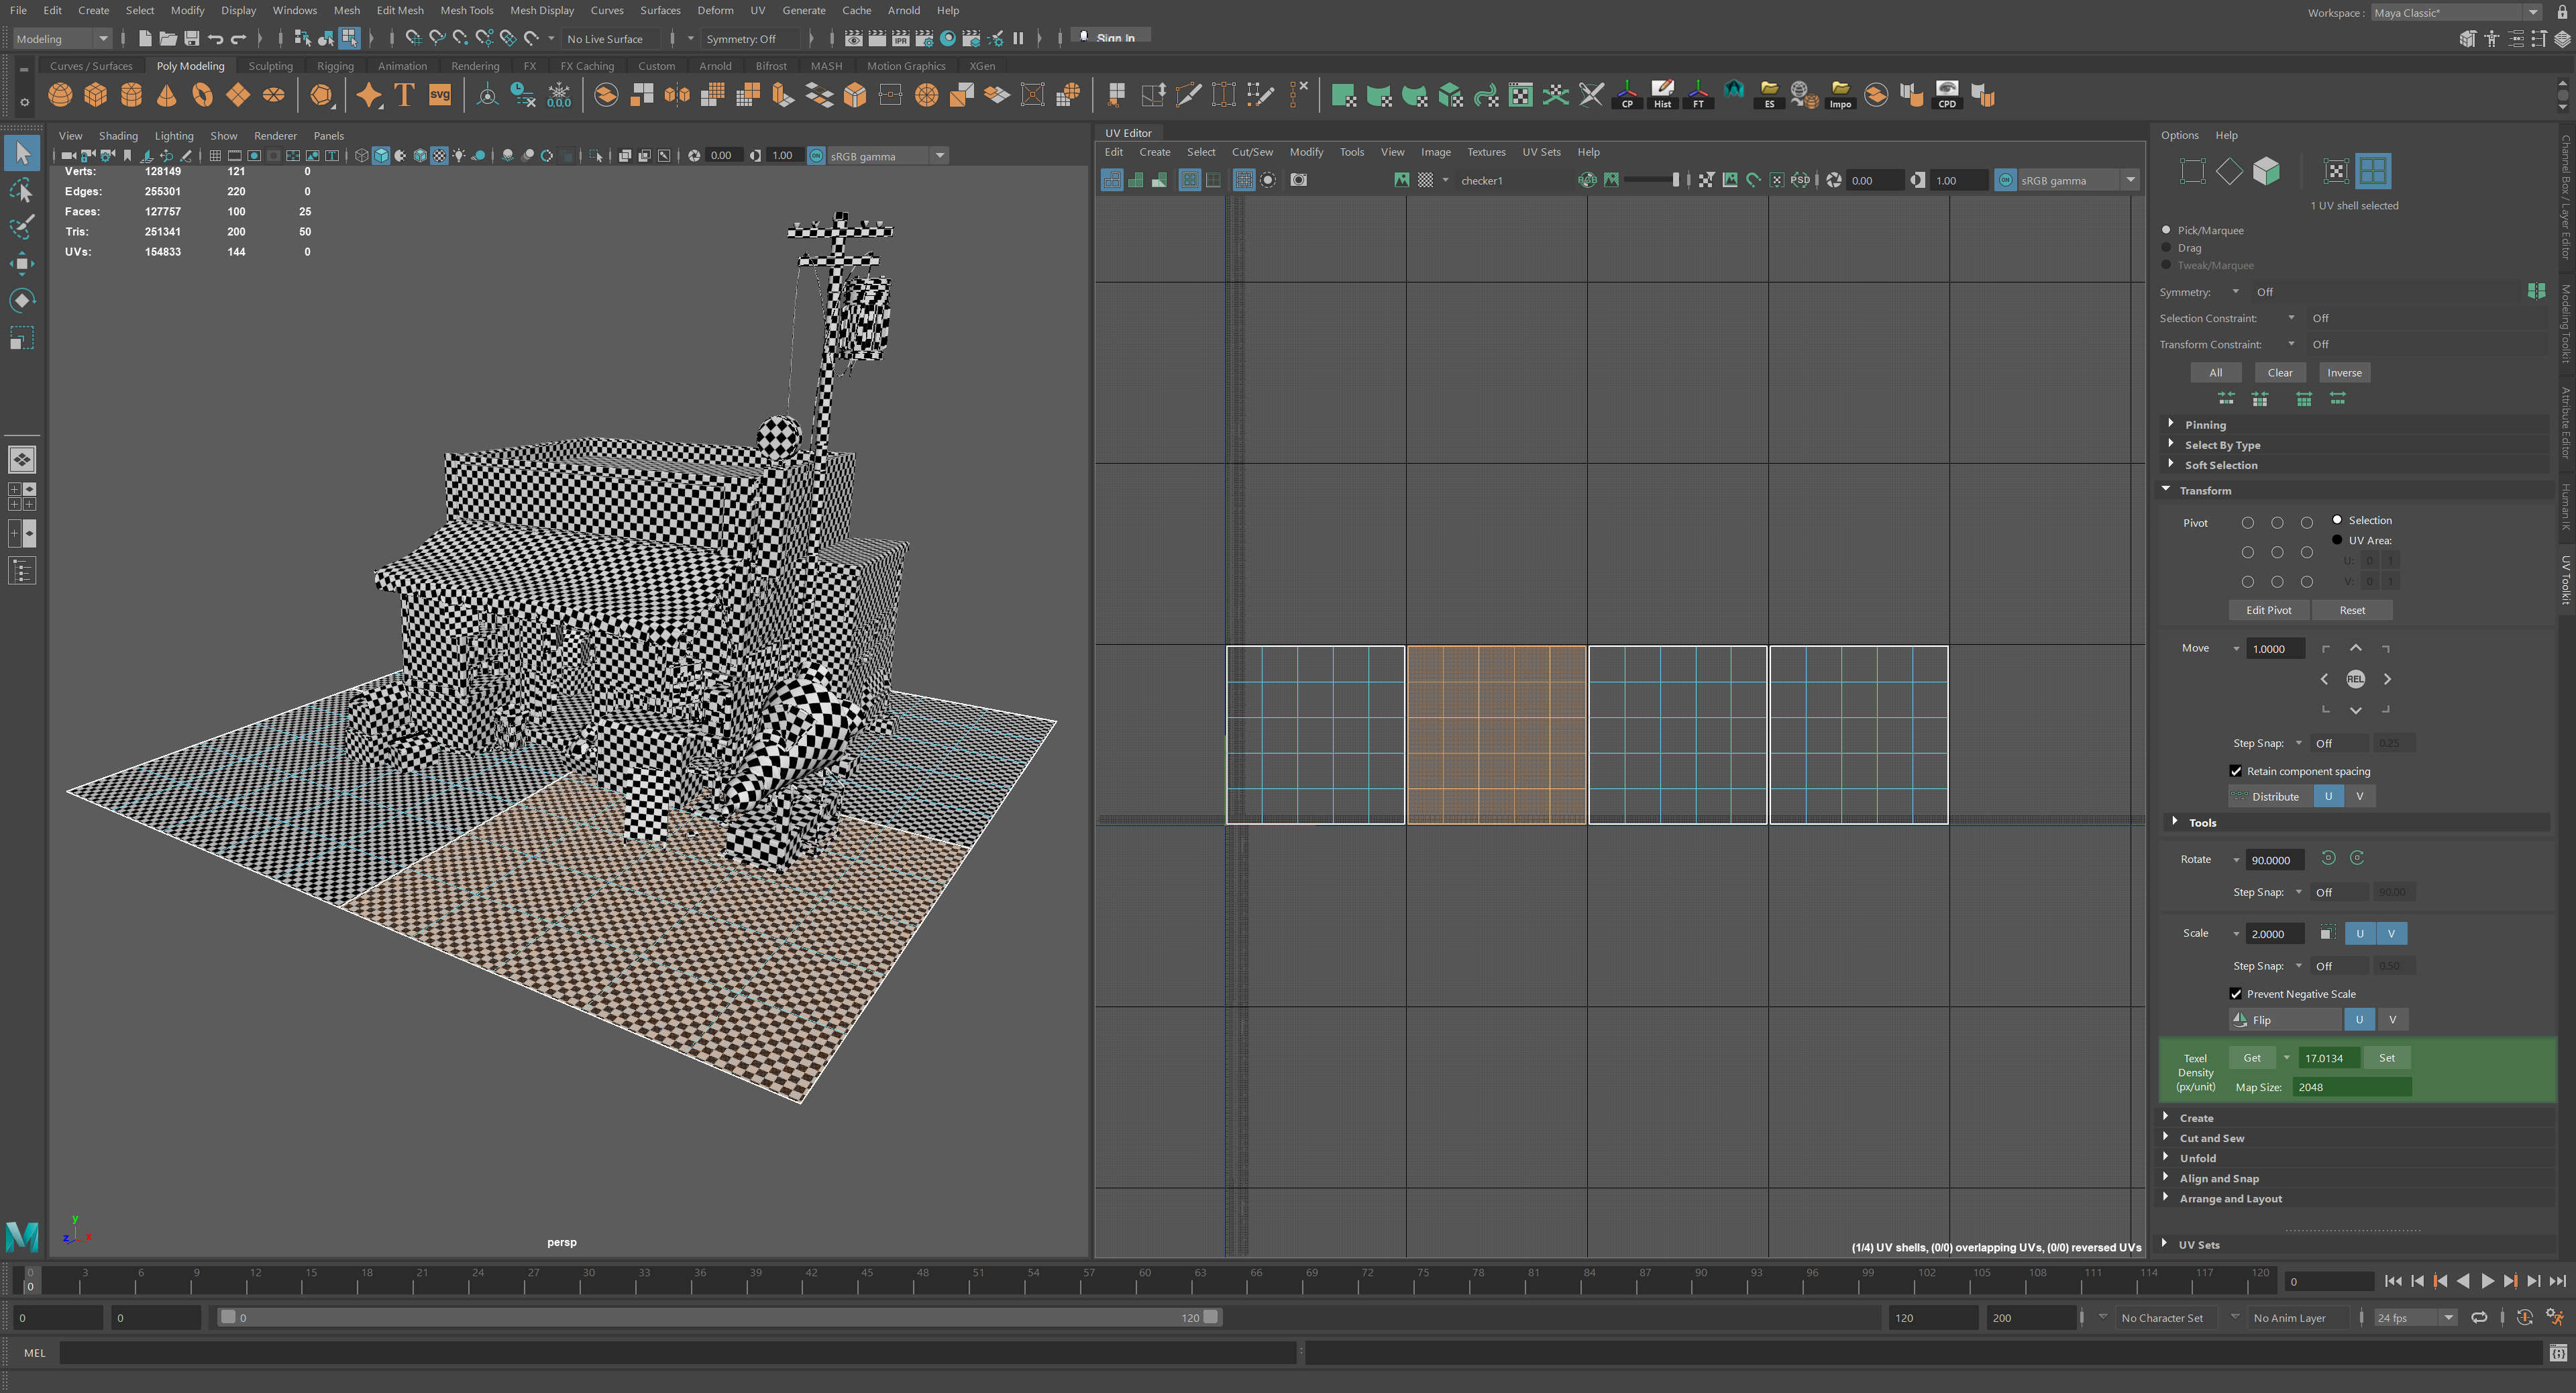
As the ground is a larger part of the mesh, I'm going to split it into four UDIMs. Thanks to the Instancing feature, I just need to work on a single Texture Set and Instantiate my group of layers across the other ground Texture Sets.
Why do we split the ground into four parts?
It is best to split the Ground in order to increase Texel density, which would permit to have a higher texture definition without going up to a huge map exporting resolution. Usually what I'm used to doing is the following:
I arrange the most important, large and indivisible parts in the UV Set;
Then I pick the Texel density for this UV shell to apply it to the other parts.
With Maya: UV Editor > Edit > UV Toolkit > Transform > Tools > Texel Density
You can get and set your Texel density from this tool.
With this process I'm sure to have a decent Texel density everywhere. I only change my common Texel density for a few small but important elements such as eyes, labels, book pages, etc.
Instancing in Painter:
Four texture sets for one object is a good optimisation regarding texel density, but it's very complicated to manage in terms of texturing because now for one material (Ground material) I have to deal with several texture sets instead of one. Thanks to the Instancing feature I just have to work on a single Texture Set and Instantiate my group of layers across the others which means I can now work and modify only one texture set and instantly see the result without going back and forth.
Once my instances are created, I can:
Apply Color variations
Remove some tiles
And apply a Dirt Mask based on the Ambient Occlusion Meshmap*
All of these steps are necessary so as to break tiling repetitions.
Baking
Because I don't have a High Definition Mesh but only one object in Medium Definition I'll bake my mesh onto itself.
In order to use Painter's Generators I baked the following:
World Space Normal (Generators)
ID (very useful for a big scene with a lot of different objects like this one)
Ambient Occlusion (Mask generators)
Curvature (Generators)
Position (Generators)
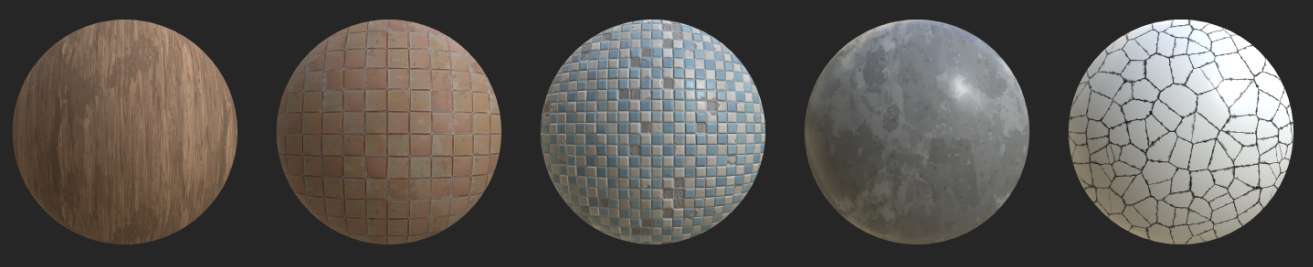
Define the main materials and find the best tool to reproduce them
While I'm browsing my mood board, I make sure to define some characteristics that will inspire my future texturing, such as a color palette - the level of details - the shapes defining the color variations etc. After that I determine what should be done in Substance Designer and what should be done in Substance Painter.
Material creation
For complex materials such as tiles, different types of wood, or any material with patterns, I would recommend to start from scratch in Substance Designer. For simple materials or those which would involve painting, go for Substance Painter and start with a Fill Layer. To match a stylized reference, define some target materials in your mood board and try to emulate them.
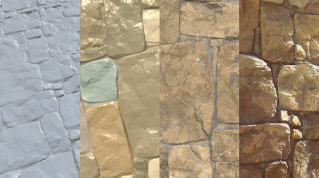
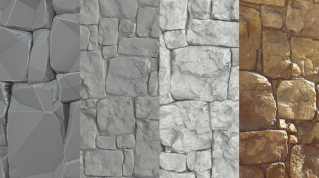
Designer
As I explained above this kind of materials with tiles will be done with Substance Designer. Tiles are a pattern repetition. Doing this with Painter would be painful.
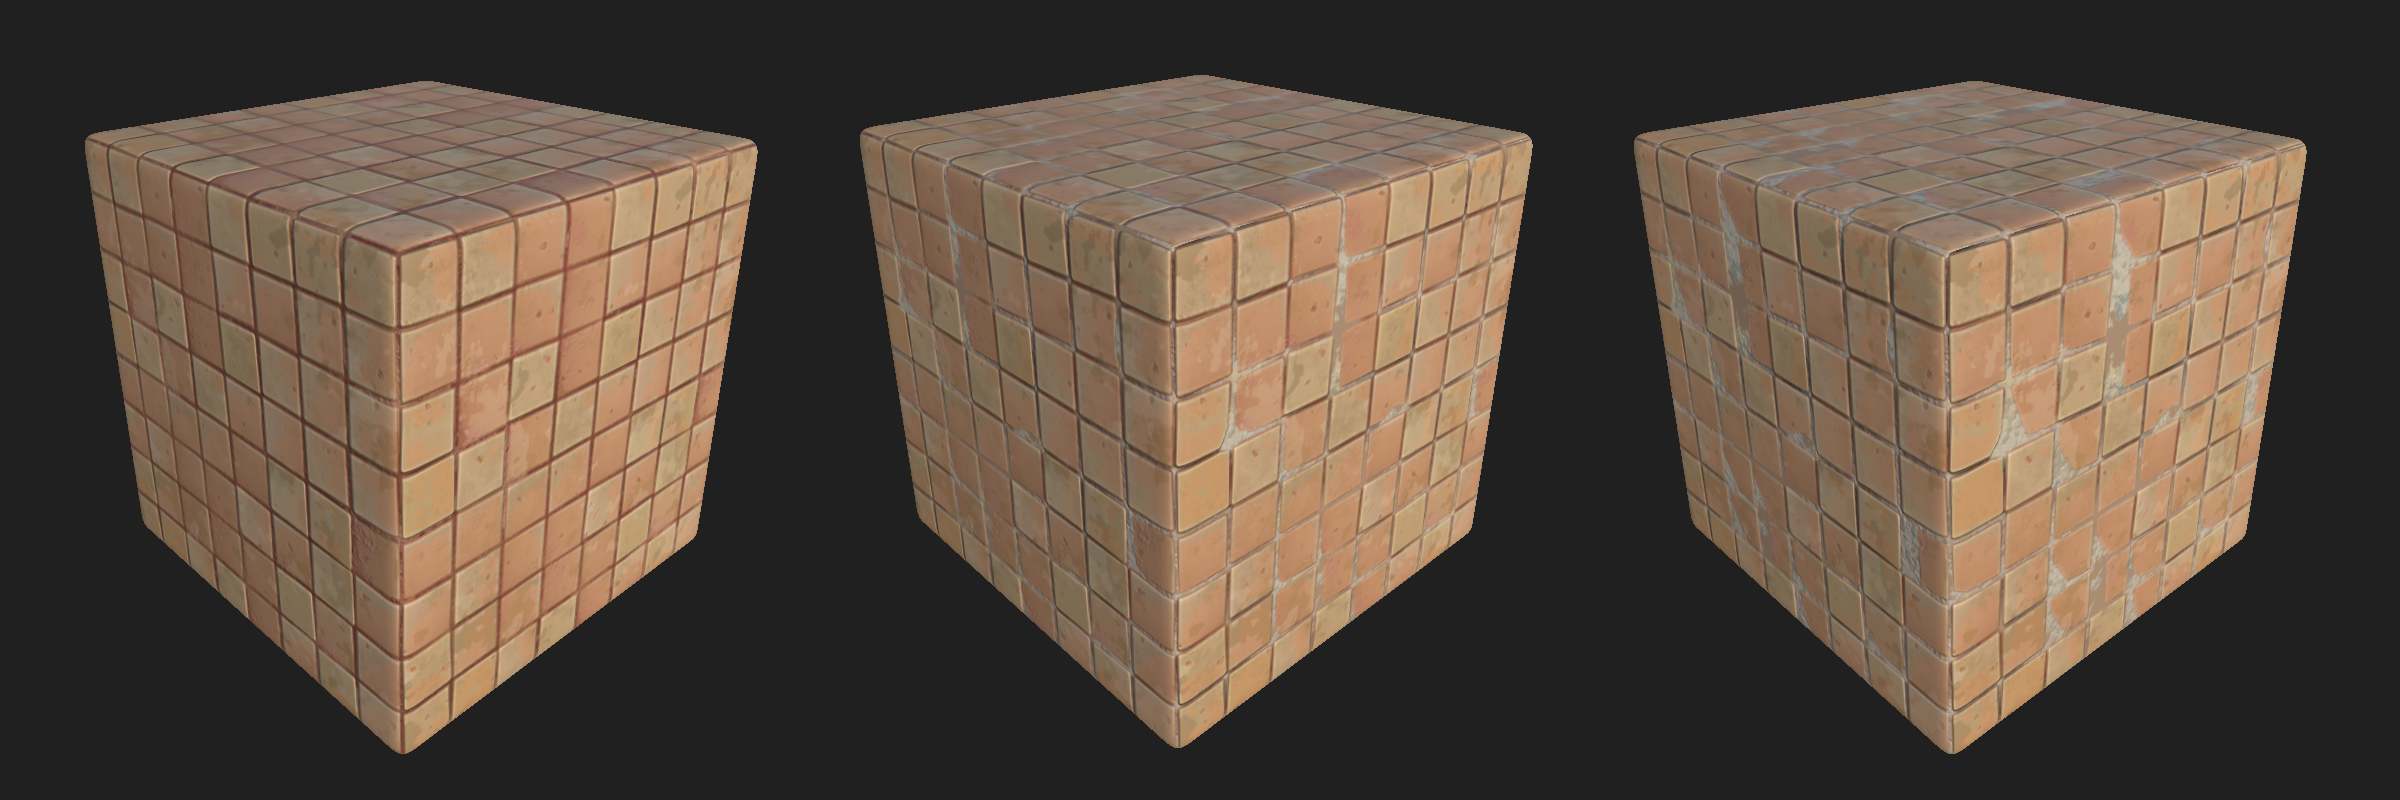
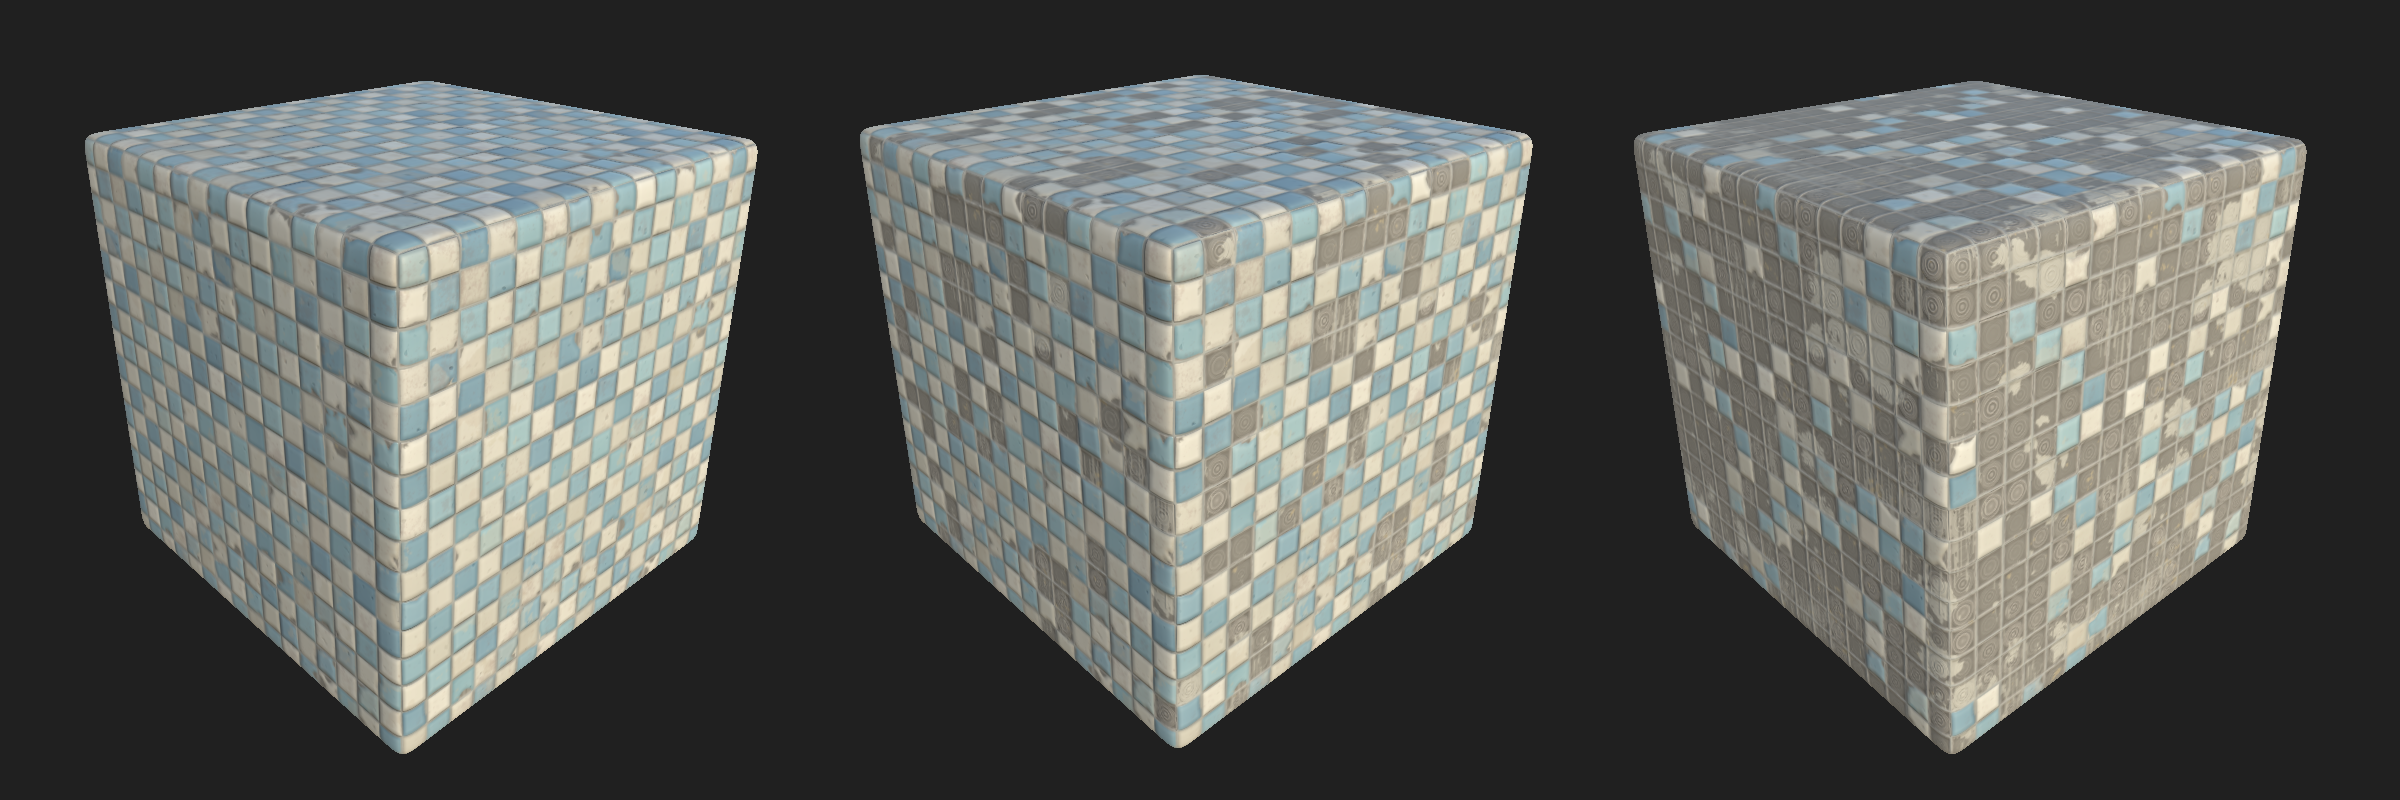
Here’s a breakdown of the main steps, and bellow you can see the result on a primitive mesh with different intensity of concrete inside the joins.
Material created by Luc Chamerlat (Technical Artist at Allegorithmic)
Painter
Materials or from scratch with a Fill Layer ?
For this project, I started from photorealistic Painter materials for only two things: concrete of the gutter and metal of the electric pole. Otherwise I started from scratch with Fill layers, used Substance Painter's procedural noises and reduced the high frequencies. When I say reducing high frequencies, I'm talking about the action of removing very small details in your procedural maps. Basically when a 2D artist draws or paints something he can't and most of the time he doesn't want to reach a photorealistic level of detail. This is why you have to reduce the high frequencies of the default Painter content to make it more stylized.
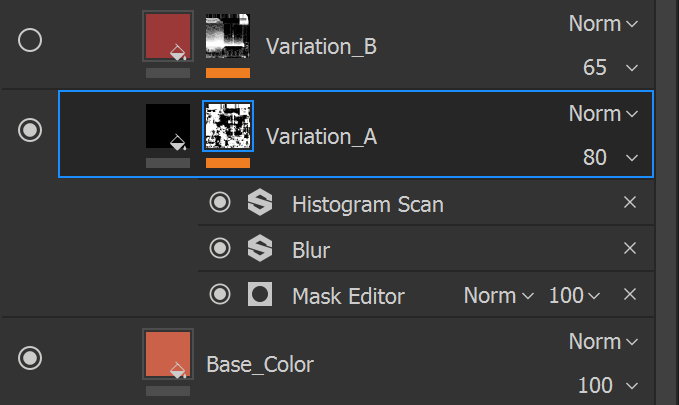
Tips and Tricks: Reducing high frequencies
From a Procedural or Mask Editor input
Blur
Histogram Scan
Blur filter will diffuse the small details (high frequencies) And Histogram Scan will clamp the blurry shape and redefine a new stylized shape without all the photorealistic details.
Most of the time this setup gave me good results. Don't forget that you can tweak every Procedural texture available in Substance Painter. Random Seed, Balance, Contrast and Noise Parameters allow you to create an infinite amount of variations. In your procedural shelf, the Thumbnails represent only one of the possible variations so be curious and tweak it, you might be surprised.
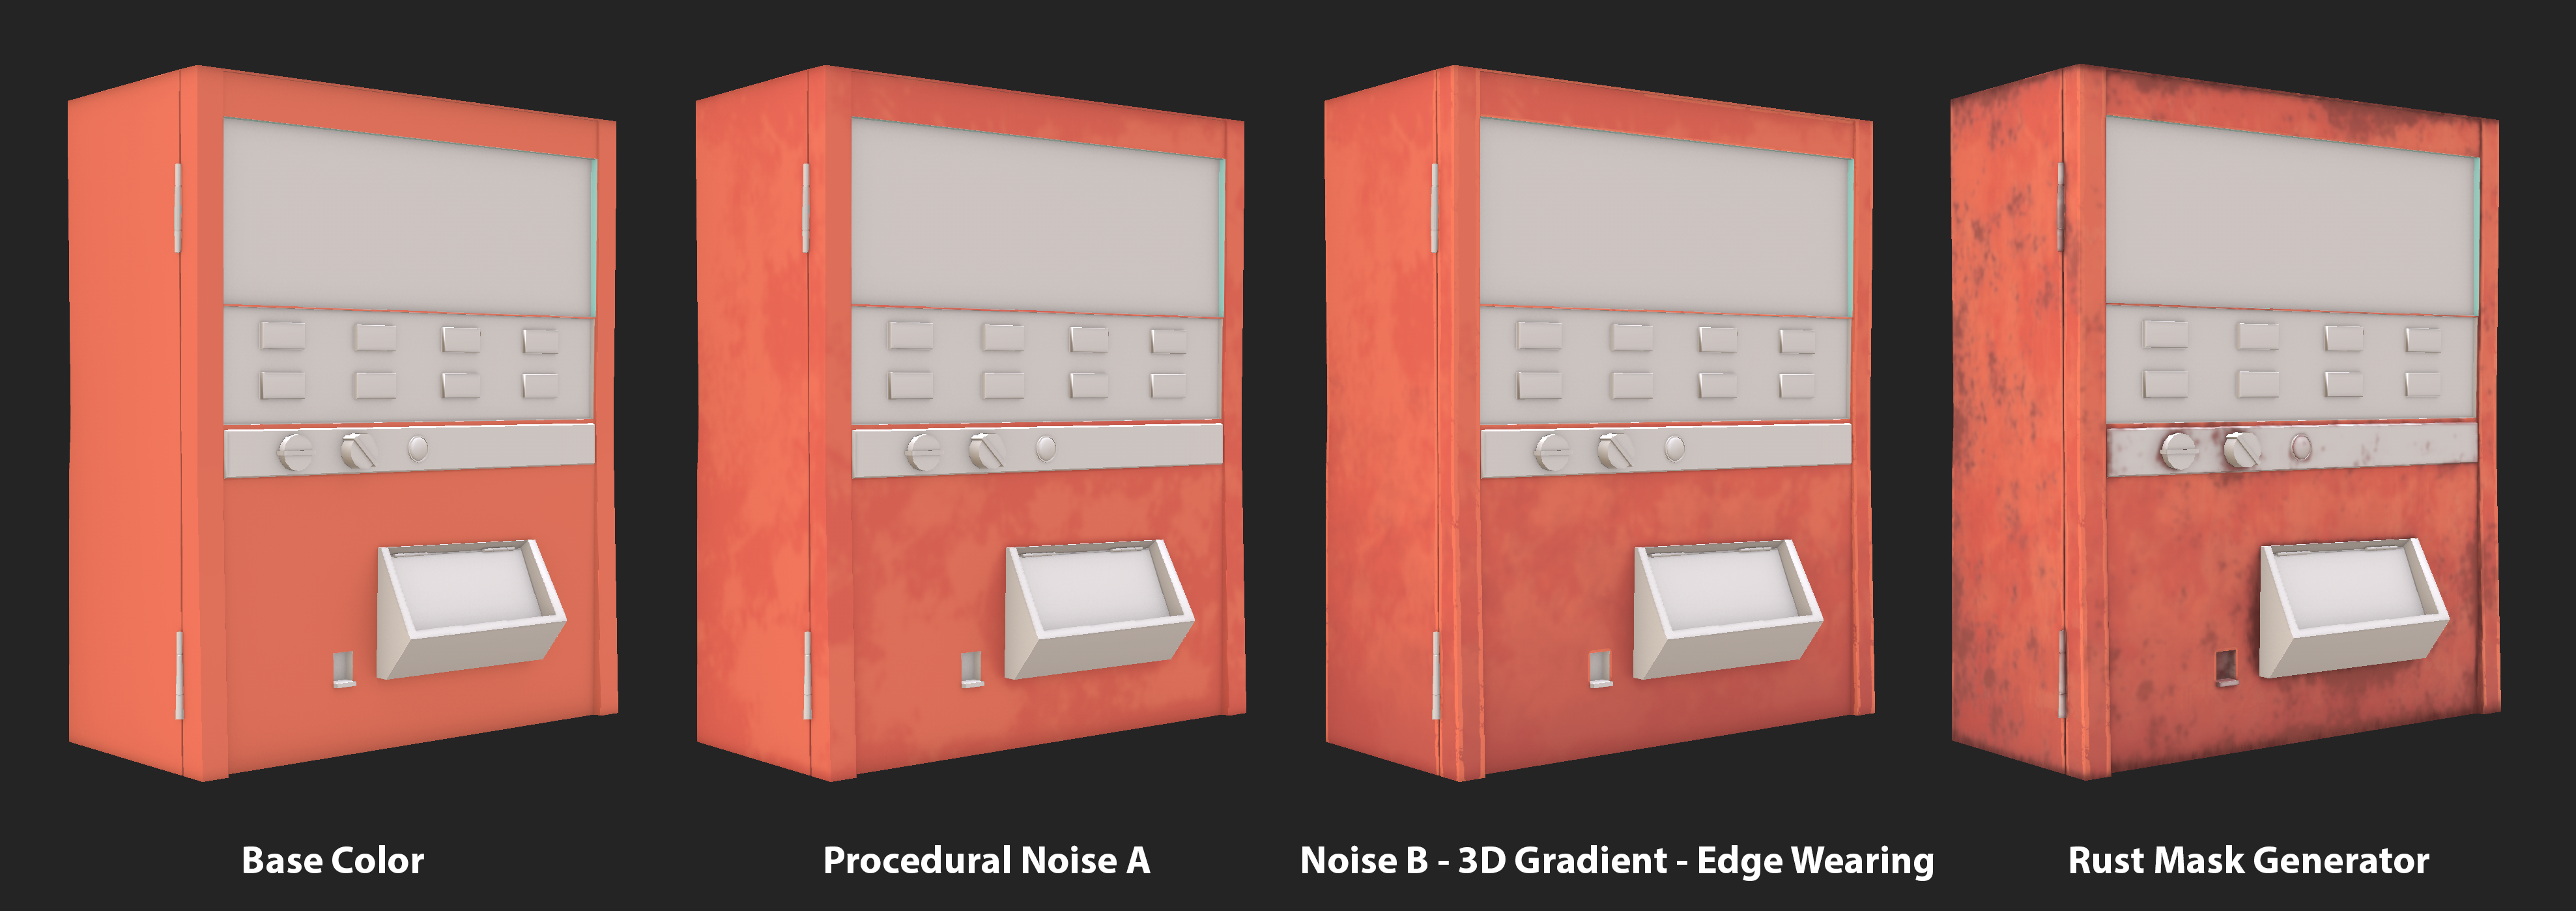
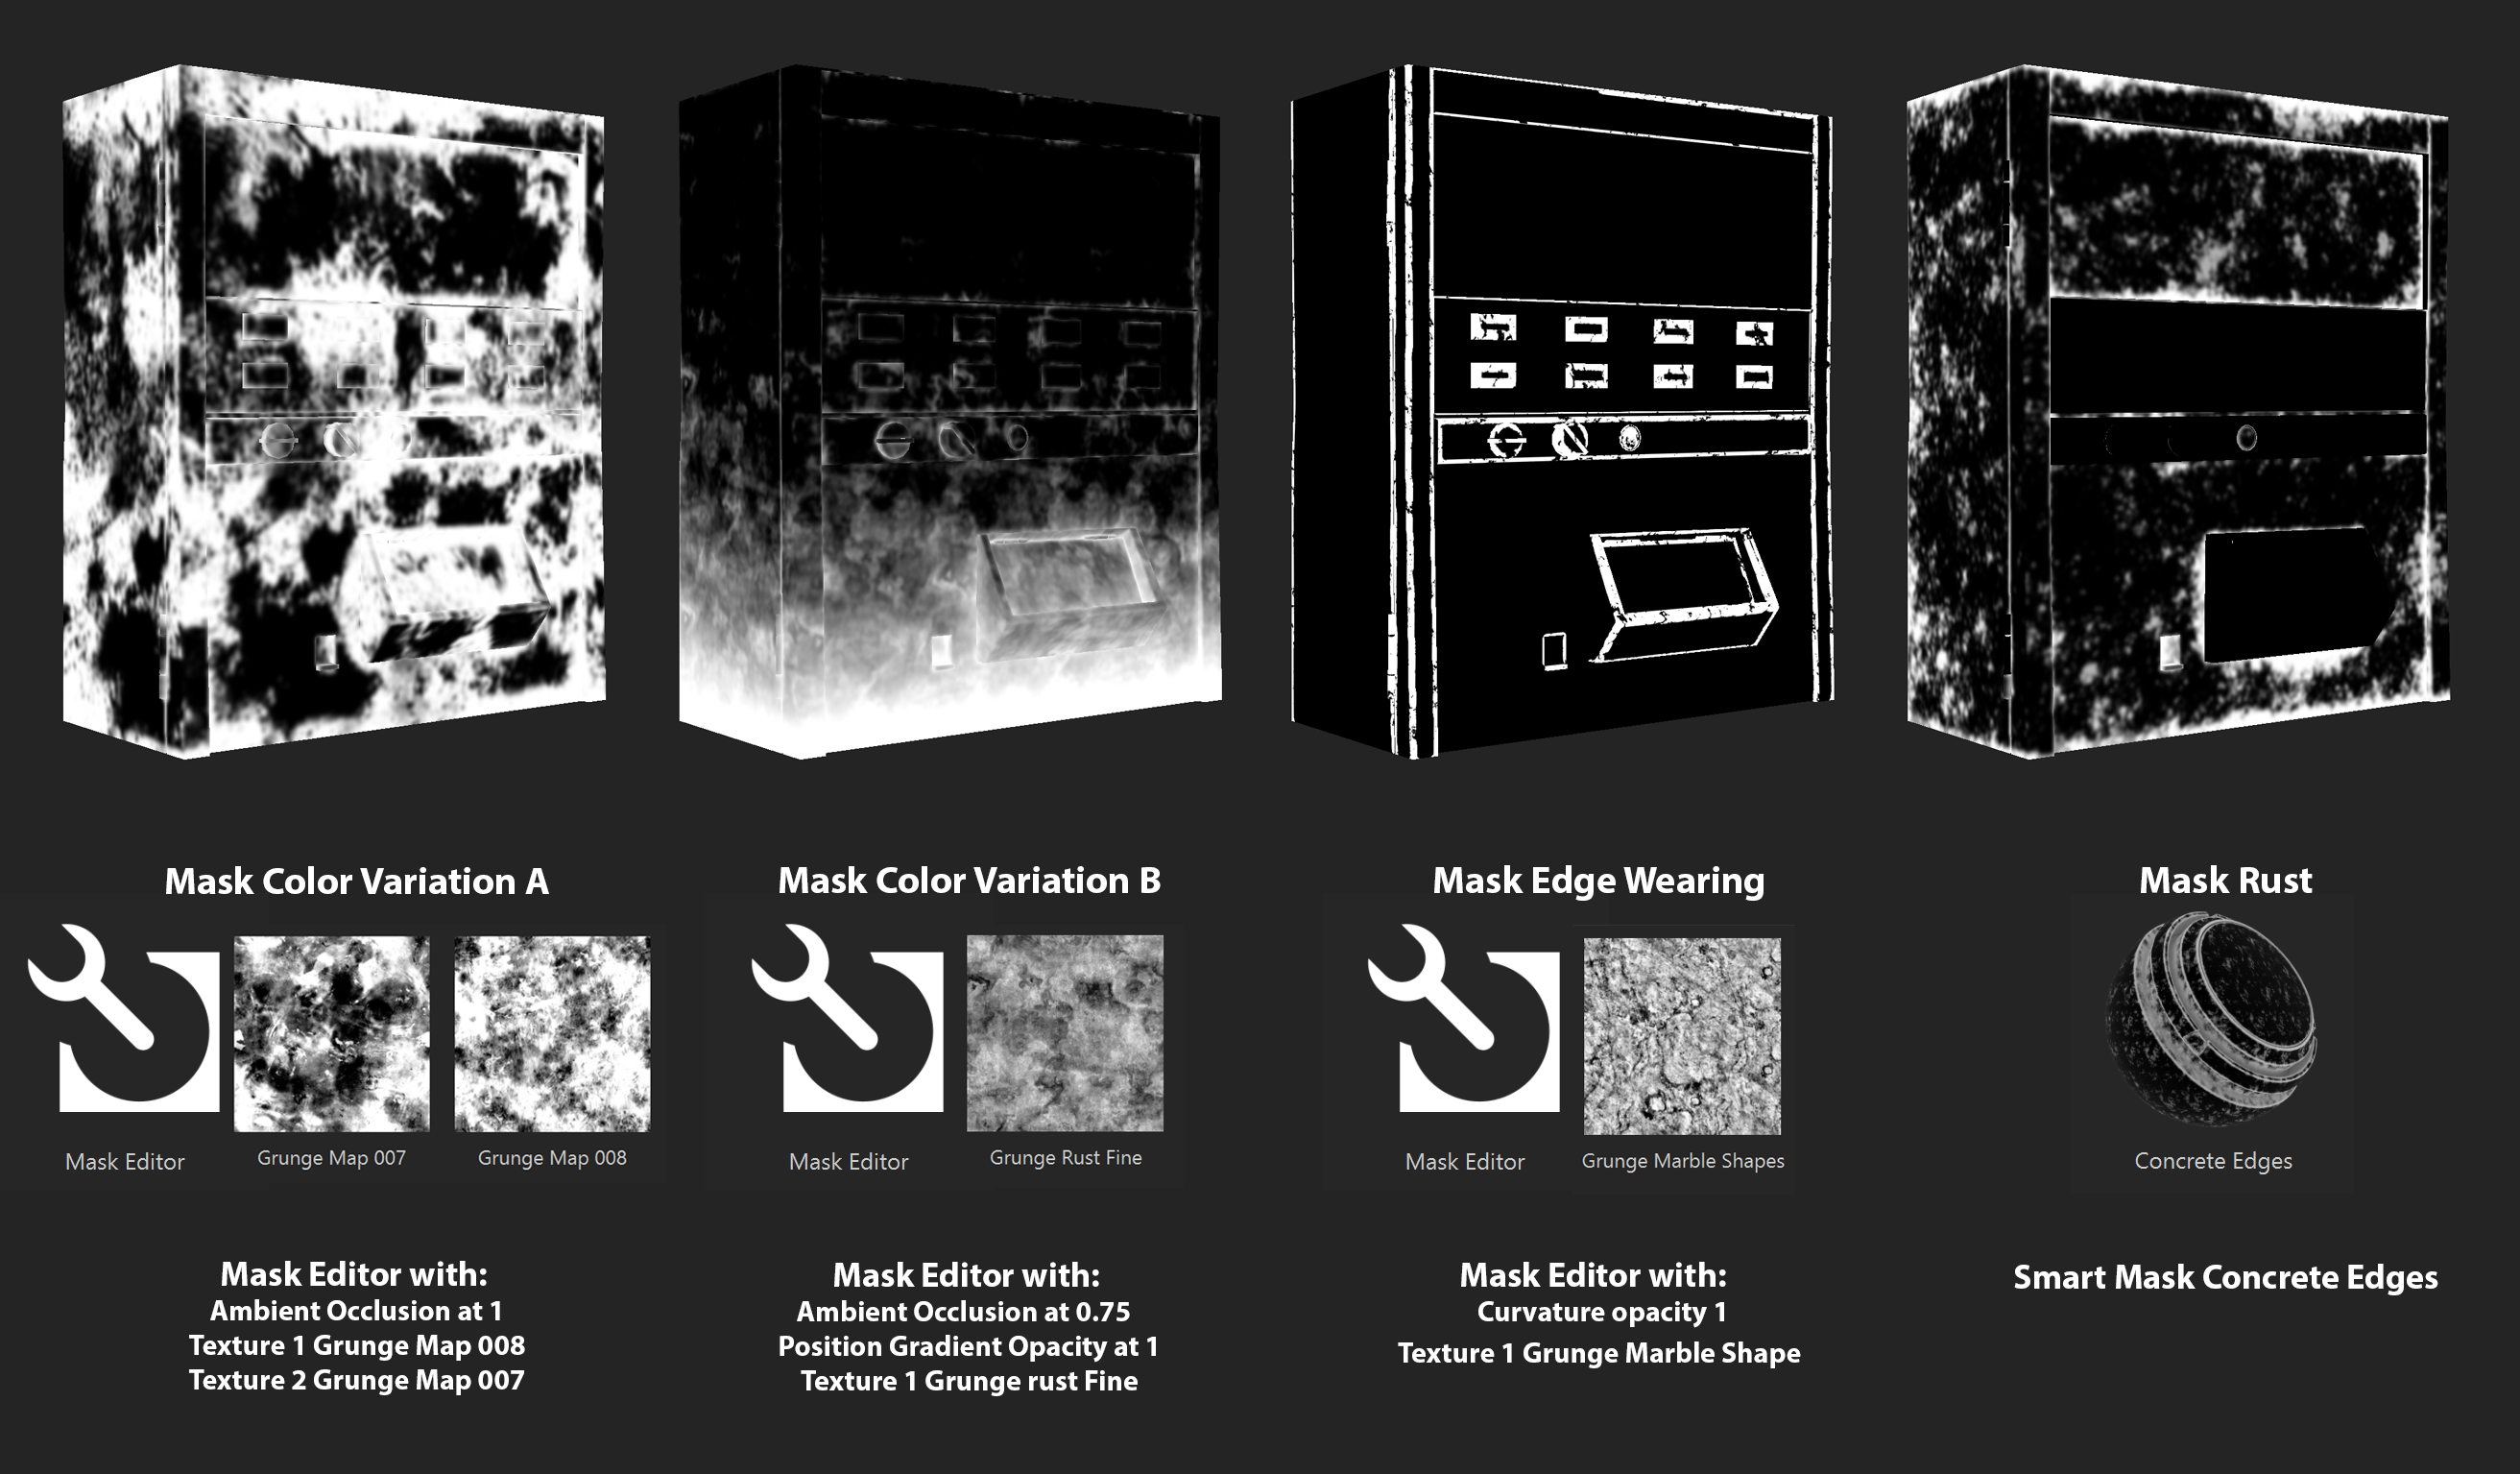
A few words about the mask structure:
The first one is a mask editor mainly driven by the Ambient Occlusion mesh map. The second one is also a mask editor with AO but in this one I also used the position map in order to create a gradient. This gradient simulated the ground dirt on the object. The third mask editor is dedicated to the edge wearing effect. And to finish a smart mask which is a mask editor preset available in the Painter shelf and as you can see this preset was made for a concrete edges effect but in our case it’s a wonderful rust generator.
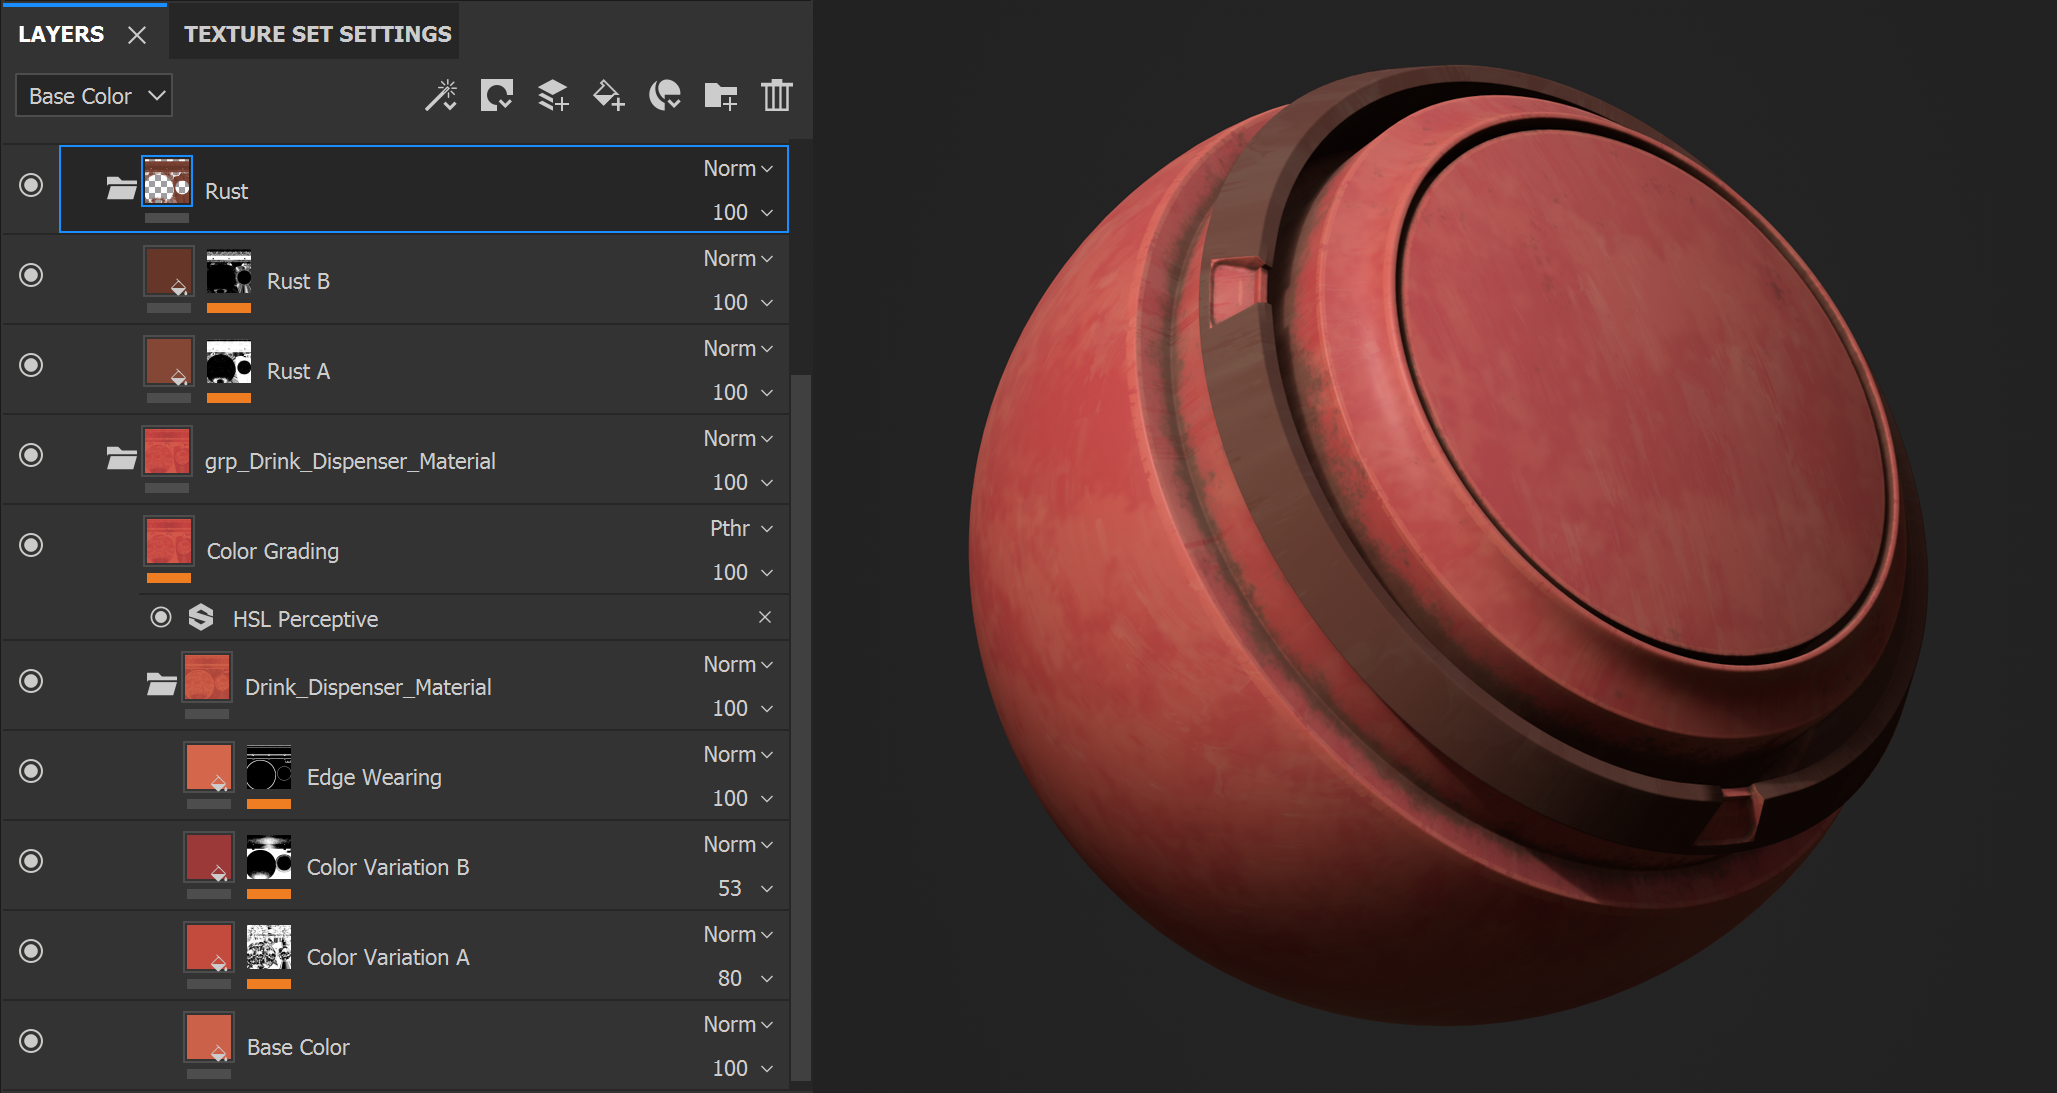
My Base Material created with Fill Layers is now done, and because it's only driven by procedural content such as Mask Generators and Procedural Maps
I can now save my layer stack as a Smart Material and use it in another project. To create a Smart Material you have to put all your layers in a Group and then right click > Create smart material
Now for the specifics details such as the Rust leaks, I will add a hand-painted layer. As an artist, I want to paint my details where I want and not be influenced by an automatic generator. For hand painting, you can use:
Brushes with Leaks Alpha
Particles brushes
Alpha projection using the Stencil tool
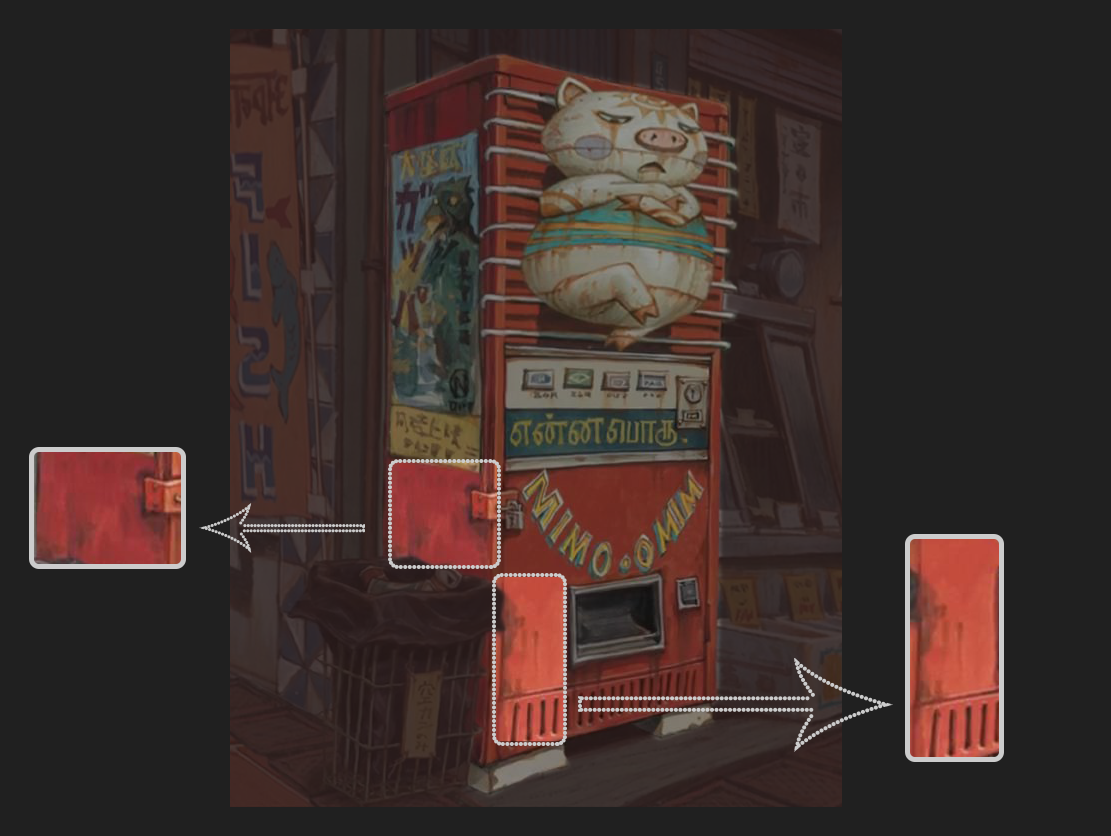
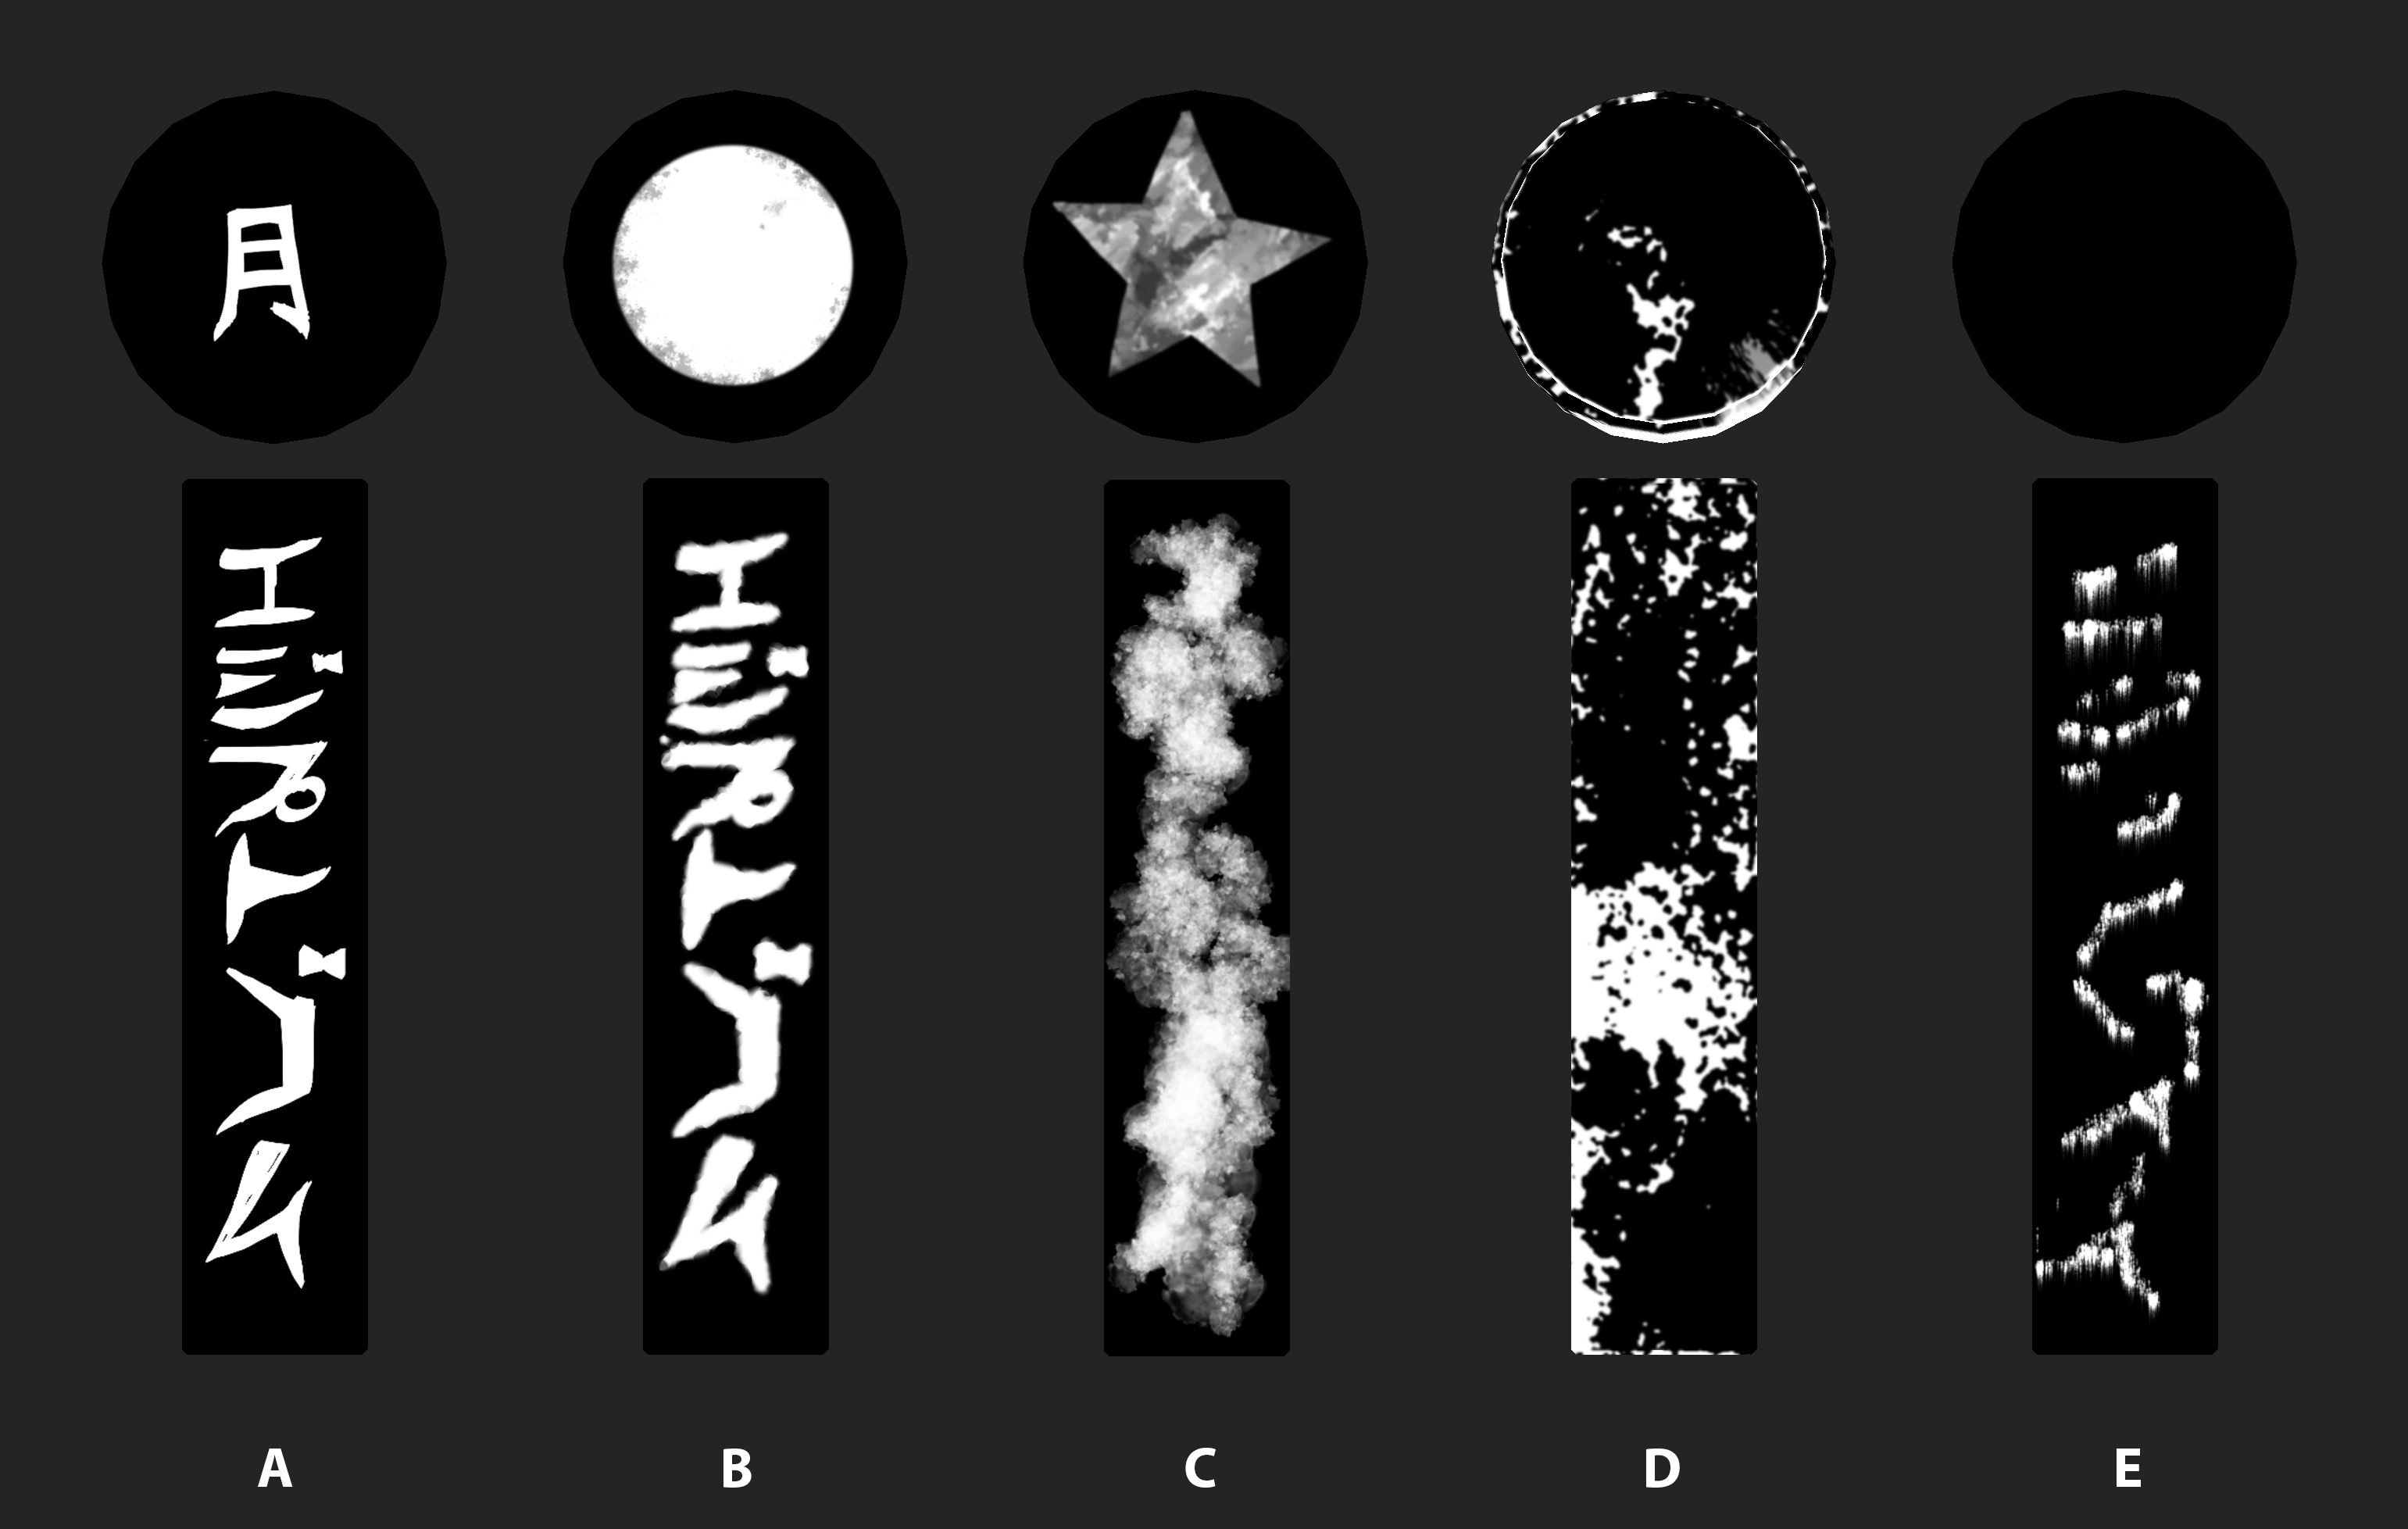
The Signs
A- Hand-painted fonts
B- Mask duplication through an Anchor point + Warp Filter
C- Hand-painted Color variations
D- Procedural Rust Mask
E- Hand painted Rust Leaks
In the end I add a Mask with a Grunge Dust Small Procedural Texture to simulate paper grain and irregularities.
THE UTILITY POLE
Breakdown of the utility pole
Base Material: Steel Rough Material + MatFinish Filter
Oxidation: Fill Layer in Multiply with a Mask fed by the Grunge Leaky Paint Map
Rust: Fill Layer in Multiply + Mask and Opacity with - Particle Paint + Blur + Sharpen - Mask Editor driven by the curvature Meshmap and Texture 1 Input fed by Grunge Rust Fine - And a Fill effect feed with Grunge Stains Heavy
Rust leaks details
For the leaks, nothing is better than the Physical paint tool. I started from a preset and then I changed some parameters such as SpawSpread, Friction, ParticleLife. NB: Thanks to the Brush Preview window you can previsualize your Brush in real-time when tweaking.
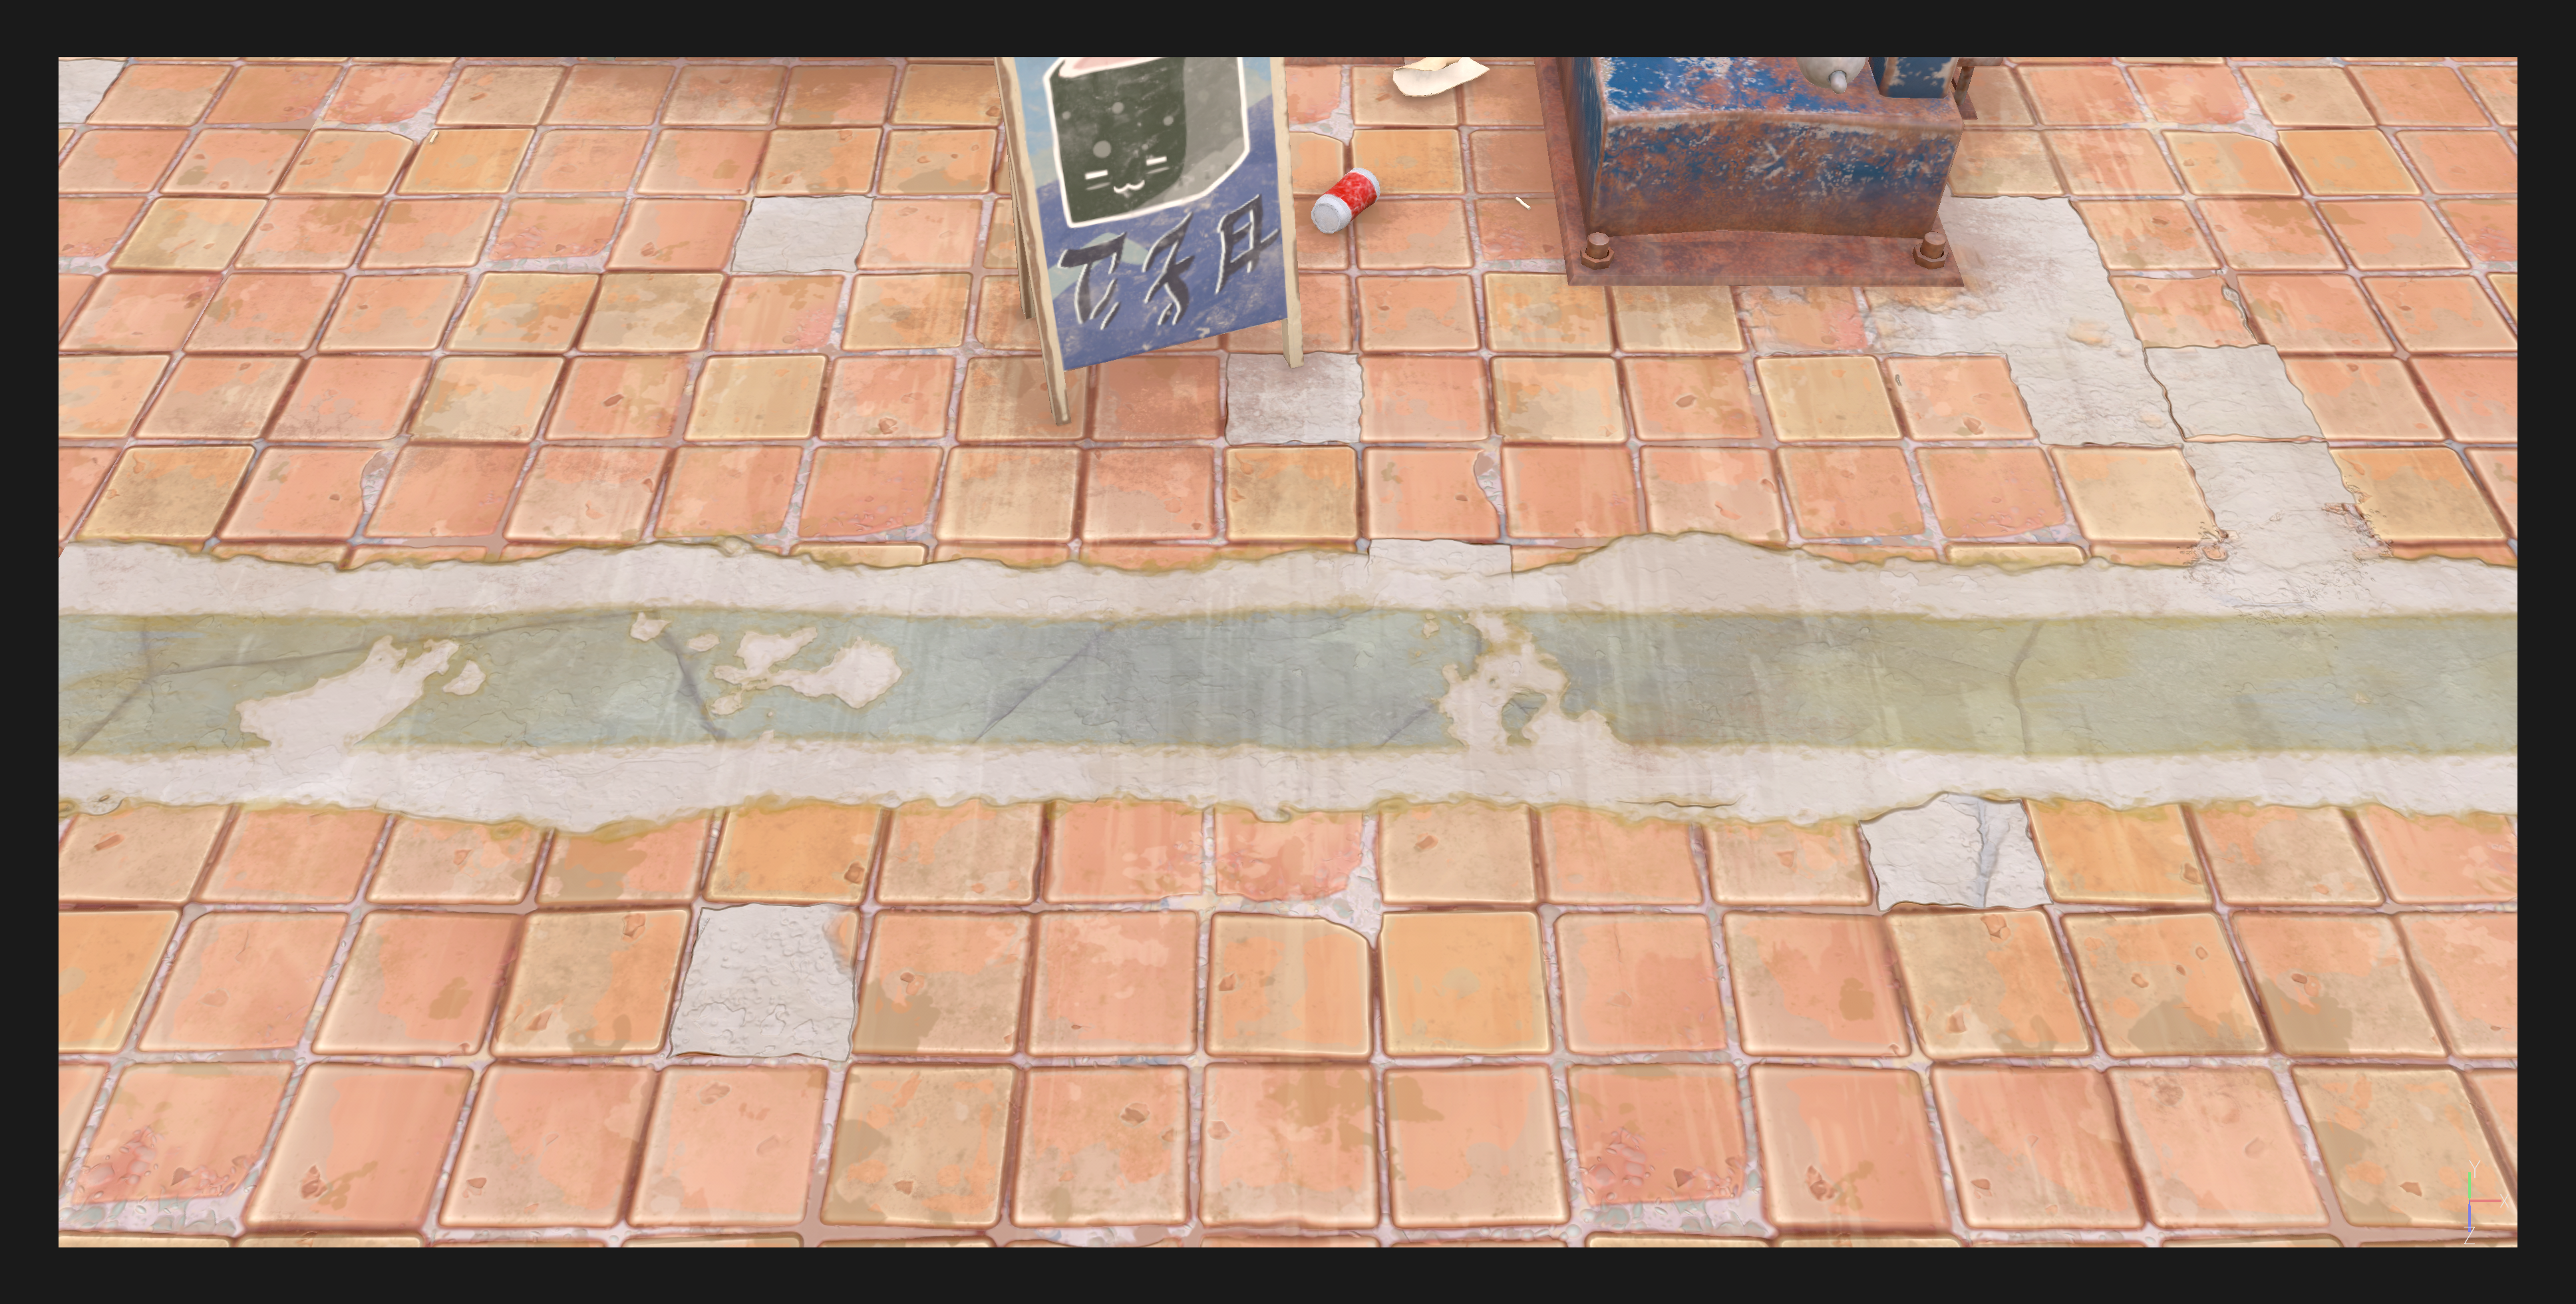
Gutter
For the gutter, the recipe is:
Gradient Linear 2
Warp Filter
And a selection of custom Filters from Substance Share
Since all of my materials are fully procedural, I can use the Instancing feature and extend my texturing to another ground TextureSet.
Have fun with Smart Materials
For this type of material please have fun and work on a setup that you can keep in your personal Shelf by using a Smart Material creation. Our workflow is fully non-destructive, so play with it as much as possible. Save your custom layers setup, masks, brushes with a simple right click to create your own Presets and then your personal style.
Smart Material created by Luc Chamerlat (Technical Artist at Allegorithmic)Available here:https://gumroad.com/l/jLSFJ
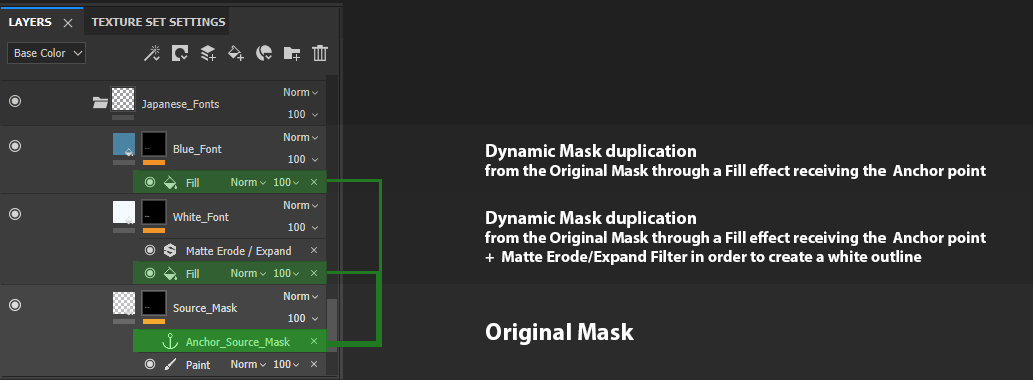
Anchor point
Anchor what ??? It's basically a dynamic connection between two layers.
How is it working?
It's very simple, you should start by defining a "Source Layer or Mask" with something you want to use in another layer, as a mask or a procedural texture. And then right click and "add anchor point"
Now you have to define a "Receiver" Layer or Mask.
You can make your connection with a:
Channel Slot
Fill effect
Mask Editor through the Micro Height and Micro Normal inputs
In my example, I'm going to use a source layer that I'll name "Source_Mask" From that layer, I'm sending my painting in two layers. The Blue one receives my painting without any post effects, it's basically a perfect duplication of my source mask. The White one just below receives my painting and a Filter called Matte Erode / Expand filter in order to extend my shape and then add outlines.
And now what we can do with that setup is paint a shape with a white outline by default. Without anchor point this thing is impossible to do.
And from that setup we can add another layer and simulate a 3D font effect for instance.
SOME KEY NOTES ON PAINTING
Use paint effects ! okay but why ?
Because with paint effects you can split your painting, change the blending mode or the opacity and it's also a good way to create a kind of history stack. I'm used to working this, way: one paint effect for the large shapes, one for the medium and so on. The idea is to anticipate any changes you may introduce later on, which is possible thanks to Substance Painter and solid workflow practices .
NB: Lazy mouse is your best friend when it comes to better precision when drawing nice curves
Channels breakdown
Renders done with IRay inside Painter
Conclusion
Finally I managed to complete the project without any need for external resources. In conclusion I’ve learned that you can use the default content of Painter to achieve a stylized project the only things you have to do are:
Play with the Procedural content parameters
Reduce the high frequencies
About Normal and Height go slowly with them on this type of project is almost useless I put some on the ground, tiles and on details not done during the modeling.
Regarding the Roughness, stay around 0.5, it could be nice to have so slight variations when camera and lights moving but not too much.
On the other hand I kept the Metallic properties, I tried to removed them but it's definitely nice to have some.
That's it for Painter
About Designer a tutorial about stylization is coming soon !
Credits
Luc Chamerlat: Has created three Materials, Wood, Gound, Tiles and two custom stylized Grunges with Substance Designer.
Céline Dameron: Has made this wonderfull Cute Alpha Generator that you can use with the Stencil tool also made with Substance Designer.
You can control how Adobe websites use cookies and similar technologies by making choices below. But note that if you disable cookies and similar technologies entirely, Adobe websites may not function properly.
Cookies are small text files stored by your web browser when you use websites. There are also other technologies that can be used for similar purposes like HTML5 Local Storage and local shared objects, web beacons, and embedded scripts. These technologies help us do things like remembering you and your preferences when you return to our sites, measure how you use the website, conduct market research, and gather information about the ads you see and interact with.
You can make choices in the menu below about what cookies and other technologies you want us to use on Adobe sites when you visit them from this browser. You can always change those choices later by clicking on the Cookie Preferences link at the bottom of the page.
If enabled:
We can improve your experience by tailoring the site and the content to things we think might be of interest
We can better keep track of your preferences — like what language you prefer to use
We will better understand your likely interests so we can provide you more relevant Adobe ads and content on non-Adobe websites and in non-Adobe apps
It will help us improve the performance of our website and those of our partners who use the Adobe Experience Cloud
If disabled:
We won’t be able to remember you from session to session so the experience may not be tailored to your interests
You’ll still have access to the content of the site but certain features that depend on cookies may not function
You’ll still see ads, they just may not be as relevant to you
General information
You can control how Adobe websites use cookies and similar technologies by making choices below. But note that if you disable cookies and similar technologies entirely, Adobe websites may not function properly.
Cookies are small text files stored by your web browser when you use websites. There are also other technologies that can be used for similar purposes like HTML5 Local Storage, web beacons, and embedded scripts. These technologies help us do things like remembering you and your preferences when you return to our sites, measure how you use the website, conduct market research, and gather information about the ads you see and interact with.
You can make choices in the menu below about what cookies and other technologies you want us to use on Adobe sites when you visit them from this browser. You can always change those choices later by clicking on the Cookie Preferences link at the bottom of the page.
If enabled:
We can improve your experience by tailoring the site and the content to things we think might be of interest
We can better keep track of your preferences — like what language you prefer to use
We will better understand your likely interests so we can provide you more relevant Adobe ads and content on non-Adobe websites and in non-Adobe apps
It will help us improve the performance of our website and those of our partners who use the Adobe Experience Cloud
If disabled:
We won’t be able to remember you from session to session so the experience may not be tailored to your interests
We’ll still count your use of our site and services
You’ll still have access to the content of the site but certain features that depend on cookies may not function
You’ll still see ads, they just may not be as relevant to you
Operate the site and core servicesOperate site and measure engagement
Always active
These cookies are required, and they are used to enable the site and related services core functionality. Without them the site could not operate, so they cannot be disabled.
These cookies enable the site and related services’ core functionality and collect statistics about user engagement, such as counting active use to help us understand trends. These cookies cannot be disabled.
Measure performance
These cookies are used to analyze site usage to measure and improve performance. Without them Adobe cannot know what content is most valued and how often unique visitors return to the site, making it hard to improve information we offer to you.
These cookies are used to analyze site usage to measure and improve performance. Without them Adobe cannot know what content is most valued, making it hard to improve information we offer to you.
Extend functionality
These cookies are used to enhance the functionality of Adobe sites such as remembering your settings and preferences to deliver a personalized experience; for example, your username, your repeated visits, preferred language, your country, or any other saved preference.
Personalize advertising
These cookies are used to enable Adobe and our partners to serve ads more relevant to your interests. Without them you will still see ads, but they might not be as relevant to you.
Personalize advertising
These cookies are used to enable Adobe and our partners to serve ads more relevant to your interests. Without them you will still see ads, but they might not be as relevant to you.