With 5518 Studios, learn how to make the Mammoth sci-fi creature with the Round Edge Shader in Modo and the texture sets in Substance Painter.
We decided to make a model of an epic Sci-Fi creature to consolidate the working skills with the Round Edge Shader in Modo and the texture sets in Substance Painter. It took 100 hours to complete, from the idea to the finished promo materials. Sergey Tyapkin, Lead 3d Artist at 5518 Studios, created the artwork.
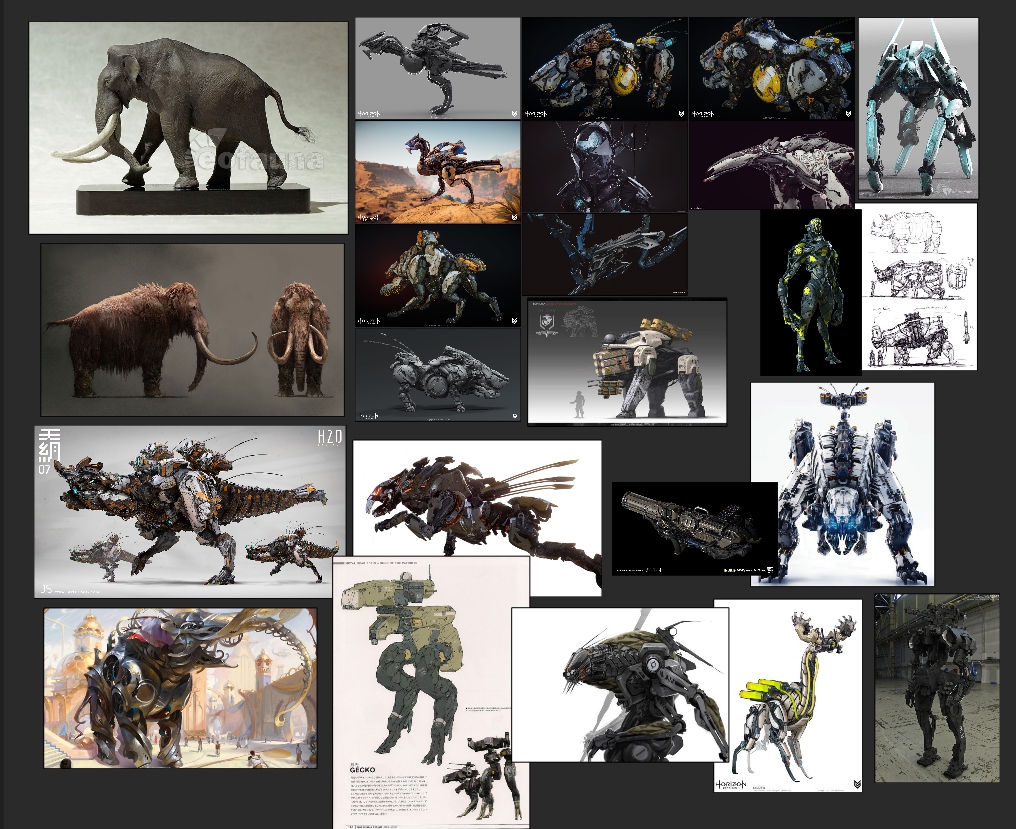
Day 1-2: Style searching and blockout creating.
Before starting work, like any artist, we create a mood board with cool artists’ references for inspiration. The images were collected in PureRef - this helps form the model's initial image. The starting point for the Mammoth's style was the Horizon: Zero Dawn game, but during the work process the style changed, the forms became coarser, and new elements were added.
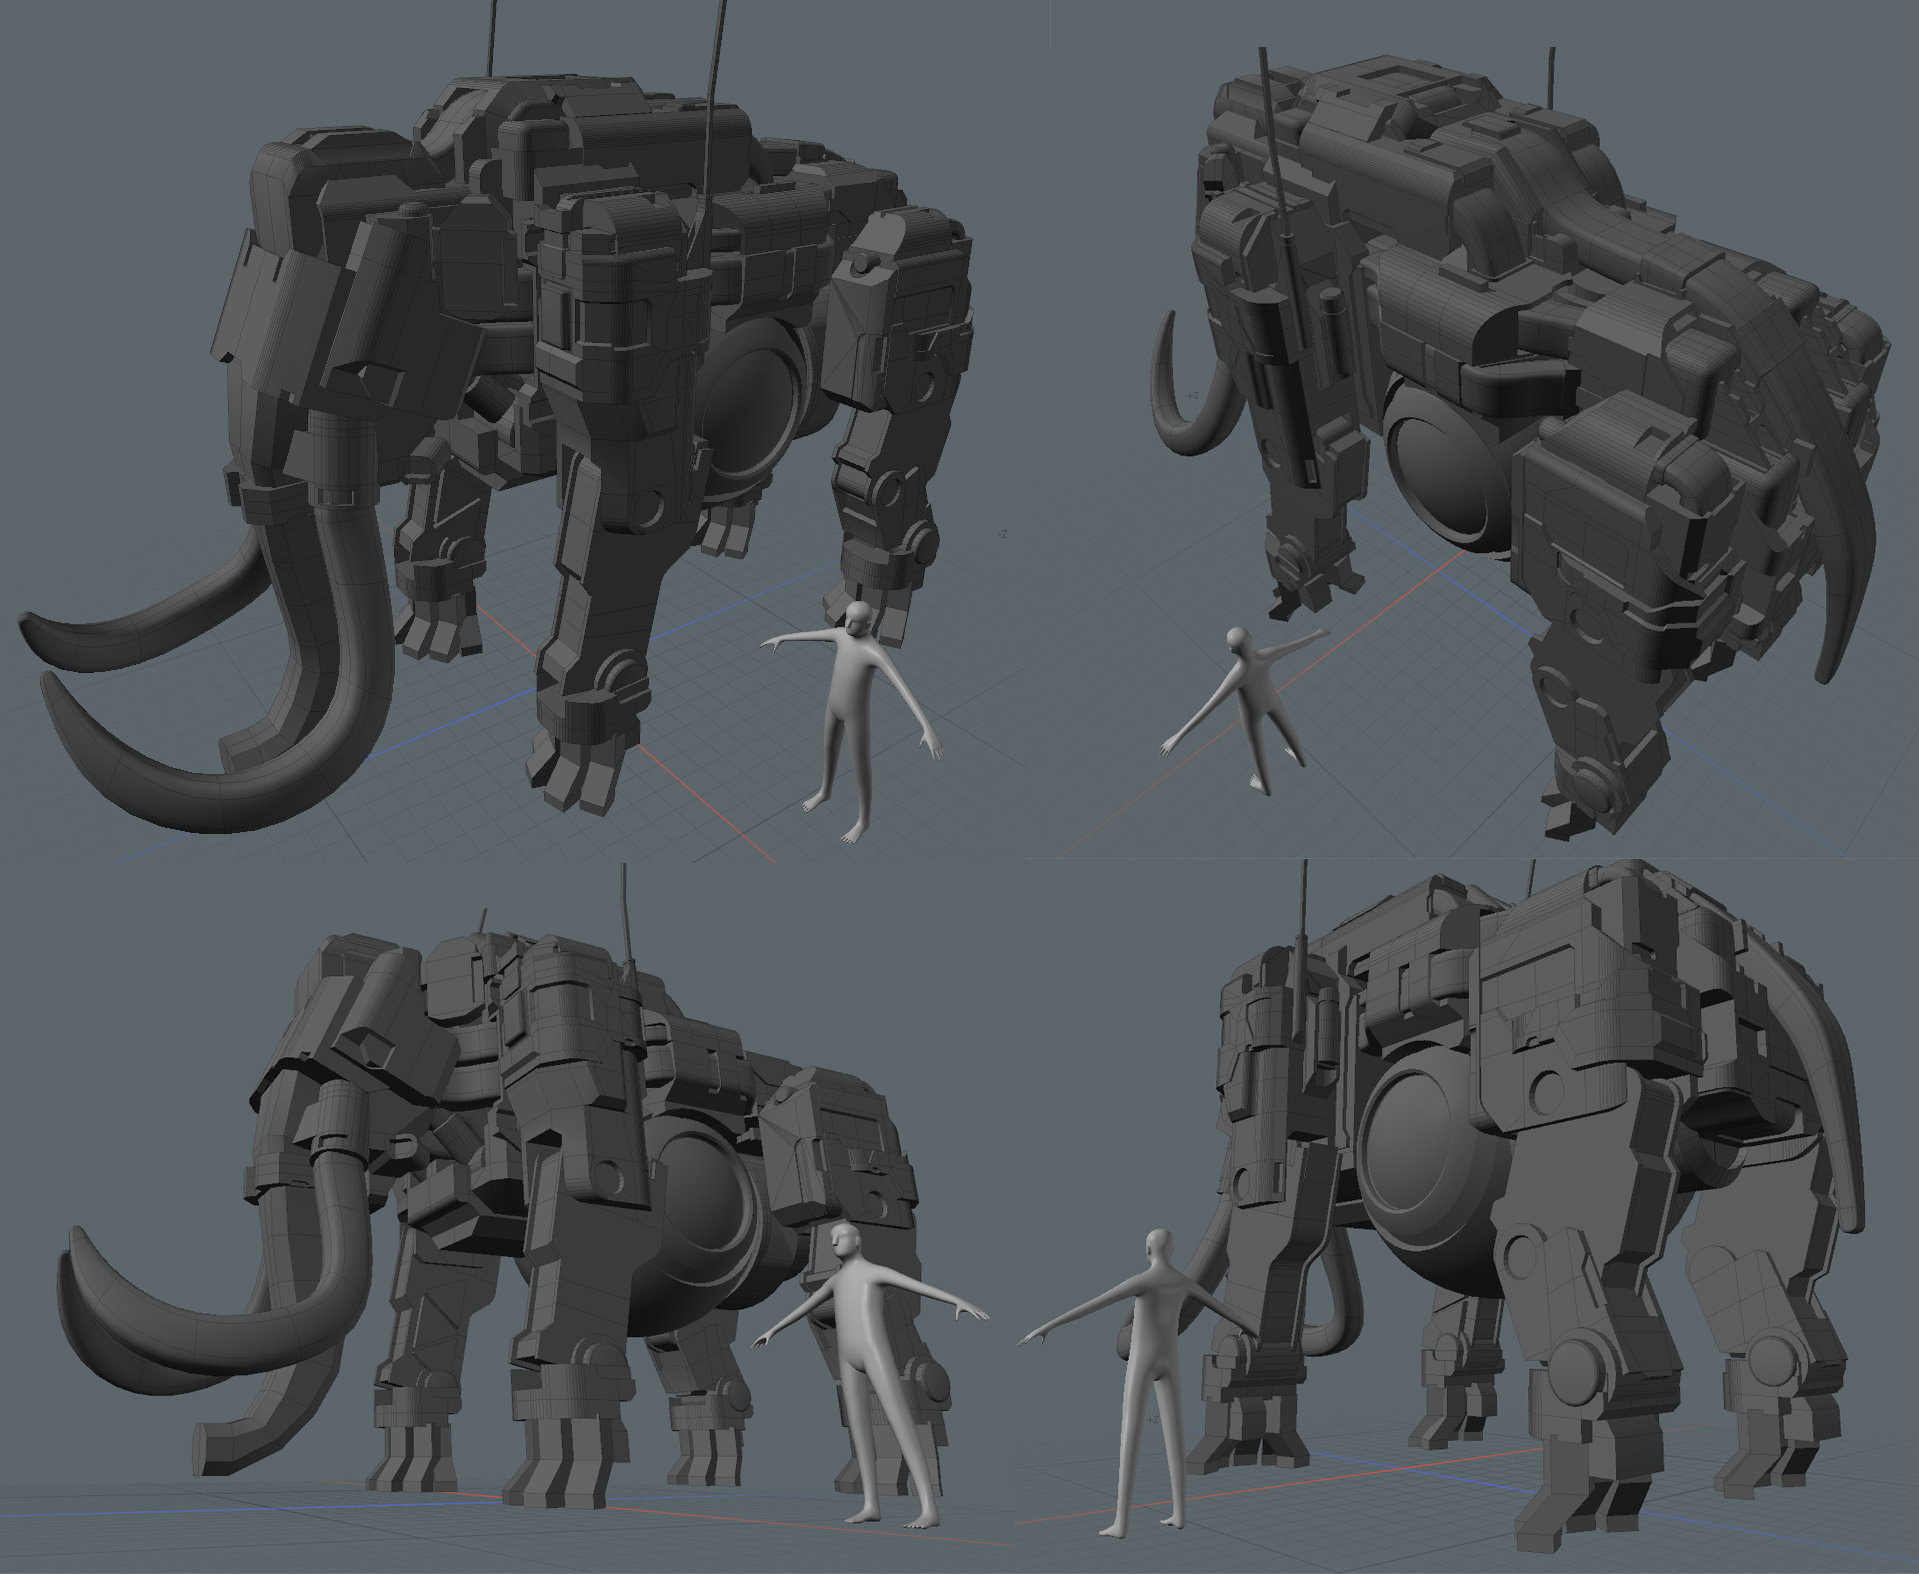
We do not worry about the accuracy of the grid and geometry while sketching a blockout. There are a lot of Boolean operations, which allows smoothing. The main point is to show shapes and silhouette: they will give the first impression of the model.
It took Sergey a day and a half for blockout, and there you are!
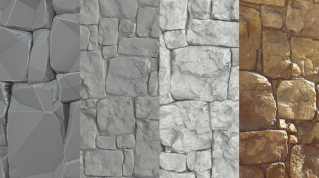
Day 3. Round Edge Shader
From our point of view, this is one of the most interesting days of the whole process - at this stage we added the average refinement and can see how the hi-poly model will look like.
"It's only blockout!" - you might say. We use the Round Edge Shader, which lets us add smoothed chamfers to any geometry on the render. There's another interesting feature, a smoothed conversion, which also forms while using the intersection of objects. This is a huge benefit and convenience for artists: you can assign different width options of chamfer for different materials. This allows you to control the thickness of the chamfers as well as the smoothing between the mesh's elements. As a result, we get complicated smooth forms without embedding geometry.
In general, you need to get used to working with the Round Edge Shader. Sometimes the results of shader manipulations are visible only on the render. But there's a plus - smoothed chamfers can be baked on a normal map! And this is exactly what we need!
Note that this technique is not a Modo-specific feature: a similar method is applicable in any modern 3D package.
And so within three days, we chose the design and made a basic hi-poly model, which allowed us to save a lot of time that would have gone to cutting the support edge for Subd.
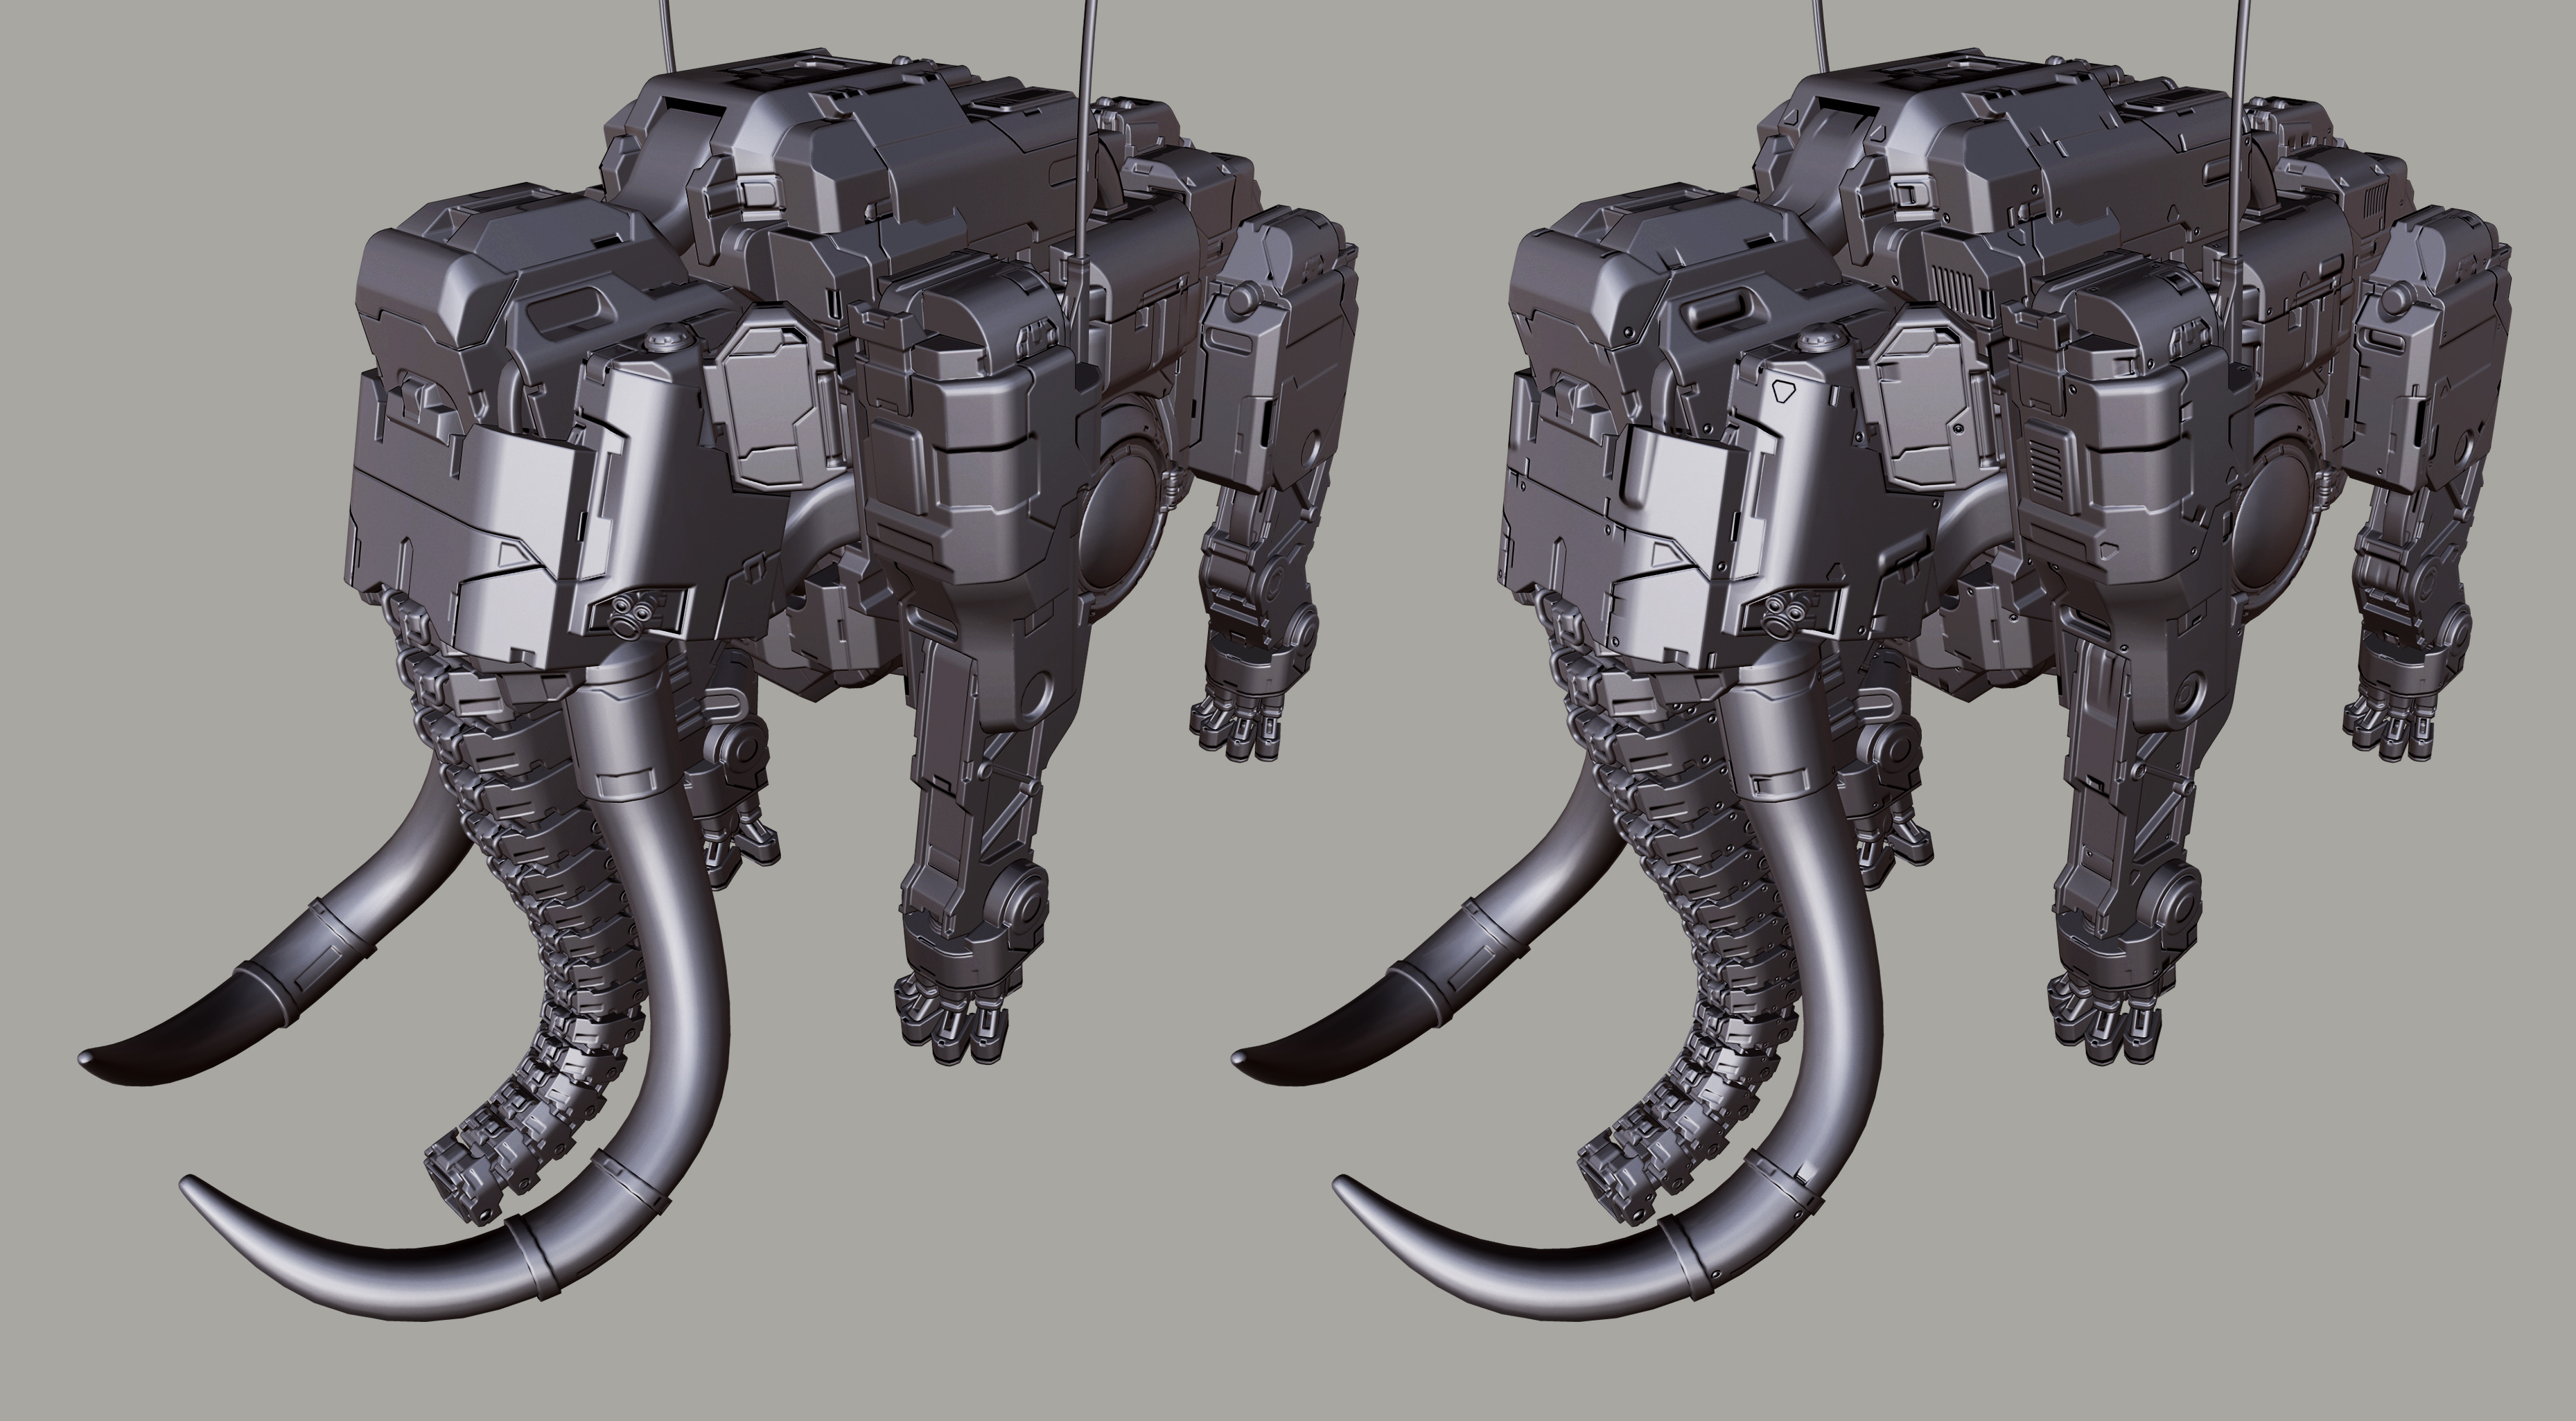
Day 4-5: Detailing the hi-poly model
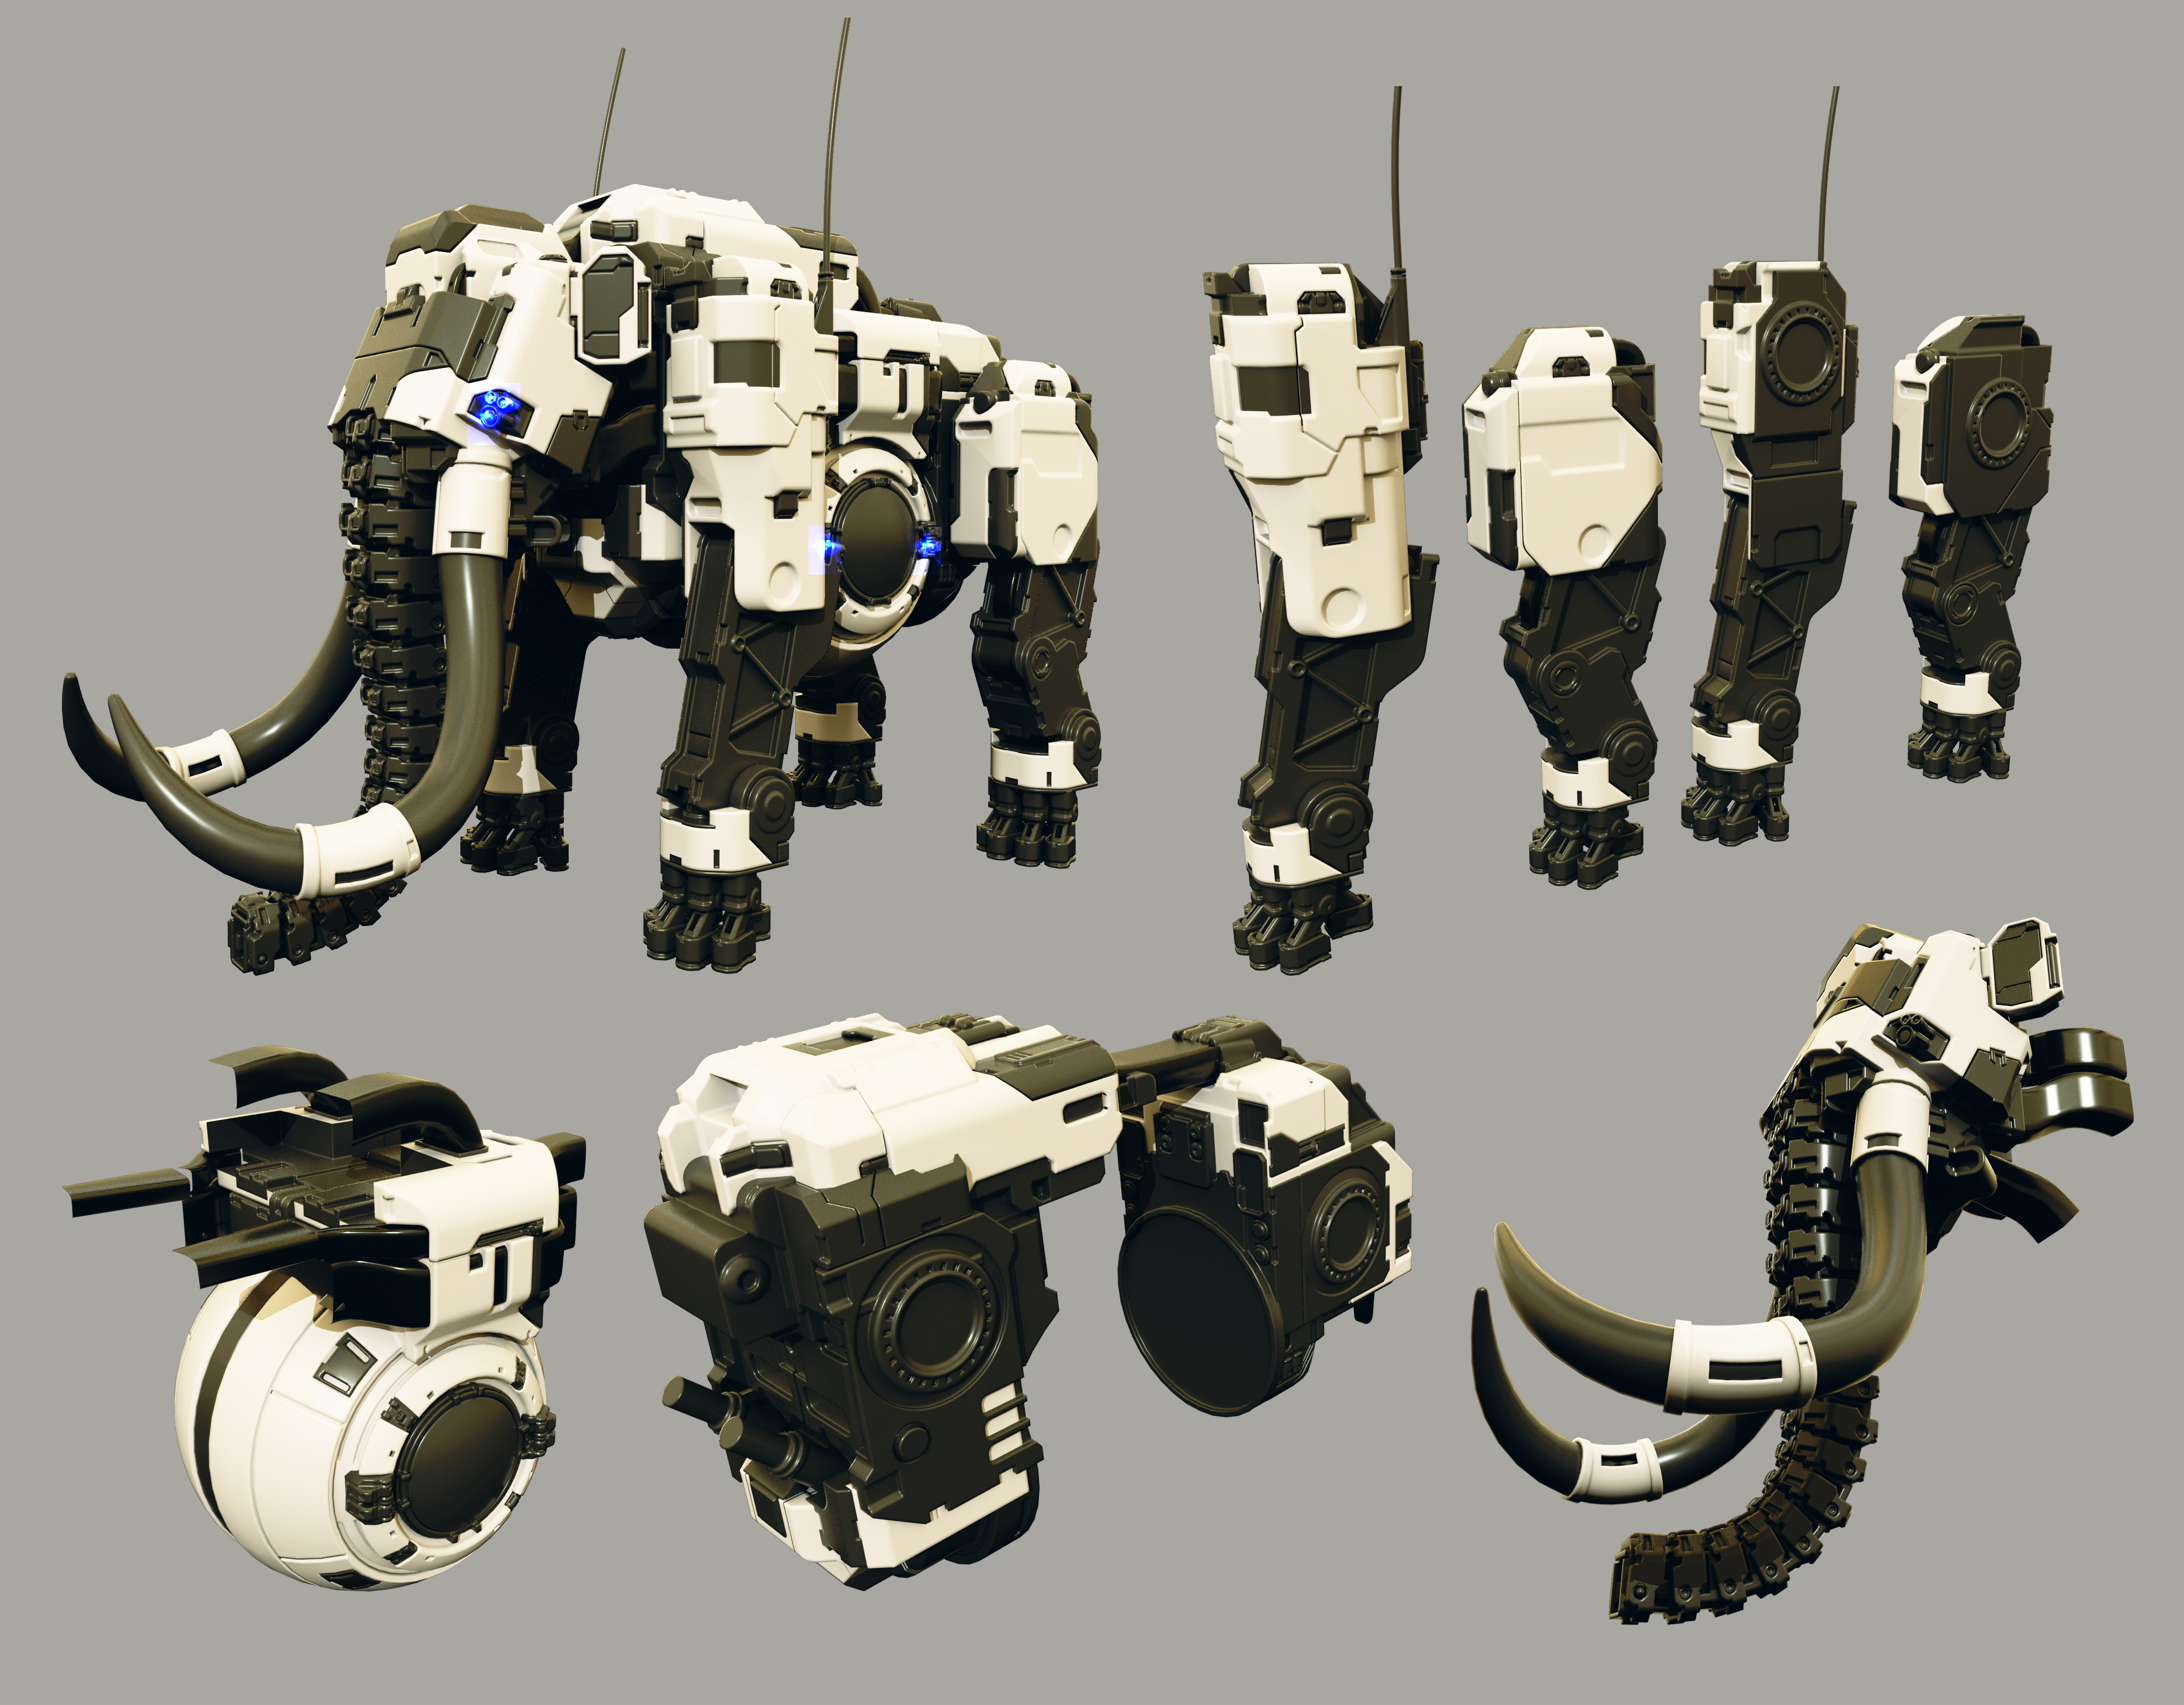
Another day and a half and we finalized the design and functionality of all parts and model modules. In our studio, we wanted it to look mobile and balanced, really solid - not just as a static model. For this, it was necessary to thoroughly review all the details, to improve the corner pieces so that everything would fit correctly.
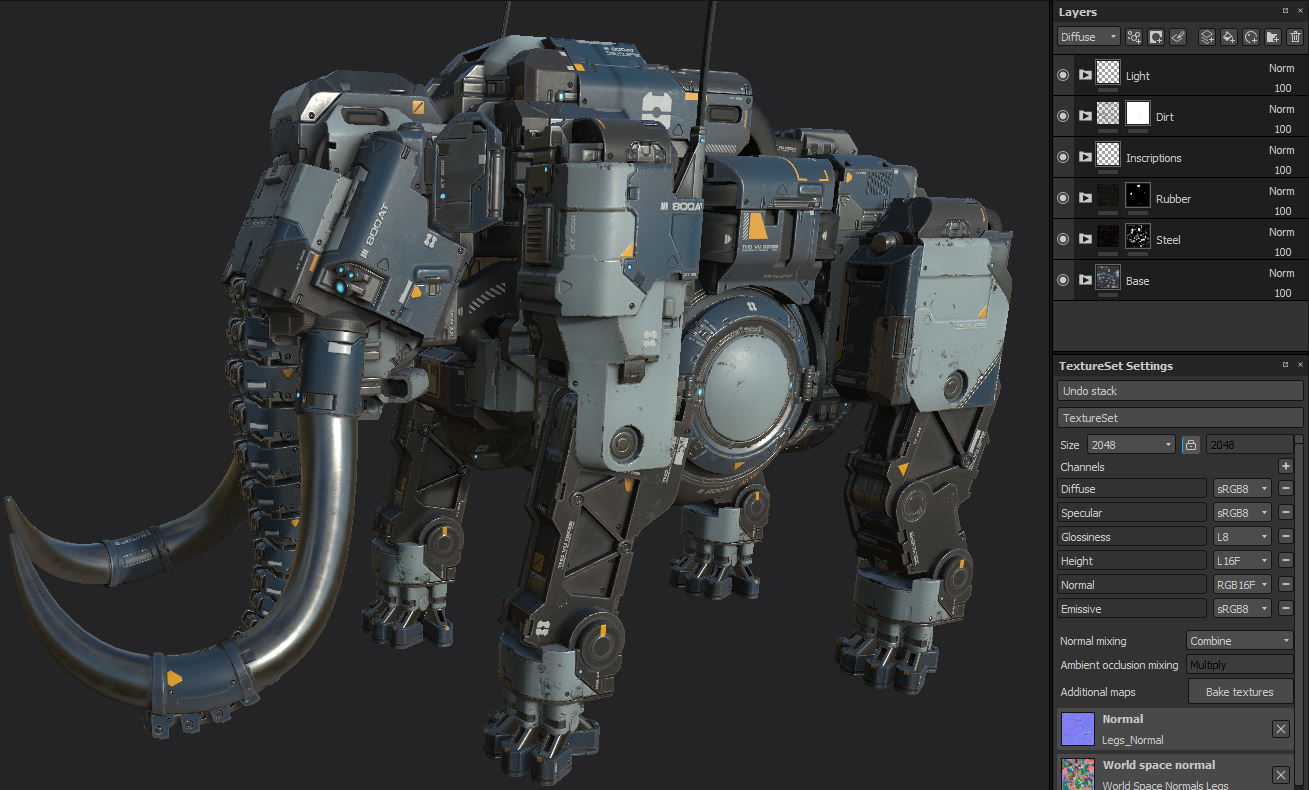
By the end of the fifth day, the hi-poly model was ready!
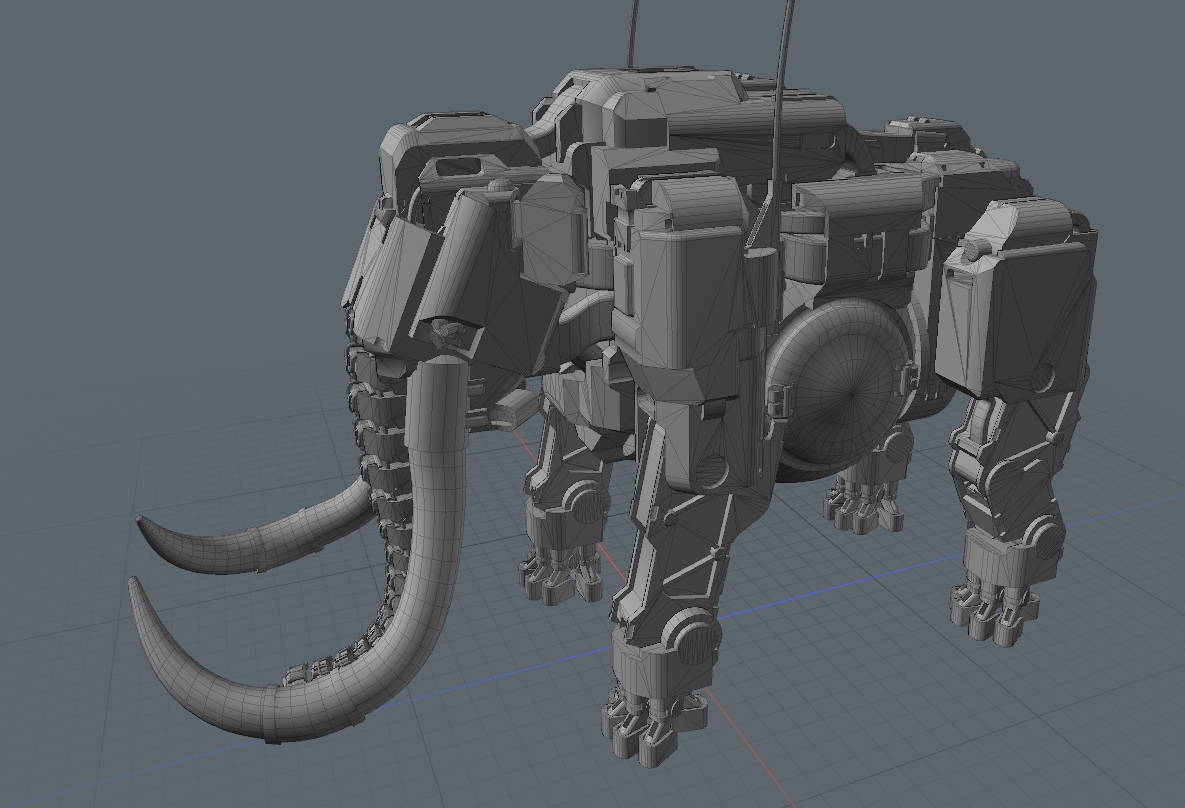
Day 6-7. Low-poly model
Sergey spent these days making the low-poly model and dreaming about the time when this process will be fully automated. At the output, 65 000 tris were obtained, which is quite consistent with the polycount in modern games for similar gaming models.
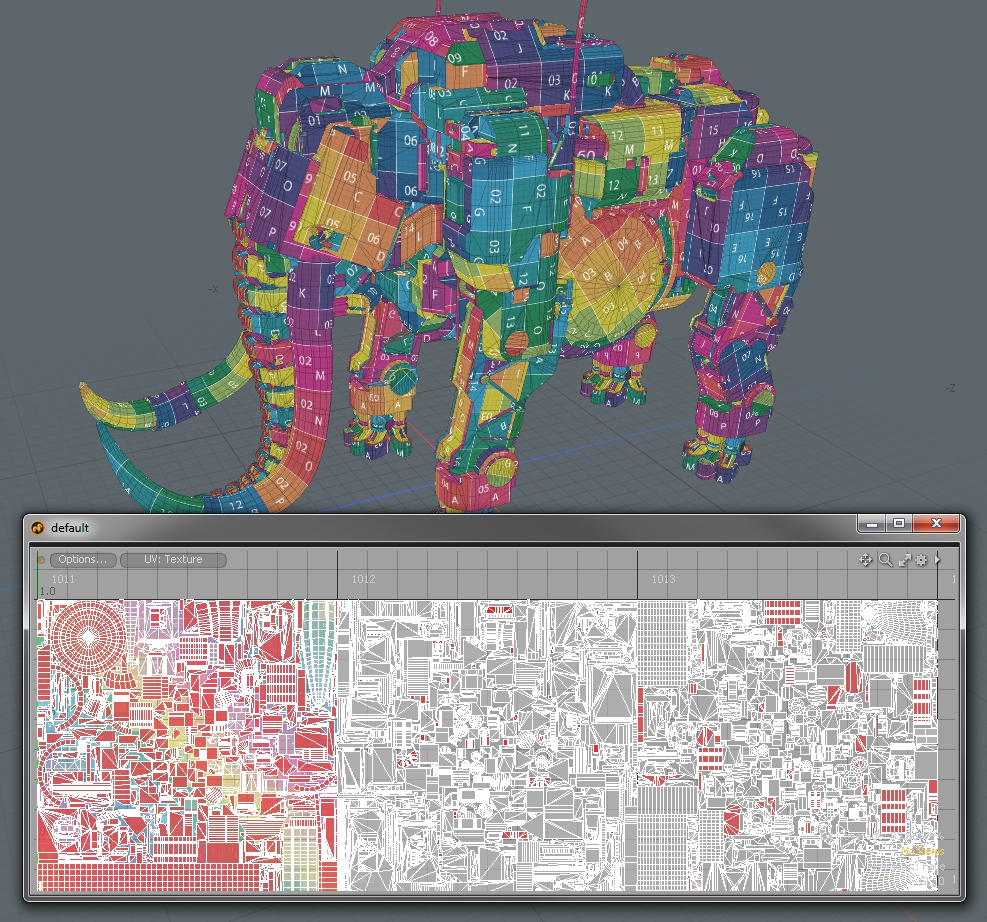
Day 8. Unwrap
We normally do an unwrap in UV Layout - in this program, the process is fast and visually simple. To increase the details, we chose to make three texture sets (head, legs, body) and test the UDIMs in the Substance Painter. UDIM is a unique unwrap square with an identifier that can be converted into a texture set in SP. In this case, there were three of them (1001, 1002, 1003).
Here's how it looks:
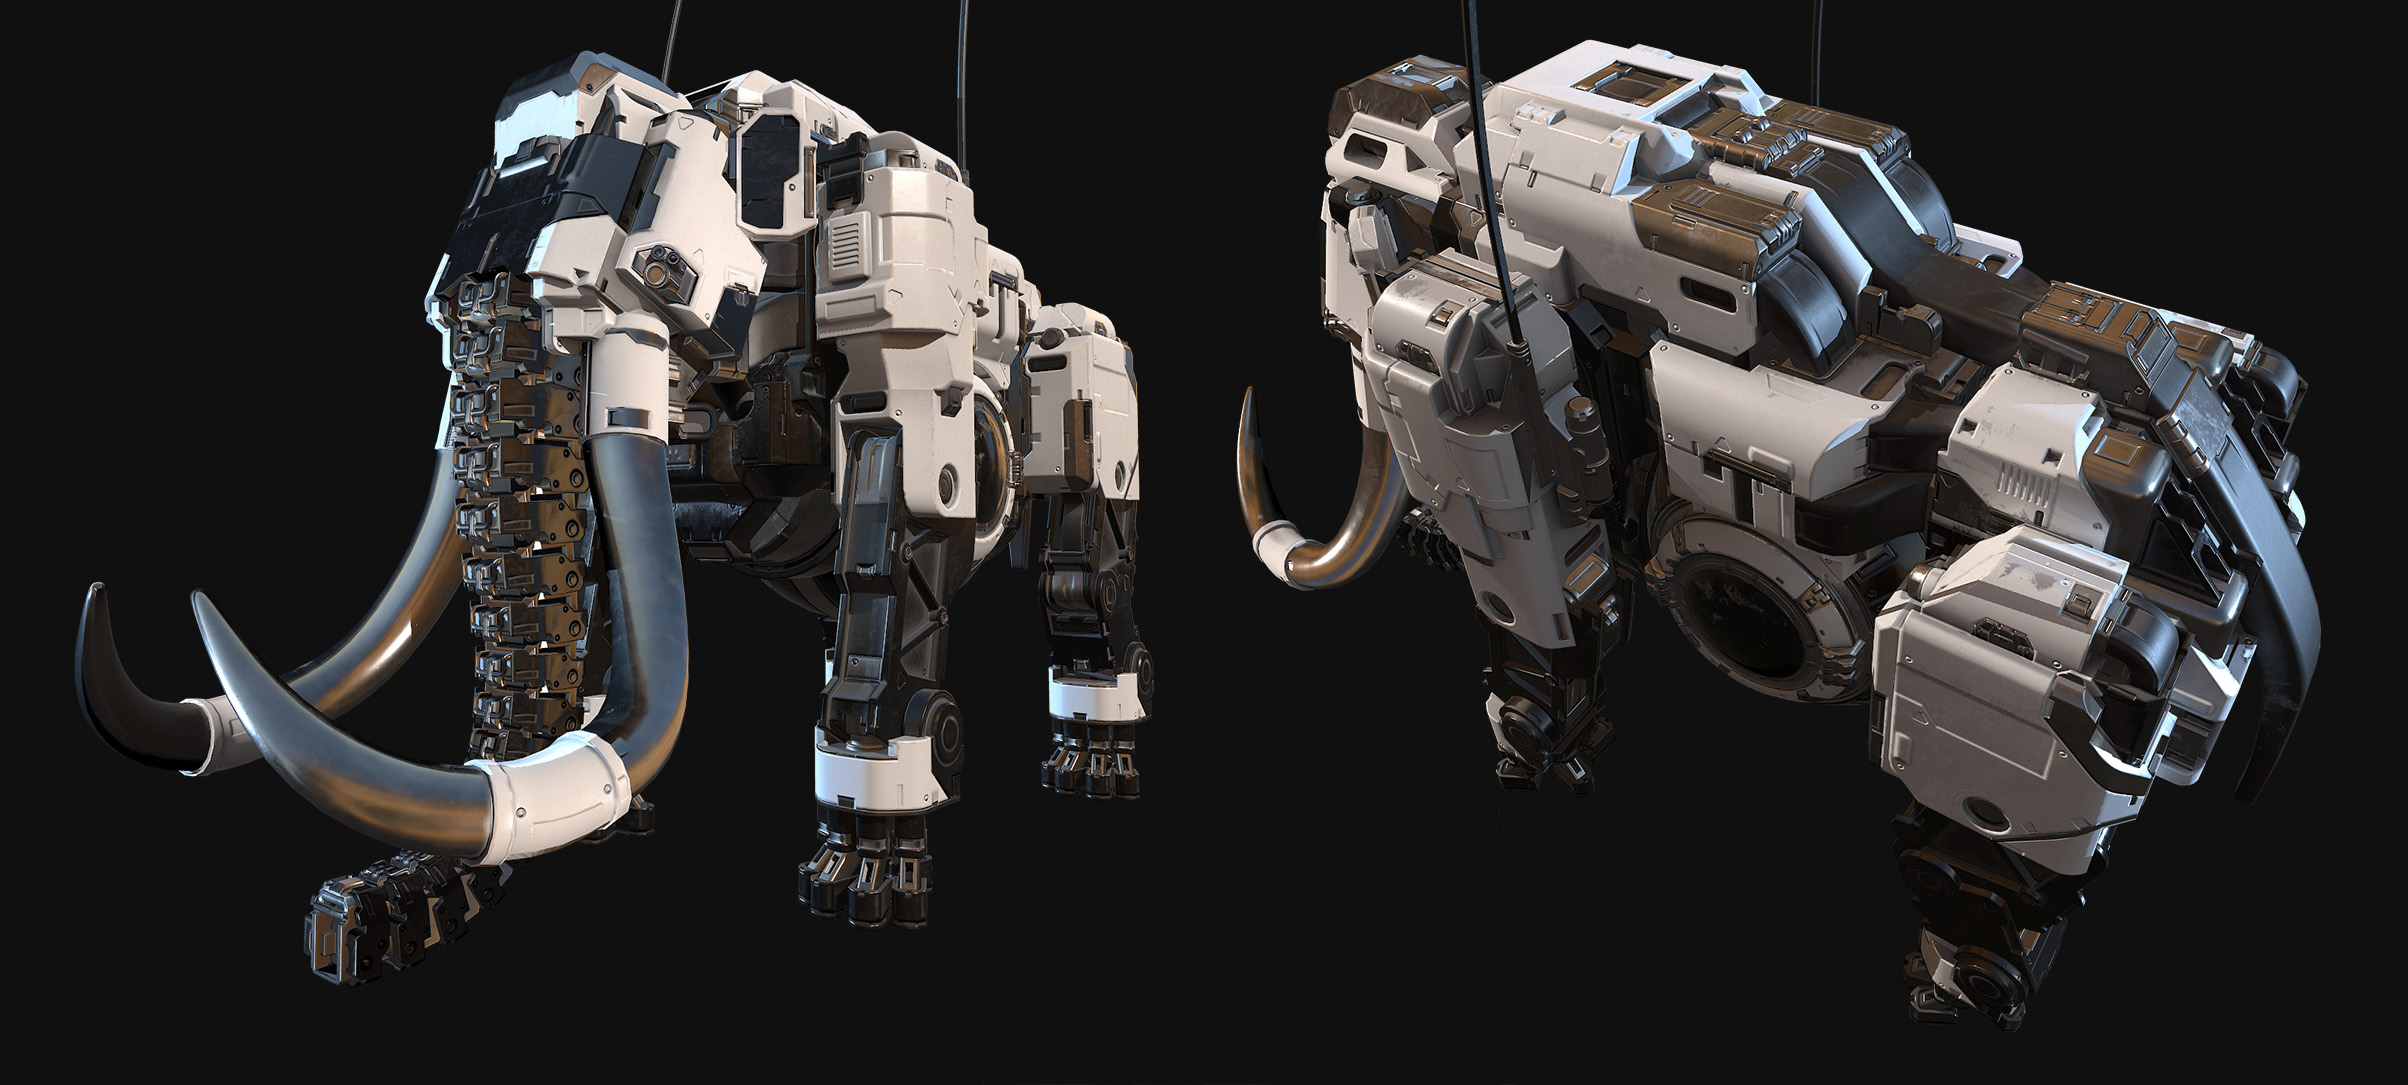
Day 9-10: Baking and finishing normal maps
At this stage, you can assess the quality of the Round Edge Shader's baked chamfers. After baking, we added the detailing of normal maps using alpha in Substance Painter. By the way, an excellent set of Sci-Fi alphas can be found on this websitehttp://jrotools.com/ .
The result looks quite convincing and we have saved a lot of time.
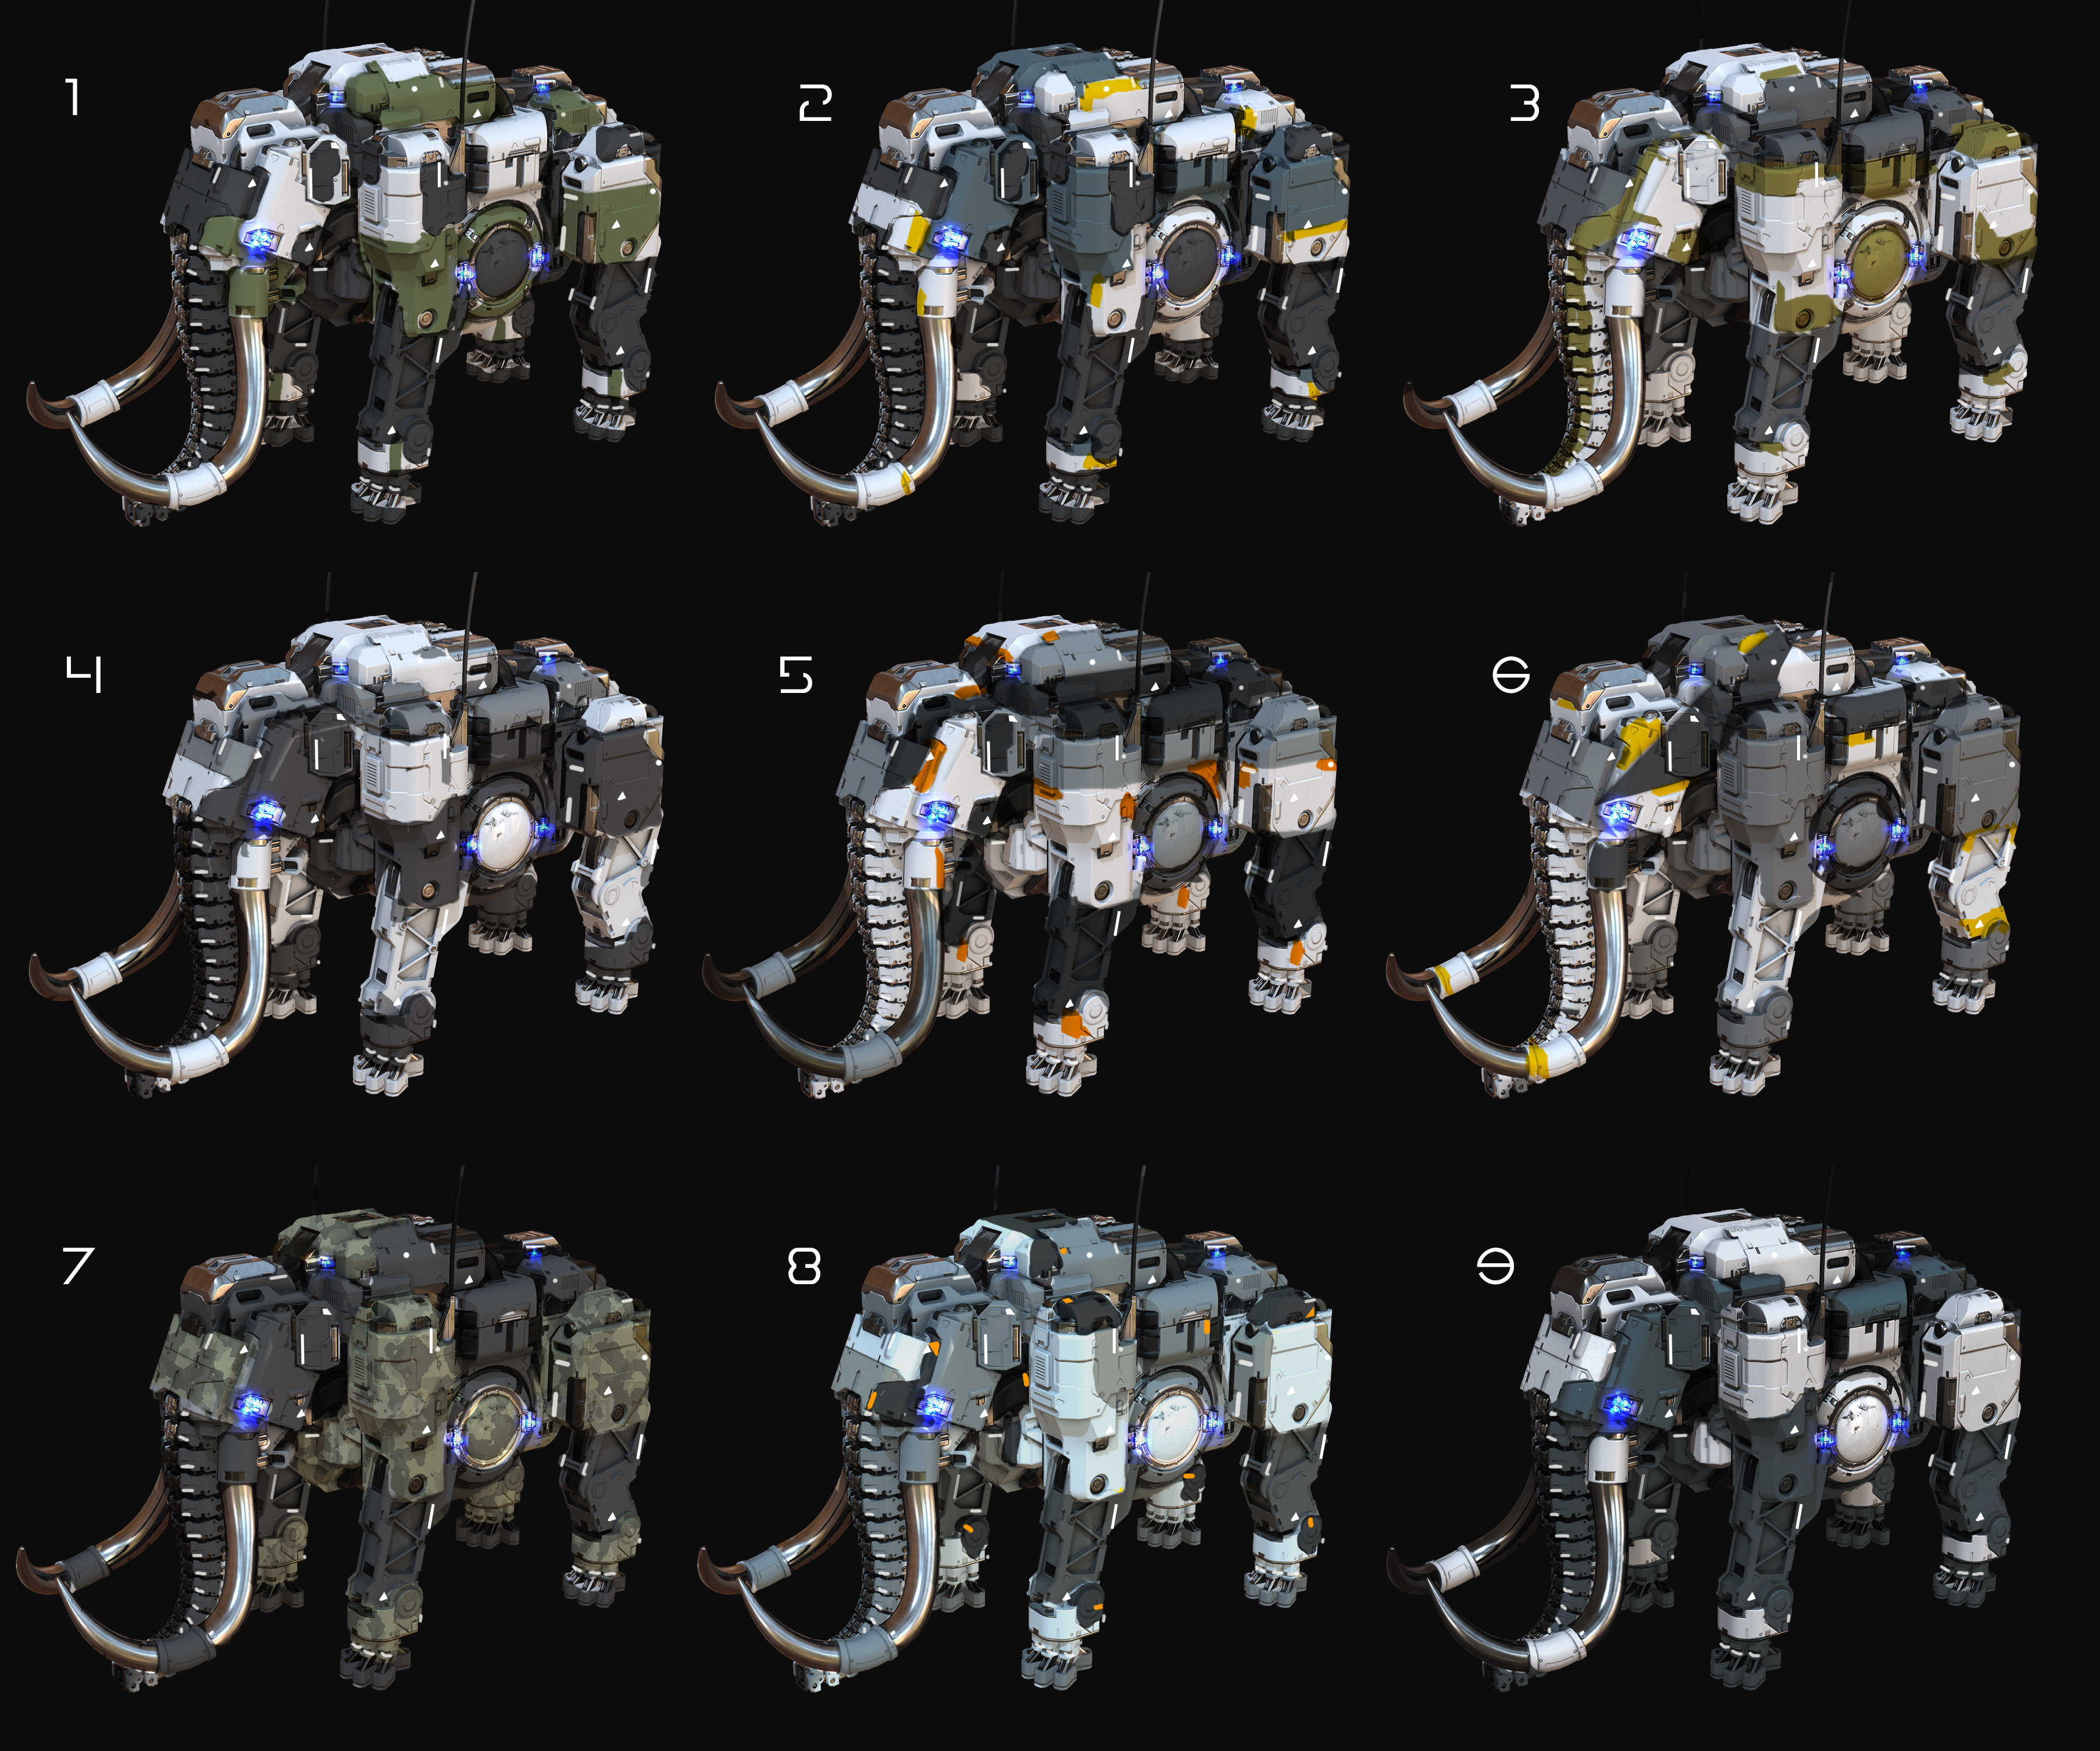
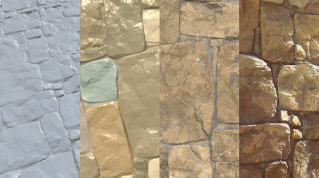
Day 11. Searching for color solutions
We began texturing and divided the model into materials and colors. For us, in the Studio, it is always a complex and interesting process which requires true virtuosity, knowledge of color theory and perception.
By the evening of the 11th day, we had something close to "Star Wars” style.
We decided once again to work through this issue, to explore more color solutions and combinations. We settled on option №8.
Day 12. Texturing.
The texturing process has now become a lot simpler, because we chose Substance Painter and we have the opportunity to optimize all processes using procedural generators and smart materials.
Here is the description of the process step by step, for those who have not worked in Substance Painter yet.
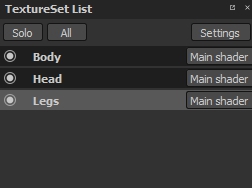
After importing the model with UDIM's in Substance Painter, we got three texture sets, renamed in accordance with the different parts of the body.
When working with textures, it is very important to adhere to a simple and clear structure. It makes life easier for both the performer and the client.
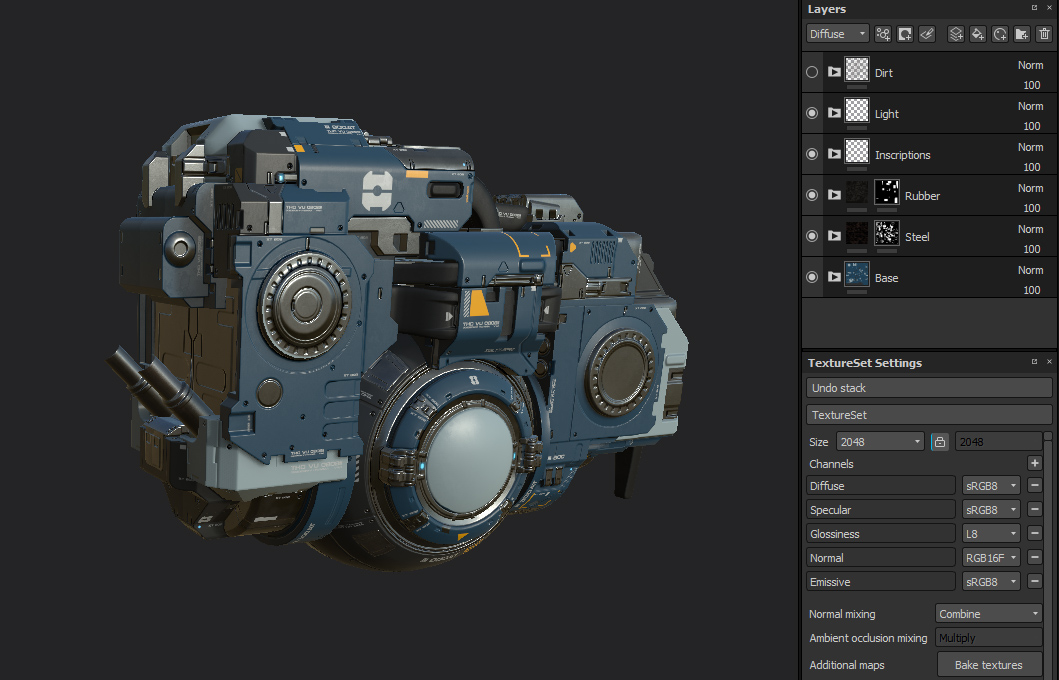
Next, we divided the model into its components by creating masks and adding the basic materials using the Substance Painter material library.
Then we added a couple of layers with the inscriptions and a separate layer with an emissive channel for the glowing elements.
A layer of dust, dirt, and rust came last. They were easy to create with the help of generators; we only needed to clean up unnecessary points.
After finishing the work with layers on one texture set, we copied all the layers from this set to the other two, corrected the masks and got the same result on these sets.
Some helpful tips we would like to give to beginners in working with Substance Painter:
It's more comfortable and faster to work with textures with a resolution lower than the final one. Just change the resolution before exporting and it does not affect the quality - because all masks are generated to the desired size when exporting.
Correct the generated masks, especially if it concerns chips, rust and dirt. Make sure that everything was in the right quantities and only in the right places - this will give realism, liveliness, and individuality to your work.
Day 13. Rendering and promo materials creation.
A competent presentation of the model is very important! Think about interesting lighting, poses, camera settings and AfterEffects. Show intermediate results of work to fellow artists in order to get feedback and improve the final result.
We use Marmoset Toolbag 3 for real-time model rendering, which allows achieving a good result in a short time. Flexible camera settings and AfterEffects help make quality renders without subsequent post-processing in Photoshop.
The possibility of animating and various parameters is particularly pleasing.
A few words about the company itself:
5518 Studios are production partner for game developers with a broad range of services including concept art, illustration, 3D modeling, animation, cinematic, AR/VR and marketing.
Our business development leads in Los Angeles, USA and production offices in St. Petersburg and Ulyanovsk, Russia.
You can control how Adobe websites use cookies and similar technologies by making choices below. But note that if you disable cookies and similar technologies entirely, Adobe websites may not function properly.
Cookies are small text files stored by your web browser when you use websites. There are also other technologies that can be used for similar purposes like HTML5 Local Storage and local shared objects, web beacons, and embedded scripts. These technologies help us do things like remembering you and your preferences when you return to our sites, measure how you use the website, conduct market research, and gather information about the ads you see and interact with.
You can make choices in the menu below about what cookies and other technologies you want us to use on Adobe sites when you visit them from this browser. You can always change those choices later by clicking on the Cookie Preferences link at the bottom of the page.
If enabled:
We can improve your experience by tailoring the site and the content to things we think might be of interest
We can better keep track of your preferences — like what language you prefer to use
We will better understand your likely interests so we can provide you more relevant Adobe ads and content on non-Adobe websites and in non-Adobe apps
It will help us improve the performance of our website and those of our partners who use the Adobe Experience Cloud
If disabled:
We won’t be able to remember you from session to session so the experience may not be tailored to your interests
You’ll still have access to the content of the site but certain features that depend on cookies may not function
You’ll still see ads, they just may not be as relevant to you
General information
You can control how Adobe websites use cookies and similar technologies by making choices below. But note that if you disable cookies and similar technologies entirely, Adobe websites may not function properly.
Cookies are small text files stored by your web browser when you use websites. There are also other technologies that can be used for similar purposes like HTML5 Local Storage, web beacons, and embedded scripts. These technologies help us do things like remembering you and your preferences when you return to our sites, measure how you use the website, conduct market research, and gather information about the ads you see and interact with.
You can make choices in the menu below about what cookies and other technologies you want us to use on Adobe sites when you visit them from this browser. You can always change those choices later by clicking on the Cookie Preferences link at the bottom of the page.
If enabled:
We can improve your experience by tailoring the site and the content to things we think might be of interest
We can better keep track of your preferences — like what language you prefer to use
We will better understand your likely interests so we can provide you more relevant Adobe ads and content on non-Adobe websites and in non-Adobe apps
It will help us improve the performance of our website and those of our partners who use the Adobe Experience Cloud
If disabled:
We won’t be able to remember you from session to session so the experience may not be tailored to your interests
We’ll still count your use of our site and services
You’ll still have access to the content of the site but certain features that depend on cookies may not function
You’ll still see ads, they just may not be as relevant to you
Operate the site and core servicesOperate site and measure engagement
Always active
These cookies are required, and they are used to enable the site and related services core functionality. Without them the site could not operate, so they cannot be disabled.
These cookies enable the site and related services’ core functionality and collect statistics about user engagement, such as counting active use to help us understand trends. These cookies cannot be disabled.
Measure performance
These cookies are used to analyze site usage to measure and improve performance. Without them Adobe cannot know what content is most valued and how often unique visitors return to the site, making it hard to improve information we offer to you.
These cookies are used to analyze site usage to measure and improve performance. Without them Adobe cannot know what content is most valued, making it hard to improve information we offer to you.
Extend functionality
These cookies are used to enhance the functionality of Adobe sites such as remembering your settings and preferences to deliver a personalized experience; for example, your username, your repeated visits, preferred language, your country, or any other saved preference.
Personalize advertising
These cookies are used to enable Adobe and our partners to serve ads more relevant to your interests. Without them you will still see ads, but they might not be as relevant to you.
Personalize advertising
These cookies are used to enable Adobe and our partners to serve ads more relevant to your interests. Without them you will still see ads, but they might not be as relevant to you.