How to use lighting for portrait photography.
The key to stunning portrait photography? Telling your subject’s story — with light.
Great portraiture brings people together.
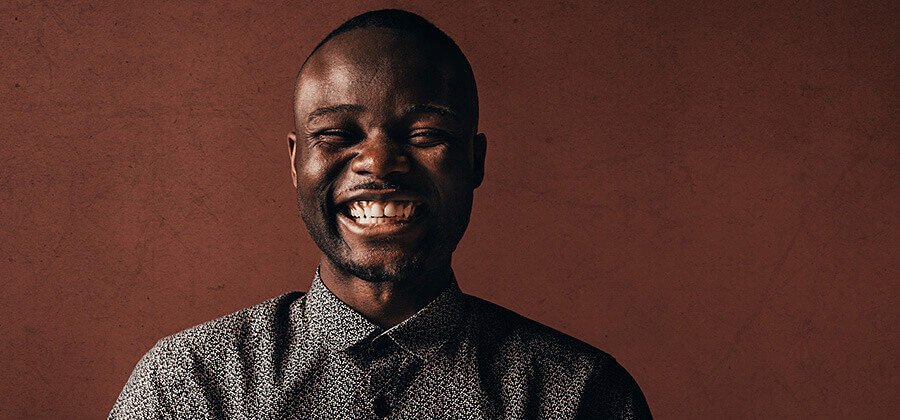
Ask any photographer the secret to capturing a beautiful shot, and they’ll tell you it’s all about the light. “As humans, we evolved to notice subtleties in light,” explains portrait photographer Kenton Waltz. “It’s ingrained in us — that’s why lighting is an especially powerful tool in photography. It facilitates human connection between the subject and the viewer.” In portrait photography, knowing how to play up your subject’s persona with the correct light can bring their story to life.
What is portrait photography?
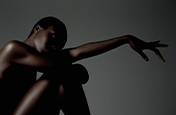
The difference between a portrait and a headshot reveals the importance of lighting in portrait photography: it’s all in the storytelling approach. “When you’re taking a headshot, you want high-key lighting so you show exactly who the person is, which will inform others’ decisions to do business with them,” says Kenton. “But when you’re taking a portrait, you can use shadows to tell a deeper story — maybe one of mystery.” Portrait photography goes beyond the image of the person; it needs to evoke emotion in the viewer. As photographer Hannah Concannon puts it, you want to “catch your subject being their true self — not their Instagram or headshot self, when they’re acting for somebody else.”
How to use lighting for portraiture.
How do you take a flattering portrait of your subject using light? The first step is knowing the advantages and disadvantages of working in natural versus artificial light. Then, let nature do most of the work — you’ll just need to learn how to leverage the best lighting outdoors. Finally, put a few pro techniques into practice to really master the art of portrait lighting.
Understand artificial vs. natural light.
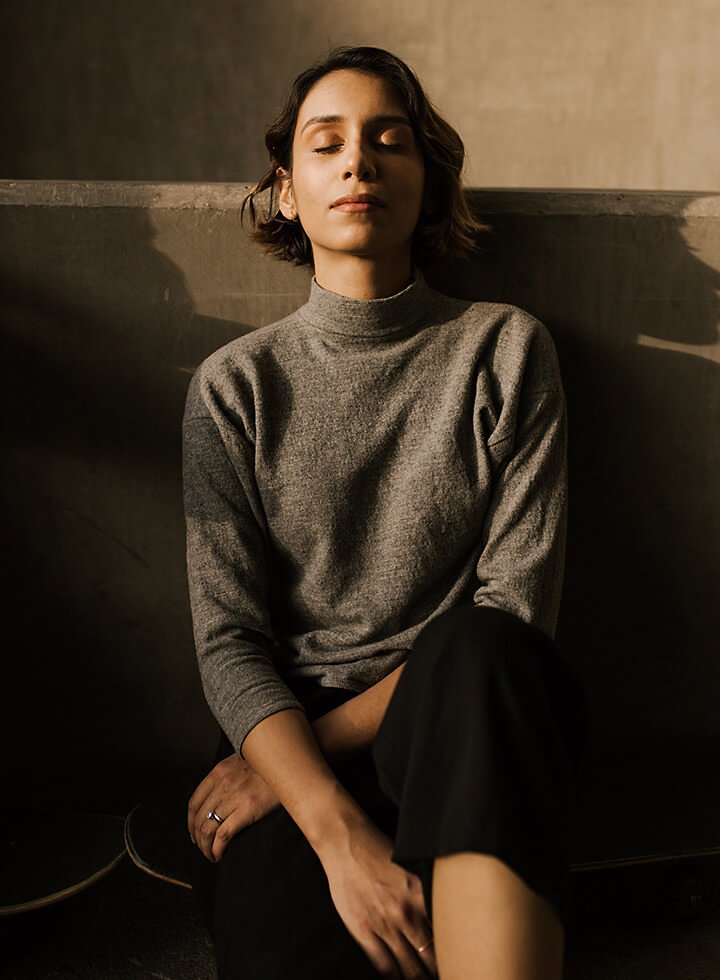
“We are very used to seeing things lit from the top down because the sun is above us. Therefore, a very natural lighting scenario involves a lot of bright light coming from above you,” explains Kenton. “An example of unnatural lighting would be ghost story–type lighting where somebody has a flashlight pointed up at their face from below, casting opposite shadows. All of a sudden, that person doesn’t look the same.” Beginners are advised to strike a balance between the two and take advantage of soft light or light that’s more spread out. The best way to do this is to position your subject next to a window on a cloudy day because the clouds will diffuse the harsh light of the sun. Then you’re working with beautiful, even lighting.
Try natural portrait lighting setups.
How you adapt your lighting will also depend on the location and time of day. Kenton recommends beginners head outdoors: “Photographing indoors is hard because you don’t have a lot of light. Outside, your exposure is easier to adjust because you don’t have to push your ISO to the max — that’s when the photo can get noisy.” If you’re bringing your subject outside to take their portrait, knowing the time that’s best for lighting will result in a higher-quality shot. The golden rule? Always aim for the golden hour, the last hour before sunset and the first hour after sunrise. “Your subject and background are more likely to have the same exposure value; therefore, it’s easier to find the right exposure for the entire image,” says Kenton.
But what if you’re forced to shoot at midday? When the sun’s at its brightest, it creates challenges — mainly, harsh lines cast on your subject’s face. To avoid sharp contrast — known as hard light — look to the nearest building for shadows. “Buildings provide open shade in harsh sunlight. The shadow the building casts from the side can create more even light for you to harness,” says Hannah. “And if you can find light-colored walls in open shade, the sunlight will bounce off the light color and fill in any dark areas.” No matter what time of day it is, always ask yourself where your main light sources are coming from before the shoot. Then you’ll be prepared to adjust accordingly.
Learn different portrait lighting techniques.
Once you master the basics of natural and artificial lighting as well as your camera flash, you can start to explore different ways of manipulating light in order to highlight your subject’s facial features and bring out their individuality.
Use a bounce board.
Bounce boards give you the ability to reflect, or “bounce,” light back onto somebody’s face. And all you need is a poster or foam board. Even while photographing at golden hour, a bounce board will help you direct the light more easily into your subject’s eyes, creating a mesmerizing effect.
Incorporate a softbox.
A softbox is a translucent cloth attached to a studio strobe or speedlight on a lightstand. It can be rectangular or square-shaped. It’s best used indoors, and does a great job of spreading out light and making the skin glow. But be careful: using a softbox can wash out any trace of definition or contrast if you’re trying to achieve a more edgy look. You can also opt for a strip softbox to get more angled light to give you control over where the light is hitting.
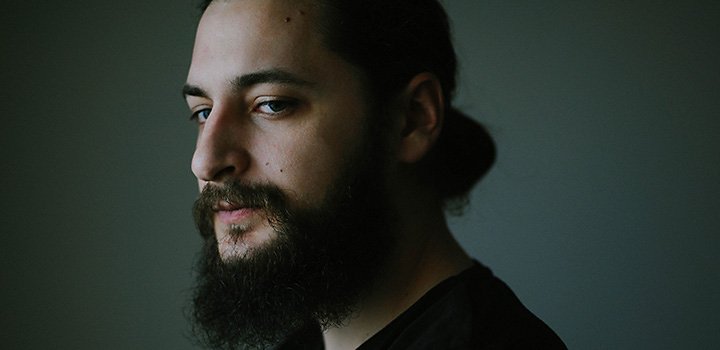
Create Rembrandt lighting.
To achieve the famed three-quarter lighting that pro photographers revere, place your light source to the left or right side of your subject’s face and aim it down at a 45-degree angle until you spot the telltale triangle of light: the light should contrast the darkest side of the face to shape the subject’s nose and cheekbone for a great portrait.
Discover portraiture tips for Adobe Photoshop Lightroom.
Even the best photographers encounter surprises with portrait lighting, like seasoned wedding photographer Corrie Mahr. “I was photographing the bride in overcast weather, and suddenly the sky opened up. I wasn’t prepared to switch my settings to accommodate the hard light overhead, so all of my photos were really overexposed. But using Lightroom, I was able to adjust the photos to depict a bright, magical moment.” That’s the beauty of photo editing — there are so many ways to fix unexpected lighting situations during post-production. From adjusting exposure and contrast to balancing shadow and temperature, it’s your go-to tool to adjust lighting styles to portray your subject at their best.
Good lighting will elevate any portrait. Knowing how to work in different light settings, taking advantage of natural outdoor lighting, and executing more challenging techniques take you one step closer to a portfolio of striking portrait photography.
Contributors
Corrie Mahr, Kenton Waltz, Hannah Concannon
Do more with Adobe Photoshop Lightroom.
Edit photos easily with Lightroom presets, Super Resolution, easily share photos from any device, and access your projects anywhere with cloud photo storage management.
You might also be interested in…

Discover how to capture all the scheduled and candid moments of the big day.

Cara menambah latar belakang bokeh pada fotografi anda.
Belajar lebih lanjut tentang kesan kabur yang indah yang dapat memberikan foto anda penampilan yang menarik.

Explore the world of culinary photography with advice from industry professionals.
Tips for effective hand poses and sitting poses.
Learn methods for effectively photographing human hands and seated subjects.