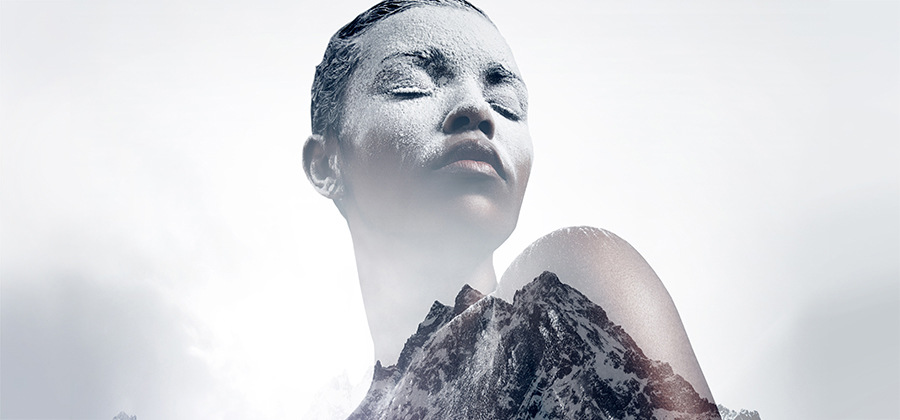
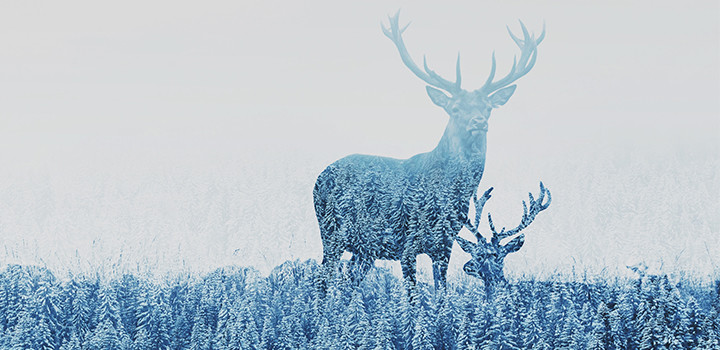
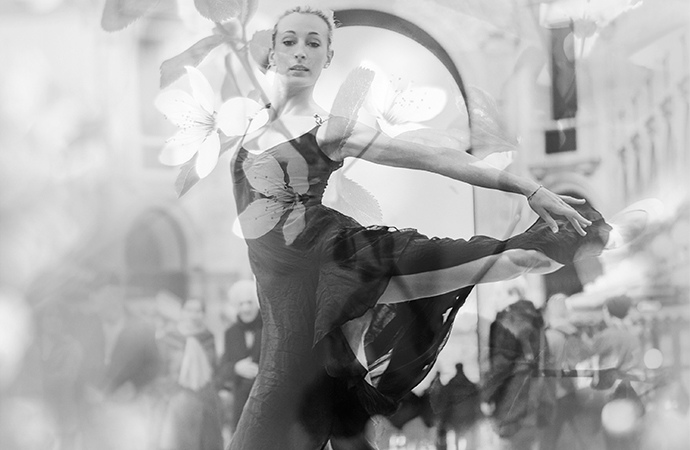
Getting started in double and multiple exposure photography.
Multiple exposure photography is an exciting way to push your artistic limits, especially with the flexibility provided by digital editing software.
A brief history of double exposure.
Nowadays, you can easily create double exposure photographs with digital photo editing software, but in the past it was more complicated. “In the old days, double exposures were made by shooting an image onto a piece of film,” experienced photographer and teacher Ben Long explains. “Rather than replacing that piece of film or winding the film forward, you would take another exposure so it would be superimposed in the camera. That was a special effect then and was a wild, surreal thing for people to see.”
Multiple exposure photography was one of the earliest instances of special effects in photos. It was an opportunity to create something that couldn’t be seen with the naked human eye. People today are accustomed to altered images, so that novelty has worn off. But double exposures still offer an opportunity to push your creative limits and craft unique and meaningful images. They often result in rather abstract images, making them a great tool for understanding composition.
Learning double exposure film photography.
To achieve a great double exposure, it’s important to get familiar with the process of making one with film photography. There are two main ways to accomplish a double exposure photo with film: in-camera, or in the darkroom.
In the camera.
When you attempt an in-camera double exposure, you take two exposures on one piece of film. Depending on your film camera, you may need to wind the film backwards before the second shot if it automatically moves forward a frame after an exposure is taken.
“You have to assume that when you’re doing a double exposure, it’s not going to work right away and you’re going to have to fiddle with it a lot.”
When attempting in-camera multiple exposures, you must stack your exposures. The light from your second exposure will continue to impact and darken your first exposure, so keep that in mind when setting your aperture and shutter speed. To avoid blowing out the final image, you should underexpose both shots. This is a tricky process. “Assume that when you’re doing a double exposure, it’s not going to work right away,” Long advises. “You’ll have to fiddle with it a lot.” Planning ahead is a huge part of double exposure success. Take the time to visualize your final image and pay attention to all the details.
Take several similar double exposure images on the same roll of film, so you can find one that works. “You don’t know what you’ve got until you develop the film,” photographer Shawn Ingersoll says.
In the darkroom.
If you’re attempting a double exposure in the darkroom, the process is a bit different. You’ll be exposing your light-sensitive paper multiple times in the enlarger (a specialized transparency projector used to project light through your photographic negative). This approach is a bit easier than in-camera, as you can use regularly shot and developed film negatives, and you can position and angle the negatives in your enlarger. This added flexibility lets you experiment with the opacity of each layer by adjusting the amount of light you expose your sensitive paper to. Your first negative may need more time exposed in the enlarger, while your second negative may need only a few seconds.
Getting a double exposure in the darkroom right the first time is difficult, so patience is key. Long suggests that beginners “stick with black and white to begin with, and learn the mechanism of your camera. Start with very simple situations. Try to find as empty a space as you can and put an element in it. Then combine that with another empty space and an element somewhere else. You’ll start to understand how that exposure builds up across your finished composite.” Experimenting with shadow and light is a great way to gain experience with composition in double exposure, whether you’re attempting it in-camera or in the darkroom.
The ease of digital double exposures.
With digital photography and editing software, multiple exposures are easier to achieve. “You can execute a shot so much more effectively now than when you were trying to double expose in the camera,” experienced photographer Carli Davidson says, “especially with images that are taken at different times or in different spaces.”
While some digital cameras have double exposure settings, the settings and tools vary depending on the brand and may not be in older cameras at all. The flexibility of editing software is where photographers and artists can really push the creative limits of double exposures. Ingersoll notes that you can “take two digital photos and lay them on top of each other. Through blending modes, transparencies, and masking you can create a double exposed image.”

Experimenting with transparencies.
To achieve a double exposure through editing, you’ll need to stack your images on top of each other and then experiment with the transparency and opacity of your top image. Opacity is the extent to which something blocks light, and with Photoshop, you can change the opacity of layers, filters, and effects so the underlying image shows through.
Masking for beginners.
Layer masking is a reversible way to hide part of a layer. If there’s a section of your first image that won’t look good laid over your second image, masking is a great solution. Masking gives you more flexibility than permanently erasing part of the image, and it’s especially useful for making composite images or double exposure.
The basics of blending.
“You don’t have to worry about winding the film back to the correct place,” Long says of doing double exposures in photo editing software. “You’ve got so much more control over how things are going to blend. You can blend things that you couldn’t blend in the darkroom.” Blending controls how pixels in your image are affected by a painting or editing tool. Instead of dodging and burning in the darkroom, blending in digital lets you merge the images on a pixel level.
Specific tutorials.
Once you understand the basics, you’re ready to successfully create a double exposure or composite image. Those miniscule adjustments can be what makes your double exposure or composite successful.
- Create a double exposure: Follow this tutorial to see how combining two images can multiply their visual impact and achieve a double exposure effect.
- Combine images in a creative way: Learn the ins and outs of creative compositing with these step-by-step tips.
- Add color to your double exposure: Elevate a simple black-and-white double exposure by experimenting with new colors.
When it comes to creating stunning double exposure photographs, Long says, “all the rules are off. You can do whatever you like.” Push your creativity and experiment with new tools, whether you’re using film or digital. Your first few double exposure attempts probably won’t be perfect, but don’t be discouraged. As with anything, this technique takes time and practice to master.
Contributors
Do more with Adobe Photoshop Lightroom.
Edit photos easily with Lightroom presets, Super Resolution, easily share photos from any device, and access your projects anywhere with cloud photo storage management.
You might also be interested in…

How to use, and break, the rule of thirds.
Improve your photo composition skills to capture more stunning images.

Understanding shallow depth of field.
Explore how shallow depth of field can add dimension to your photographs.
Discover how adjusting shutter speed can help you capture clean shots or motion-filled moments.
Tips for capturing nature photos of all kinds.
Explore the possibilities of nature photography, from animals in motion to sprawling landscapes.