.

How to expand a photo’s background in Photoshop Elements

Turn a portrait photo into a landscape, make room for text, or give a tight composition more breathing room. Generative Expand uses AI to fill in new space around your photo automatically, so it looks like it was always there.

Explore Photoshop Elements

What is Generative Expand?

Generative Expand is an AI-powered feature that lets you resize a photo’s canvas and fill the new space automatically. It’s found in the AI tab, and it uses AI to generate new content that matches your photo’s existing scene, such as continuing a sky, a field, or a wall.

It’s especially useful for turning a portrait photo into a landscape (or the other way around), creating room for a title or caption alongside an image, or rescuing a photo that was cropped a little too tight.

Time required: About 3–5 minutes. Skill level: Beginner-friendly.

Before you begin, make sure you have:

  • Photoshop Elements installed and open on your computer. Don't have it yet? Start a free 7-day trial.
  • A photo you’d like to expand. Photos with a simple, consistent background, like sky, grass, or a plain wall, tend to give the most natural results.
  • A rough idea of the new shape or size you want, such as a specific aspect ratio or extra room on one side.

Step 1: Open your photo

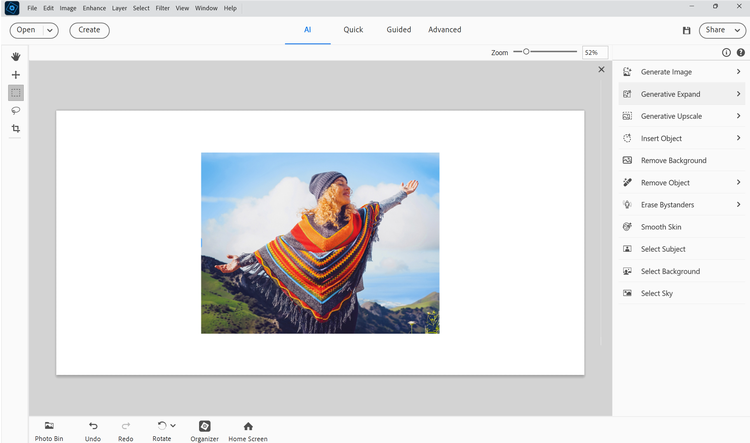
Open your photo in Photoshop Elements and click the AI tab at the top of the screen. In the panel on the right, click Generative Expand.

Photo opened and Generative Expand selected

Step 2: Resize your photo’s canvas

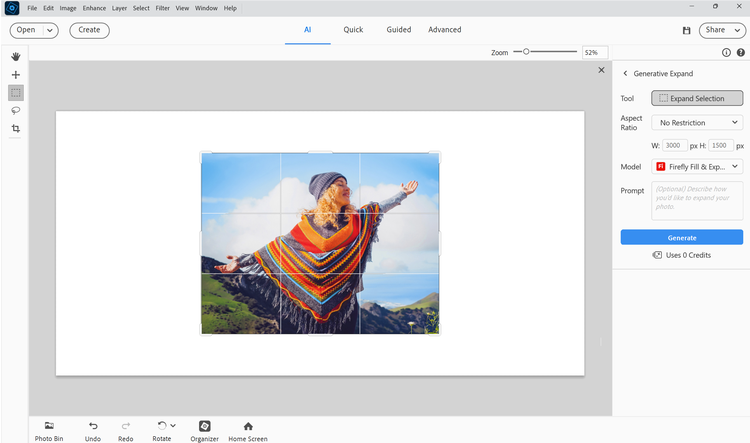
Drag the handles around your photo to expand the canvas in any direction, or enter exact width and height values. A grid overlay appears to help you judge the new composition as you resize.

Tip: Expanding one or two sides at a time usually gives the most natural-looking result.
Photo with grid overlay

Step 3: Choose options and generate

If you want a specific aspect ratio, choose one from the Aspect Ratio menu. Then, in the Prompt box, you can optionally describe what you'd like to see in the new space, such as “sandy beach” or “open sky.” Click Generate. Photoshop Elements fills the new canvas area based on your description, or, if you leave the prompt blank, with content that matches the surrounding scene.

Tip: The Prompt field is optional. Leaving it blank lets Photoshop Elements decide what to generate based on your photo alone. Adding a short, simple description gives you more control over the result, for example “rocky shoreline” instead of open water.
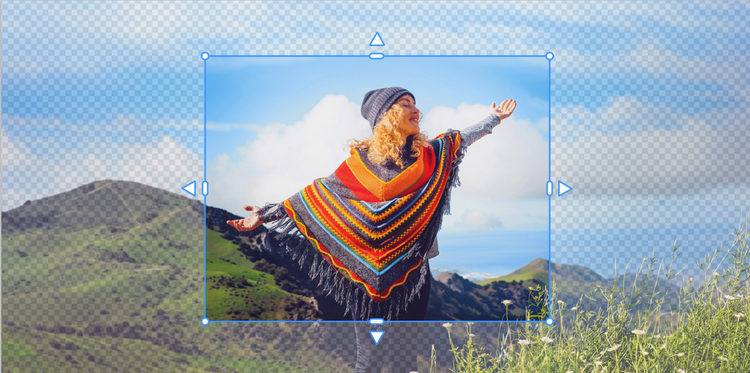
Photo where the mountains, sea, and sky continue around the selected portion

Step 4: Save your photo

Once you’re happy with the result, go to File > Save As and give your expanded photo a new name. This keeps your original photo safe and untouched on your computer.

Helpful hints for better results

Natural backgrounds expand most convincingly

Open sky, grass, a beach, or a plain wall are the easiest for the AI to continue. Busy or highly detailed backgrounds may need a few tries to get right.

Expand in stages for bigger changes

If you need a lot of extra space, try expanding in two or three smaller steps rather than all at once. Each pass gives the AI more to work with.

Try a few variations before settling

Generative Expand can produce a different result each time. It’s worth generating more than once and comparing before you save.

Check the edges where old and new content meet

Zoom in along the border of your original photo and the newly generated area to make sure the transition looks seamless.


Save today