How to restore an old or damaged photo in Photoshop Elements
Bring a faded, scratched, or damaged photo back to life with a single click. The AI-powered Restore Photo feature reduces noise, fills in cracks, and brings back lost detail automatically. No manual retouching skills required.
What is Restore Photo?
Restore Photo is an AI-powered feature in Photoshop Elements that repairs damaged, faded, or scratched photos automatically. As soon as you open the feature, Photoshop Elements analyzes your photo and applies adjustments to reduce noise, improve contrast, fill in cracks, and recover detail that’s been lost to age or damage.
It’s especially useful for digitizing old family albums and vintage prints, where scans often pick up scratches, spots, discoloration, or a general loss of sharpness. Once the automatic restoration is applied, you can fine-tune the result with a few simple sliders and clean up anything that’s left with the built-in Remove tool.
Time required: About 3–5 minutes. Skill level: Beginner-friendly.
Before you begin, make sure you have:
- Photoshop Elements installed and open on your computer. Don't have it yet? Start a free 7-day trial.
- A scanned or damaged photo you’d like to restore. Old prints, faded snapshots, and scratched scans all work well.
- A stable internet connection for the one-time AI model download the first time you use Restore Photo.
Step 1: Open your photo and select Restore Photo
Open your scanned or damaged photo in Photoshop Elements. Go to Enhance in the menu bar at the top of the screen, then choose Restore Photo... to open the feature.
If you’re working from a physical print, scan it at as high a resolution as your scanner allows. A higher-resolution scan gives the AI more detail to work with, which usually leads to a cleaner restoration.
Note: The first time you use Restore Photo, Photoshop Elements needs to download the AI model that powers it (an under-1 GB download). You’ll see a download screen with a progress indicator before the feature opens. This only happens once; after that, Restore Photo opens immediately.
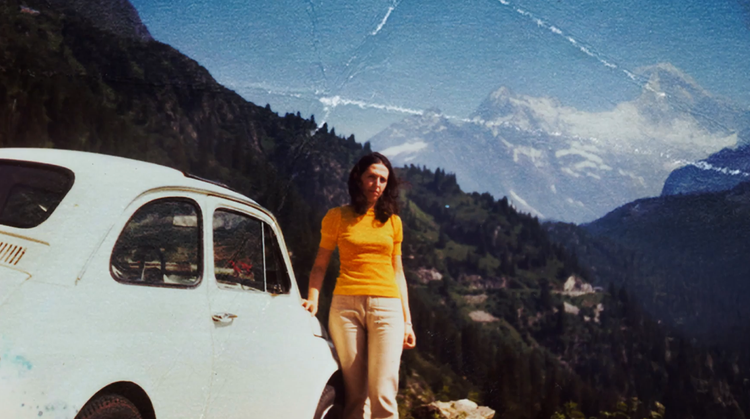
Step 2: Restore your photo automatically with AI
As soon as the Restore Photo window opens, Photoshop Elements automatically analyzes your photo and applies a first pass of restoration. It reduces noise, improves contrast, and fills in cracks and scratches based on what it detects in the image.
You don’t need to do anything to start this process. The automatic restoration happens as soon as you open the feature. Take a moment to compare the result with your original before moving on to any manual clean-up.
Step 3: Clean up any remaining spots
Look over the restored photo for any spots, scratches, or marks the automatic pass didn’t fully catch. The toolbar on the left of the Restore Photo window gives you a few tools to help:
- Zoom: get a closer look at small areas of damage
- Crop: trim away damaged or uneven edges
- Hand tool: move around a zoomed-in photo
- Remove tool: brush over small spots, scratches, or blemishes to erase them
Select the Remove tool and paint over anything that’s still visible after the automatic restoration. Photoshop Elements fills in the area based on the surrounding pixels.
Step 4: Fine-tune with the sliders
In the panel on the right, use the sliders to adjust how much restoration is applied. You can enhance detail or reduce noise further, depending on how the photo looks. If Photoshop Elements detects a face in your photo, an Enhance Face slider also becomes available, letting you sharpen facial detail specifically.
Note: Small adjustments go a long way. The sliders update in real time, so nudge them a little at a time and keep an eye on the preview rather than pushing straight to the extremes.
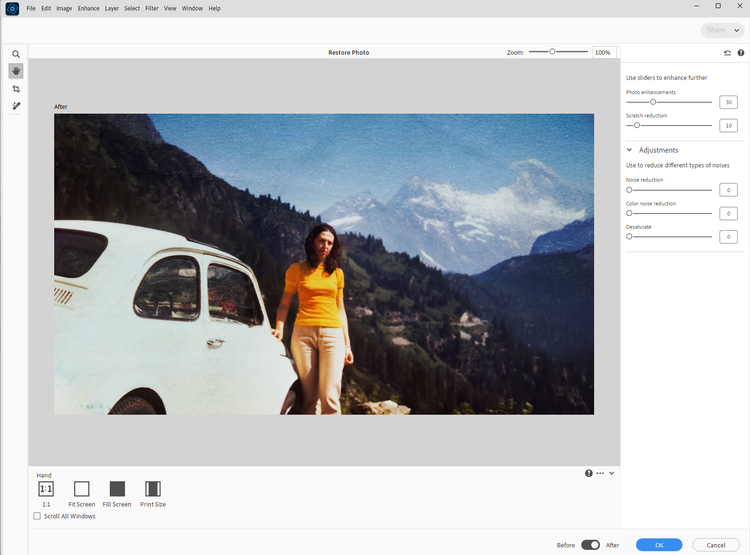
Step 5: Apply your result and keep editing
Once you’re happy with the restoration, click OK to apply it. Your photo returns to the main editor, where you can continue working in either Quick or Expert mode.
Step 6: Save your photo
Go to File > Save As and give your restored photo a new name. This keeps your original scan safe and untouched on your computer, in case you’d like to go back and try a different restoration later.
Note: Nothing is permanent until you save. Press Ctrl+Z on a PC or Command+Z on a Mac at any point to undo a step and try again.
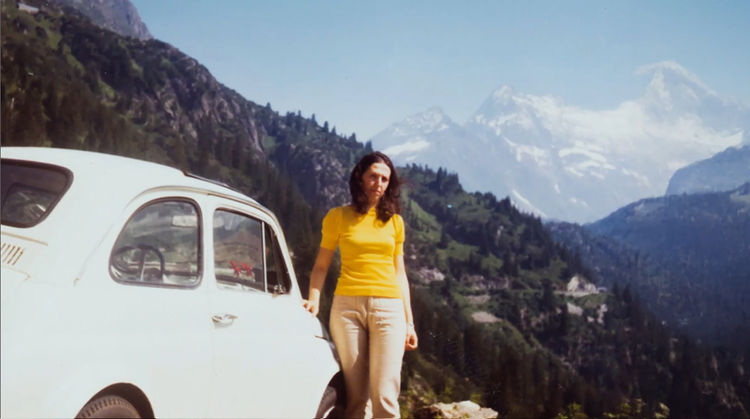
Helpful hints for better results
Start with the best scan you can get
Restore Photo works from whatever detail is in your file, so a clean, high-resolution scan of the original print gives the AI more to work with. If you have the option, scan at a higher resolution than you think you need.
Let the automatic pass do the heavy lifting
The first restoration happens automatically the moment you open the feature. Review that result carefully before reaching for manual tools. Often the sliders and a light touch with the Remove tool are all that’s needed afterward.
Add color after restoring a black-and-white photo
Once you’ve restored a black-and-white or sepia photo, the Color B&W Photo quick action can add realistic color on top. Restoring first and colorizing second usually gives the cleanest result.

You may also like