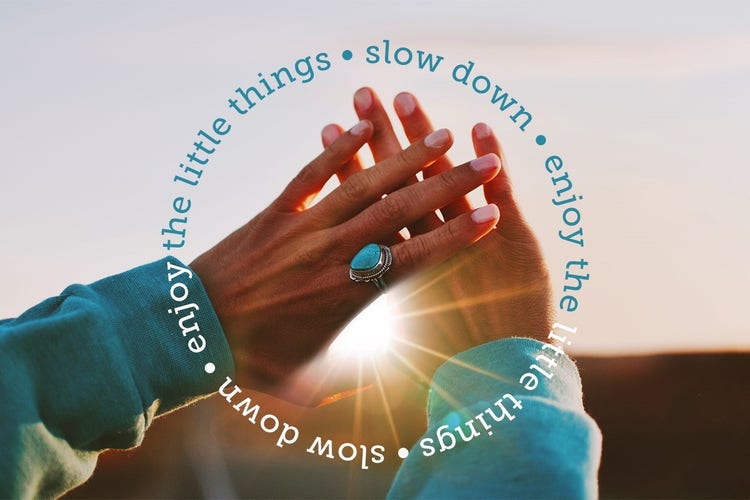
What is the Text on Shape tool?
Text on Shape is a feature in the Add Text guided edit in Photoshop Elements. Instead of placing text in a straight horizontal line, it lets you flow your words along the edge of a preset shape — a circle, arch, star, wave, and more. The text follows the contour of the shape automatically, giving you a polished, designed look without any manual adjustments. It works well for badge-style photo treatments, anniversary or birthday cards, social media images, and any project where you want text to feel like part of the composition rather than just a label dropped on top.
Time required: About 5 minutes. Skill level: Beginner-friendly
Before you begin, make sure you have:
- Photoshop Elements installed and open on your computer. Don’t have it yet? Start a free 7-day trial.
- A photo you’d like to add text to.
- A short phrase or label in mind. Text on Shape works best with a few words rather than a long sentence.
Step 1: Open your photo in Guided mode and select Add Text
Open your photo in Photoshop Elements and click Guided at the top of the screen. Click the Basics tab and then select Add Text. In the panel on the right, click the Text on Shape icon.

Step 2: Pick a shape
A row of preset shape options will appear in the Tool Options menu at the bottom of the screen. Click the shape you want your text to follow, then click and drag on your photo to draw it. The shape will appear as a path on your image.

Step 3: Type your text on the shape
Hover your cursor over the shape path until the cursor icon changes to show a text cursor with a small curve through it. When you see that icon, click on the path and start typing. Your text will flow along the edge of the shape automatically.
Not sure where to click? Move your cursor slowly along the outline of the shape and watch for the cursor to change. That change is the signal that you’re in the right spot to start typing.

Step 4: Adjust the font and color
Select all or part of your text and use the Tool Options menu at the bottom of the screen to change the font, size, and color. You can apply different formatting to different words if you like — for example, making one word larger or a different color for emphasis.
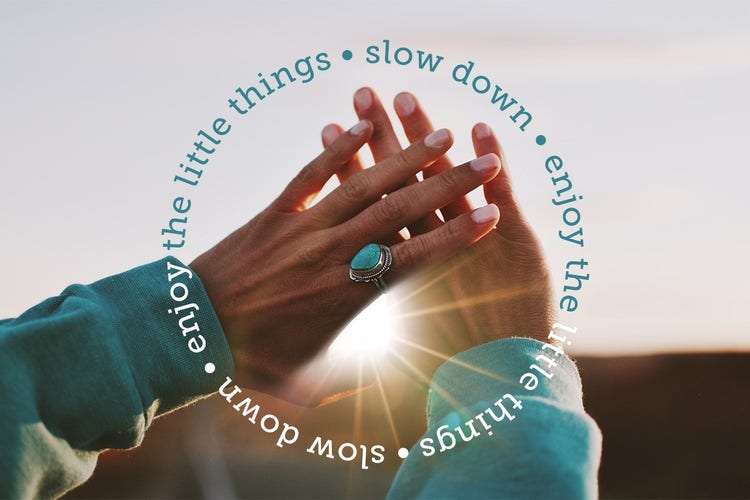
Step 5: Save your result
Once you’re happy with how the text looks, click Done in the guided edit panel. Your photo will return to the main editor window where you can continue making changes or go straight to saving.
Go to File > Save As and give your edited version a new name to keep your original photo safe and untouched.
Helpful hints for better results
Keep the text short
A short phrase of three to seven words works best on a shape path. Longer text can crowd the path or wrap in unexpected ways. If you have more to say, consider using a larger shape or splitting the text across two separate paths.
Use contrast to make the text readable
Text placed over a photo can get lost if the color is too similar to the background. A light color works well on dark areas of a photo, and a dark color on light areas. If your photo is too varied, try a white text with a dark outline or a drop shadow style applied to make it pop.
Try different shapes for different moods
A circle feels classic and badge-like. An arch gives text a banner quality. A wave adds movement and energy. Spending a minute trying a few different shapes can completely change the feel of the finished result.
You can always undo
Press Ctrl+Z on a PC or Command+Z on a Mac to undo any step. Photoshop Elements keeps a full history of your edits, so you’re never stuck with a result you’re not happy with.
Common questions

You may also like
Photoshop Elements 2027
Photoshop Elements &
Premiere Elements 2027
Create
- Restore a photo
- Insert an object into a photo
- Warp text into curves and shapes
- Extend a photo background
- Remove objects and people from photos
- Remove or replace your background
- Add text styles like shadows and glows
- Touch up portraits
- Create a custom pattern brush
- Move, scale, or duplicate an object
- Combine multiple photos into one
- Add text to a shape
Connect