
Content as a Service v3 - Thursday, October 1, 2026 at 09:50


What is a custom pattern brush?
A pattern brush in Photoshop Elements is a brush that paints a repeating shape or graphic instead of a solid stroke. Rather than drawing a plain line, it stamps your chosen image at regular intervals as you paint — creating a trail of snowflakes, stars, leaves, hearts, or any shape you define.
The custom part means you’re not limited to the presets that come with Photoshop Elements. You can take any image or graphic you have — a simple black-and-white shape works best — and turn it into your own unique brush in just a few steps. Once created, it’s saved to your brush library and available any time you open Photoshop Elements.
Time required: About 10 minutes. Skill level: Beginner to intermediate.
Before you begin, make sure you have:
- Photoshop Elements installed and open on your computer. Don’t have it yet? Start a free 7-day trial.
- An image or graphic to use as the basis of your brush. A solid black shape on a white background works best — a star, leaf, snowflake, paw print, or any simple silhouette.
- A photo you’d like to paint the pattern onto, or a blank canvas to experiment on.
Step 1: Open your shape image in Advanced mode
Open the image or graphic you want to use as your brush shape in Photoshop Elements. Go to File > Open and navigate to the file on your computer. Make sure you’re in Advanced mode — you’ll find the mode selector at the top of the screen.
Tip: Solid black shapes on a white background give the cleanest brush results. The darker areas of your image become the painted part of the brush, and the lighter areas become transparent. If your image has colors, don’t worry — you’ll convert it to black in the next step.
Step 2: Add a solid color adjustment layer
With your image open and selected, click the New Adjustment Layer icon at the bottom of the Layers panel — it looks like a half-filled circle. From the menu that appears, choose Solid Color. A color picker will open. Select pure black and click OK.
This converts your shape to solid black, which is what Photoshop Elements uses to define the brush tip. Make sure the adjustment layer is set to a blending mode that covers the image beneath it — Normal at full opacity works well.
Tip: If your shape is already solid black on a white background, you can skip this step and go straight to defining the brush. The adjustment layer is most useful when working with colored or photographic source images.
Step 3: Define the brush from your selection
Go to the Edit menu at the top of the screen and select Define Brush from Selection. Photoshop Elements will capture the current state of your image and prepare it as a brush tip.
If you don’t see “Define Brush from Selection” in the menu, make sure you’re in Advanced mode and that the image is open and active. The option only appears in the Edit menu when Advanced mode is active.
Step 4: Name your new brush
A dialog box will appear asking you to give your new brush a name. Type something descriptive — for example, “Snowflake,” “Leaf,” or “Star pattern” — so you can find it easily later. Click OK to save it.
Your new brush is now saved to your brush library and will appear in the brush picker whenever you select the Brush tool in Photoshop Elements.
Tip: A clear, descriptive name makes it much easier to find your brush later, especially if you create several custom brushes over time. Something like “Small star brush” or “Paw print large” is more useful than a generic name.
Step 5: Adjust and paint with your brush
Select the Brush tool from the toolbar on the left. In the Tool Options bar at the top, click the brush preset picker and find your new brush by name. Once selected, you can adjust the settings:
- Size: use the size slider or the bracket keys.
- To decrease: -[
- To increase: ]
- Spacing: controls the distance between each stamp of the shape as you paint
- Color: set your foreground color to whatever you want the pattern to be painted in
Click and drag on your photo or canvas to paint with your new pattern brush. Each stroke will lay down repeating stamps of your shape.
Tip: Painting on a new layer rather than directly on your photo gives you more flexibility. You can adjust the opacity of the pattern layer, change its blending mode, or delete it entirely without affecting your original photo.
Step 6: Save your work
Once you’re happy with the result, go to File > Save As and give your edited photo a new name. This keeps your original photo safe and untouched.
Pattern inspiration
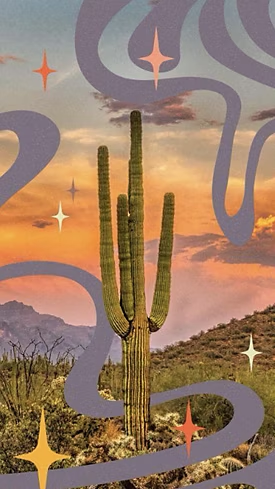
Here are a few examples of what’s possible with custom pattern brushes — from playful to romantic to bold.
ROADTRIP RAINBOW

WHIMSICAL DESERT
ROMANTIC RAIN

Looking for an easier starting point?
If you’d rather not build a brush from scratch, the Pattern Brush guided edit in Photoshop Elements has dozens of ready-made pattern presets you can apply directly to your photos. Open it from the Guided mode panel under Fun Edits. It’s a great way to explore what pattern brushes can do before diving into creating your own. Watch video
Helpful hints for better results
Simple shapes make the best brushes
The cleaner and simpler your source shape, the more versatile your brush will be. A solid silhouette with no fine detail — a star, a leaf, a heart, a raindrop — will look good at any size. Highly detailed shapes can become hard to read at smaller sizes or when spaced close together.
Adjust the spacing for different effects
Tight spacing creates a dense, overlapping pattern. Wider spacing gives each shape room to breathe and reads as a more scattered, airy effect. Try dragging the Spacing slider to both extremes to get a feel for the range before settling on a setting.
Paint on a separate layer
Always add a new layer before painting your pattern onto a photo. This gives you full control over the result — you can reduce the opacity of the layer, change the blending mode, or delete it entirely without touching the original image underneath.
Try the Pattern Brush guided edit first
If you’re new to pattern brushes, the Pattern Brush guided edit in Guided mode is a great place to start. It includes dozens of preset patterns and walks you through the process step by step — no brush creation required. Once you’re comfortable with how it works, creating your own custom brush will feel much more straightforward.
Common questions
A solid black shape on a white background gives the cleanest result. Simple silhouettes — stars, leaves, snowflakes, paw prints, geometric shapes — work particularly well. Photographic images with lots of color and detail can be used, but the result is less predictable. Converting to high-contrast black and white first usually helps.
Yes. Once you define and name a brush, it’s saved to your brush library and will be available every time you open Photoshop Elements. You don’t need to recreate it.
Yes. The brush paints in whatever color you have set as your foreground color. Just click the foreground color swatch at the bottom of the toolbar, pick a color, and your next brushstroke will use that color. You can change the color as many times as you like.
The Pattern Brush guided edit uses its own set of built-in presets rather than custom brushes from your library. For the most flexibility with your own custom brushes, use the Brush tool directly in Advanced mode.
Yes. Open the brush picker with the Brush tool selected, right-click on the brush you want to remove, and choose Delete Brush. This removes it from your library permanently, so make sure you ’ re certain before deleting.
Not if you paint on a separate layer and use File > Save As to save with a new filename. Your original photo will stay exactly as it was.
You may also like
CardTitle
Create a custom pattern brush.
CardImage

CardImageAltText
Serene mountain scene with asterisks stamped on the image
PrimaryTag
caas:content-type/how-to
Tags
caas:content-type/how-to, caas:products/photoshop-elements
BadgeText
How-to